It is well known that Windows 10 & 11 system backup is a very important measure to protect the system security task. Because when we have the backup, in case of hardware failure, system crash and other emergencies, you can use the backup file to quickly restore the system to the normal running state at the time of backup, without worrying about the data loss problem and the time-consuming and laborious situation of repairing the system.
Since the backup file is so important, how should we keep it properly? I think backing up your computer system to a USB flash drive is a good choice. Therefore, in this article, I will share with you why and how to backup Windows 10 & 11 to a USB flash drive.
Part 1: Why backup Windows 10 & 11 system to USB flash drive?
Backing up your Windows 10 & 11 system to a USB drive reduces the risk of backup image corruption and is safer than backing up to a local hard drive. It has the following four advantages.
Disk-computer separation: The USB flash drive will be separated from the computer after the system backup is finished, so you can put it in a safe place. Thus, your backup data will not be affected by computer hardware failure, viruses and malware.
Universal Interface: You can easily connect it to any computer via USB port and then restore your computer with Windows 10 & 11 system image backup.
Small and portable: The USB drive is very tiny, you can put it in your pocket or anywhere very easily.
Strong resistance: It has no mechanical device inside, strong shock resistance, and also has moisture and anti-magnetic, high and low temperature resistance, etc. It is very safe.
Part 2: How to Backup Windows 10 & 11 to a USB Flash Drive?
Way 1: Backup Win10 & 11 to USB drive using Backup and Restore
Backup and Restore (Windows 7) is a feature that comes with Windows 10/11. It does not mean restore backup to Windows 7, but the feature is exactly the same in Windows 10/11 as it is in Windows 7, and has been inherited from Windows 7 until now. This feature allows you to take a backup of a partition of your existing system and then perform a quick restore with the backup file if something goes wrong with your system.
It's worth noting that the system's own Backup and Restore (Windows 7) feature has a limitation: the usable space on the USB drive needs to be greater than or equal to 64 GB. otherwise, you will not be able to find your USB drive in the local drive, which is the default limitation of Windows, so if you want to use this method to backup your system, I recommend that you use a USB flash drive larger than 128GB.
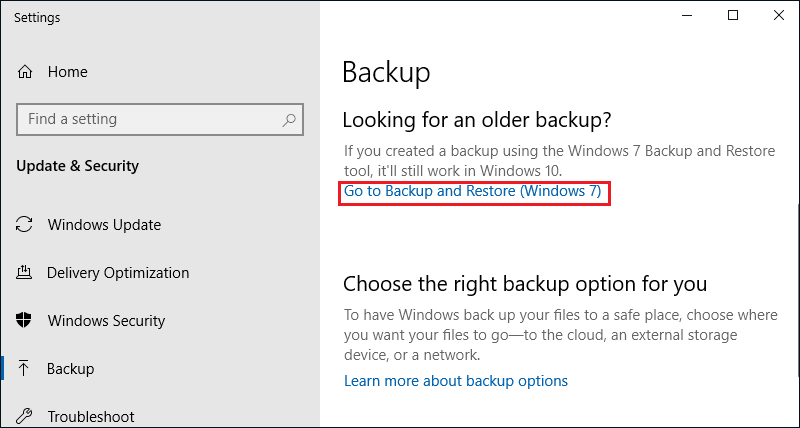
Step 1: Connect the USB flash drive to the PC and make sure it can be detected by the PC. Click "Search" in the bottom left corner of the desktop and type "Backup settings" to open. Then click "Go to Backup and Restore (Windows 7)".
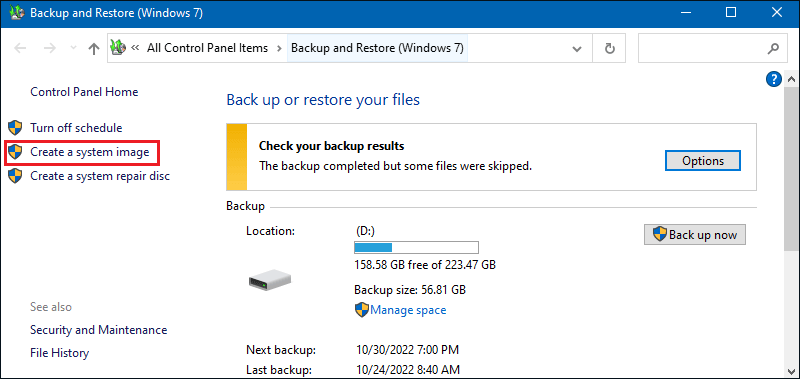
Step 2: Click on "Create a system image" on the left side.
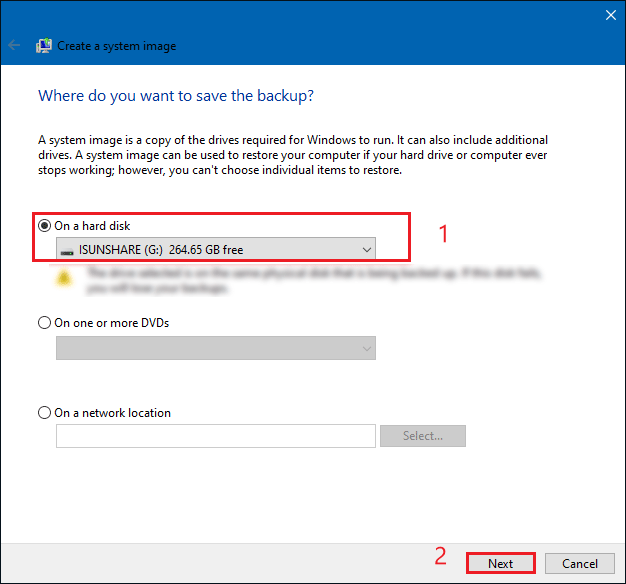
Step 3: Check "On a hard disk" and select your USB drive, then click "Next".
Step 4: After confirming the backup settings are correct, then click "Start Backup" and wait for it to finish.
Way 2: Create a Windows 10 & 11 Recovery Drive
We can also use Windows built-in tool to create a Windows 10 & 11 recovery drive to USB. Then we can backup system files to the recovery drive. It will help us to recover our PC when our PC is under attack.
Step 1: Type Control Panel in the Start menu bar to open it, and locate the following location in the address bar.
Control Panel\All Control Panel Items\Recovery
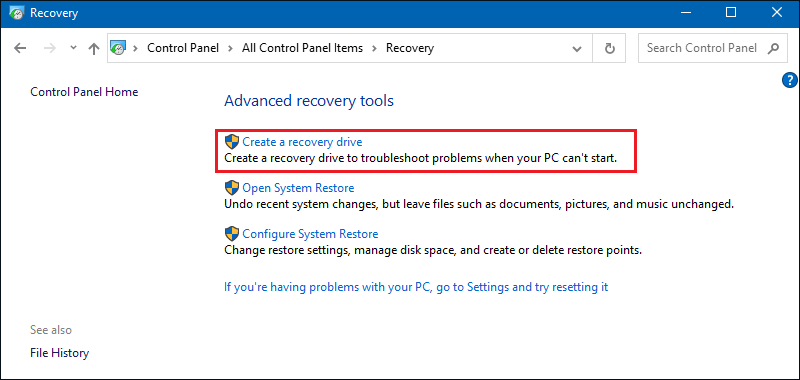
Step 2: Click the "Create a recovery drive" option.
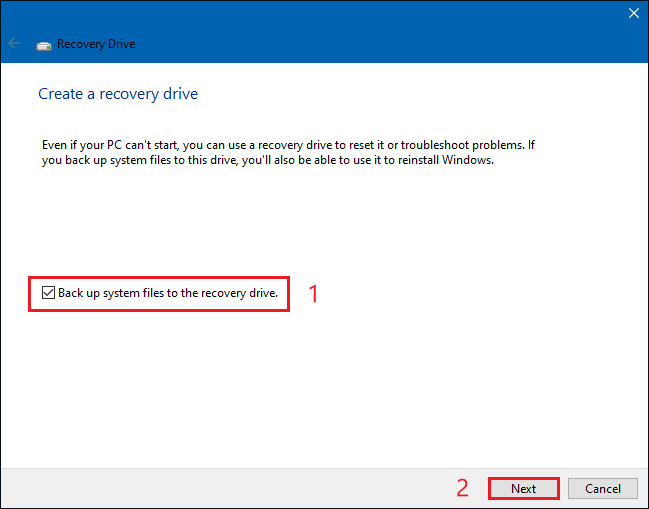
Step 3: Check "Back up system files to the recovery drive" option and click "Next".
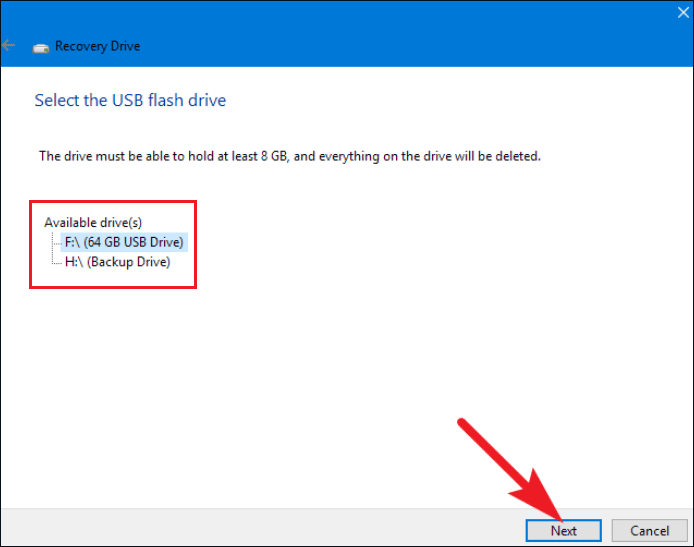
Step 4: Select your USB flash drive as the recovery drive and click Next.
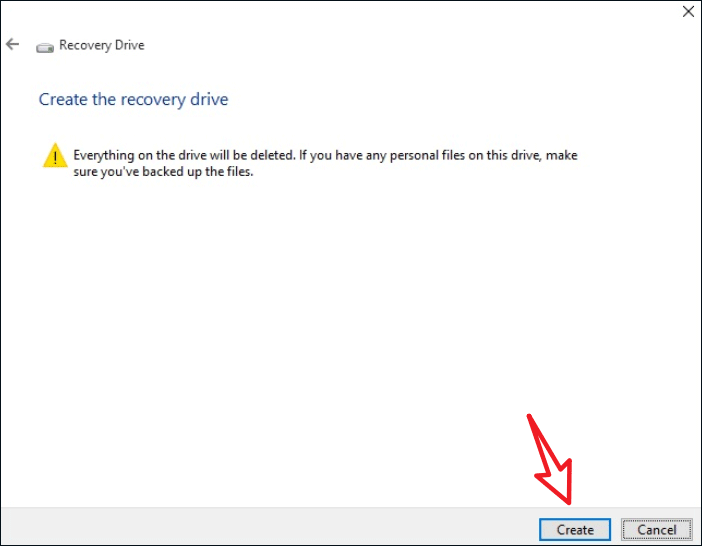
Step 5: Confirm the warning message and click Create. Creating the recovery drive may take some time. You can do other things during the preparation process.
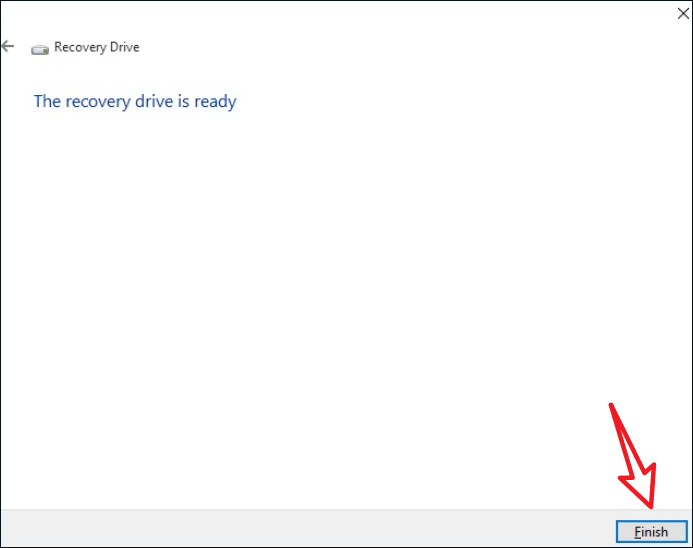
Step 6: When you see the message "The recovery drive is ready", click Finish.
Way 3: Use CloneGo to backup Windows 10 & 11 to a USB drive (recommended)
CloneGo is the reliable partition/disk clone software to copy, backup and restore Windows system/partition. Or you can clone the whole hard disk directly. It is 100% secure and clean to clone disk/partition.
Step 1: Download and install CloneGo Genius on your PC. Then insert the USB drive into your PC.
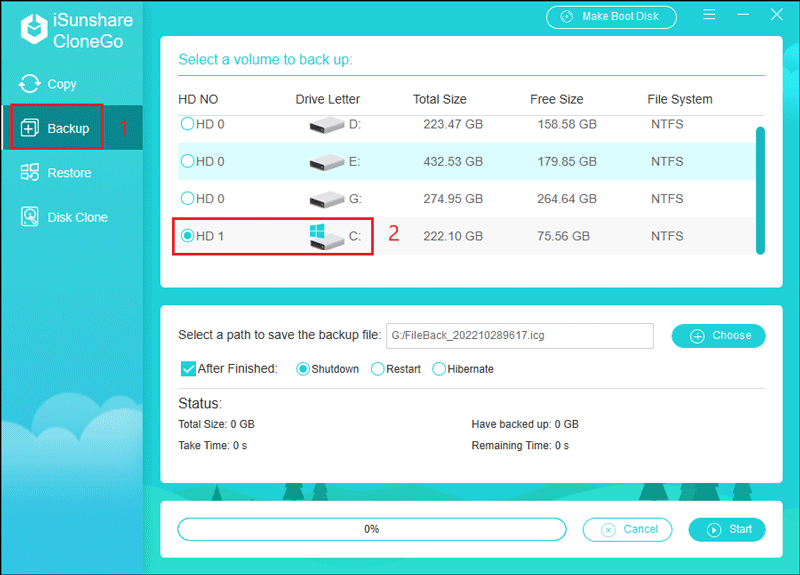
Step 2: Choose Backup in the left menu. Select the Windows system (the partition with the Windows logo) to backup under the Select a volume to back up option.
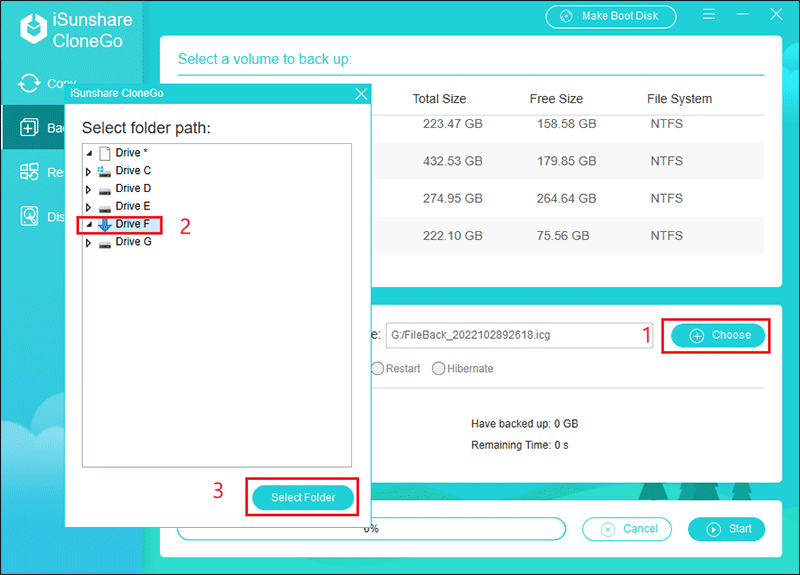
Step 3: Click the Choose button at the end of "Select a path to save backup file" to select your USB drive to save the backup file. (Note: The storage size of your USB drive must be larger than the size of the system drive.)
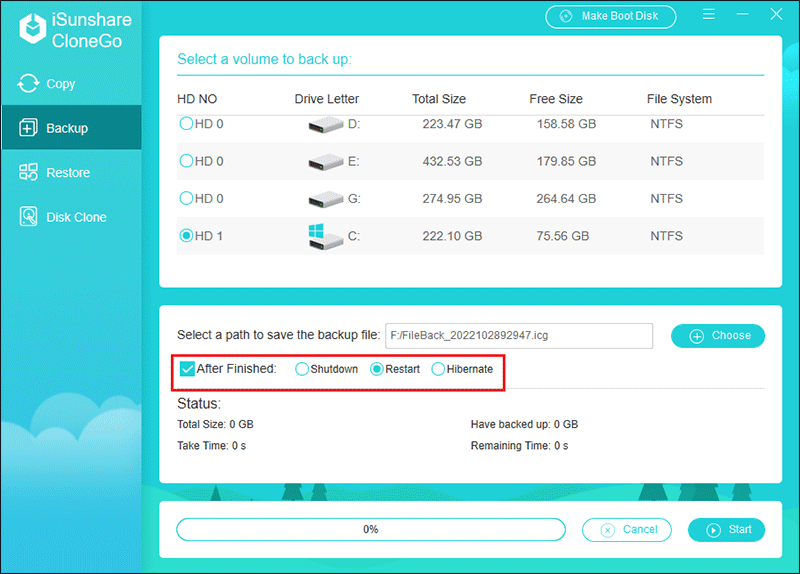
Step 4(optional): Check the "After finished" box and select its option to shutdown/restart/sleep your PC at the end of the backup process.
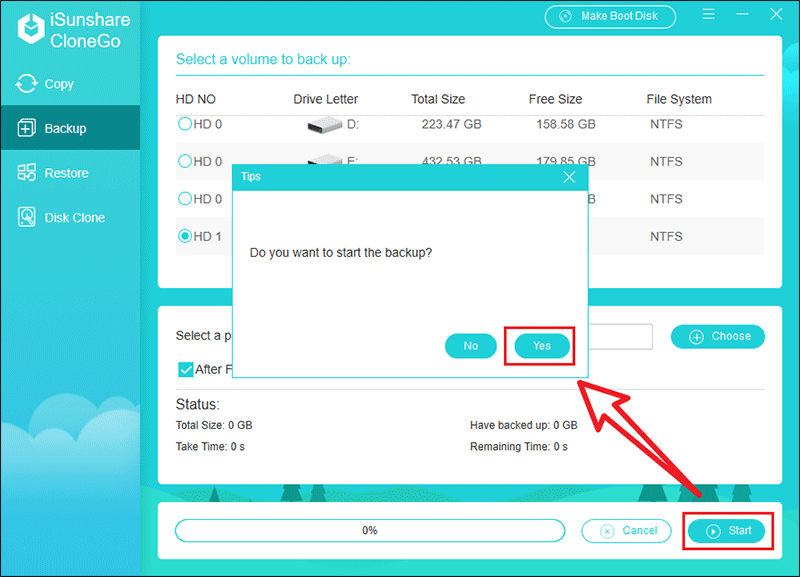
Step 5: Tap the "Start" button in the bottom right corner of the interface, and when you see the pop-up screen, tap "Yes" to start the backup.
Step 6: Hit OK when the backup process is finished, which means that the Windows system has been backed up successfully.
Conclusion:
After backing up your Windows 10 & 11 system to a USB drive, if the system does not boot, create a bootable USB drive so that you can boot your computer, and then you can restore your Windows 10 & 11 system to a normal state. iSunshare WinToGo Genius is a good choice, it can easily make a bootable Windows USB drive. It is also fully compatible with all Windows operating systems and versions. Anyway, you can download it to try it out!