As we all know, Microsoft Edge is the default web browser of Windows 10. "C:\Users\Username\Downloads" is the default download directory of Microsoft Edge to save files, documents, pictures that you download from the Internet in Windows 10. Now that the default Microsoft Edge download location exists in the C drive, if you have too many files downloaded and saved in the C drive, they will occupy too much system disk space and make the system run slow. In that case, you may want to change the default download location to another drive. Or you may want to use a different location to save the downloaded files in Microsoft Edge for other reasons. Well, here is what you want! You will be shown how to change default download location in Microsoft Edge in Windows 10 in this article.
Option 1: Change Microsoft Edge Default Download Location via Edge Settings
The Download folder in the C drive is the default folder on your PC to which Microsoft Edge stores files you download from the Internet, but you can change the default Downloads folder location as you want. It is very convenient for you to do it from the Edge Settings directly. However, this way may be not applied to some older versions of Microsoft Edge. So if this way doesn't work to you, move your attention to Option 2.
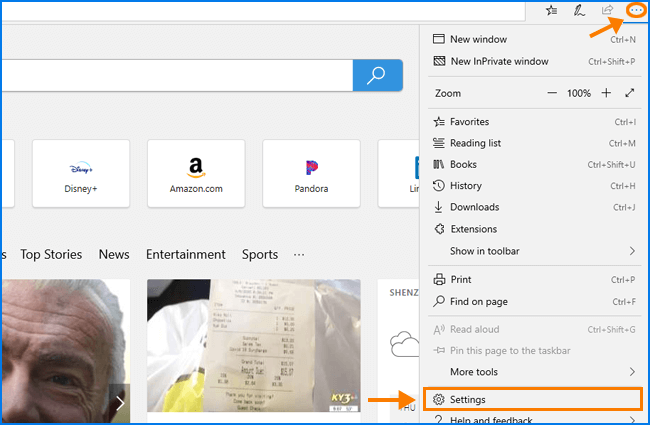
Step 1: Launch Microsoft Edge browser in your computer. On the upper-right corner of the interface, click the More icon (shaped as three horizontal dots), and then select the option of Settings to proceed.
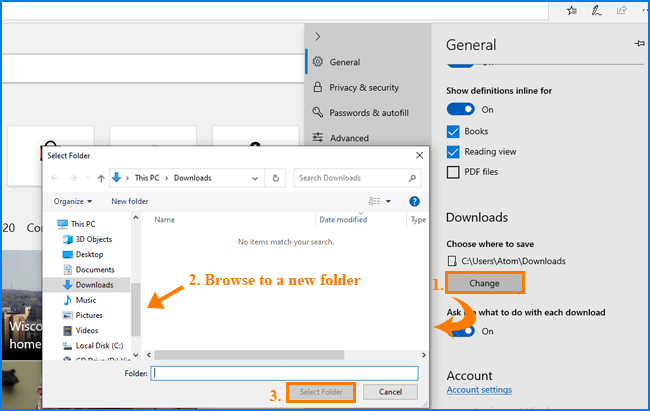
Step 2: Go to the section of Downloads and you can check the current location of the download folder there. Then tap on the button of Change to bring the Select Folder window so that you can choose a new location.
Step 3: Browse to a folder where you want to shift the default downloads location to and then click the button of Select Folder to confirm. From now, files that you download from Microsoft Edge will be saved to the new location.
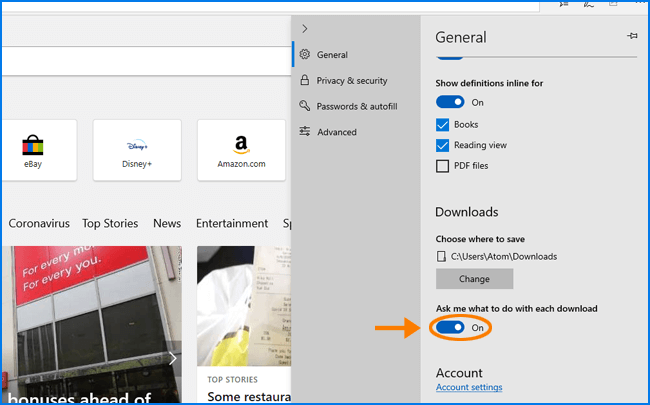
Notice: Under the Downloads section, you can also choose to turn on the option called "Ask me what to do with each download" (or "Ask where to save each file before downloading" in some versions). If you enable this feature in your Edge browser, every time when you start a download, Microsoft Edge will allow you to choose what you want to do: save the file in the default Downloads folder; save the file as a specific file in a specific folder that you manually select; or cancel the download.
Option 2: Change Microsoft Edge Default Download Location in File Explorer
The second option offered to you to change default download location in Microsoft Edge is through the Downloads Properties in File Explorer. Below are the detailed instructions.
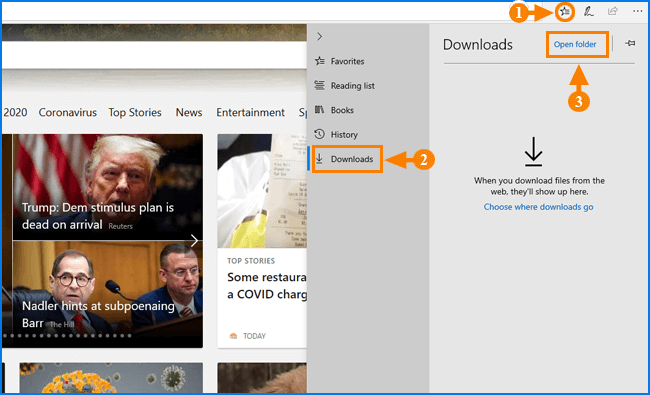
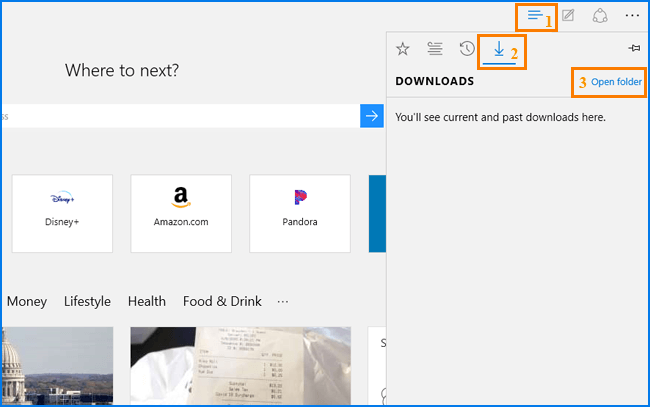
Step 1: Open Microsoft Edge, click the Hub icon, go to the Downloads, and then click the link of Open Files to go on. It will directly bring you to C:\Users\Username\Downloads, the Microsoft Edge's default download directory.
Notice: In some different versions of Microsoft Edge, you may see interface displayed as the below screenshot:
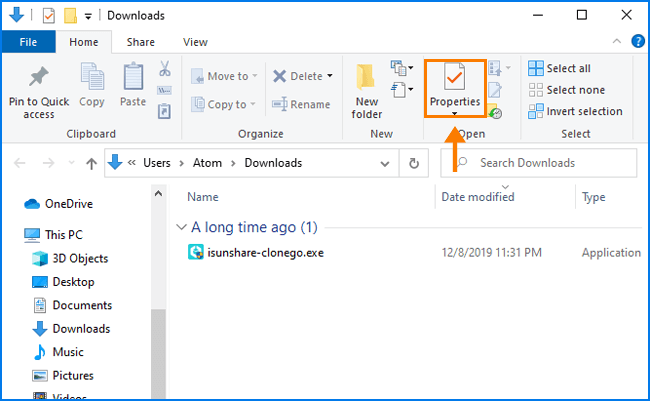
Step 2: In the Downloads interface, click the Properties button to open the Downloads Properties pane.
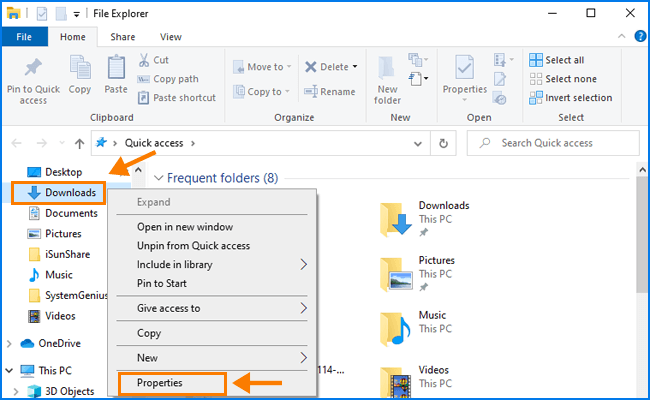
Notice: Alternatively, you can open the File Explorer directly, right-click on the Downloads folder in the left pane of your File Explorer, and then select Properties from the drop-down menu to open the Downloads Properties.
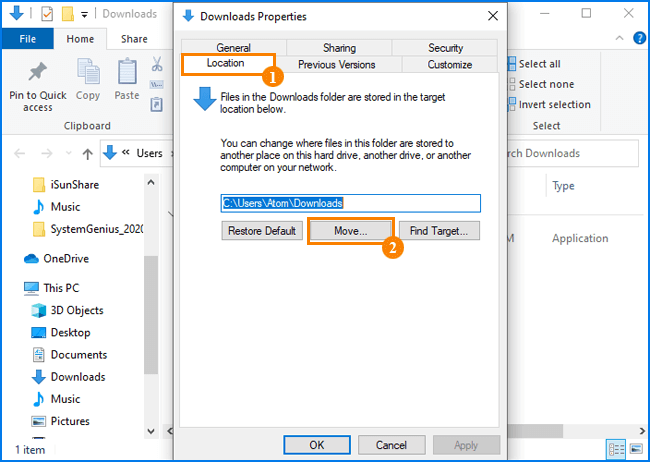
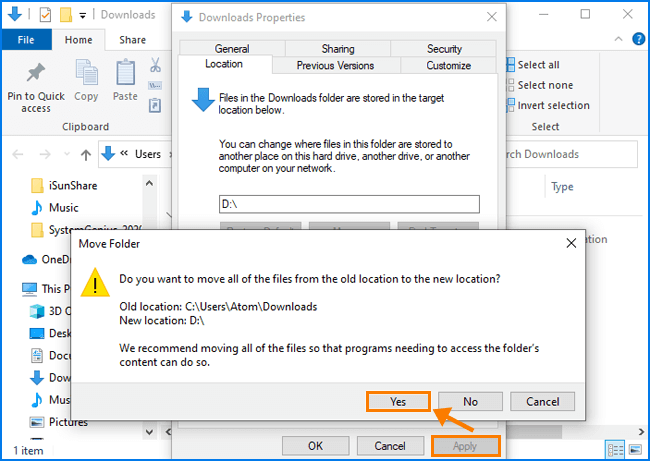
Step 3: Go to the tab of Location and you will see the current download path in the blank. You can delete the default location and enter the new path for your desired download folder manually. Or you can click the Move button to browse a new destination to save the downloaded files and click Select Folder to make sure. It can be another place on this hard drive, another drive or another computer on your network.
Step 4: Click Apply to save changes. When you are asked "Do you want to move all of the files from the old location to the new location", click Yes to confirm. The next time when you download files from the Edge browser, they will be saved to the new download location.
Option 3: Change Microsoft Edge Default Download Location by Registry Editor
In addition, you can follow the steps below to change the default Edge Browser location for downloaded files by Registry Editor. This way is also very helpful.
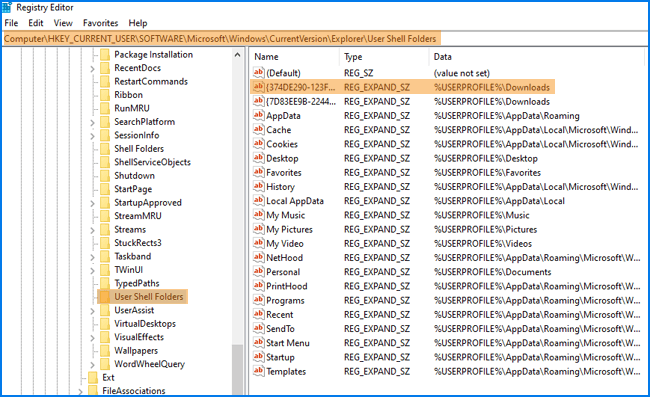
Step 1: Open Registry Editor in your computer and follow the below path to go to the User Shell Folders key:
Step 2: On the right panel of the interface, look for the key of "{374DE290-123F-4565-9164-39C4925E467B}" with the string of "%USERPROFILE%\Downloads" and then double click it to edit string.
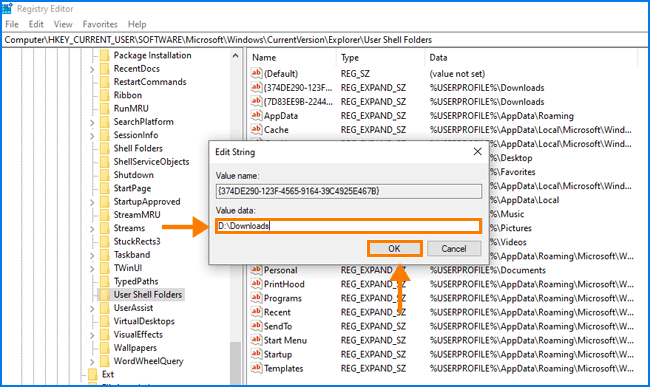
Step 3: You can delete the default value data "%USERPROFILE%\Downloads" and change it to a new folder path where you want the files downloaded from Microsoft Edge to be saved according to your preference. Then click the button of OK to save changes.
Step 4: Close the Registry Editor and restart your computer to make changes take effect. Then the files downloaded from Microsoft Edge will be saved in the new location.
Option 4: Change Microsoft Edge Default Download Location with System Genius
iSunshare System Genius is a software that integrates multiple functions such as junk files cleanup, system services management and Windows optimization. You can also use it to transfer the default download directory from the system drive to another new place in a few clicks. Meanwhile, all the downloaded files in the original path can be moved to the new location so that you can release more system disk space.
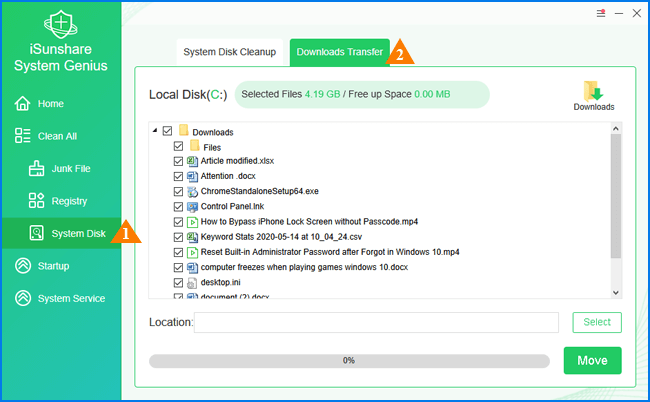
Step 1: Click the below button to free download and install iSunshare System Genius in your computer. Then run the software and go to the function of System Disk on the left menu bar.
Step 2: Then you will see two options at the top of the interface. One is System Disk Cleanup and the other is Downloads Transfer. Select the option of Downloads Transfer to continue and then the Downloads folder and all files in this folder will be displayed on the screen.
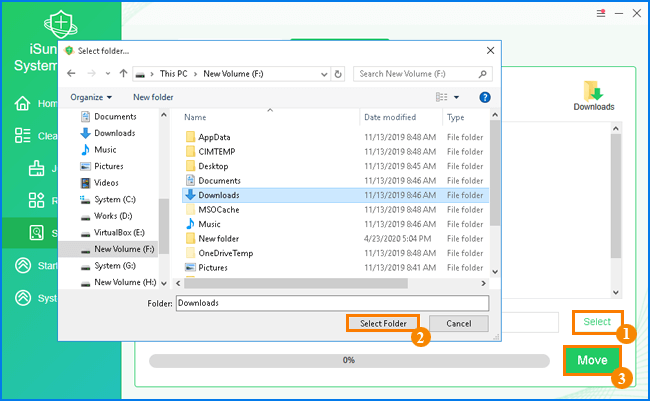
Step 3: Tap on the Select button to browse to a new download path and click Select Folder to confirm. Then you can click the Move button to move those downloaded files to the new selected download path.