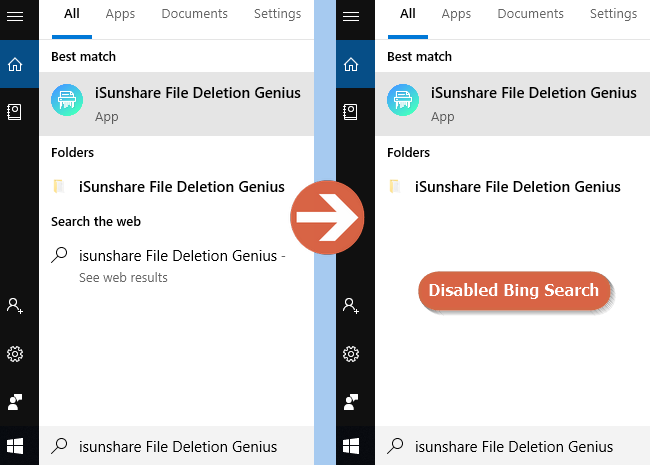
In the Windows 10 version before 1803, you can remove the Bing search from the start menu with the help of Cortana easily. However, beginning with Windows 10 1803, you just can turn off the Bing search in the Registry. If you have updated your Windows 10 to the version 1803 or newer and just want to enable the start menu to search in the local files, you can use the way here to disable Bing in the start menu of Windows 10 1803 or later.
Steps to Disable Bing in the Start Menu of Windows 10 1803 or Later
Step 1: Search Regedit in the start menu and run it as an admin.
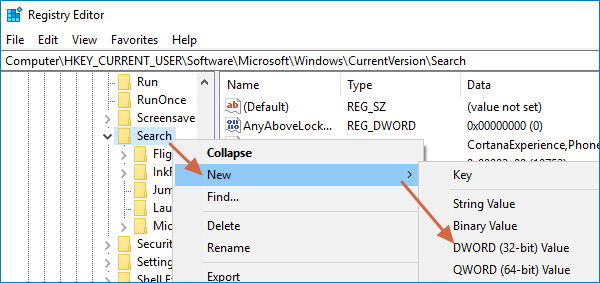
Step 2: In the left pane, click HKEY_CURRENT_USER > SOFTWARE > Microsoft > Windows > CurrentVersion > Search.
Step 3: Right-click the Search folder. Then, select New > DWORD (32-bit) Value and name the new value BingSearchEnabled.
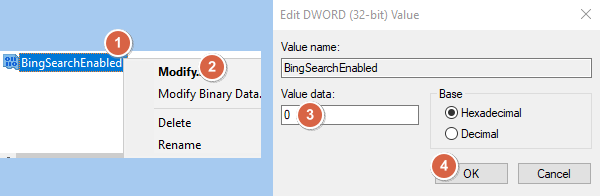
Step 4: Right-click the BingSearchEnabled value and click Modify to change its "Value data" to 0 if it is not.
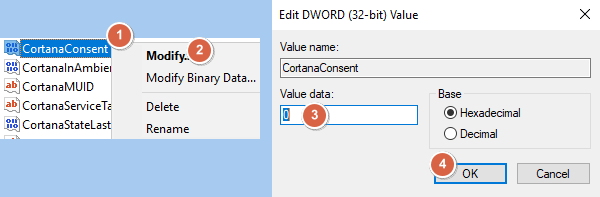
Step 5: Near the BingSearchEnabled value, find the CortanaConsent value and modify its value data to 0, either. If the value is not existed, you can create it just like making the BingSearchEnabled value.
Step 6: Exit Registry Editor and you will find that Bing is disabled in the start menu.