The topic of this article is about how to disable Remote Desktop in Windows 10. Windows Remote Desktop is a very useful feature which permits a user to remotely take control of a computer over a network connection. With this feature, people can easily access everything on the remote computer once they establish a connection between the two devices. On the one hand, it is very convenient. For example, you can allow professional personnel from other locations to connect to you PC and offer you tech support when you are in need. However, one the other hand, it gives chances for unauthorized people to gain control of your computer to steal your important data and personal information. Therefore, when you don't use Remote Desktop, it is suggested to turn it off for security reasons.
Part 1: Disable Remote Desktop in Windows 10 in Windows Settings
Remote Desktop enables you connect to and control this PC from a remote device. So you are able to work from another device as if you were working directly on this PC. But to protect your computer from being accessed from untrusted people, you'd better turn it off. Now follow the below steps to learn how to turn off Remote Desktop in Windows 10 via Windows Settings.
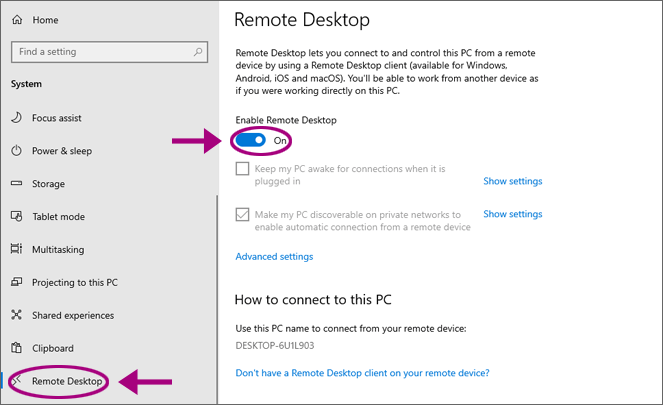
Step 1: Open the Settings app in your computer, choose System to continue and then select the option of Remote Desktop on the left pane. Now you can notice that the status of Remote Desktop is enabled.
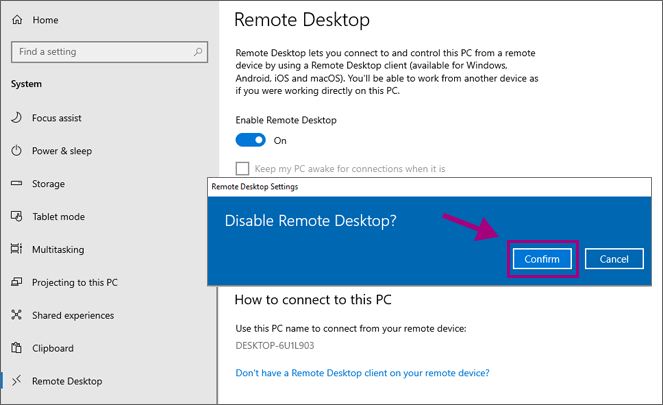
Step 2: Click the slider to turn off Remote Desktop from the right interface and then click the Confirm button on the popup window to verify your operation.
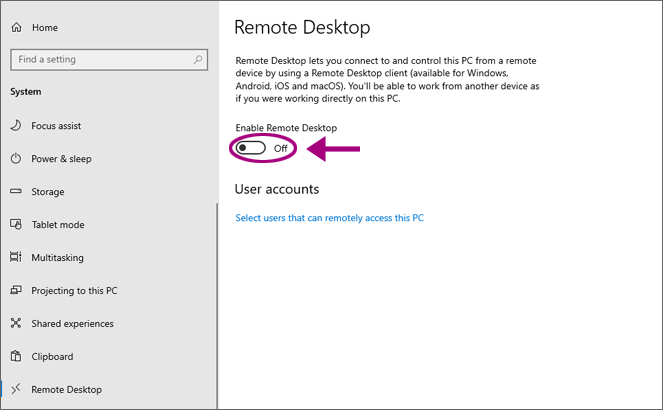
Step 3: Then Remote Desktop on your computer will be disabled successfully.
However, this approach may not work with some versions of Windows 10. If you are confronted with this question, try to disable Remote Desktop with other methods provided as below.
Part 2: Disable Remote Desktop in Windows 10 via System Properties
If the first approach is not suitable to you, you can also choose to turn off Remote Desktop in Windows 10 via System Properties from Control Panel. Here are the instructions:
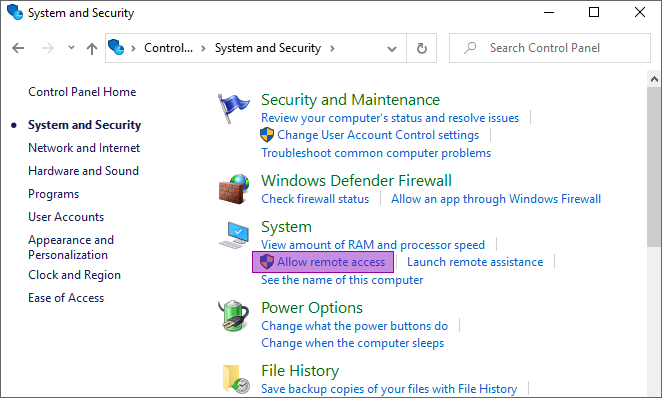
Step 1: Open Control Panel, choose System and Security and then click on the link of Allow remote access under the section of System to open the System Properties pane.
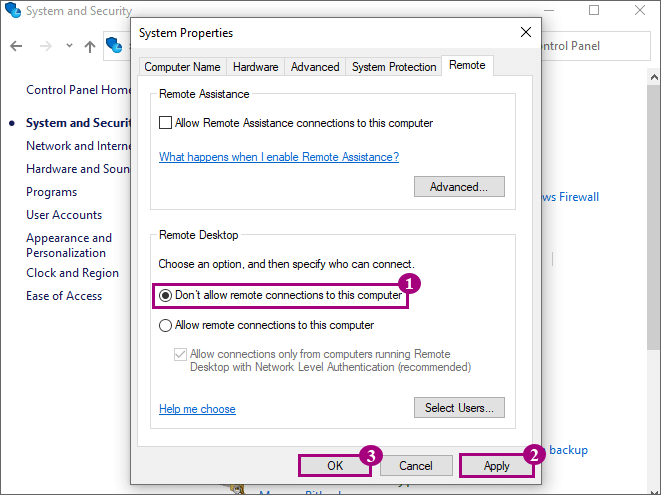
Step 2: Under the part of Remote Desktop in the tab of Remote, select the option of Don't Allow Remote connections to this computer, and then click on Apply and OK to save changes on your computer.
Part 3: Disable Remote Desktop in Windows 10 through Group Policy
Another workable method to disable Remote Desktop in Windows 10 is to disable the setting of "Allow users to connect remotely by using Remote Desktop Services" through the Local Group Policy Editor. This policy setting allows you to configure remote access to computers by using Remote Desktop Services. If you don't know how to do it, please read on.
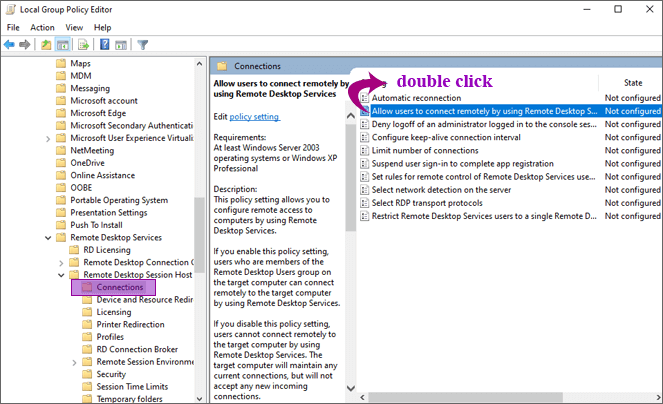
Step 1: Access the Local Group Policy Editor in your Windows 10 computer. On the left pane of Local Group Policy Editor, locate to the Connections folder according to the following path:
Step 2: On the right pane, double click the option of Allow users to connect remotely by using Remote Desktop Services in order to edit it.
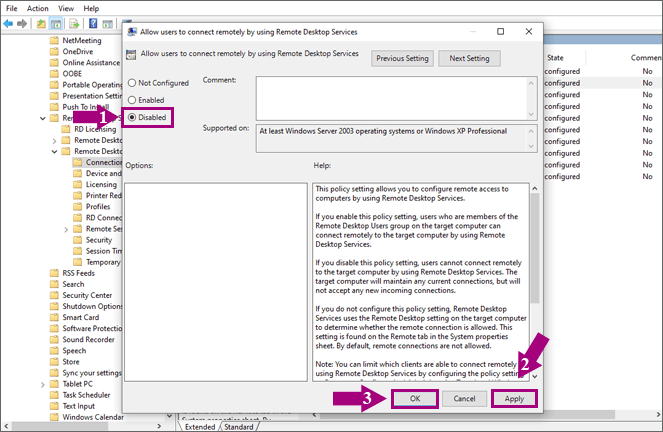
Step 3: Select the option of Disabled and then click Apply and OK to save the policy setting.
After you disable this policy setting, users cannot connect remotely to the target computer by using Remote Desktop Services. The target PC will maintain any current connections, but will not accept any new incoming connections.
Part 4: Disable Remote Desktop Service in Windows 10 with System Genius
Remote Desktop Service allows users to connect interactively to a remote computer. Remote Desktop and Remote Desktop Session Host Server depend on this service. If you are going to turn off Remote Desktop Service in your computer, I can recommend a useful tool – iSunshare System Genius to do it for you effortlessly.
Step 1: Get iSunshare System Genius downloaded and installed properly in your Windows 10 PC.
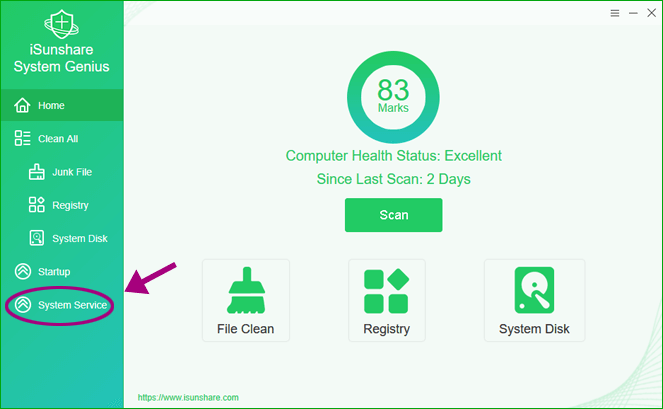
Step 2: Launch it and take the choice of System Service on the left menu column. Then it will display all the Windows services for you.
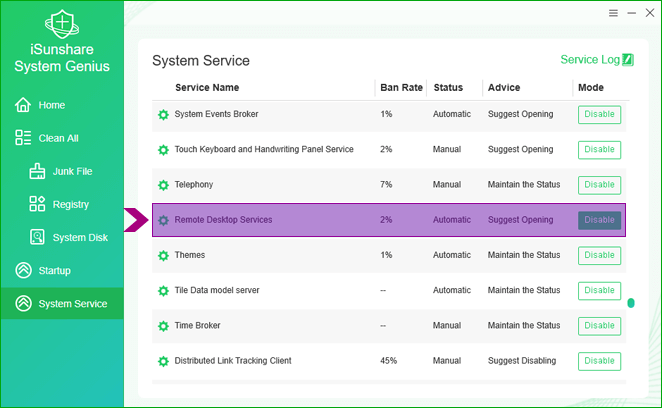
Step 3: Locate to Remote Desktop Service and click the Disable button to turn off this service on your PC.