You may like to capture beautiful moments, events and celebrations on your phone or camera. Or watching your favorite movie on a lazy weekend. Most of these videos are saved in .mp4 format. Any corruption in them can cause trouble for all users.
If you are experiencing a similar situation and are looking for ways to repair your corrupted video files, then you have come to the right place. In this article, I will share with you 2 free tools to repair corrupted video file on Windows 11.
Tool 1: Use FFmpeg re-encoding to repair corrupted Video file
Download and extract the FFmpeg package
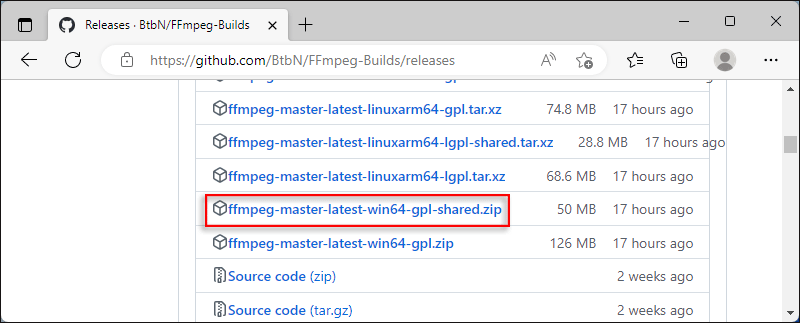
Step 1: Download FFmpeg program zip file, click on the ffmpeg-master-latest-win64-gpl-shared.zip link to download the program zip to your D drive, or you can download it to another drive.
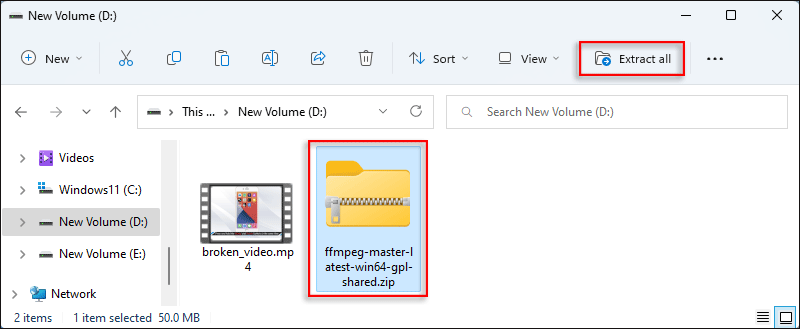
Step 2: Open D drive in the File Explorer, then select the FFmpeg program zip package ffmpeg-master-latest-win64-gpl-shared.zip you just downloaded, then click Extract all in the top right.
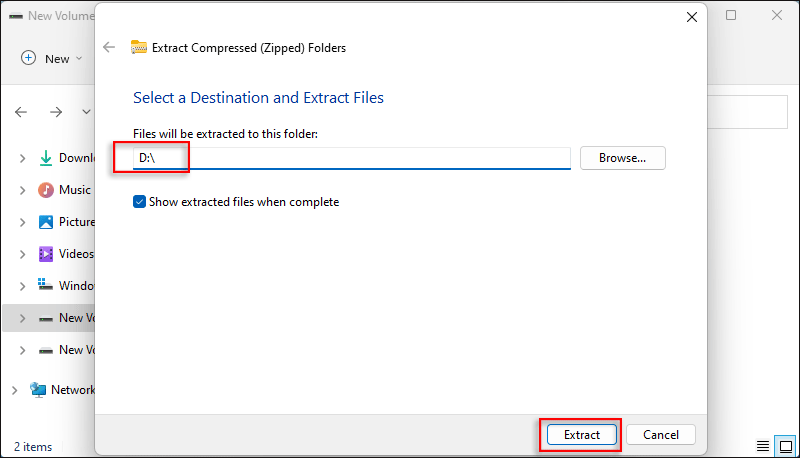
Step 3: Modify the unzip path to: D:\, then click Extract.
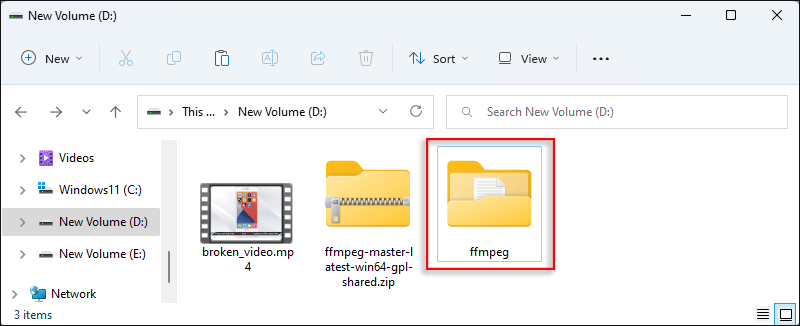
Step 4: After finishing unpacking the FFmpeg program archive, rename the ffmpeg-master-latest-win64-gpl-shared folder as ffmpeg.
Use the FFmpeg program command to view and repair corrupted videos
Step 1: Click Search on the taskbar to open the panel, then type cmd in the search box, find the Command Prompt App and click Open.
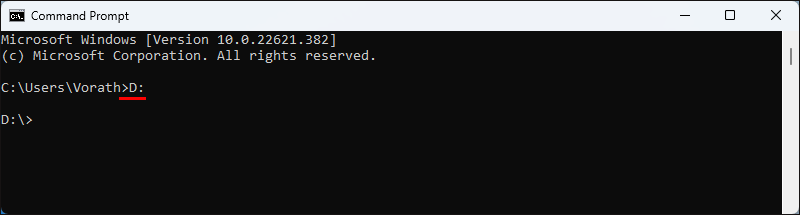
Step 2: Enter the command:D:, then press Enter to enter the D drive.
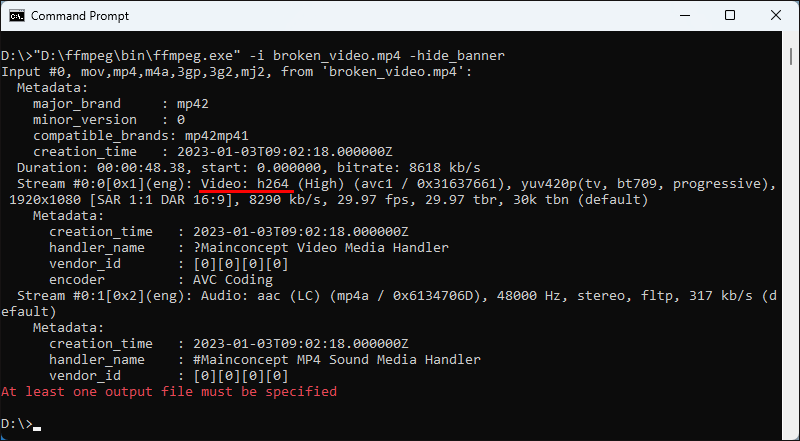
Step 3: Enter the command: "D:\ffmpeg\bin\ffmpeg.exe" -i broken_video.mp4 -hide_banner, then press Enter to view information about the broken video file.
Step 4: You can see the video encoding of the corrupted video broken_video.mp4 as: h264.
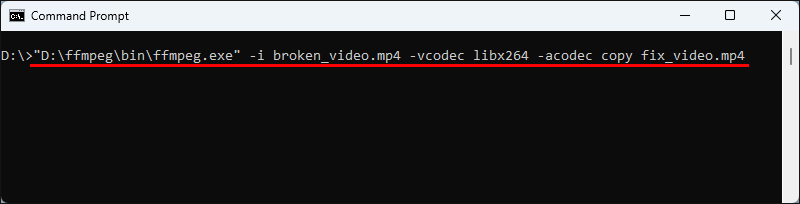
Step 5: Enter the command: "D:\ffmpeg\bin\ffmpeg.exe" -i broken_video.mp4 -vcodec libx264 -acodec copy fix_video.mp4 and press Enter to re-encode the broken video file.
-vcodec libx264 means: the video encoder is libx264.
-acodec copy means: audio is not re-encoded, it is directly copied from the original encoding.
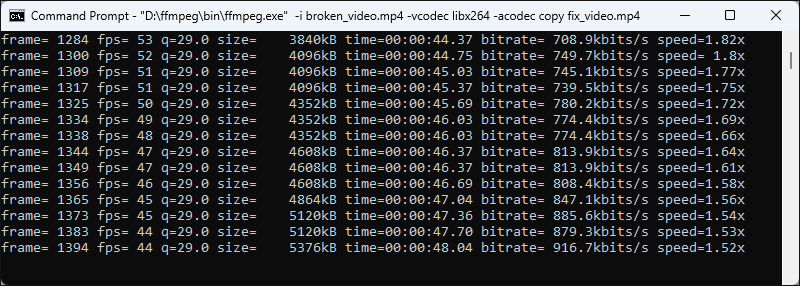
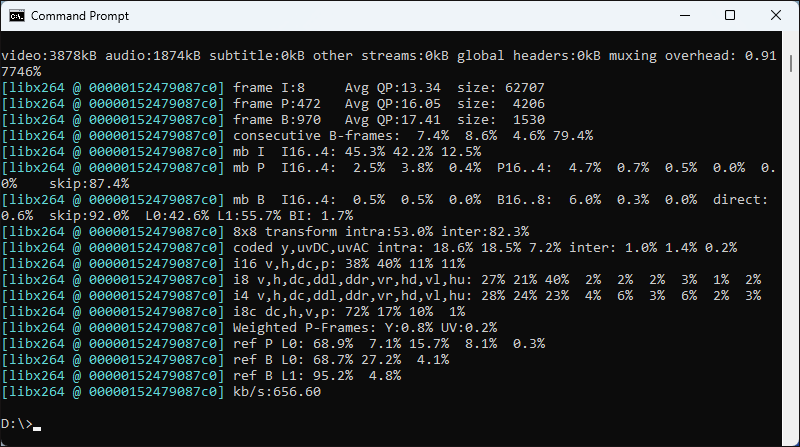
Step 6: You can see that the command prompt is encoding the program for the corrupted video.
Step 7: The figure below shows after completing the recoding.
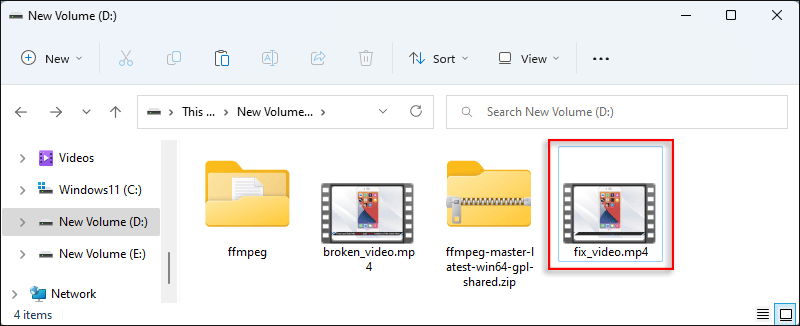
Step 8: At this point, open File Explorer and you can see the repaired video under the same folder as the corrupted video: fix_video.mp4 is already stored here.
Tool 2: Use Untrunc to repair corrupted Video file
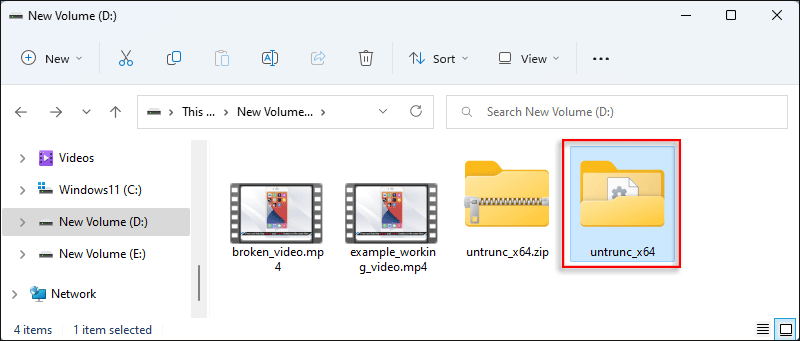
Download and unzip the Untrunc program zip file
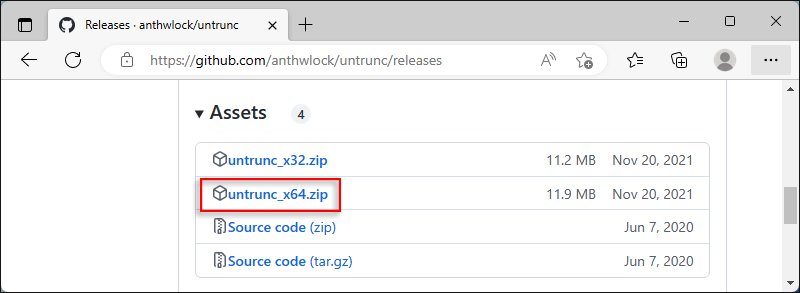
Step 1: Download the Untrunc program zip archive. Click the untrunc_x64.zip link to download the program zip to your D drive, or you can download it to another drive.
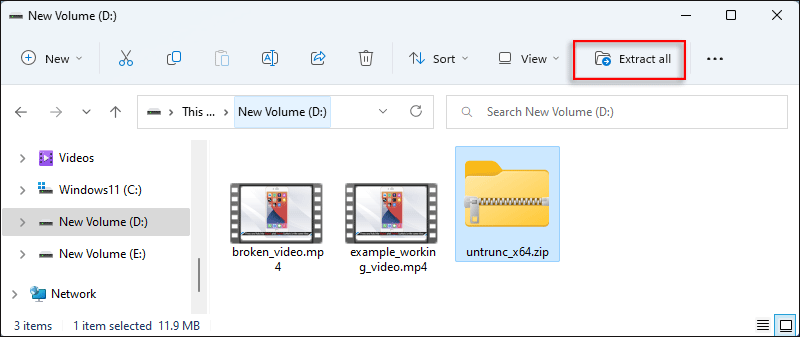
Step 2: Open the File Explorer, click on the D drive, click to select the Untrunc zip package untrunc_x64.zip that you just downloaded, and then click Extract all at the top right.
Step 3: Modify the unzip path to: D:\, click Extract to unzip the Untrunc program zip package.
Open the Untrunc program window and select the corrupted video and the sample working video to repair the corrupted video.
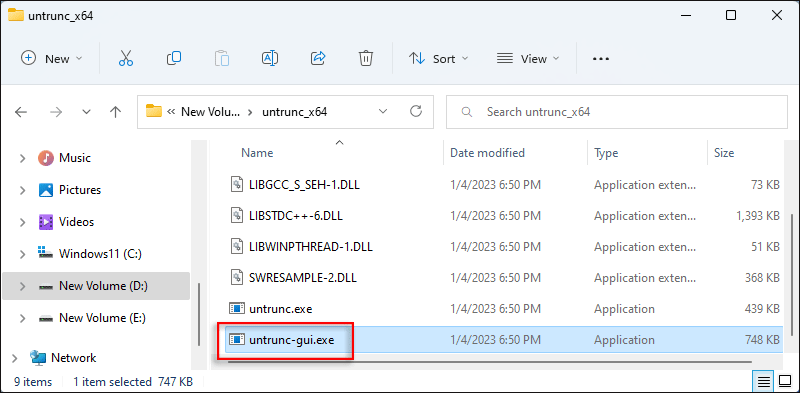
Step 1: Double-click to open the untrunc_x64 folder.
Step 2: Double-click to open the untrunc-gui.exe application.
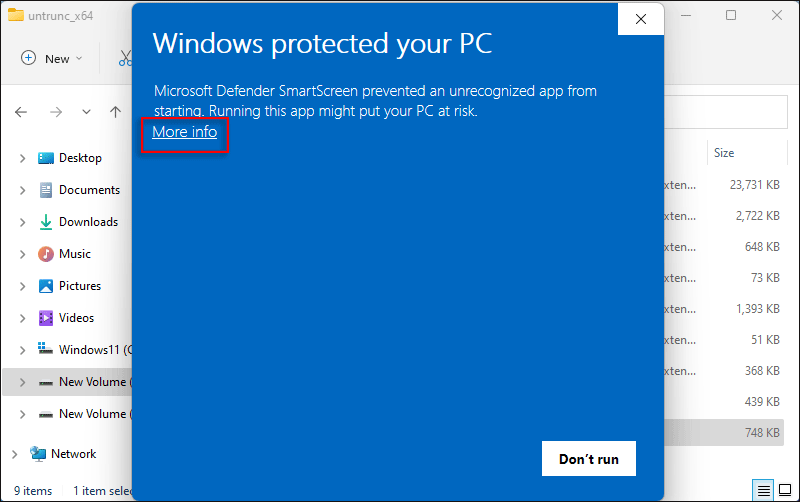
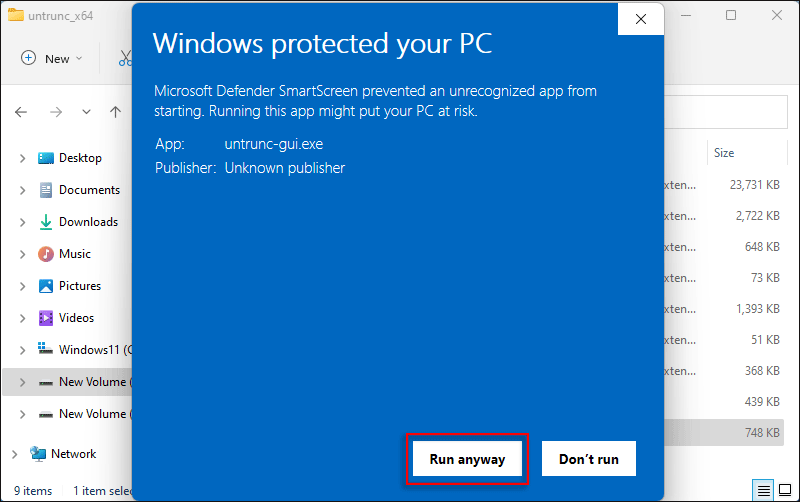
Step 3: Click on More info.
Step 4: Click on Run anyway.
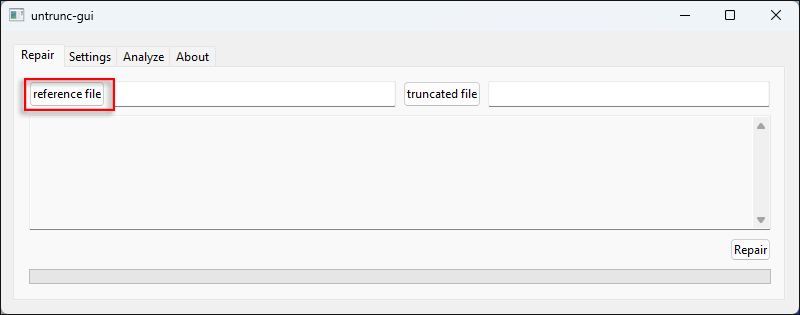
Step 5: After opening the untrunc-gui.exe application window, click on the reference file to select a sample working video.
Note: Example work videos can be similar videos, preferably from the same device, such as the same phone, camera, etc.
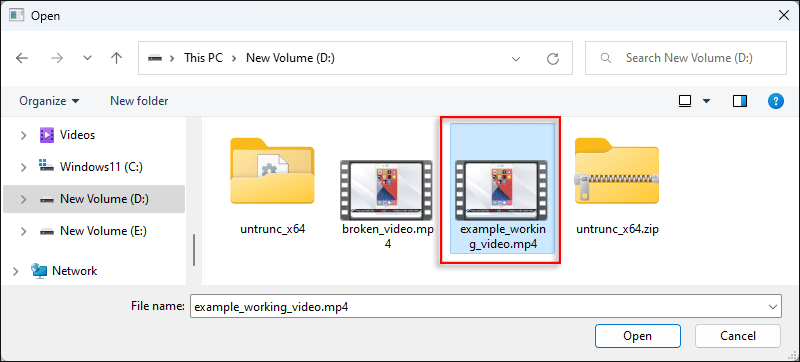
Step 6: Open the D drive and select a sample working video: example_working_video.mp4.
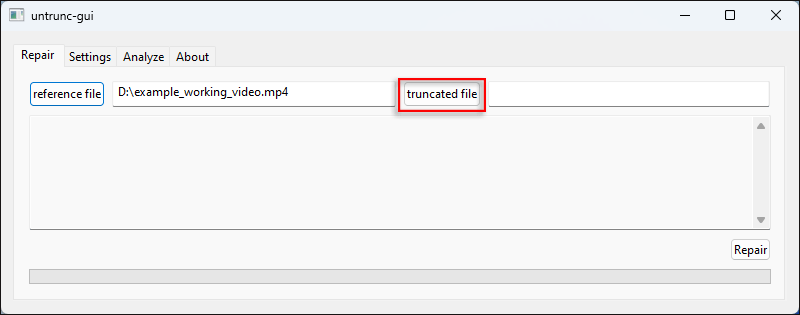
Step 7: When the selection is complete, click on the truncated file to select a corrupted video.
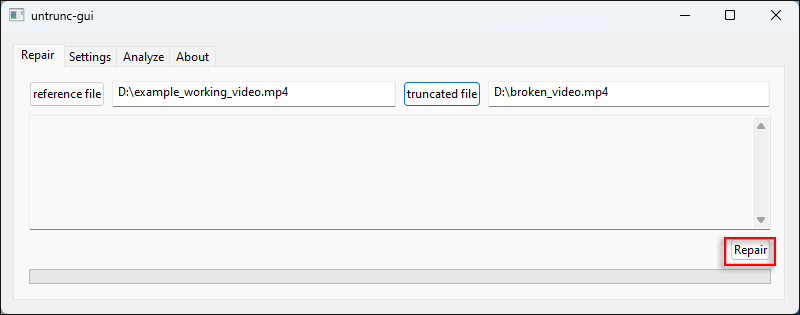
Step 8: Open the D drive and select a corrupted video: broken_video.mp4.
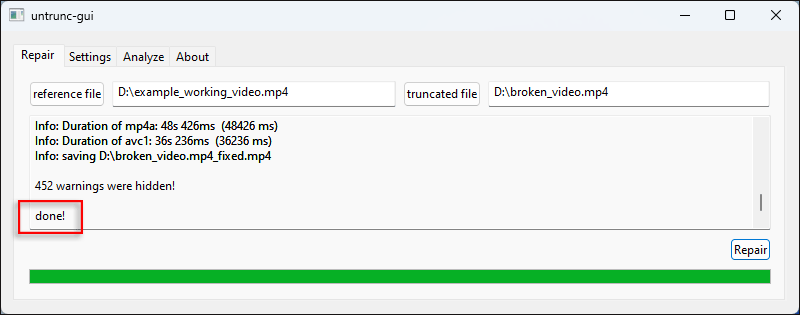
Step 9: Once the selection is complete, click Repair to start repairing the video.
Step 10: The figure below shows after completing the repair video.
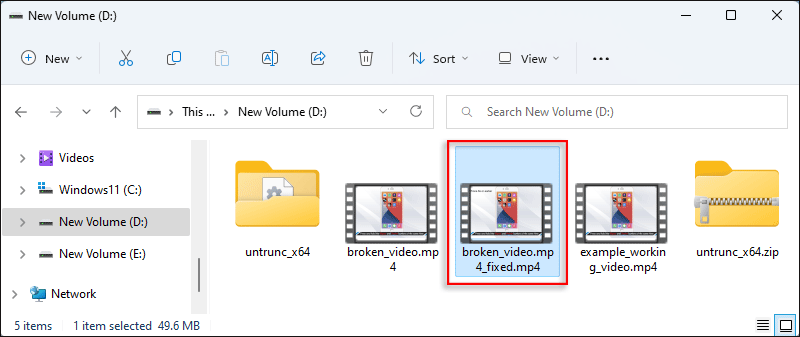
Step 11: Open the D drive in the File Explorer and you can see that the video has been saved after completing the repair: broken_video.mp4_fixed.mp4.