Virtualization, which allows users to run multiple logical computers on one machine. Every logical computer can install an operating system at the same time. Furthermore, all of them run respectively without interference. VMware and VirtualBox are the most common and popular cross-platform virtualization products. However, fewer people know about the Windows built-in virtual machine. Since Windows 8, Microsoft provides two ways for us to create a virtual machine: Hyper-V or PowerShell. This document walks through how to create a virtual machine with Hyper-V or PowerShell in Windows 10.
- Part 1: Create a Virtual Machine with Hyper-V in Windows 10
- Part 2: Create a Virtual Machine with PowerShell in Windows 10
Part 1: Create a Virtual Machine with Hyper-V in Windows 10
Comparing to VMware and VirtualBox, Hyper-V spends less time to launch and power off through it doesn’t support using peripherals such as USB flash drive. What’s more, you cannot run VMware or VirtualBox while using Hyper-V.
NOTE: Hyper-V is available for all 64-bits versions in Windows 8 and later but not include Windows Home edition.
Step 1: Enable Virtualization in BIOS Windows 10
By default, the virtualization technology is disabled in BIOS settings. So, we have to enable the hardware virtualization in advance.
1. Keeping pressing hotkey like Delete key while start or restart your computer.
2. Under the Security tab, locate to System Security item and enable Virtualization Technology.

3. Hit F10 to save changes and exit.
Step 2: Enable Virtualization in Control Panel Windows 10
To create a virtual machine in Hyper-V Manager, you need to prepare an .iso file beforehand.
1. Type Control Panel in the search bar and select it from the result;
2. Click on Programs;
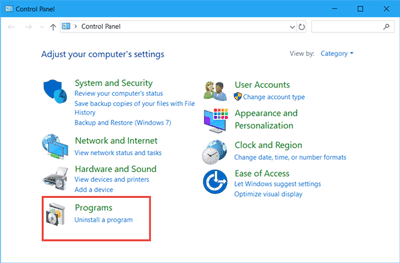
3. Click Turn Windows features on or off.

4. Check the box of Hyper-V and click on OK button. Then you need to restart your PC to apply changes.

Step 3: Create Virtual Machine with Hyper-V Manager
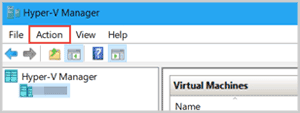
1. Search Hyper-V Manager and run it.

2. Click on Action > New > Virtual Machine and follow the wizard to create a Virtual Machine by Hyper-V in Windows 10.

Part 2: Create a Virtual Machine with PowerShell in Windows 10
Step 1: You should enable virtualization in BIOS and control panel as Step 1-2 in Part 1 above.
Step 2: Open PowerShell ISE, copy the following codes and paste into it. Save the file as My file.ps1 to the root directory of Drive D.
$Server = "Windows10"               #Create VM name as Windows10
$ServerRAM = 1GB                    #Set RAM size to 1 GB
$ServerVHD = 60GB                   #Set VHD size to 80GB
$VMLOC = "D:\HyperV"                #Define where the virtual hard disk file is stored
$Switch = "TestSW"                  #Define the name of the virtual switch
$Ws2018ISO = "E:\iso\Windows10.iso" #Specify where to install the ISO file

# Create folders and virtual throw switches for virtual machines
MD $VMLOC -ErrorAction SilentlyContinue
$TestSwitch = Get-VMSwitch -Name $Switch -ErrorAction SilentlyContinue;
if ($TestSwitch.Count -EQ 0){New-VMSwitch -Name $Switch -SwitchType Private}

# Create a new virtual machine
New-VM -Name $Server -Path $VMLOC -MemoryStartupBytes $ServerRAM -NewVHDPath
$VMLOC\$ServerVHD.vhdx -NewVHDSizeBytes $ServerVHD -SwitchName $Switch

# Configuring a virtual machine
Set-VMDvdDrive -VMName $Server -Path $Windows10ISO

#Start the Virtual Machine
Start-VM $Server
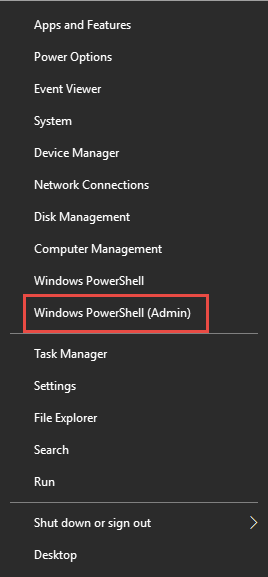
Step 3: Right-click on Start and choose Windows PowerShell (Admin) from the items.
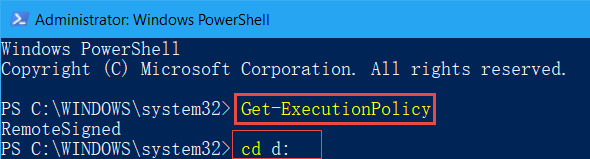
Step 4: Run get-executionpolicy command to see the PowerShell execution policy. If it returns Restricted, you should run the set-executionpolicy remotesigned commend to get the highest authority to run the script then type Y and hit Enter. If it returns RemoteSigned to you, you can run the script directly.
Step 5: Due to my .ps1 file stored in Drive D, so type cd d: to switch the directory.
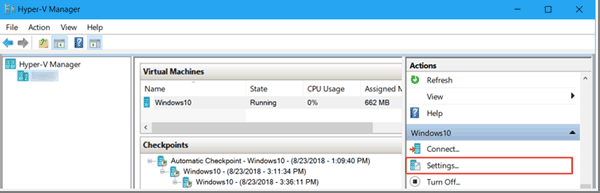
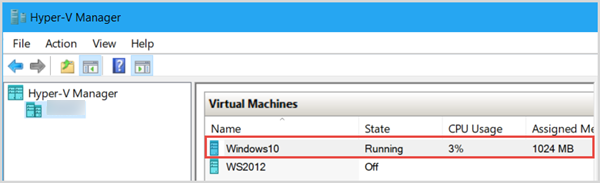
Step 6: Type & ‘.\My file.ps1’ and hit Enter. When it finishes creating Virtual Machine, you can see it running on the Hyper-V Manager. Double-click on it to launch it.

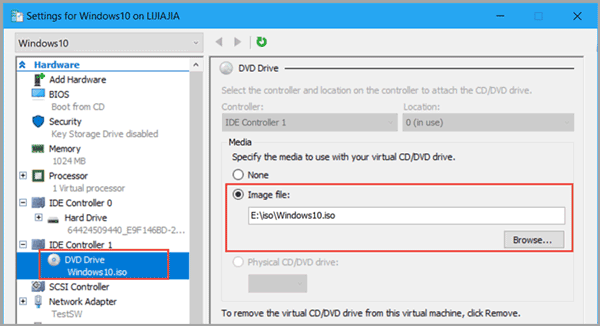
Note: If Windows blank screen at startup, you can click on Settings in the right panel. Locate to DVD Drive and select Image file and add your .iso file to the VM.