Do you want to password protect sensitive files or folders on your SanDisk USB flash drive? One of the biggest concerns about storing sensitive files on a flash drive is that someone who owns the drive, and the computer can see, modify, copy or steal your data. Therefore, it is essential to password protect your SanDisk flash drive. In this post, I will share with you 4 ways to achieve this goal. You can try just one method that works best for you.
- Way 1: Password protect SanDisk flash drive via SafeUSB Genius
- Way 2: Password protect SanDisk flash drive via BitLocker Genius
- Way 3: Password protect SanDisk flash drive via SanDisk SecureAccess
- Way 4: Password protect SanDisk flash drive via SafeFile Genius
Way 1: Password protect SanDisk flash drive via SafeUSB Genius
iSunshare SafeUSB Genius is a multifunctional USB drive protection tool. It can effectively improve the security of USB drives and protect personal photos, audio, video or other private data from leakage. It is easy to set the password of the encrypted USB drive and easy to operate for novices. And it is compatible with almost all Windows OS and USB flash drives.
Step 1: Download and install SafeUSB Genius on your PC. Then insert your SanDisk flash drive in your computer.
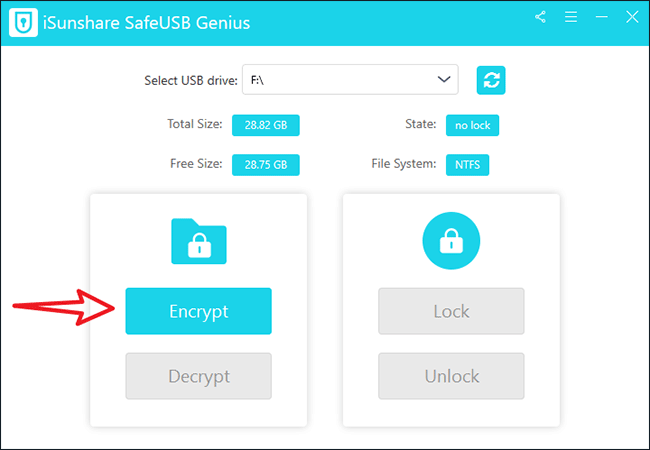
Step 2: Click on the Encrypt option in the main menu screen.
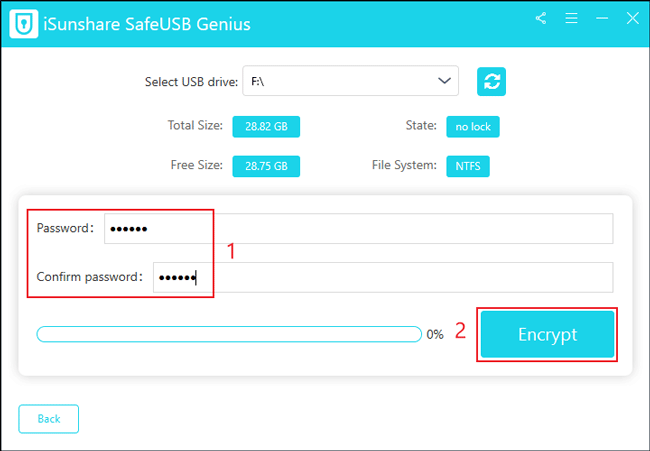
Step 3: Set a password of at least 6 digits or letters and enter it twice. After that, click Encrypt to start encrypting your SanDisk flash drive data.
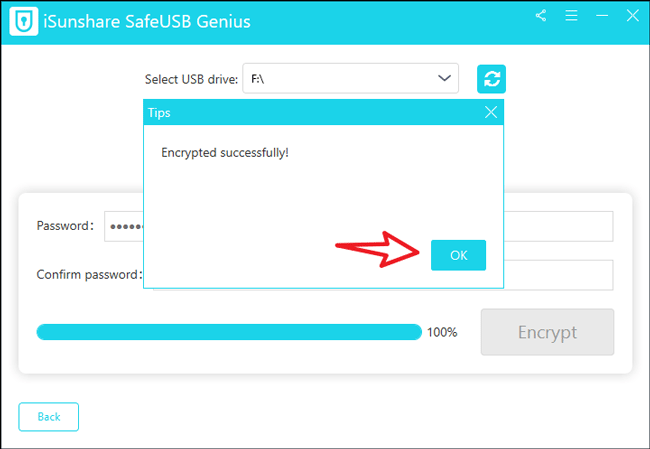
Step 4: Soon, your SanDisk flash drive is successfully password protected. Click OK in the pop-up dialog box below to end the encryption.
Way 2: Password protect SanDisk flash drive via BitLocker Genius
iSunshare BitLocker Genius is a disk encryption tool that can encrypt the internal/external drive with BitLocker in Windows and Mac OS. It can encrypt hard drives, SSDs, USB drives, external hard drives, SD cards, MicroSD cards, memory cards, etc.
Step 1: Download and install BitLocker Genius on your PC. Then insert the SanDisk flash drive in your computer’s USB port.
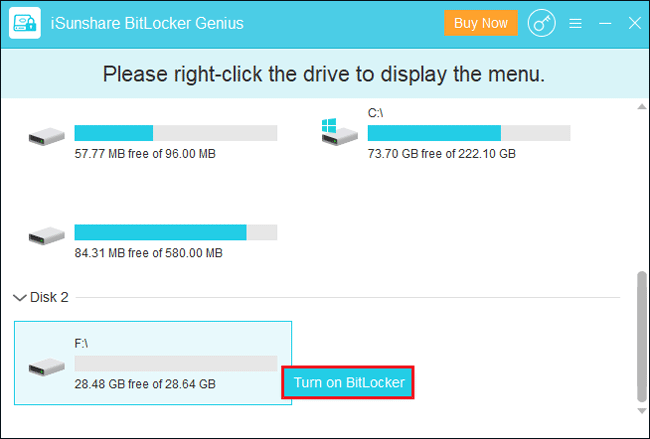
Step 2: Right-click on the SanDisk USB flash drive you want to password protect with BitLocker and select the Turn on BitLocker option.
Step 3: Give your SanDisk flash drive a BitLocker password of no less than 8 digits, then enter it again to confirm the password. Then Click save to file option in the lower-left corner to save the recovery key. Choose a safe place on your local computer to save the recovery key stored in the text.
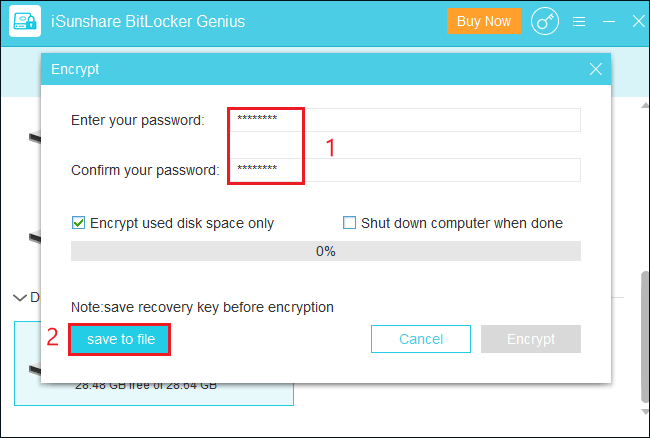
Step 4: You can either check the Encrypt used disk space only option or uncheck it, and let BitLocker encrypt the entire disk. Then check the Encrypt button.

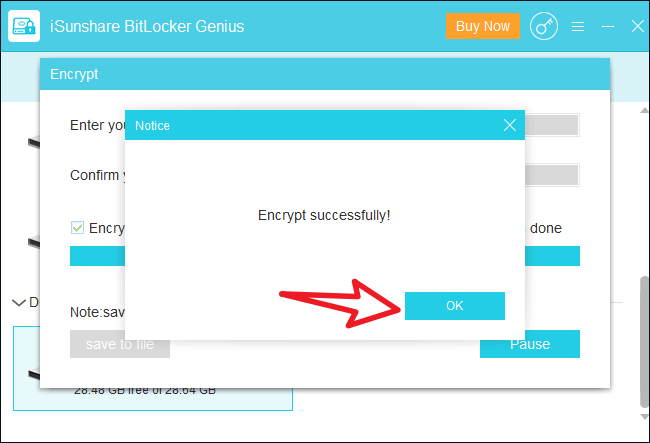
Step 5: Wait for a while, a successful encryption message will appear, click OK to close the dialog box.
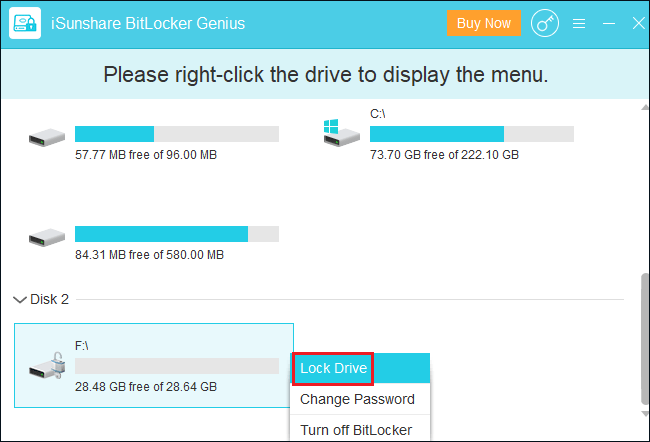
Step 6: You can right-click on the unlocked SanDisk flash drive and select the Lock Drive option.
Way 3: Password protect SanDisk flash drive via SanDisk SecureAccess
SanDisk SecureAccess is a quick and easy way to store and protect critical and sensitive files on your SanDisk USB flash drive. Simply drag and drop your important files inside. Your repository is password protected and your files are automatically encrypted. So even if you share your SanDisk USB flash drive or if that flash drive is lost or stolen, your files are safe.
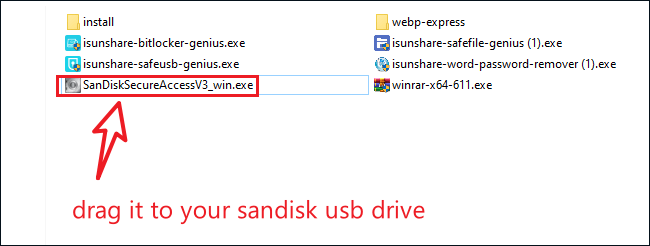
Step 1: Connect your SanDisk USB flash drive to your PC. Download and install SanDisk SecureAccess on your PC. Then drag SanDiskSecureAccessV3_win.exe to the USB flash drive.
Step 2: Double-click on this executable file in the USB flash drive and click Next in the Welcome screen that pops up.

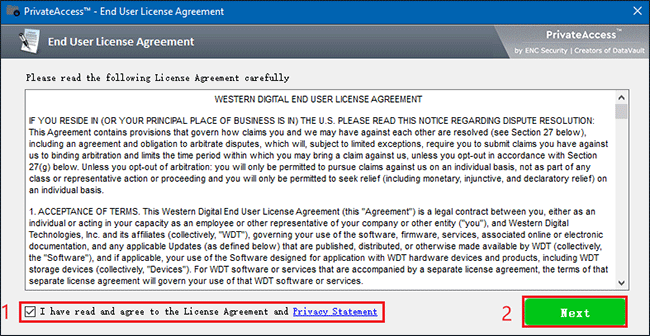
Step 3: Check I have read and agree to the License Agreement and Privacy Statement option and click on Next.
Step 4: Please create a strong password and add its hint if necessary. Then click OK. Please note that there is no “Forgotten Password” protocol. If you lose your password, you lose your password-protected files.

Step 5: Click on Next option again in the pop-up window.
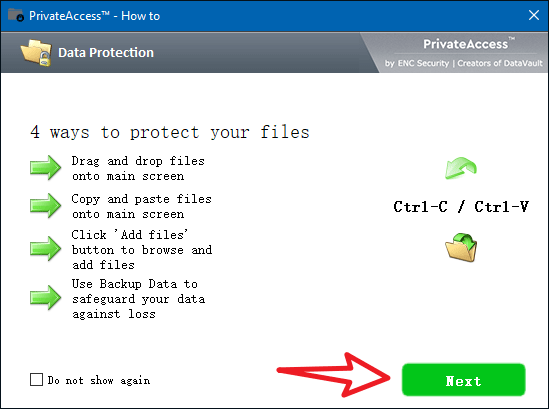
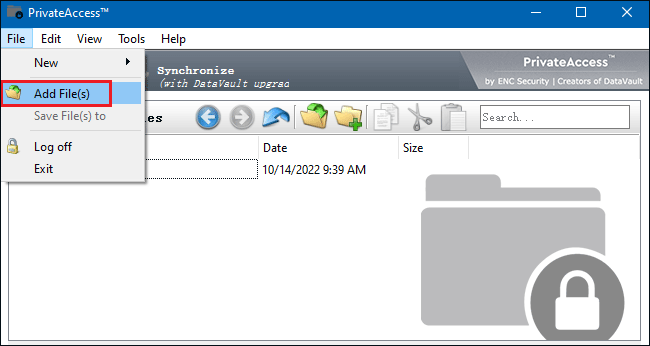
Step 6: In the PrivateAccess interface, click on File > Add File(s). Alternatively, you can drag and drop files into it.
Step 7: When you have finished selecting the files that need to be password protected, click Log off.
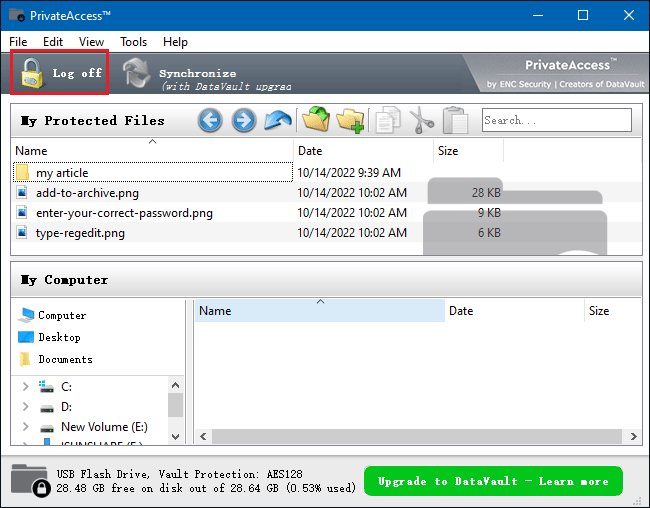
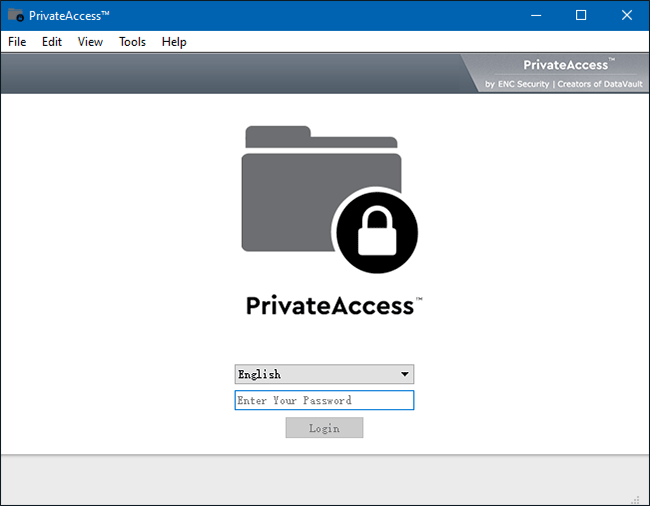
Step 8: You will see this window every time you want to log in and after logging out from PrivateAccess.
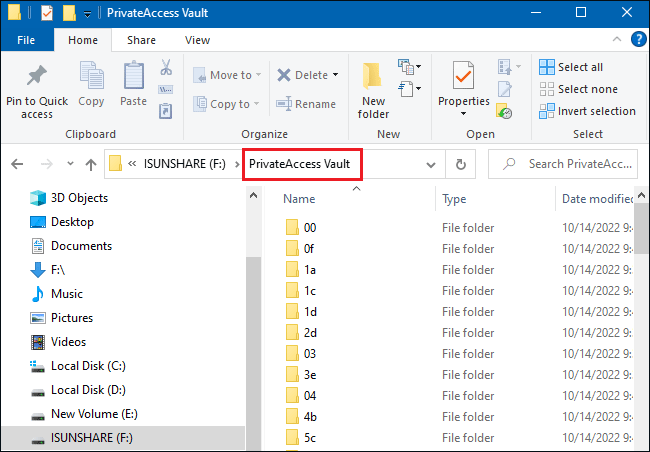
Step 9: When you look at the files on your SanDisk flash drive, you will notice that a new PrivateAccess Vault folder appears. This folder contains your password-protected files whose names seem to be random and without a password, they are useless.
Way 4: Password protect SanDisk flash drive via SafeFile Genius
The SafeUSB Genius and BitLocker Genius mentioned above encrypt the entire SanDisk flash drive. If you don’t need to password-protected all files, but only some sensitive files, iSunshare Safefile Genius is a good choice for you, it can encrypt individual files or folders, and is very easy to use.
Step 1: Download and install SafeFile Genius on your PC, and make sure your SanDisk flash drive is connected to your computer.
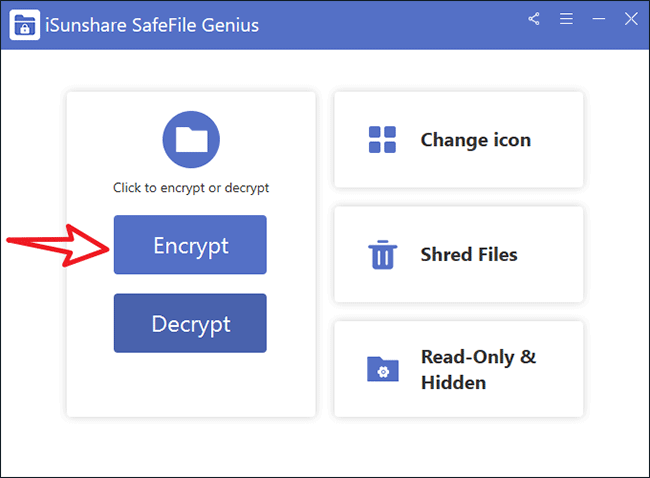
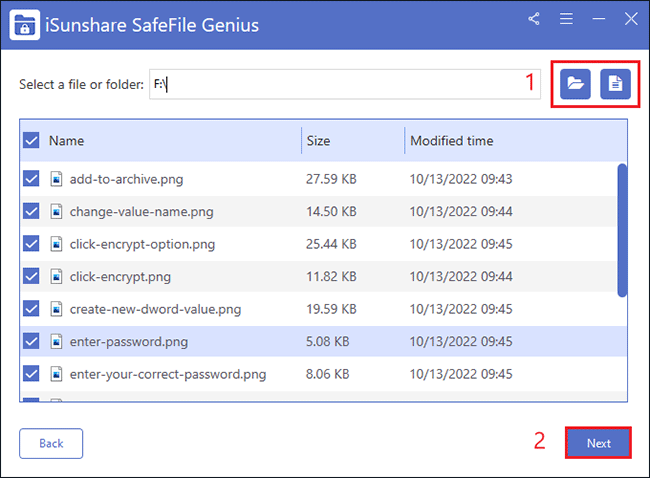
Step 2:Click on the Encrypt option in the main screen of the software.
Step 3: Click the File or Folder button from your SanDisk flash drive to select the files you need to password protect. Then click Next.
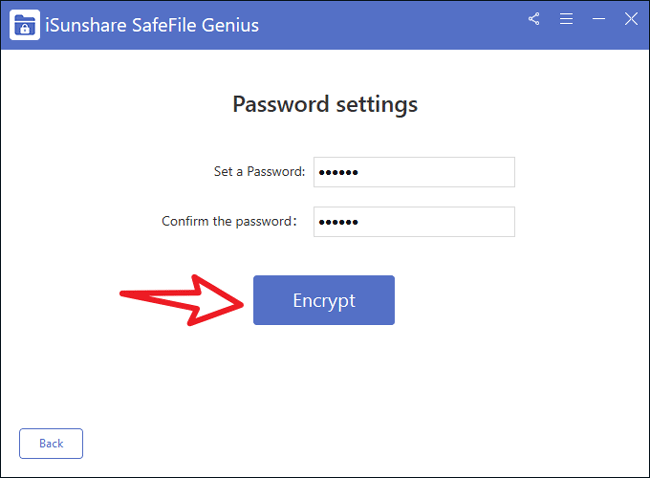
Step 4: Set a password of at least 6 digits and click on the Encrypt button.
Step 5: Wait a while and your files are encrypted successfully.
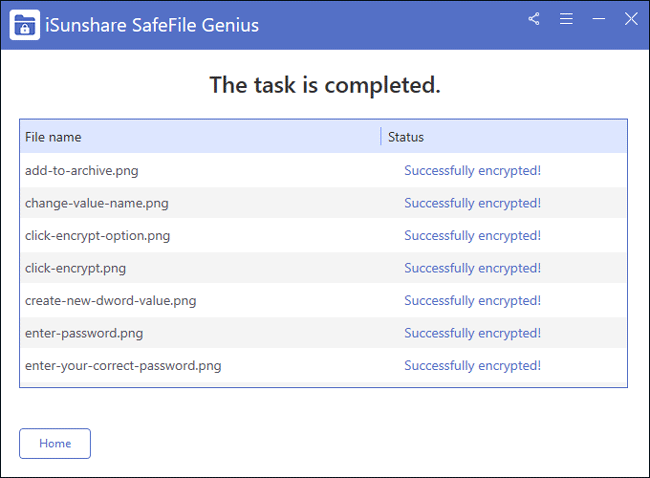
Note: SafeFile Genius won’t delete the original and unencrypted file, but you can choose to delete them by yourself.
Related article:
- Why and How to Encrypt USB Flash Drive
- SanDisk USB Flash Drive Data Recovery with Three Tools
- Free 2 Ways to Password Encrypt a USB Flash Drive on Mac
- How to Fix Unrecognized USB Flash Drive
- How to Decrypt the USB Encrypted with BitLocker in Windows and Linux