We use cookies for personalizing content and ads and providing social media features. Your usage information on our website will be used for social media, advertising, and traffic analytics, or shared with our partners. Clicking "Accept" means you agree to use our cookies .
When using Microsoft Office Word 2016, you may want to enable read-only mode for a word document to prevent others changing your finished work. This passage talks about how to enable read-only mode in Word document.
When you want to make a current Word document read only, you should follow the under steps.
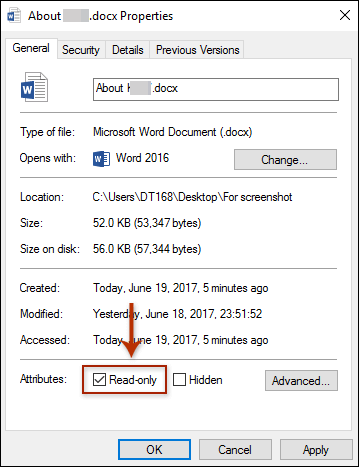
Step 1: Navigate to the folder of the target Word document, then right-click it and select Properties in the coming menu list. Then in the coming dialog, just check Read-only box at the bottom of the dialog.
Make a Word document read only by restrict editing feature
When you want to make a opened Word document read only, just follow the way.
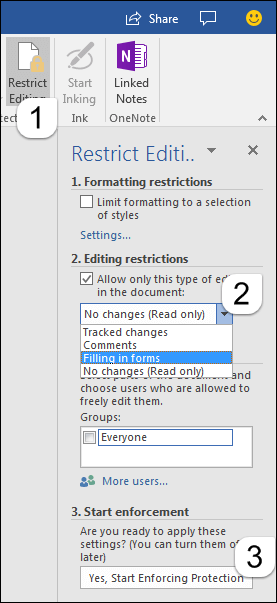
Step 1: When you open the Word document, then click the Review item at the top of the ribbon, and find Restrict Editing in its subcategories.
Step 2: In the Restrict Editing panel, just check the Allow only this type of editing in the document. Select the Filling in forms in the below scroll down list. Then navigate to the bottom of the panel, click the Yes, Start Enforcing Protection icon.
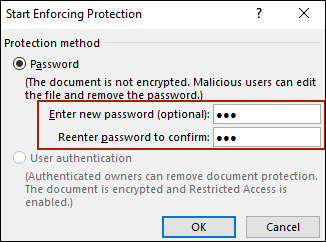
Step 3: In the coming Start Enforcing Protection dialog, please type a password into both Enter new password (optional) and Reenter password to confirm boxes, and click the OK button.
Note: After the above operation, your document is read-only, and nobody can edit this Word document. If you want to stop the protection of the Word document, just repeat the above action to find Restrict Editing and click Stop Protection in its panel and type password to disable the read-only mode.
Make a Word document read only by save as tool
When you are going to make a new created Word document read only, just follow this way.
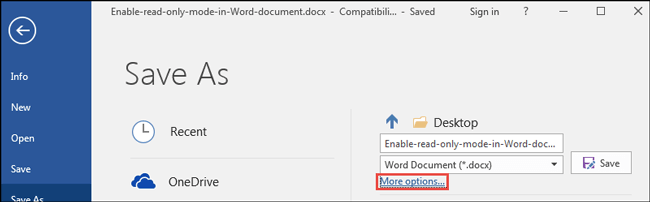
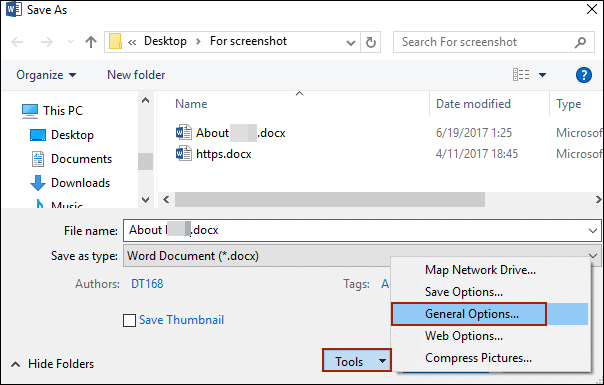
Step 1: Follow the navigation chain File>>Save as. In the coming interface, just click More options.
Step 2: When the save as dialog pops up, just navigate to the bottom of it, click Tools icon and select General Options in the coming menu list.
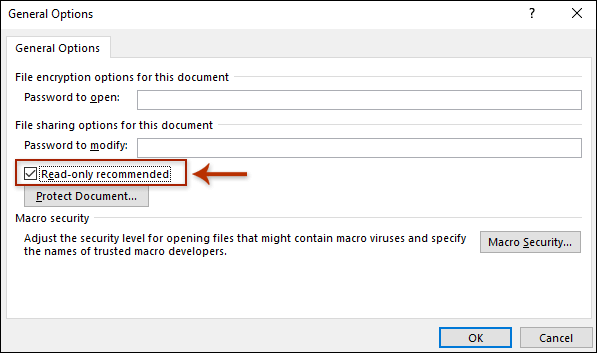
Step 3: In the coming General Options dialog, check the Read-only recommended option, and click the OK button.
Step 4: Click Save button at the bottom of the Save As dialog.
Note: If your Word document has never been saved before, you need to specify the destination folder and file name.
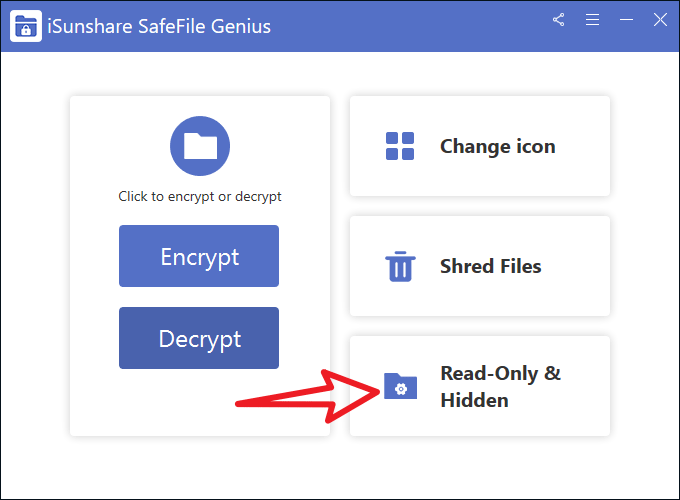
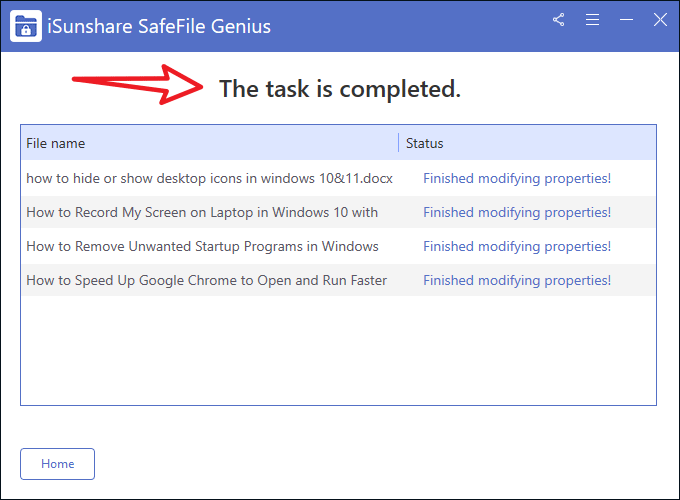
Step 2: Click the Read-Only & Hidden button on the main screen of the software.
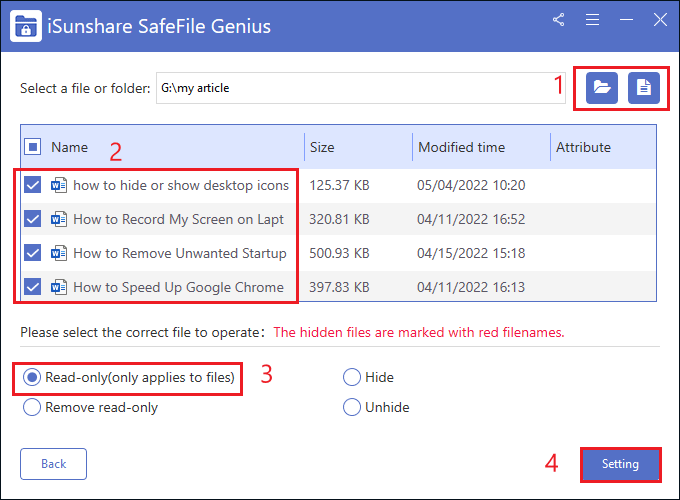
Step 3: Click on the File or Folder button to select your word documents from your local computer, then check the Read-only(only applies to files) button and finally click Setting.
Step 4: When the task completion prompt appears, this means that your word document has been successfully set to read-only properties.