We use cookies for personalizing content and ads and providing social media features. Your usage information on our website will be used for social media, advertising, and traffic analytics, or shared with our partners. Clicking "Accept" means you agree to use our cookies .
In order to use the network more conveniently, we usually set up WiFi hotspot network connection. However, some win10 system users found their computer suddenly unable to connect to the WiFi hotspot, what should they do? The following post shares three solutions to the failure of WiFi hotspot connection in Win10 systems caused by the stop of ICS service.
Attentions, there are three ways to solve failed WiFi hotspot connection in win 10.
Step 1: Download a new wireless network card driver which is compatible with win 10.
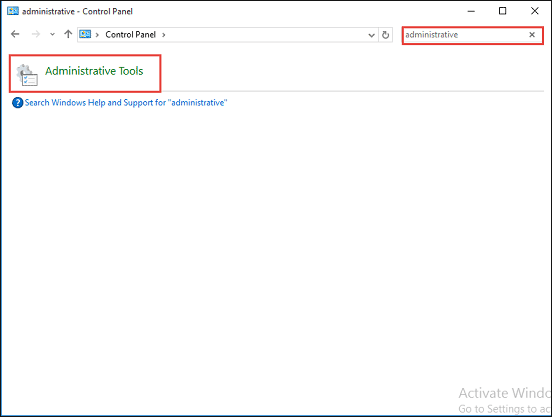
Step 2: Then open Control Panel, type administrative into the search bar at the top-right of Control Panel window, find and click Administrative Tools link.
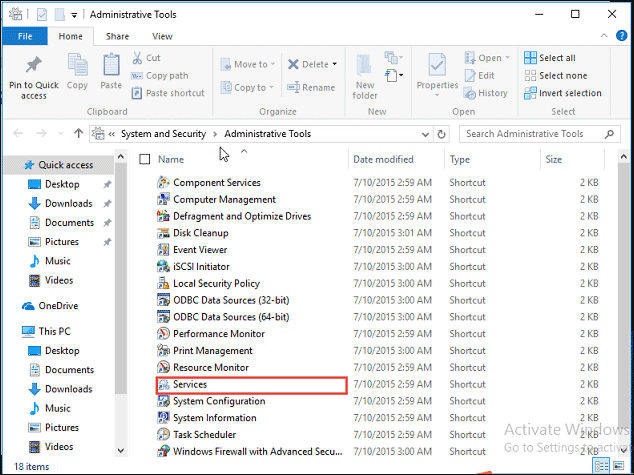
Step 3: In the option list under Administrative Tools, find Services option and click it to open Services window.
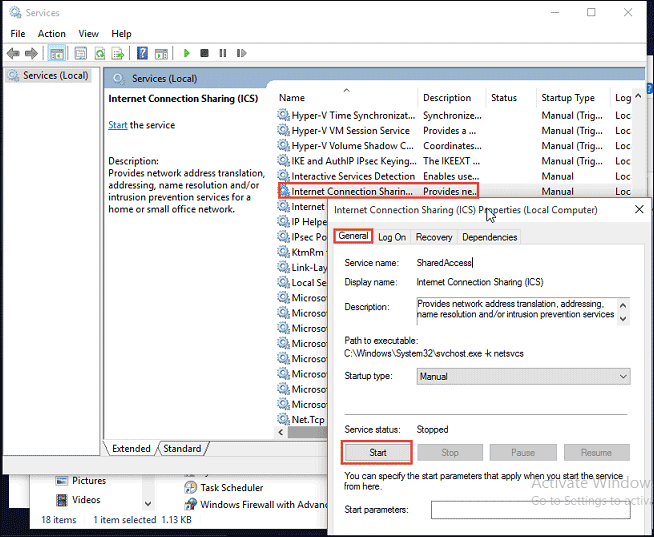
Step 4: Choose the option Internet Connection Sharing, then set the Service status to Start and restart your PC.
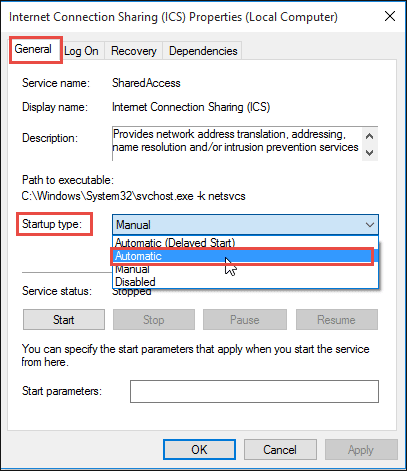
Way 2: Change Startup Type of Service
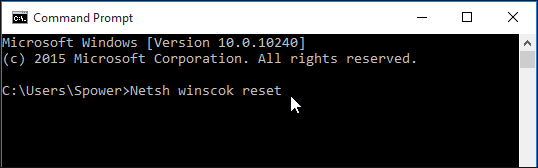
Step 1: Press Win+ R key combination then type CMD into command box, type Netsh winsock reset into command box and click Enter, then restart your PC.
Step 2: Do as mentioned above to open Administrative Tools window, then find the Services option in option list. Then click it to open the Services window, and find the service called Internet Connection sharing, and click it.
.
Step 3: In this window, set Startup type to be Automatic, don't forget clicking OK at bottom of the window. Last but not least, repeat the same actions to the service called Windows Firewall and restart your PC.
.
Way 3: Refresh at Registry Editor
Step 1: Press Win+ R key combination, type regedit to open Registry Editor window, follow the path HKEY_LOCAL_MACHINE\SYSTEM\CurrenteControlSet\Services\RasMan\PPP\EAP to find the item EAP and delete all of its sub-items and restart your PC.
Tip: Now, you can make a wifi hotspot connect in windows 10 successfully, If not, try to check your network and connection settings.
 .
.


