We use cookies for personalizing content and ads and providing social media features. Your usage information on our website will be used for social media, advertising, and traffic analytics, or shared with our partners. Clicking "Accept" means you agree to use our cookies .
A complete backup protects against hardware failure, malware, or system issues by capturing your OS, apps, settings, and personal files. Here's how to do it effectively. In this article, you can learn two ways to backup and restore your entire computer in Windows 10.
Way 1: Backup and Restore with Windows 10 Backup and Restore Utility
There is the built-in utility in Windows 10 computer which can help to create the full backup for your computer. The Backup and Restore utility makes it easy to backup the drives in your computer.
Backup Windows 10 PC
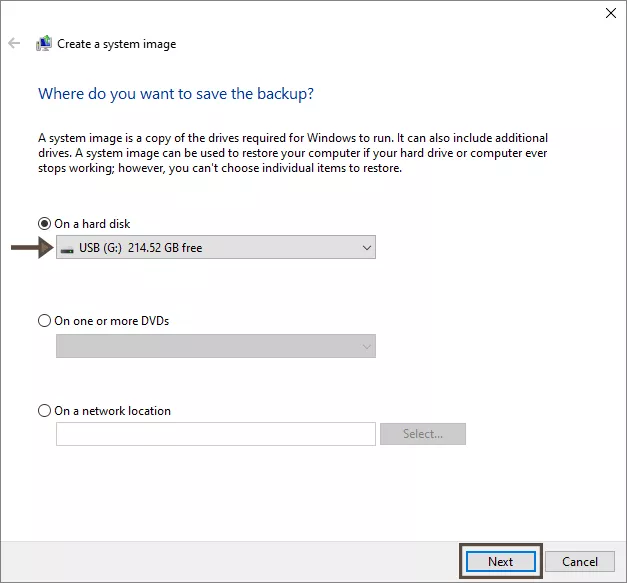
Step 1: Get another disk connected to your computer so that you can save the backup image in the disk. It is necessary to make sure the disk has large capacity.
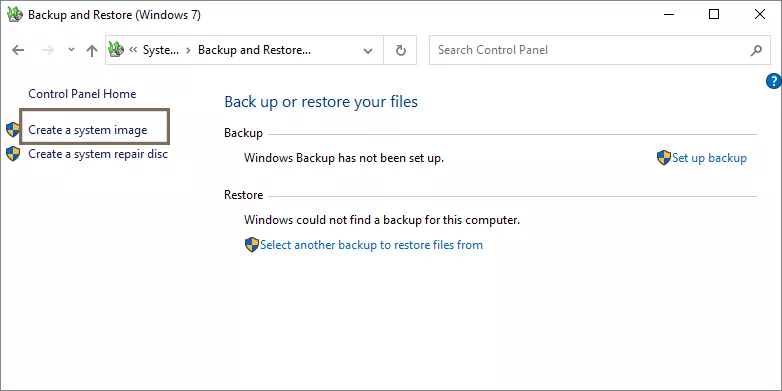
Step 2: Access Control Panel and choose Backup and Restore (Windows 7) function.
Step 3: On the left side, click the Create a system image option.
Step 4: On the prompt, select the drive to save the backup and follow the steps to start the backup.
Restore Your PC from a System Image
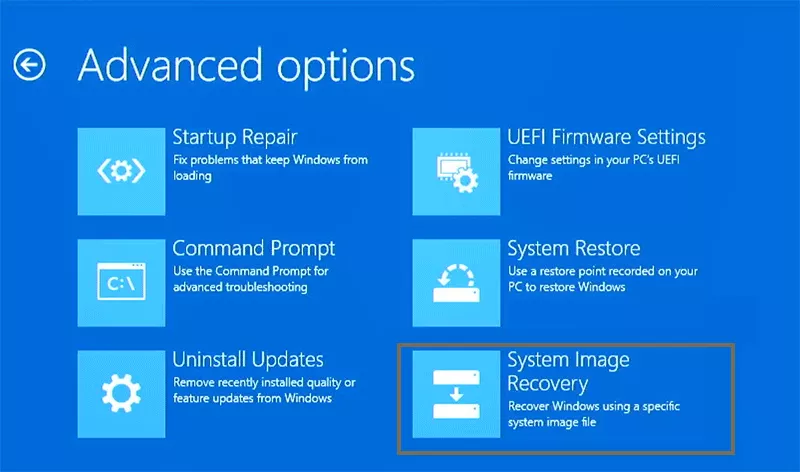
If there is error in your Windows 10 PC and you want to restore the backup, just enter your computer WinPE and select Troubleshoot> System Image Recovery. After that, you can select the backup source and complete the restoration. Finally, reboot and confirm everything is restored.
Way 2: Backup and Restore Your PC with iSunshare CloneGo
Things can be easy when you find the suitable way and reliable tool. To move the full content of the Windows 10 PC to another, you can full backup each partition in your Windows 10 pc firstly, then restore all the partition backups in an SSD and boot another Windows 10 computer from the SSD at last. In the process of executing the way above, a third-party tool—iSunshare CloneGo, the Windows backup and restore utility will be applied. With the help of CloneGo, you can backup and restore your entire Windows 10 pc without data loss.
Except that iSunshare CloneGo has the easy-to-use but powerful backup and restore features, its Make Boot Disk feature is an important reason to choose it. As we all know, WinPE is the mini Windows system that performs well in backing up and restoring Windows 10/8/7. And the Make Boot Disk feature is developed by taking advantage of the features of WinPE, which can help 100% backing up and restoring the Windows 10 pc.
Preparations:
1. Install iSunshare CloneGo in the backed-up Windows 10 pc.
2. Insert a USB disk into the backed-up Windows 10 pc. The USB disk is used to be the bootable drive of WinPE.
3. Connect a large enough SSD to the backed-up Windows 10 pc and please backup the content in it if there are files in the SSD. If the connected SSD is a new one, you have to make it recognizable.
iSunshare Reliable Disk/Partition Clone Software
Completely back up and restore your Windows PC
Easily create a WinPE to back up data without booting OS
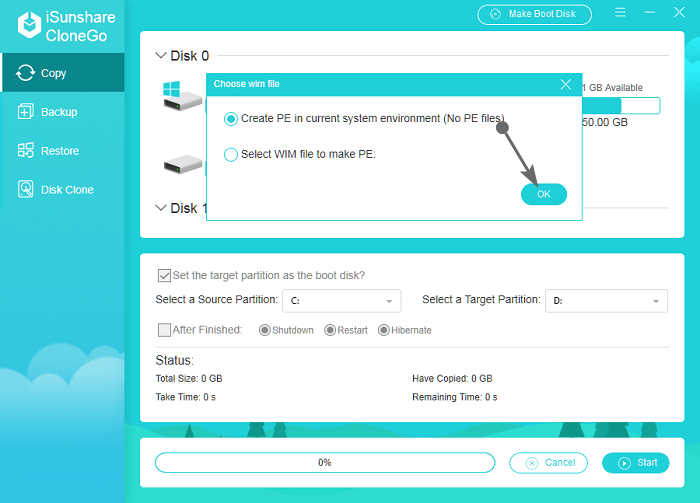
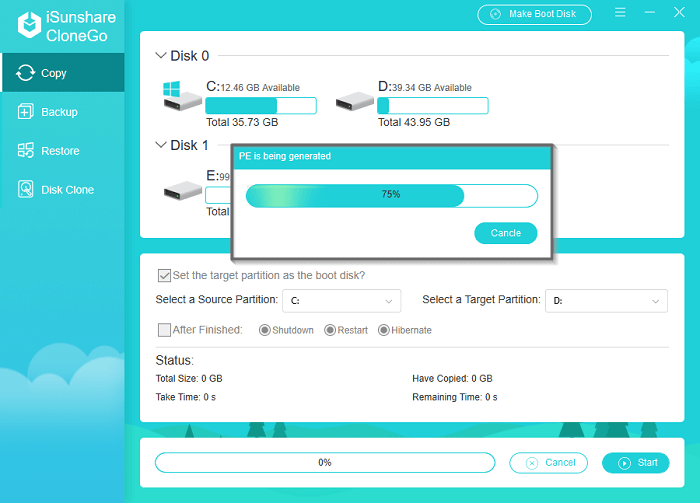
Step 1: Run CloneGo and click the Make Boot Disk option to create the WinPE. Then, 2 options will be shown for you to make the WinPE drive, which are Create PE in current system environment and Select WIM file to make PE. You can choose one of them to create WinPE.
Tips: If the first option is unable to choose, it means that there isn't the PE file in your Windows computer.
Difference between the two options for making PE:
The option that Create PE in current system environment enables the made PE work well on the Windows computer that creates the PE.
The PE made by the option Select WIM file to make PE can be used on other Windows computers, besides the computer that creates it.
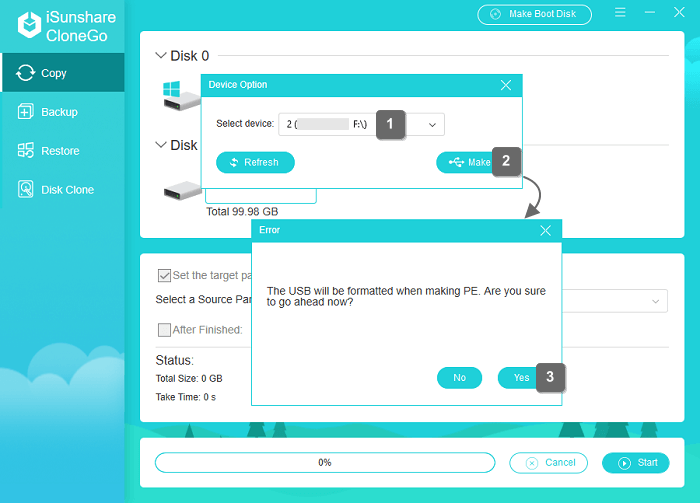
Step 2: Select the USB device to store the made WinPE and you will get the Format USB box. Just confirm it.
Step 3: Then the software will begin to burn WinPE into the USB device. After it's over, you need to start the computer and enter the BIOS/UEFI/Boot Menu to make the pc start from the USB device.
2. Backup Partitions in the Windows 10 PC
As the same disk will be identified with different drive letters in Windows 10 and WinPE, for example, the drive letter of Windows 10 D disk may be changed from D to E in the WinPE. You can recognize each drive through its total size or free size in the user interface of CloneGo.
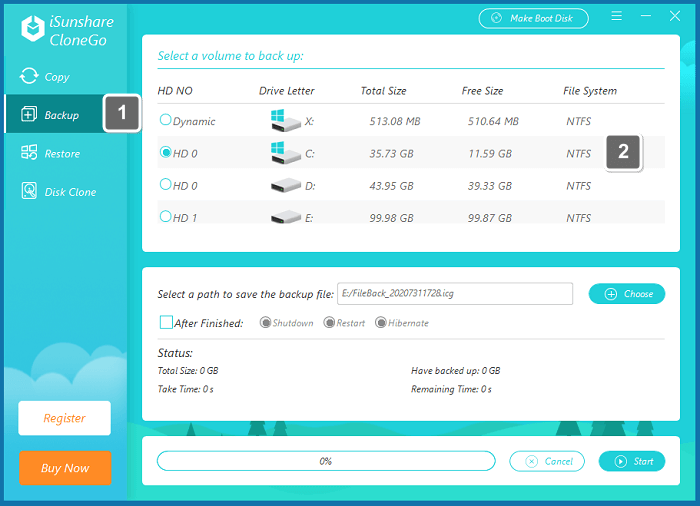
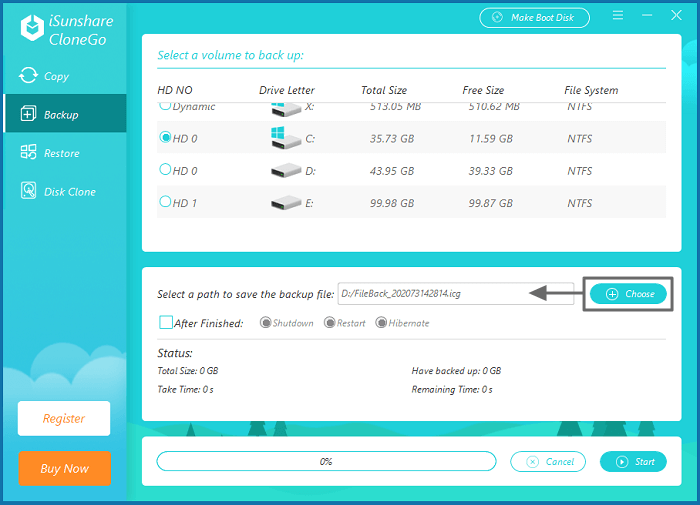
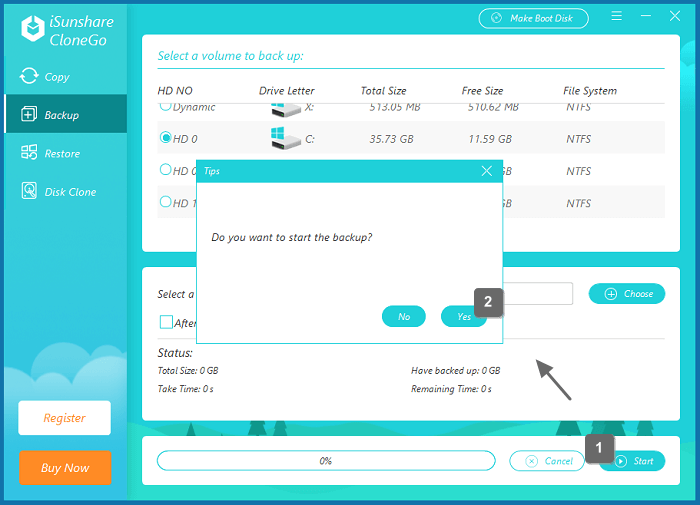
Step 1: After successful WinPE boot, CloneGo will be shown directly without any click. Then just tap the Backup button and select the backed-up partition under the Select a volume to back up option.
Step 2: Hit the Choose button to select a volume or folder in the SSD to save the backup file.
Step 3: Click the Start button and when a prompt is popped out to ask for the confirmation of the backup operation, you can hit the Yes button to move on.
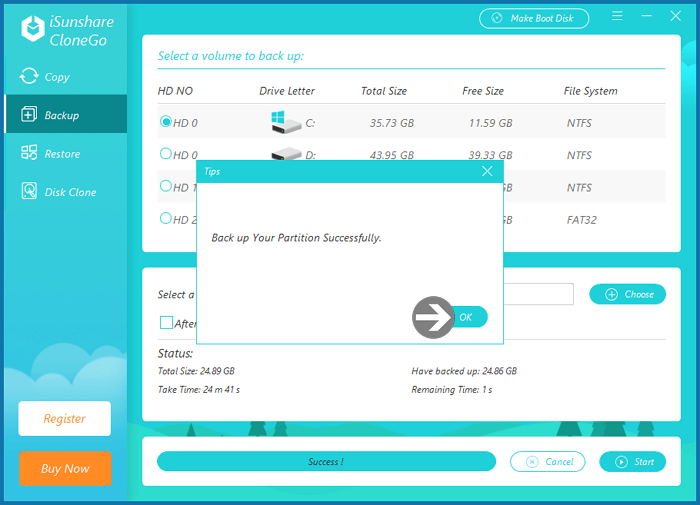
Step 4: When the backup operation is finished, a small box will be shown to tell you. You can click the OK button to continue your usage.
3. Restore the Partition Backups of Windows 10 PC
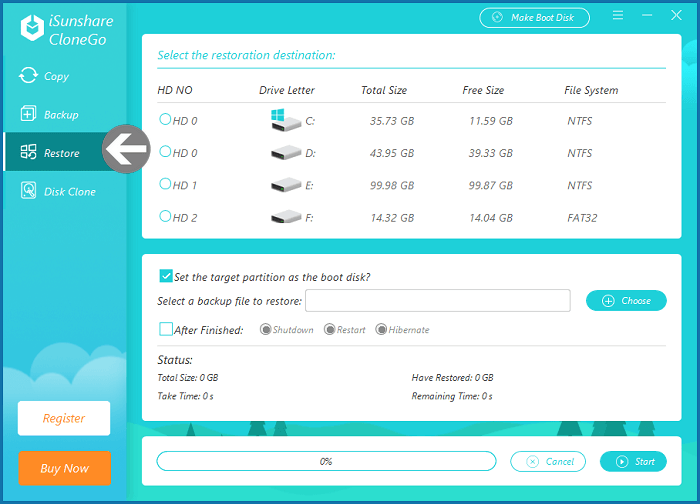
Step 1: In the CloneGo of WinPE environment, select the Restore button in the left pane.
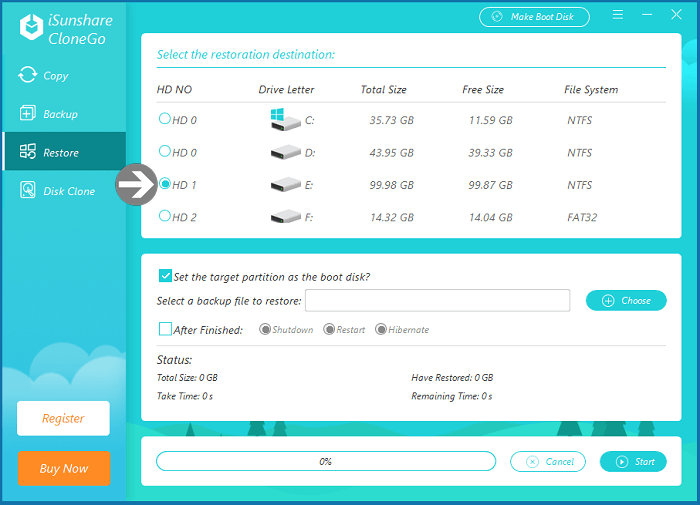
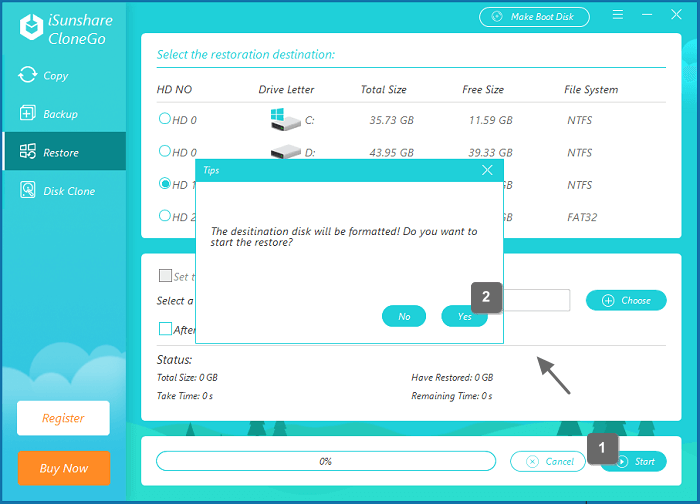
Step 2: Click the volume in the SSD to be the restoration destination.
Step 3: Input the backup file by clicking the Choose button and selecting the file.
When you restore the system backup, you can check Set the target partition as the boot disk, which will make the restored Windows 10 bootable. Aside from this, you can use the After Finished function to shutdown/restart/hibernate your pc after the restoration operation ends.
Step 4: Start the restoration and hit the Yes button when a tips message is popped out to remind you the restoration destination will be formatted.
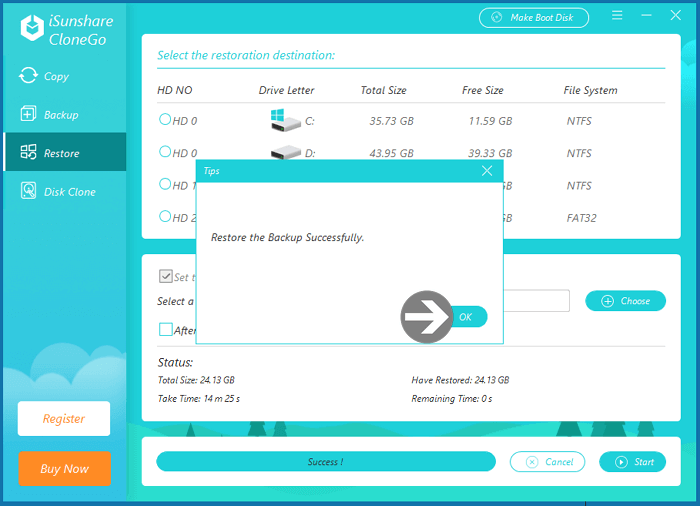
Step 5: After the backup process is finished, you can see a prompted box written with Restore the backup successfully, just choose the OK button to exit it.
To backup your entire pc with Windows 10 installed and restore the partition backups completely in the SSD, you can realize it by repeating the operations in Part Two and Part Three. Then just connect the SSD to the new or another Windows 10 pc and boot the pc from the SSD to get the operating environment which is the same as that of your original Windows 10 computer.