logo
Resources Windows 10 Enable InPrivate Browsing for Privacy Protection in Windows 10

Enable InPrivate Browsing for Privacy Protection in Windows 10

By Michael | Last Updated

InPrivate Browsing helps you stop IE from storing data such as cookies, temporary Internet files, browsing history, etc. Thus, this text introduces three simple methods to enable it on Windows 10 computer for your privacy protection.

Video guide on how to enable InPrivate Browsing in Internet Explorer:

3 ways to enable InPrivate Browsing in IE on Windows 10:

Way 1: Enable it using keyboard shortcuts.

Press Ctrl+Shift+P to instantly have this feature enabled.

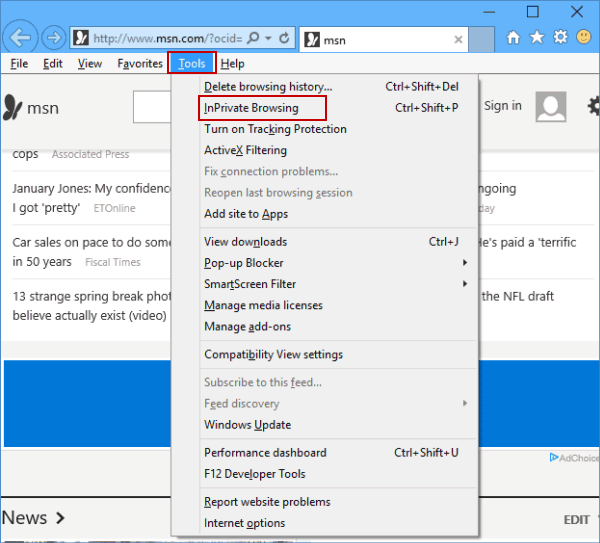
Way 2: Turn on InPrivate Browsing in the Tools menu.

Click Tools on the Menu bar to open its menu, and then choose InPrivate Browsing.

enable inprivate browsing in tools menu

Tip: If the Menu bar is missing in IE, find how to display it in Show or Hide Menu Bar/Favorites Bar/Command Bar/Status Bar in IE.

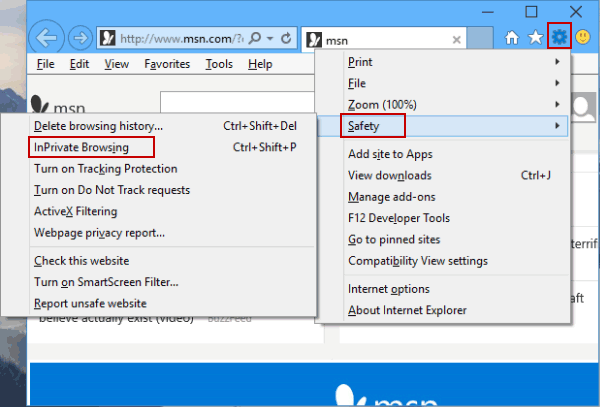
Way 3: Enable InPrivate Browsing via the Tools button.

In Internet Explorer, tap the Tools button (i.e. the gear icon) on the top right, choose Safety in the list and click InPrivate Browsing in the sub-list.

enable inprivate browsing via tools button

Related Articles: