We use cookies for personalizing content and ads and providing social media features. Your usage information on our website will be used for social media, advertising, and traffic analytics, or shared with our partners. Clicking "Accept" means you agree to use our cookies .
Quite a few Windows 10 users complain that they have the issue of mouse lag. Mouse lag is really an irritating issue in Windows 10 system as lack of smooth mouse movement will cause poor user experience. Imaging that you are playing games but your cursor is freezing or lagging, you may get crazy. What to do if you face the issue of mouse moving slow on Windows 10? This article will teach you How to Fix Mouse Lag on Windows 10 easily and effectively.
1. Test a different USB port (preferably a rear/motherboard port) to rule out port issues.
2. Check wireless batteries or recharge the mouse—low power often causes lag.
3. Clean the sensor and mouse surface—dust can interfere with optical sensors.
4. Try the mouse on another PC—if it still lags, the device may be faulty.
5. Eliminate radio interference—move wireless dongles away from routers or other USB sticks.
Way 2: Disable and Enable Scroll Inactive Windows
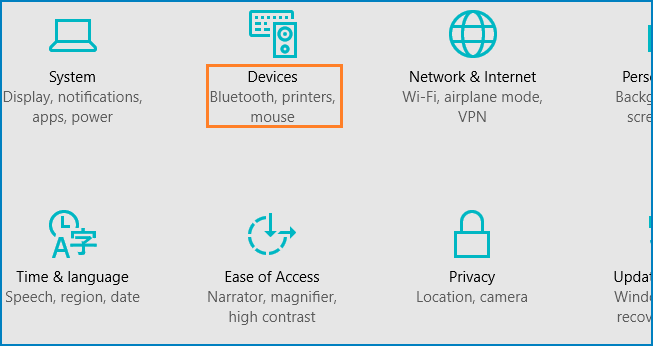
Step 1: Go to Settings and choose Devices from the list of options.
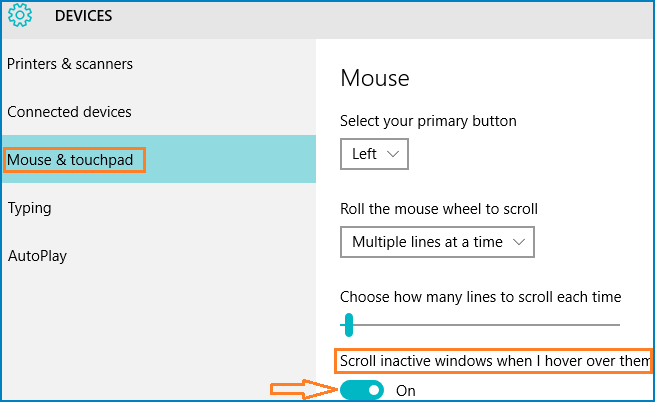
Step 2: Select Mouse & Touchpad on the left panel, find the option of Scroll inaction windows when I hover over them on the right panel and then disable/enable the button.
Step 3: Repeat disabling and enabling the option for a few times. Then you can check if the issue of mouse moving slow on Windows 10 has been improved.
Way 3: Reinstall or Update the Mouse Driver
How to fix mouse lag on Windows 10? You can try to reinstall or update the mouse driver.
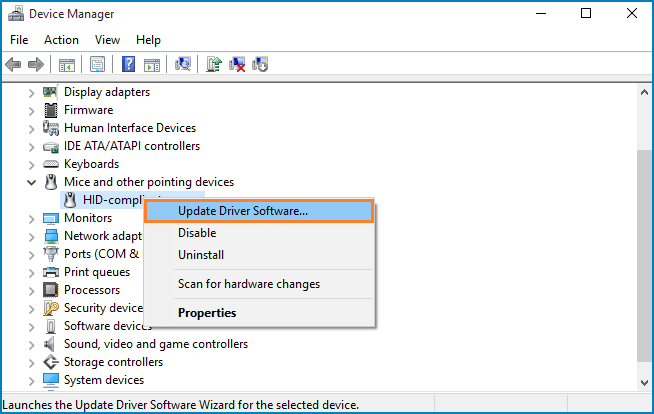
Step 1: Right click the Windows icon and select Device Manager.
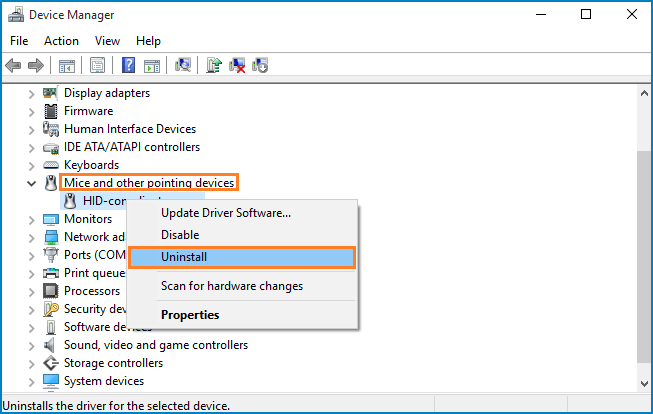
Step 2: Expand the section of Mice and other pointing devices, right-click your mouse driver and choose Uninstall. Then click OK to confirm.
Step 3: Then restart your computer and Windows will automatically reinstall the mouse driver.
How to update the mouse driver? After you right click your mouse driver, select Update Driver Software from the drop-down menu.
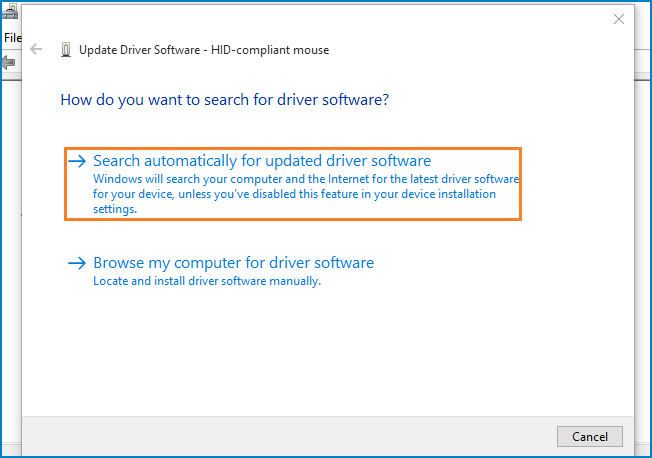
Click Search automatically for updated driver software. Then it will help you to update the mouse driver.
Way 4: Roll Back the Mouse Driver
You are able to roll back mouser driver to fix mouse lag. Here are the instructions:
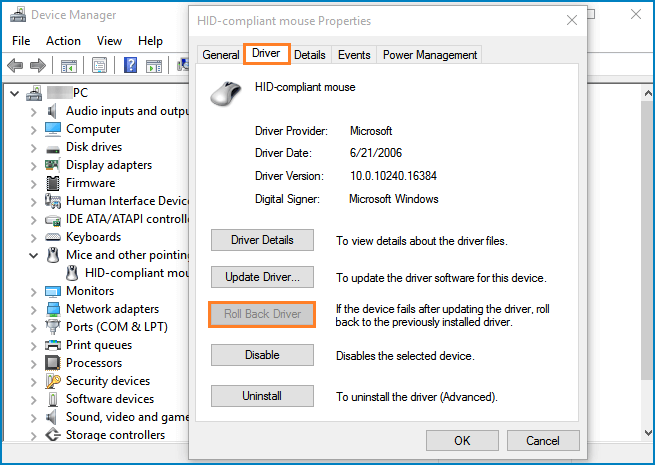
Step 1: Go to Device Manager>Mice and other pointing devices and then double click your mouse driver.
Step 2: Click the Driver tab and tap the Roll Back Driver if available. If the button is grayed out, you can't continue this way.
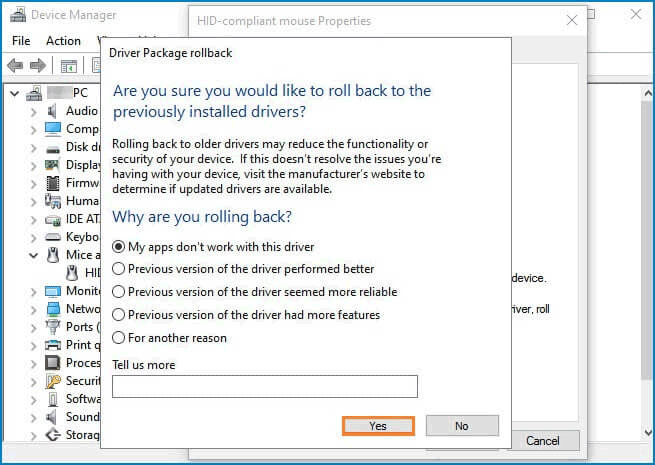
Step 3: If it is available, after you click it, the Driver Package rollback window will pop up. Choose one reason that prompts you to roll back the driver and click Yes.
Way 5: Unplug other USB Devices Connected to Your PC
If you have other USB devices connected to your computer, this will disturb the normally working of your mouse the cause the appearance of mouse lag. So next time when your mouse doesn't work effectively, you can consider unplugging other USB devices that are connected to your computer.
Way 6: Turn Off the Feature of Fast Startup
In order to fix mouse lag, many users advise to disable the feature of fast startup. That is one cause for mouse lag although it is a useful feature on Windows 10. So you can have a try to fix this problem.
Step 1: Enter Control Panel in the search blank and launch it.
Step 2: When Control Panel is opened, search Power Options in the search bar of the panel and click to open it.
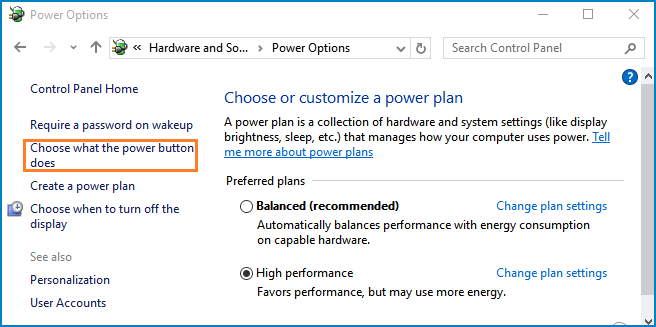
Step 3: Then select Choose what the power button does.
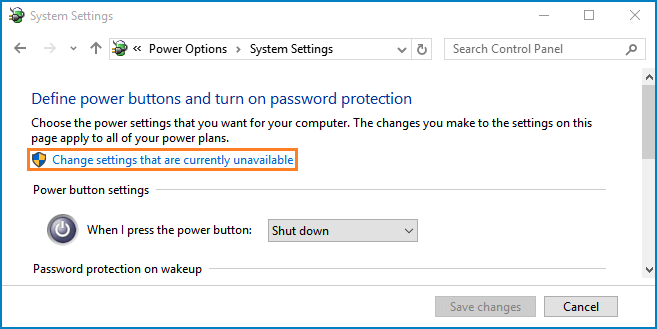
Step 4: Click Change settings that are currently unavailable.
Step 5: Under the section of Shutdown settings, uncheck the box of Turn on fast startup (recommended) and click Save changes.
Way 7: Change the Power Management Settings
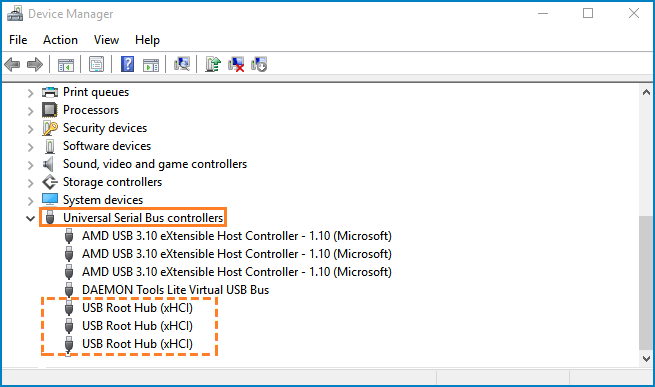
Step 1: Open Device Manager and expand Universal Serial Bus controllers.
Step 2: Double click the USB Root Hub to open its properties panel.
Step 3: Choose Power Management, uncheck Allow the computer to turn off this device to save power. Click OK to save changes. Repeat these steps for all USB Hub devices on your PC.
Way 8: Disable Conflicting Features & Applications
1.Turn off Cortana, Realtek/NVIDIA High-Res Audio processes, and disable audio services if they cause lag.
2.Disable overlays or software like Xbox Game Bar, gaming overlays, or NVIDIA Broadcast—they can cause pointer stutter.
3. Try disabling Sync/Adaptive Sync in GPU settings; this can improve pointer smoothness