We use cookies for personalizing content and ads and providing social media features. Your usage information on our website will be used for social media, advertising, and traffic analytics, or shared with our partners. Clicking "Accept" means you agree to use our cookies .
Is it possible for you to change the mouse pointer trails in your Windows 10 computer? Yes, you can make the changes. This article respectively illustrates how to display and hide pointer trails on Windows 10 computer.
Part 1: Display pointer trails in Windows 10
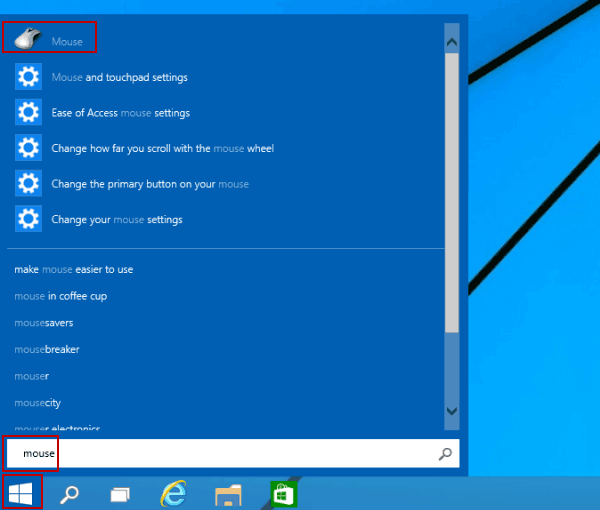
Step 1: Click the bottom-left Start button on the desktop, enter mouse in the blank box and tap Mouse in the search results to open Mouse Properties.
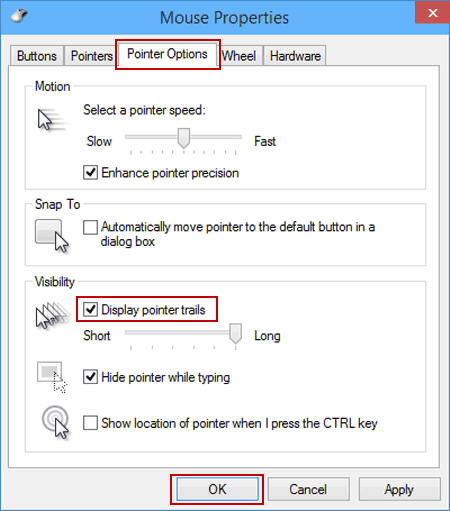
Step 2: Choose Pointer Options, select Display pointer trails and hit OK.
Tip: To specify the length of pointer trails, you can move the small scale in Visibility to left or right.
Part 2: Hide pointer trails in Windows 10
Step 1: Open Mouse Properties according to the above instruction.
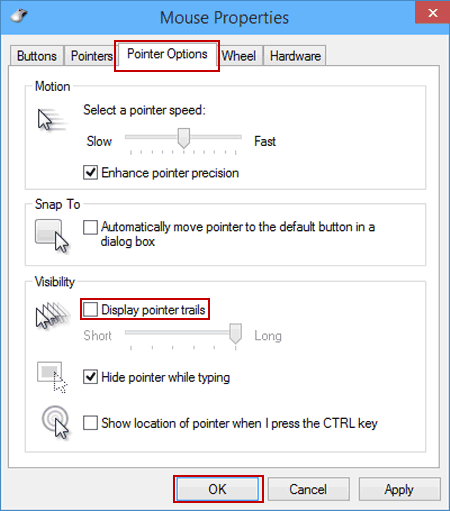
Step 2: Click Pointer Options, deselect Display pointer trails and tap OK.
Part 3: Enable or Disable Mouse Trials via Registry Editor
Step 2: Expand Computer >HKEY_CURRENT_USER>Control Panel>Mouse, then find MouseTrails on the right pane.
Step 3: Double-click the MouseTrails and change its value data to 2-7. It will change your mouse trails length according to the number. The bigger the number is, the longer your mouse trails will be.
Step 4: Click the OK button and restart your computer to make the changes take into effect.