We use cookies for personalizing content and ads and providing social media features. Your usage information on our website will be used for social media, advertising, and traffic analytics, or shared with our partners. Clicking "Accept" means you agree to use our cookies .
"My WiFi network is not showing up on Windows 10. What can I do to solve this problem?" It is likely that many people are bothered by this problem. It is upsetting when you try to connect your computer to Internet but the WiFi network not showing up. This error may be related to the WiFi problem, network connection problem, the incorrect WiFi configuration of your WiFi router and your computer, or the WiFi network driver issue. Don't panic if you are facing the issue of WiFi not showing up on Windows 10. You can try to resolve this problem with the following solutions.
Step 1: Right click the Internet icon at the right bottom corner of the interface and select the option of Open Network and Sharing Center.
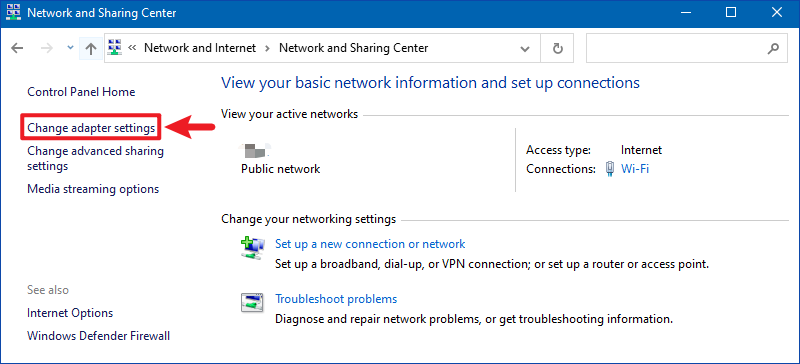
Step 2: Click Change adapter settings in the Network and Sharing Center window to go to the Network Connections panel.
Alternatively, you can go to the Network Connections panel by pressing the Windows Key + R at the same time, then type ncpa.cpl and hit Enter.
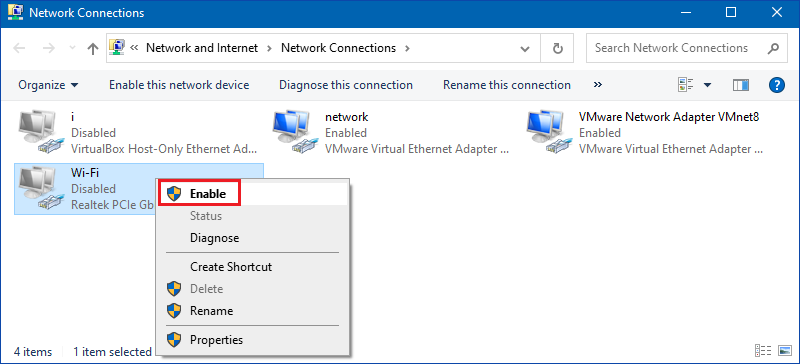
Step 3: Check whether you have enabled the WiFi service. If you haven't, right click your WiFi network and select Enable from the drop-down menu. If you already have, right click your WiFi network and select Disable and then go to enable it.
Step 4: Restart your Windows and reconnect to your WiFi again to see whether it helps to fix the Windows 10 WiFi not showing up issue.
Solution 2: Click the Toggle to Enable the Wi-Fi
Step 1: Press the Windows Key + I key simultaneously on the keyboard to open Settings.
Step 2: Select the option of Network & Internet from the list.
Step 3: Choose Wi-Fi on the left pane, and click the toggle to enable Wi-Fi. Now you can try to connect to the Wi-Fi network. This time the WiFi network may show up.
Solution 3: Turn on WLAN AutoConfig Service
Step 1: Press the Windows logo key + R on your keyboard at the same time and enter services.msc, then click the button of OK to proceed.
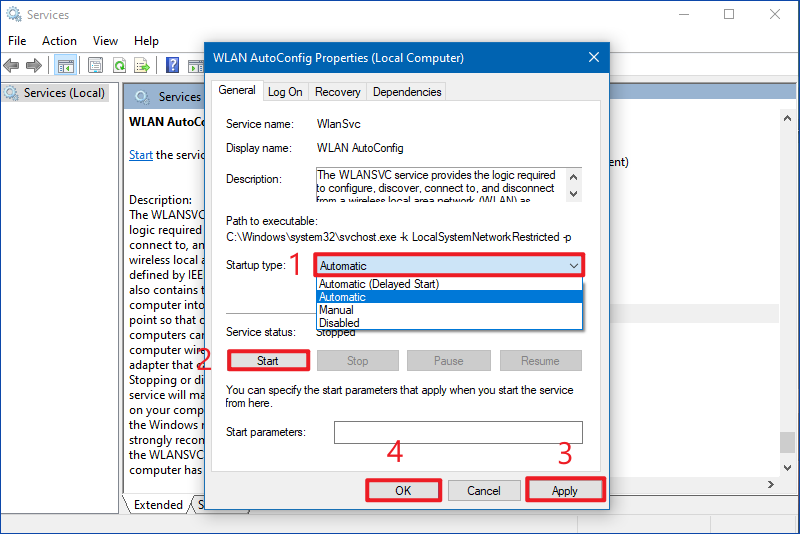
Step 2: Look for WLAN AutoConfig in the Name column, right click it and select Properties.
Step 3: Change the Startup type to Automatic and click the button of Start if the service is not running in the WLAN AutoConfig Properties panel. Then click Apply>OK to save changes and exit.
Step 4: Then you can restart your computer now to see if WiFi shows up.
Solution 4: Restart Your Wi-Fi Router
You can try to restart your modem and WiFi router in order to fix WiFi network list not showing up in Windows 10. First of all, you should turn off your WiFi router or modem and unplug the power source. Wait for quite a few seconds and then reconnect the power cable to the router or the modem again. Then switch on the router and try to connect your computer to the Internet network to see if it works. Sometimes a simple restart can effectively solve the problem.
Solution 5: Run Internet Connections Troubleshooter
Step 1: Go to Settings>Update & Security and select Troubleshoot on the left pane.
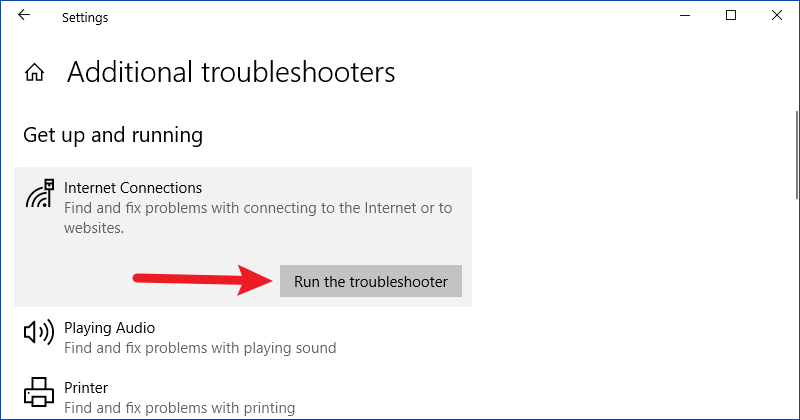
Step 2: On the right pane, look for Internet Connections under Get up and running section and then click the Run the troubleshooter button. Then it will try to find and fix problems with connecting to the Internet. Follow the on-screen instructions to go ahead.
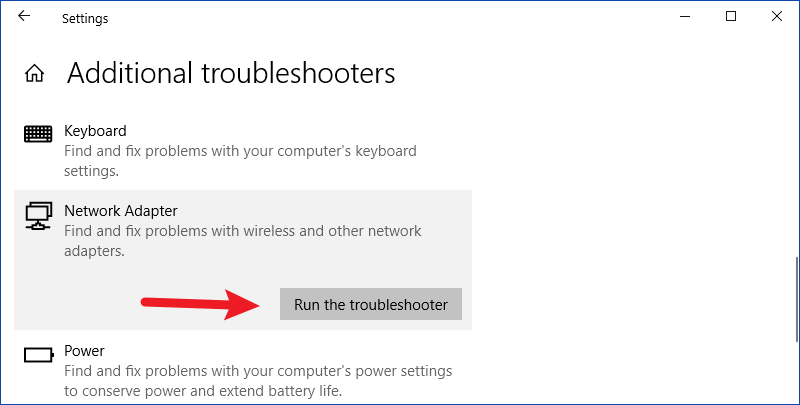
If the above operation didn't fix the issue, go to Network Adapter and then click on Run the troubleshooter. It will help you find and fix problems with wireless and other network adapters.
Step 3: Reboot your PC to save changes.
Solution 6: Uninstall or Update Wireless Network Adapter Drivers
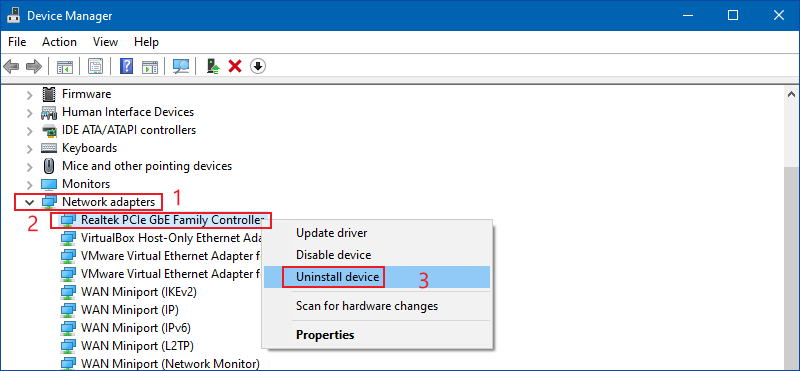
Step 1: Right click the Windows icon on the left bottom of the interface and select Device Manager.
Step 2: Expand Network adapters and find the network adapter for your device, right click it and select Uninstall from the context menu. Click OK to continue.
Step 3: Restart your PC and Windows will automatically install the default drivers for the network adapter.
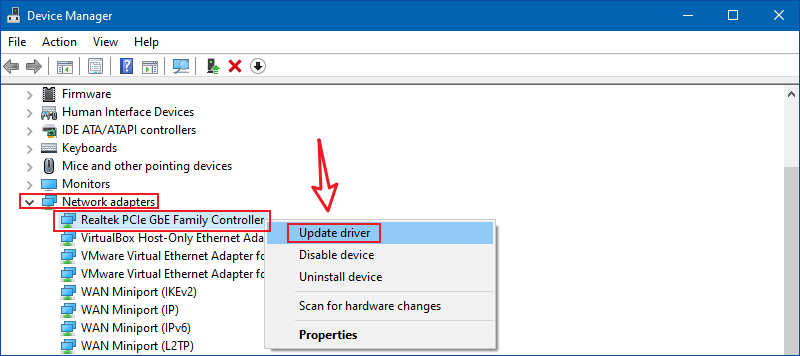
You can also choose to update your network adapter driver. In order to do that, you should:
Step 1: Right click your network adapter name and select Updater Driver Software.
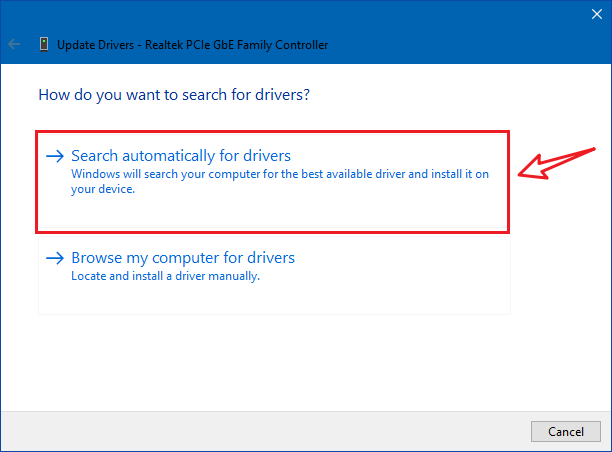
Step 2: Then select Search automatically for updated driver software.
Step 3: Then it will search for the latest driver software for your device. Try to complete the process according to the on-screen instruction.