Three Ways to Safely Eject a USB Flash Drive on Windows 10
In order to avoid data loss, it is necessary for you to learn how to safely remove an external hard drive or USB flash drive from your computer after you finish using it. If you don't eject a USB flash drive before disconnecting it, you may face the issue of data corruption. So don't be lazy. Well, how to eject an external hard drive or USB flash drive from your computer? Look at here. This post will teach you how to eject flash drive from Windows 10 easily and safely with 3 ways.

Way 1: Use the Notification Area on the Taskbar
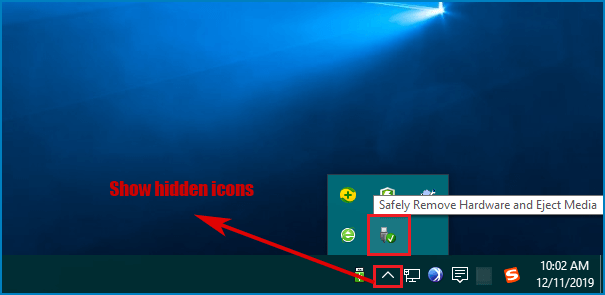
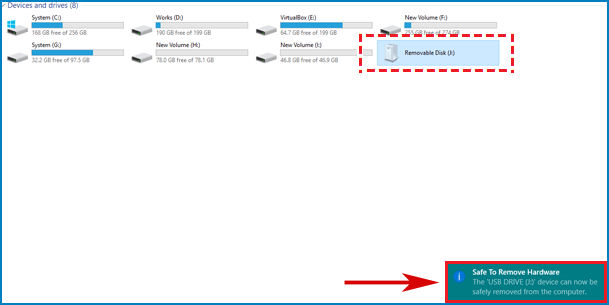
How to eject external hard drive on Windows 10? The easiest way to eject device is to use the Notification Area on the desktop taskbar. Here are the instructions:
Step 1: Go to the Notification Area on the desktop taskbar at the bottom right of the interface, click the icon of up arrow which means Show hidden icons and then a small window with several items will open.
Step 2: Find the icon of Safely Remove Hardware and Eject Media, usually with a checkmark next to it, click it and then a menu list will pop up.
Step 3: Select the option of Eject Device from the menu.
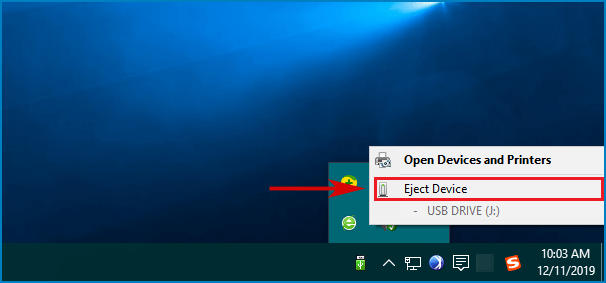
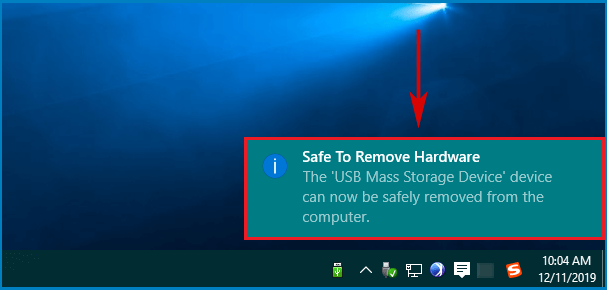
Then a message saying Safe to Remove Hardware will remind you that the USB Mass Storage Device is now safely removed from the computer. Then you can gently pull out the flash drive from your computer.
Way 2: Use the Program of This PC
As what we have discussed before, when you don't need the USB flash drive, you can't pull it out directly because it is unsafe for the data. As for how to eject USB from Windows 10 safely, you can also use the feature of This PC on your computer to eject it. Follow the below steps to learn how to eject a flash drive on Windows 10 with the feature of This PC.
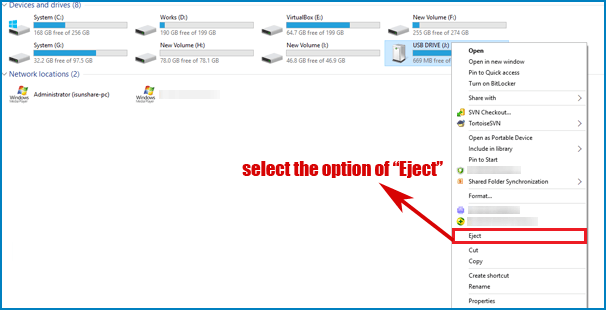
Step 1: Type This PC in the Windows search blank and click the result to open it.
Step 2: Look for your flash drive name and right click it. Then a drop-down menu with a list of options will appear, select the choice of Eject.
Step 3: Then the prompt of Safe to Remove Hardware will appear. Now you can slightly unplug the flash drive.
Way 3: Enable the Feature of Quick Removal
In order to safely remove USB on Windows 10, actually you can enable the feature of Quick Removal on you windows computer, which is a Windows service that formats your flash drive for a no-eject removal, so that you could easily unplug the flash drive when you're done with it.
Step 1: Make sure that your flash drive is plugged in properly. Pay attention to that your flash drive must be connected to the computer currently in order to enable Quick Removal.
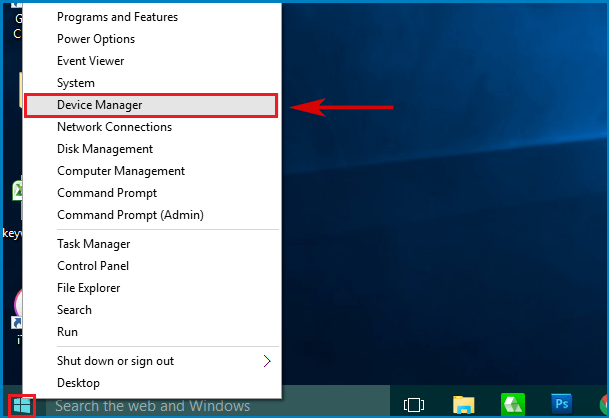
Step 2: Right click the Start button (the Windows logo) and choose Device Manager.
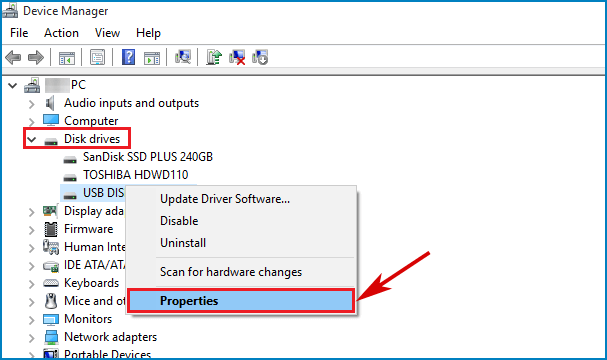
Step 3: Double click Disk drives in order to expand it, from which you can see list of your computer's disk drives including your currently attached flash drive.
Step 4: Right click your flash drive and select Properties.
Step 5: Click the tab of Policies, enable Quick Removal and click OK to save changes.

After that, you can safely remove USB drive from Windows 10 computer.
Related Articles:


