We use cookies for personalizing content and ads and providing social media features. Your usage information on our website will be used for social media, advertising, and traffic analytics, or shared with our partners. Clicking "Accept" means you agree to use our cookies .
Nowadays People use USB hard drive in our daily work very often to store and transfer data. However, sometimes when you connect your USB drive to your Windows 10 computer, your computer doesn't detect your USB device and you may receive an error message saying "USB Device not recognized. One of the devices attached to this computer has malfunctioned and Windows does not recognize it." What is going on? Go ahead the following solutions to learn how to easily fix USB Device Not Recognized on Windows 10.
USB stick is not recognized in Windows 10? If you encounter such a situation, the first way you can try to fix the error is to plug out your USB drive and shutdown your computer. A few minutes later, restart the computer and reconnect your drive to it. If it doesn't work, move on to next methods.
Solution 2: Turn Off the Feature of Fast Startup
The reason why USB flash drive is not recognized by Windows 10 may exist in the feature of Fast Startup. If you have turned on Fast Startup on your PC, your usage of USB hard drive maybe influenced. Here are the steps to turn off it.
Step 1: Go to Start, type Control Panel in the search box and then click to launch it.
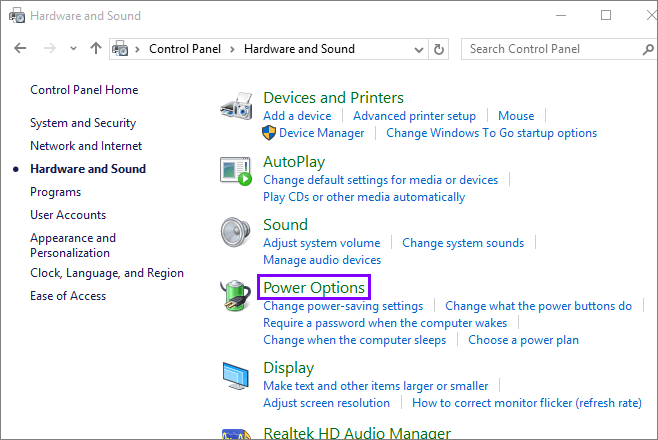
Step 2: Select the option of Hardware and Sound in the window of Control Panel and then look for Power Options.
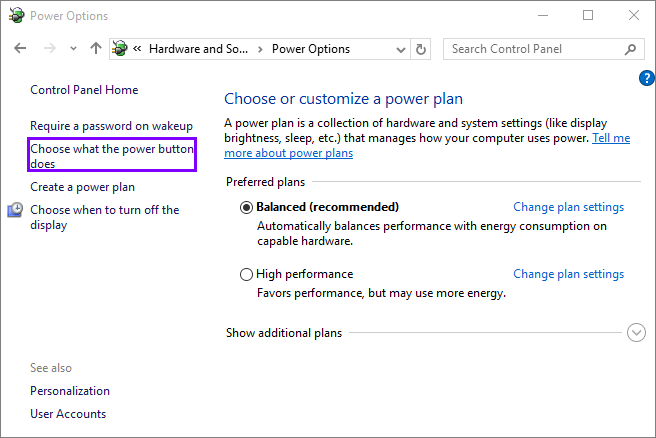
Step 3: Click Choose what the power button does on the left panel of Power Options.
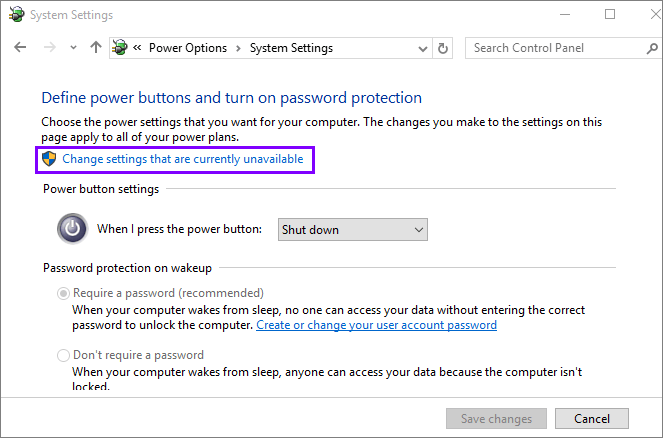
Step 4: And then click Change settings that are currently unavailable in the next window.
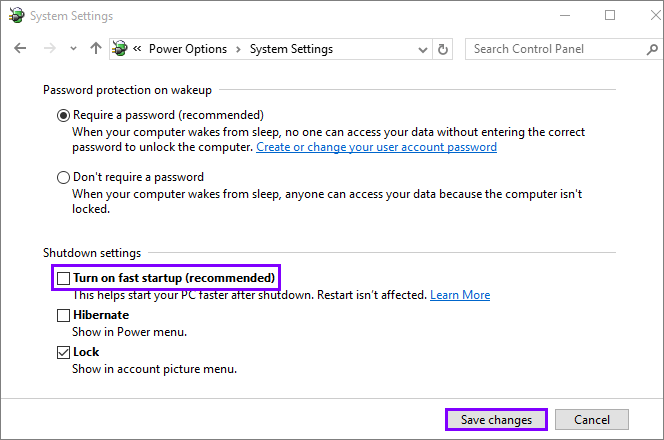
Step 5: Under the section of Shutdown settings, uncheck the option of Turn on fast startup and then click the button of Save Changes. Then restart your computer to see if it works.
Solution 3: Uninstall Driver and Reconnect the USB Drive
If your USB drive doesn't show up in your Windows PC after connected, there maybe something wrong with the USB driver. When your USB flash drive or USB external hard drive isn't recognized due to driver errors, implement the blow instructions to fix it.
Step 1: Press the key of Windows+X simultaneously and select Device Manager from the list.
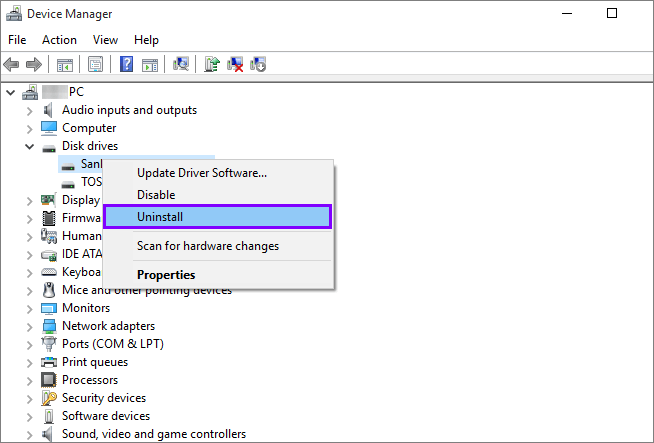
Step 2: Go to Disk drives, find your USB hard drive and right click it and then select Uninstall from the drop-down menu. Click OK to verify your action.
Step 3: After the USB driver is uninstalled completely, unplug your USB device and restart your computer.
Step 4: Wait for a while and then reconnect your USB hard drive to your Windows PC. This time your USB hard drive will be recognized.
Solution 4: Try to Reinstall USB Controllers
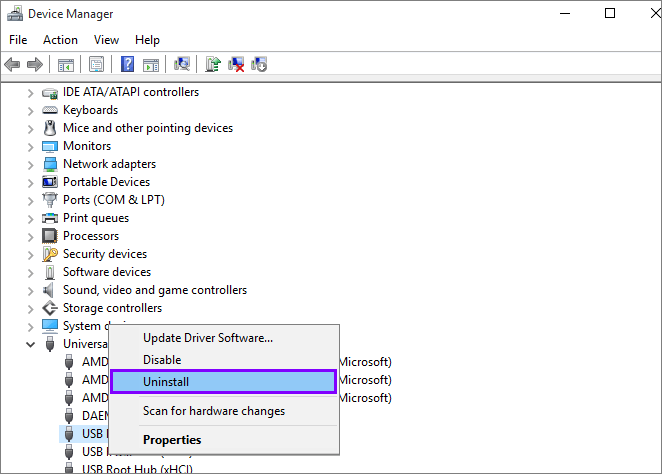
Step 1: Open Device Manager and double click Universal Serial Bus controllers in order to open it.
Step 2: Right click the device and select Uninstall. Repeat the same operation to each drive.
Step 3: Restart your computer. And your USB controllers will be automatically installed.
Solution 5: Disable USB Selective Suspend Setting
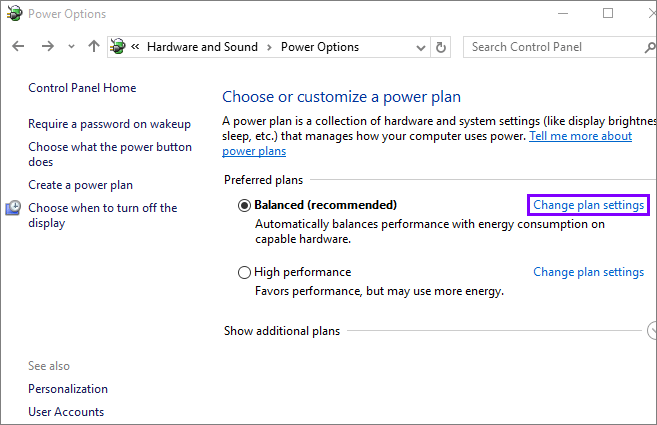
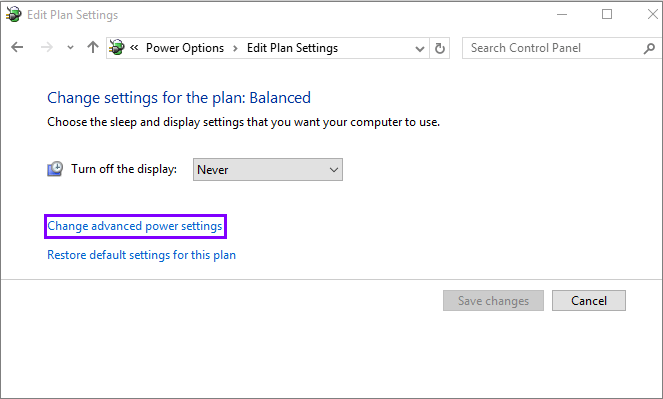
Step 1: Go to Control Panel>Power Options, then select Change plan settings.
Step 2: In the next interface, click Change advanced power settings.
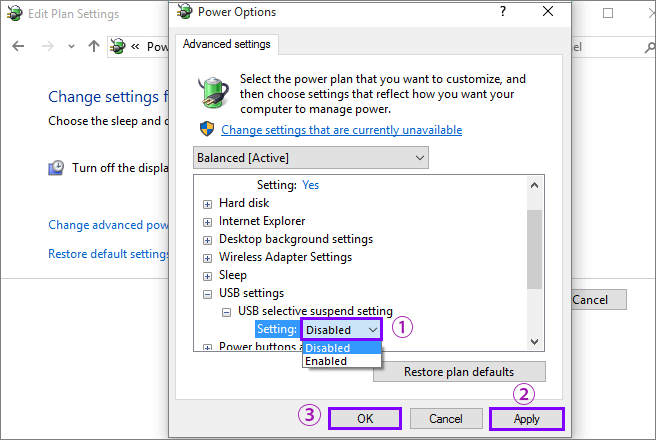
Step 3: Expand USB settings>USB selective suspend settings, choose to Disable both Battery and Plugged in settings and then click Apply>OK.
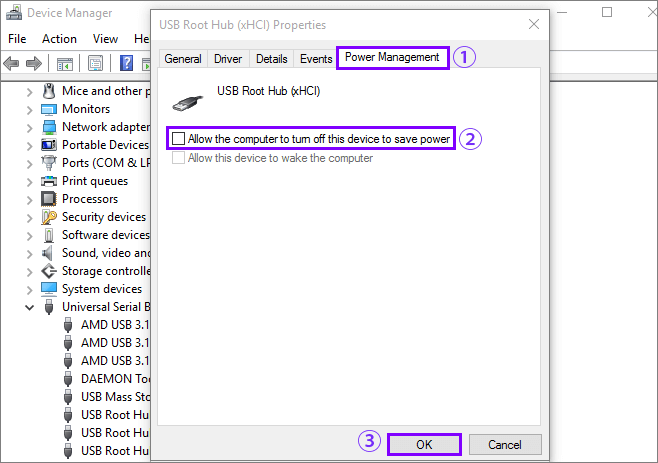
Solution 6: Change the Power Management Setting for USB Root Hub
Step 1: Open Device Manager, expand Universal Serial Bus controllers, right click USB Root Hub and select Properties.
Step 2: Select the tab of Power Management, uncheck the Allow the computer to turn off this device to save power, and then click OK to save changes.
Step 3: Repeat the same operation to each USB Root Hub if you have more than one. After it, plug in your USB device to see if it works.
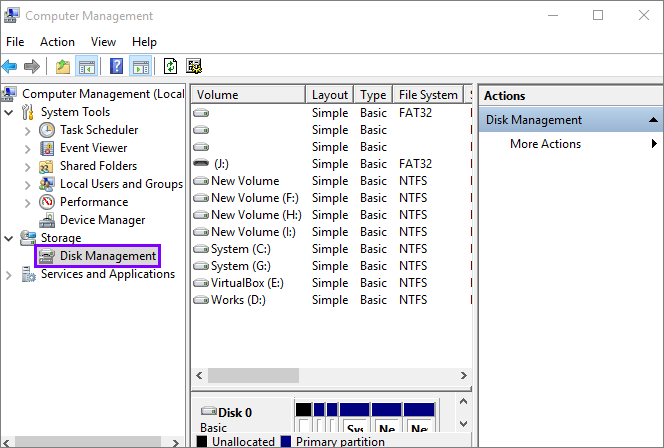
Solution 7: Check Disk Management for the USB Device
If the USB device is not appearing in File Explorer, check Disk Management.
Step 1: Enter Computer Management in the search blank and open it.
Step 2: Navigate to Storage>Disk Management.
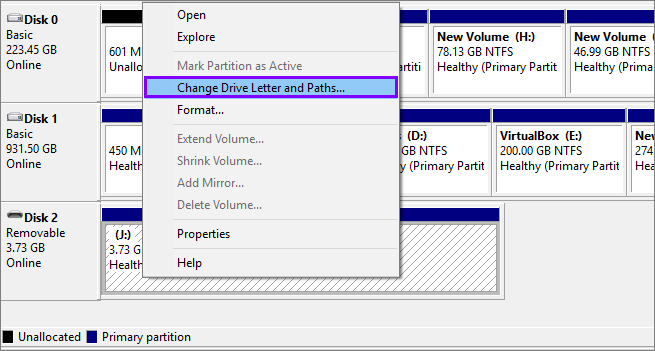
Step 3: Look for your USB hard drive. If it appears but lacks a drive letter, right-click and select Change Drive Letter and Paths and then click Add to assign a letter to this partition. By the way, make sure that you use NTFS file system so that you can execute this method as Windows 10 can only work with NTFS and FAT32 file systems.
Solution 8: Uninstall Hidden Devices from Device Manager
USB drive that doesn't show up may be hidden in Device Manager. You can uninstall it from Device Manager.
Step 1: Right click Start icon and choose Device Manger.
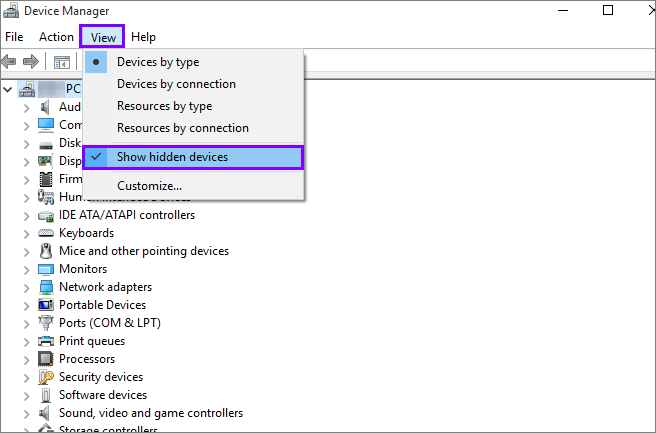
Step 2: In the Device Manager panel, click View>Show hidden devices.
Step 3: Expand all the sections and and delete all grayed out entries. Finally, reboot your computer and reconnect your USB drive to it.