We use cookies for personalizing content and ads and providing social media features. Your usage information on our website will be used for social media, advertising, and traffic analytics, or shared with our partners. Clicking "Accept" means you agree to use our cookies .
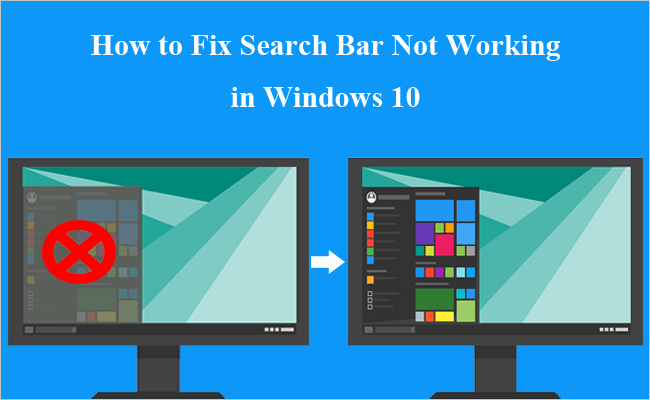
Windows Search is a very useful feature in Windows 10, which allows you to search for particular programs, applications, documents, pictures, files, settings and so on so that you can quickly access to them. But sometimes the Windows Search doesn't find the results as what we expected or even becomes unresponsive, which will cause a lot of inconveniences to Windows users. What to do if search bar in Windows 10 not working? You can adopt the following methods to solve this problem effectively.
If your Windows 10 search function not working and you don't know what to do, actually the first thing that you can try to do is to restart your computer. It is possible that the problem may disappear after you reboot your computer. However, if restarting makes no difference to the unresponsive search bar in your Windows 10 computer, don't worry and just go ahead with the following other methods to fix this issue.
Method 2: Check for Windows Update
Getting the latest updates for your Windows 10 can do help to maintain your device running smoothly and securely. So when you find the issue of search in Windows 10 not working happened to you, you can check your Windows for update.
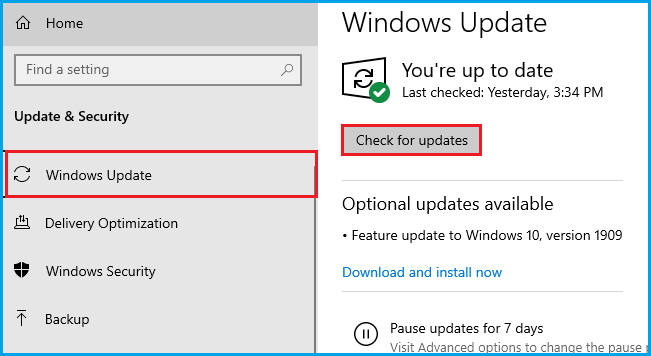
Step 1: Click the Start button, select Settings, and then choose Update & security.
Step 2: Go to Windows Update in the left pane and click the button of Check for updates in the right pane. And wait for the checking process to complete. Install any update if it is available.
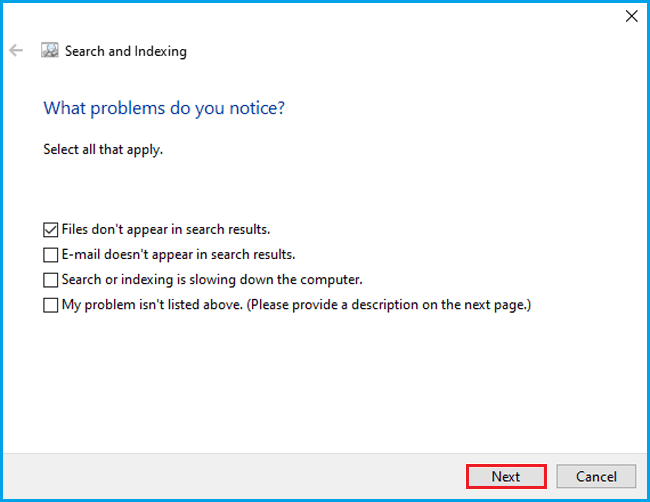
Method 3: Run the Search and Indexing Troubleshooter
If you are facing the problem of Windows 10 search box not working, you can run the Windows Search and Indexing troubleshooter in order to fix problems which are likely to affect this process. Follow these below steps to implement this method:
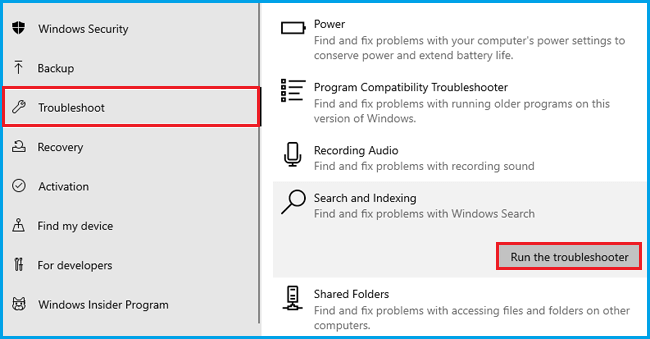
Step 1: Go to Settings>Update & security>Troubleshoot.
Step 2: Under the section of Find and fix other problems, select Search and Indexing. And then click the button of Run the troubleshooter.
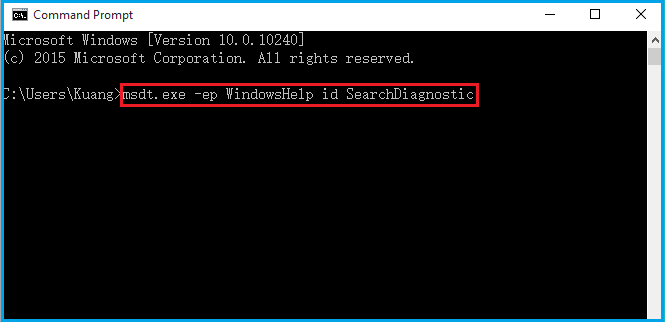
Alternatively, you can also open the troubleshooter by running a command in command prompt. To do this, you should: press the Windows logo key+R to open the Run dialogue box, enter cmd, and then select OK. At the command prompt, enter the command: msdt.exe -ep WindowsHelp id SearchDiagnostic. And press Enter to run it. Then the troubleshooter will be opened.
Step 3: Choose problems that apply and click the Next button. Windows will try to detect and solve them if it is applicable.
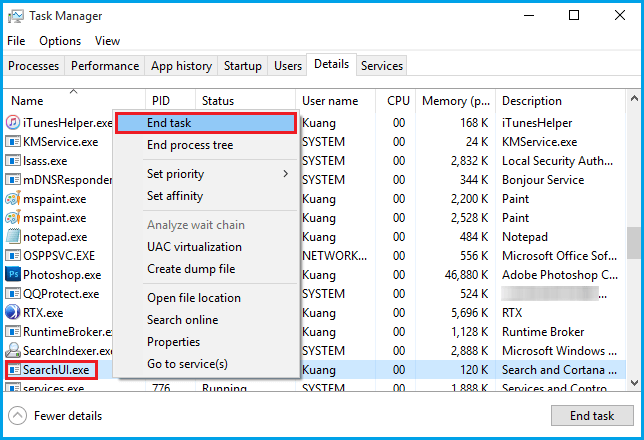
Method 4: Restart Windows Search/Cortana via Task Manager
Start menu search not working in Windows 10? You can end the SearchUI process in Task Manager to restart Windows Search so that you can reuse it. Here is the guidance:
Step 1: Right-click the taskbar and select Task Manager from the drop-down menu.
Step 2: Go to the Details tab in the Task Manager window. Find SearchUI.exe in the Name column, right click it and select the option of End task.
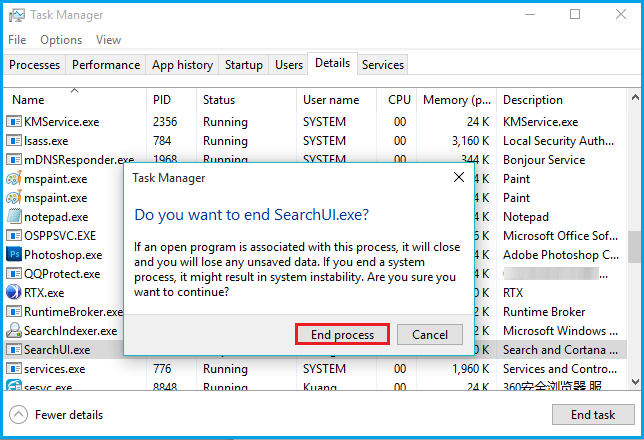
Step 3: Click End process to go ahead. And the Windows Search process will automatically restart the next time you search.
If you can find Cortana in the Name column, repeat the steps to end its process in order to restart it.
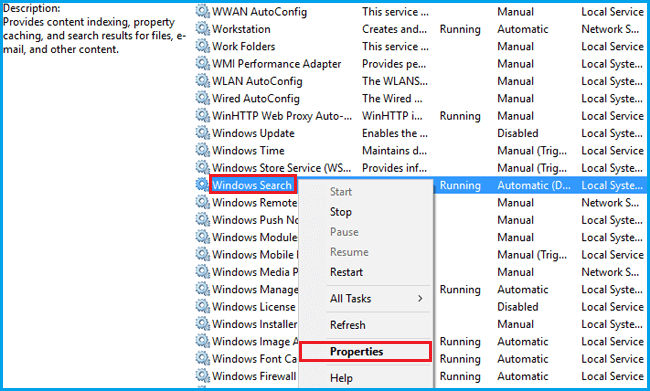
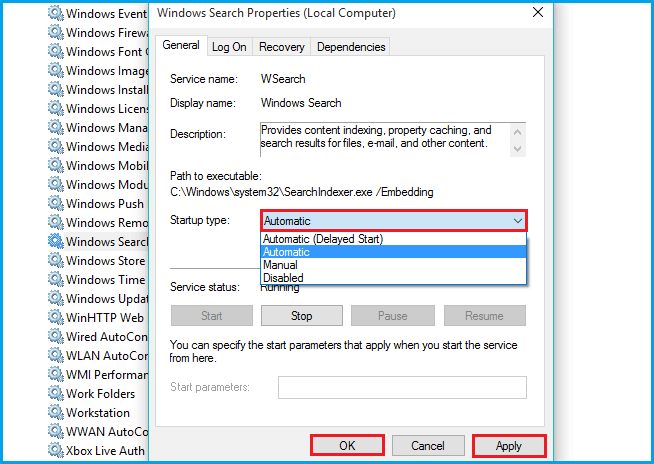
Method 5: Modify Windows Search Service
In order to fix the issue of search box in Windows 10 not working, you need to do some modifications for Windows Search service.
Step 1: Press the Windows logo key and R at the same time, type services.msc in the blank and click Enter.
Step 2: Scroll down and locate to the option of Windows Search in the Name column, right click it and select Properties.
Step 3: Go to the Startup type, change the startup type to Automatic, and then click Apply>OK to save changes and exit. Restart your computer to check the results.
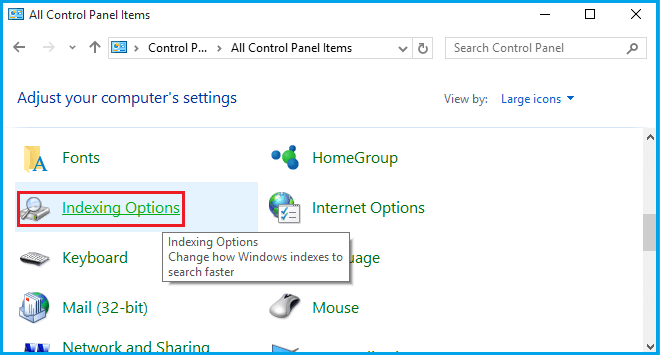
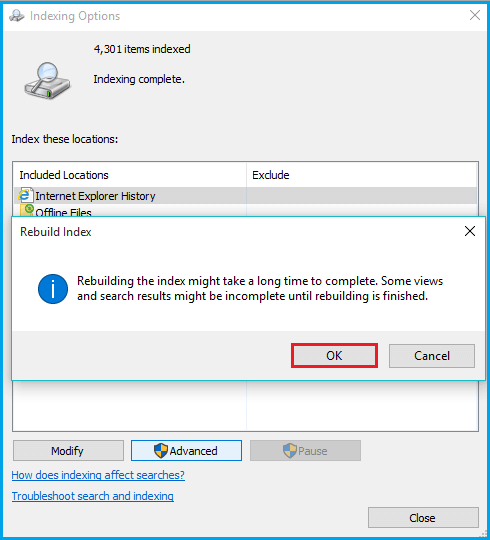
Method 6: Rebuild Indexing Services
You can rebuild indexing services to get rid of the Windows 10 search box not working issue.
Step 1: Open your Control Panel, select to view by Small icons or Large icons, and then find Indexing Options and click it.
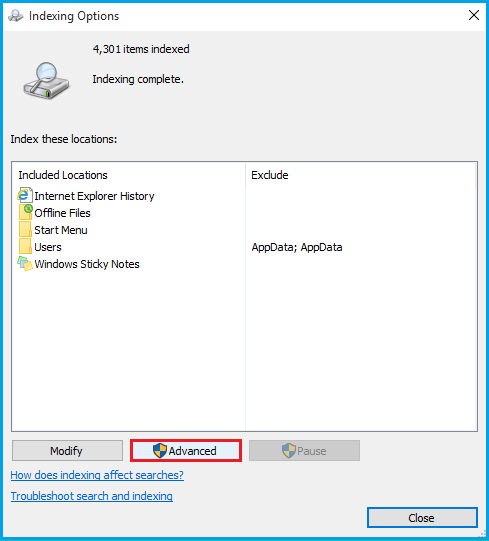
Step 2: Click the Advanced button in the Indexing Options panel.
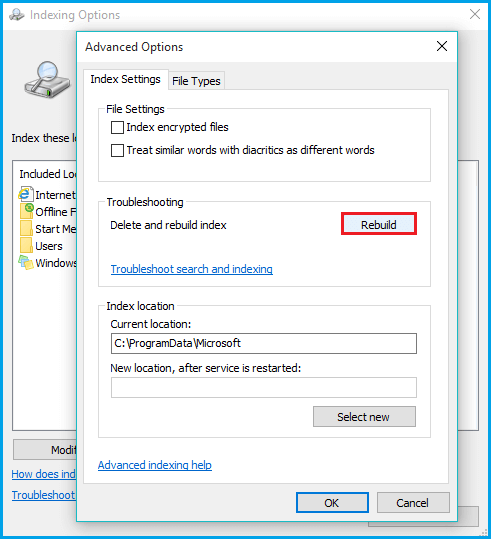
Step 3: Click Rebuild under the Troubleshooting part.
Step 4: When you see a prompted message, click OK to proceed.