We use cookies for personalizing content and ads and providing social media features. Your usage information on our website will be used for social media, advertising, and traffic analytics, or shared with our partners. Clicking "Accept" means you agree to use our cookies .
Windows Search is a very useful and convenient feature in Windows 10 which helps you look for documents, files, programs, emails, pictures and other contents in your computer easier and quicker as long as you search them in the Windows search box. This feature is enabled by Windows Search service.
With this service enabled, the files on the computer will be indexed in a faster search speed. If you are not going to use the Windows Search feature or you think that it causes the slow performance of your computer, you can choose to disable it in your computer. In the following part of this passage, we will explore How to Turn On/Off Windows Search Service in Windows 10.
Should the Windows Search Service be Enabled or Disabled?
As what we have talked above, Windows Search service helps you get a faster result when you are searching particular content in your computer. Generally speaking, if you use the Windows Search feature very often and this feature makes no difference to your computer performance, you can keep the Windows Search service enabled in your computer.
However, it is recommended to turn off the feature of Windows Search indexing if you don't use it often. Sometimes, it might become the culprit of your computer's slow performance. If you discover that it is one of the causes of your computer poor performance, you can boost the running speed of your computer by turning off the Windows Search service. By the way, turning off this feature does not mean that Windows Search won't work at all. You'll still have access to search. But the truth is that searches will take longer to finish.
Option 1: Turn On/Off Windows Search Service by System Genius
Don't know how to turn on or turn off Windows Search service in your Windows 10 computer? You can use a tool to do that for you. iSunshare System Genius is a multifunctional Windows optimizer. You can make use of one of its powerful functions called "System Service" to manage various system services on your computer conveniently in order to speed up your system. The software provides an intuitive interface to you, so it is easy to use.
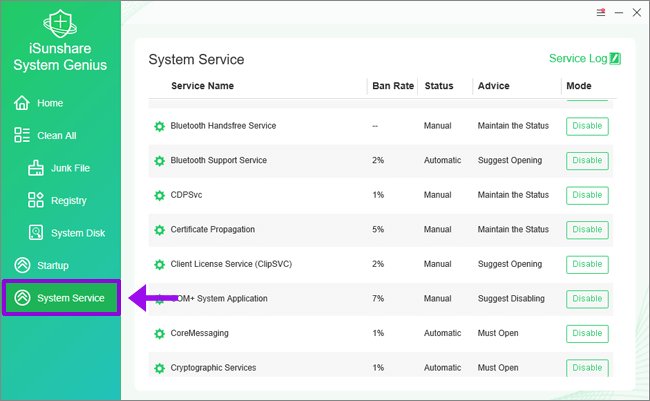
Step 1. Download iSunshare System Genius and install it on your computer, run it and you will come to the main page. As you can see, there are quite a few options of functions on the left menu bar. In order to manage the Windows Search service, select the option of System Service to proceed.
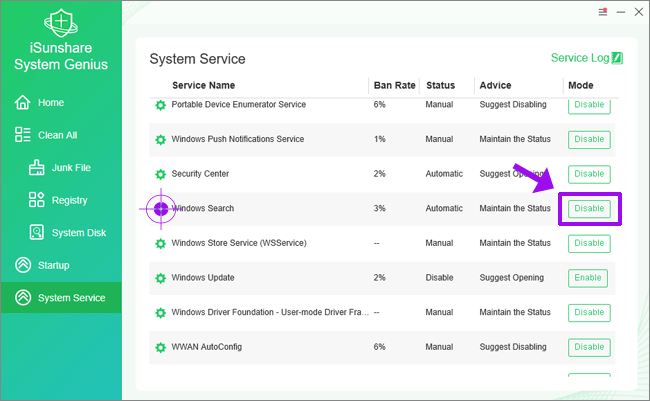
Step 2. On the right panel of the System Service interface, you can check all the names of the system services in your computer and their current status. If you want to turn off the feature of Windows Search, find its name and then click the Disable button to disable this service.
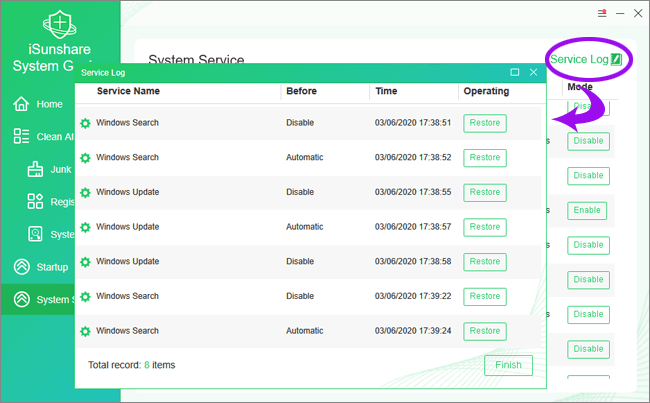
The software will record your each operation and you can check the history operations through the Service Log.
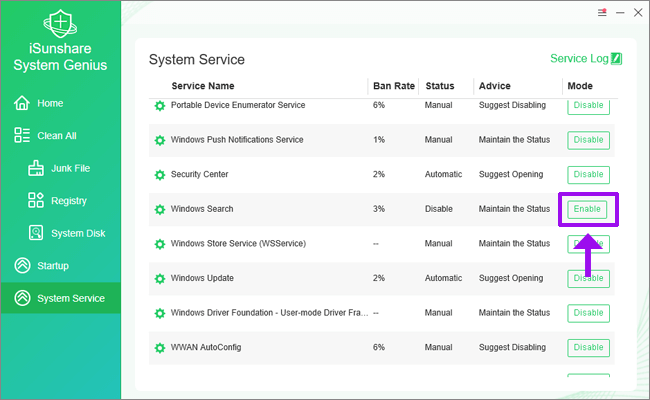
Step 3. Or, if you want to restore the operation to the Windows Search service, you can click the Enable button to turn on the service again.
In the Advice column, advice on how to deal with the service are offered to you. You can take it into consideration before you decide to enable or disable it. If you enable or disable some crucial system services at random, some unpredictable consequences may happen. More seriously, it may cause your system works abnormally. So be cautious.
Option 2: Turn On/Off Windows Search Service via Services
You can choose to turn on Windows Search service or turn off Windows Search service via Services. To do this, first of all, you should press the Win + R keys simultaneously to open the Run dialog box, type "services.msc" without quotes into the blank, and then tap on the OK button to open Services. Then you can select one of the following two choices to continue.
1. Turn On Windows Search Service:
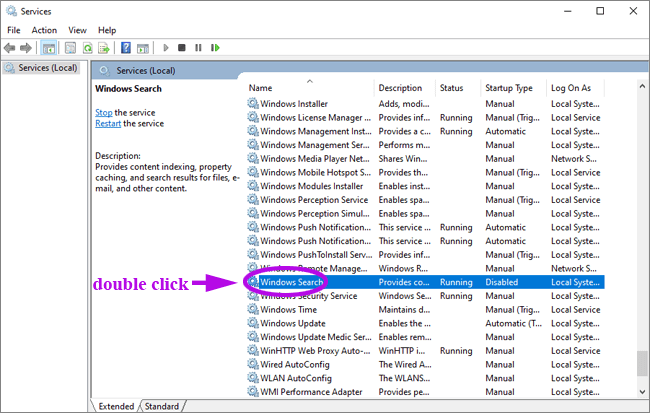
Step 1. In the Name column, look for Windows Search and double click it to open the Windows Search Properties pane.
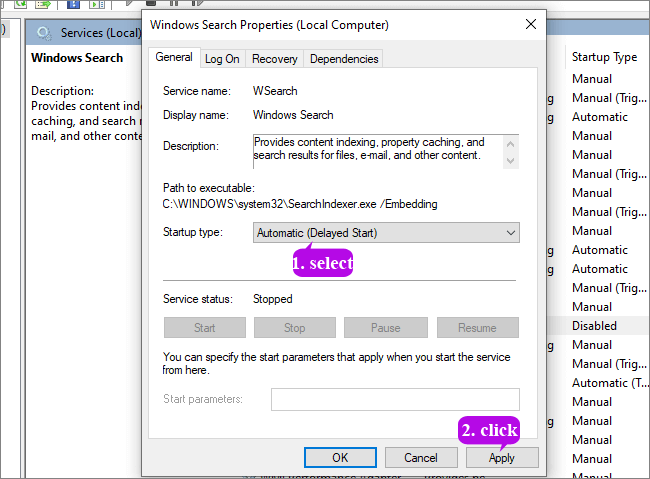
Step 2. Click the down arrow icon to expand the Startup type drop menu, select the option of Automatic (Delayed Start), and then tap on the button of Apply to proceed.
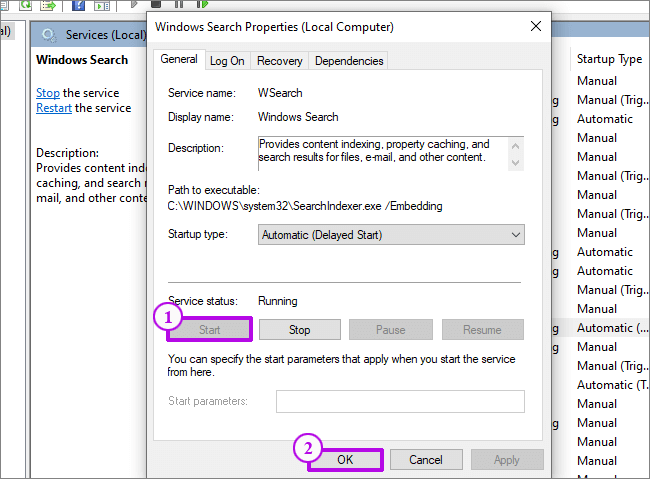
Step 3. Under Services status, click the button of Start and then tap OK to save changes and exit.
2. Turn Off Windows Search Service:
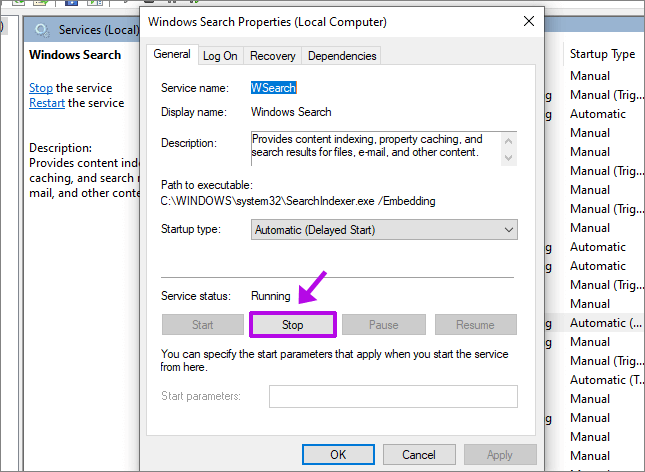
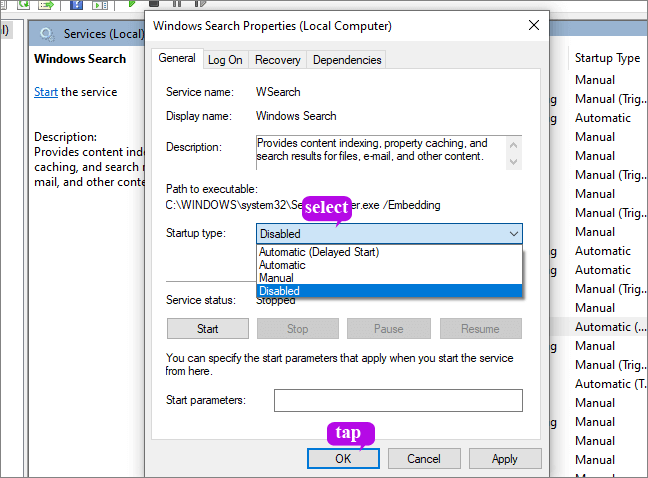
Step 1. Double click Windows Search to open its properties.
Step 2. If the service is currently running, click the button of Stop under Services status.
Step 3. Select the option of Disabled in the Startup type drop menu and then tap on OK to keep the modifications.
Option 3: Turn On/Off Windows Search Service Using CMD
You can also enable and disable the Windows Search service from Command Prompt. It is rather simple as you only need to run a command to do that. Now just follow these below steps to learn how to start or stop Windows Search using cmd in Windows 10.
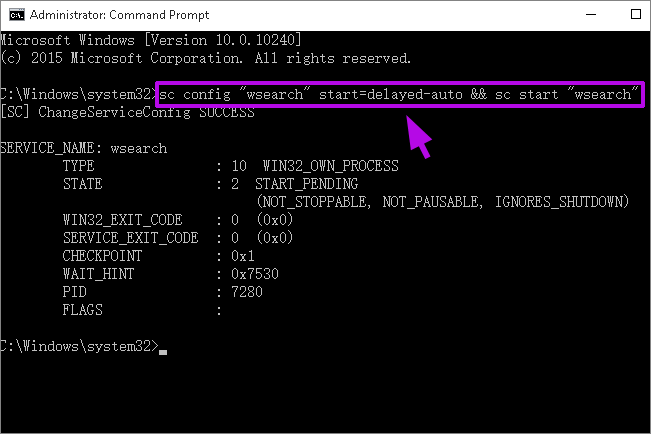
Step 2. If you want to enable Windows Search service, enter the command of sc config "wsearch" start=delayed-auto && sc start "wsearch" in the Command Prompt and press the key of Enter to run it.
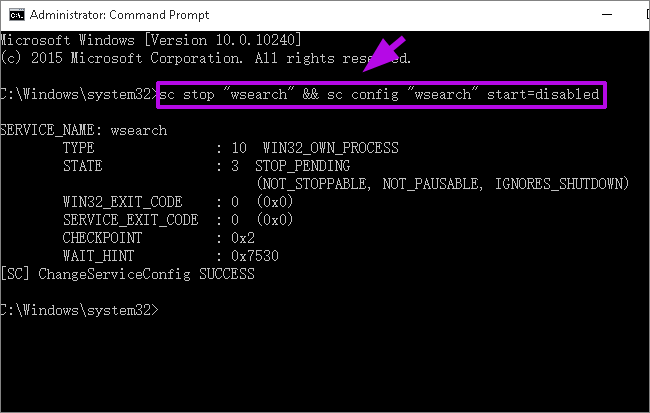
If you want to disable Windows Search service, enter the command of sc stop "wsearch" && sc config "wsearch" start=disabled in the Command Prompt and press the key of Enter to run it.
Step 3. Now you can close the Command Prompt as you like.