We use cookies for personalizing content and ads and providing social media features. Your usage information on our website will be used for social media, advertising, and traffic analytics, or shared with our partners. Clicking "Accept" means you agree to use our cookies .
By default, password protected sharing is enabled on Windows 10. So that people can access the shared files, folders and printer with your user account and password. If you want to let others access the shared content, you can turn off password protect sharing on Windows 10. Now, you can learn how to turn off/on password protect sharing in Windows 10 computer.
Password protected sharing is a Windows advanced sharing setting, which restrict only the users with an account on your computer can reach the shared contents. If you want to share the content with others on the network, you should turn off password protect sharing.
Section 2: How to Enable or Disable Password Protect Sharing in Windows 10
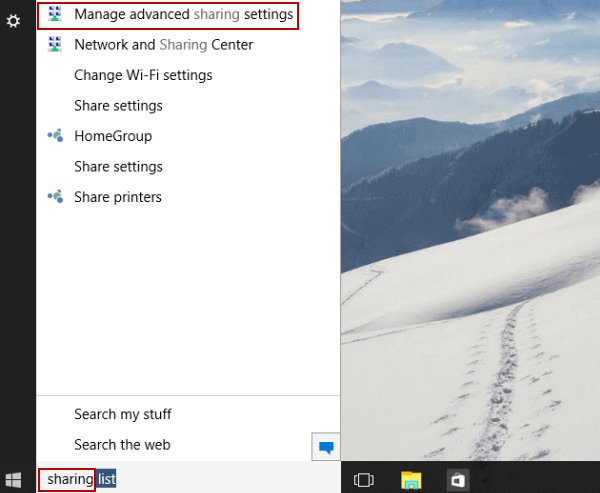
Step 1: Enter sharing in the search box and choose Manage advanced sharing settings from the result.
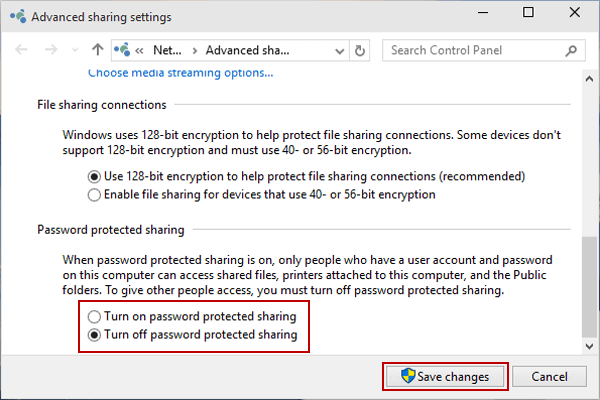
Step 2: Click the down arrow on the right of All Networks to expand the settings.
Step 3: Select Turn off password protected sharing or Turn on password protected sharing, and tap Save changes.
Section 3: Cannot Turn off Password Protect Sharing—What to Do
If you cannot turn off password protect sharing, or turn off password protect sharing not working, what can you do? This issue can be caused by the incorrect settings in registry value or the password on your guest account. So, you can fix this issue by changing the guest account password to blank or changing the registry value.
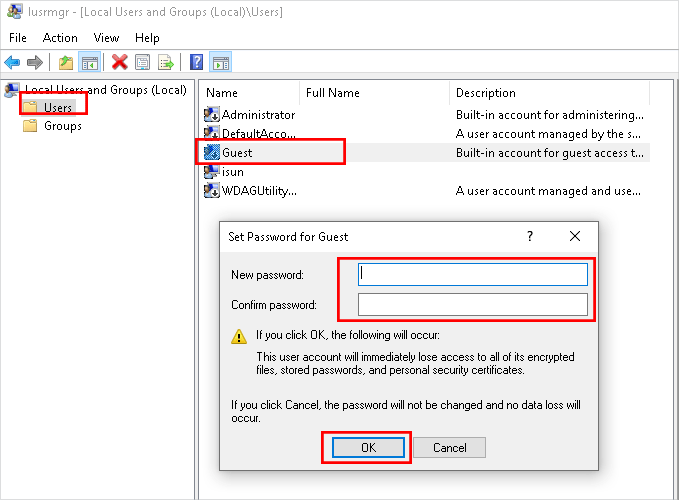
Step 2: On the left menu, choose the Users option. Then go to right-click Guest on the right panel.
Step 3: Choose Set Password… and then you can see the new box to set the new password. Just let the two box blank and click the OK button. After that, the guest account password is removed.
Way 2: Change the registry value
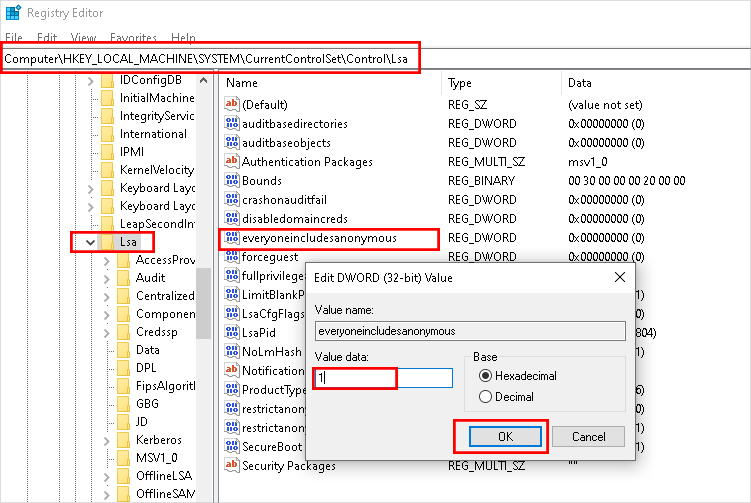
Step 1:Open Registry Editor on your computer. And then you need to access this location: HKEY_LOCAL_MACHINE\SYSTEM\CurrentControlSet\Control\Lsa
Step 2: After that, you can click the Lsa folder on the right and then double-click the registry named everyoneincludesanonymous in REG_DWORD type on the right panel.
Step 3: On the pop-out box, change the value data to 1. Then, click OK to save the change.
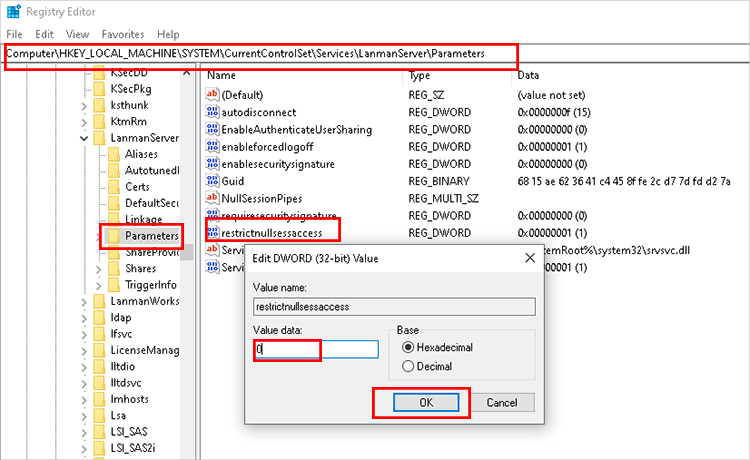
Step 4: Navigate to parameters folder in Registry Editor:
HKEY_LOCAL_MACHINE\SYSTEM\CurrentControlSet\Services\LanmanServer\Parameters
Step 5: Click Parameters folder and then double-click the registry named restrictnullsessaccess in REG_DWORD type. Then change the value data to 0 in the pop-out box.
Step 6: Save the change and then restart your computer. After that, you can check whether the issue is solved or not.