We use cookies for personalizing content and ads and providing social media features. Your usage information on our website will be used for social media, advertising, and traffic analytics, or shared with our partners. Clicking "Accept" means you agree to use our cookies .
Windows 10/11 comes with built-in speech recognition features that let you control your PC using voice commands. While useful for some, it can be distracting or unnecessary for others. If you don't use it, you may want to turn off speech recognition to save resources and avoid accidental activations. This guide explains different ways to disable Speech Recognition in Windows 10/11 step by step.
Method 1: Turn Off Speech Recognition from Settings
With the below change, you can prevent the feature from launching when you start Windows. If the speech recognition is on, you can also press the shortcut key: Windows + Ctrl + S to turn off it.
Step 1: Press Win + I to open Settings.
Step 2: Navigate to Ease of Access and then click Speech from the sidebar.
Step 3: Toggle off the switch button of Turn on Speech Recognition.
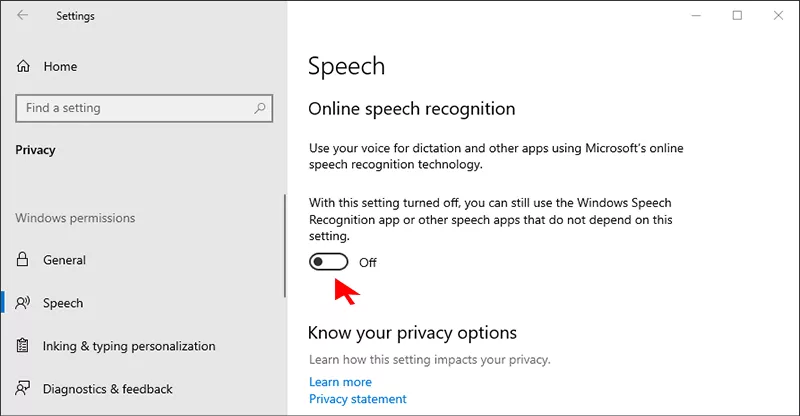
Both Windows 10 and 11 use cloud-based speech services for dictation and Cortana. With the following steps, you can prevent features like dictation and voice typing from working.
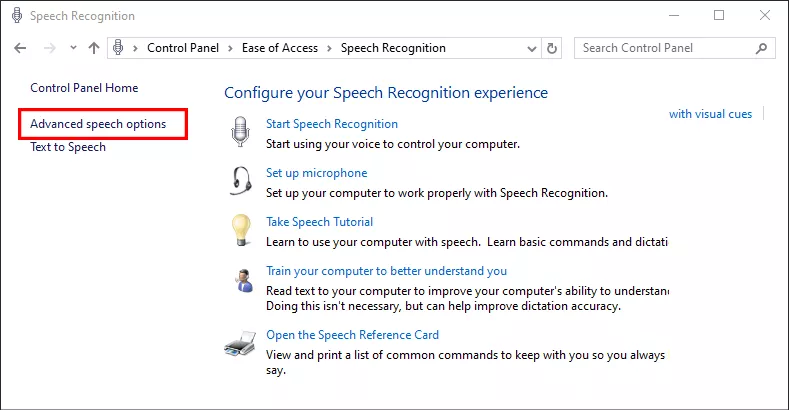
Step 3: Click Advanced speech options on the left side.
Step 4: In the dialog box, uncheck Run Speech Recognition at startup. After that, click OK.
Conclusion
Disabling Speech Recognition in Windows 10/11 can help you save resources, improve privacy, and avoid accidental microphone activation. You can easily re-enable it anytime if you want to use voice commands or dictation again.