We use cookies for personalizing content and ads and providing social media features. Your usage information on our website will be used for social media, advertising, and traffic analytics, or shared with our partners. Clicking "Accept" means you agree to use our cookies .
Many users have heard that the Steps Recorder in Windows computer can record operation steps and illustrate them with clear pictures, but they don't know how it works. In consequence, this article will provide handy tips on how to use Steps Recorder in Windows 8 computer.
Tips 2: Make associated settings before starting recording. (Optional)
Step 1: In the Steps Recorder window, click the down arrow and choose Settings to continue.
Step 2: Finish related settings.
1. Name the file and specify saved location.
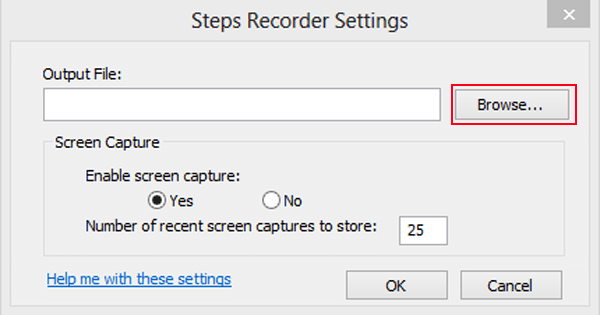
Procedure 1: In the Steps Recorder Settings dialog box, click Browse button.
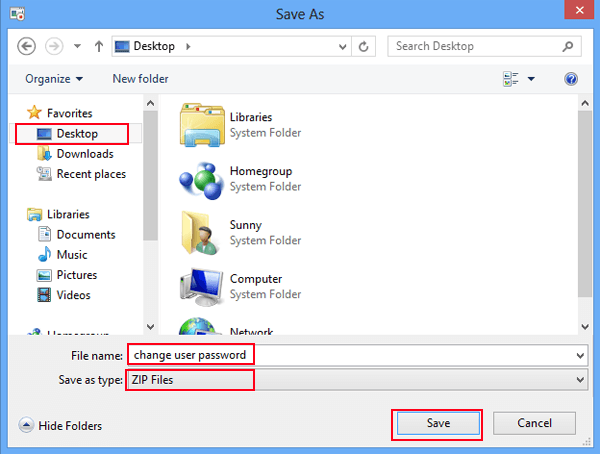
Procedure 2: Name output file, choose file type (i.e. ZIP Files or XML Files), specify saved location and click Save.
2. Enable or disable screen capture.
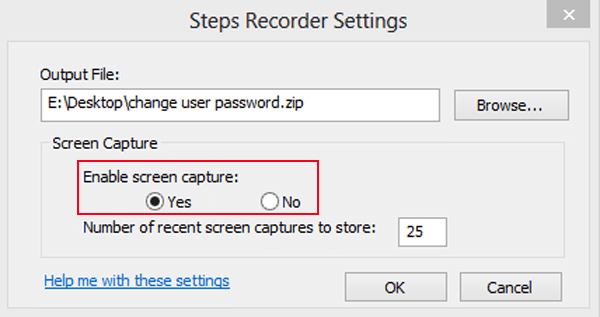
If you don't want the recorder to illustrate the operation steps by screen captures, choose No to disable screen capture. If not, keep the default selection (i.e. Yes) to enable it.
3. Set number of screen captures.
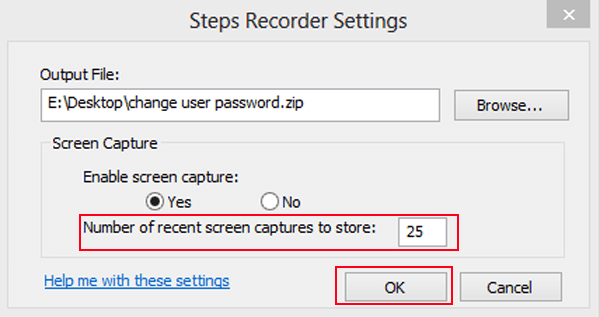
The default number is 25, and you can manually set it if you need to increase or decrease it. After that, tap OK to confirm the settings.
Tips 3: Start recording.
In the Steps Recorder window, click Start Record (or press Alt+A) and get down to complete certain setting step by step as usual.
Tips 4: Pause recording.
If you need to pause the recording, tap Pause Record in the Steps Recorder, or press Alt+U to suspend it.
Tips 5: Continue recording.
Go on recording by clicking Resume Record (or using Alt+S) in the recorder.
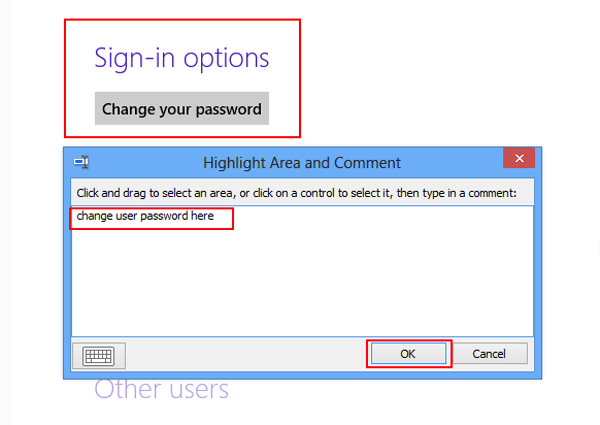
Tips 6: Add Comment to a step.
If you want to highlight something in certain step, you can add comment. And the following 2 procedures can be followed.
Procedure 1: In the recorder, choose Add Comment or press Alt+C.
Procedure 2: Click and drag to select an area, type comment in the window of Highlight Area and Comment and tap OK.
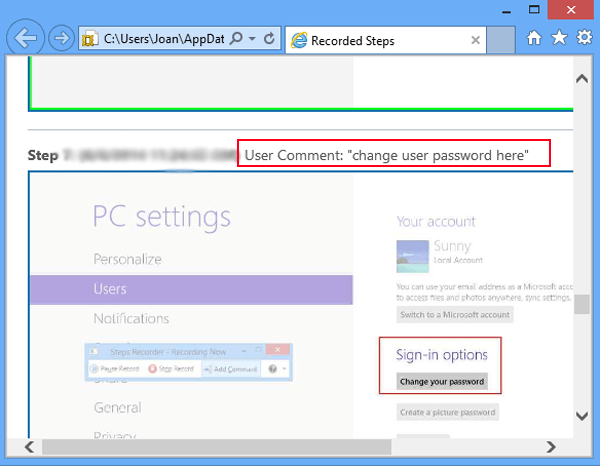
Later, in the saved file, you can find that the comment is added to the specified step.
Tips 7: Stop recording
Select Stop Record in the recorder or press Alt+O to finish recording.
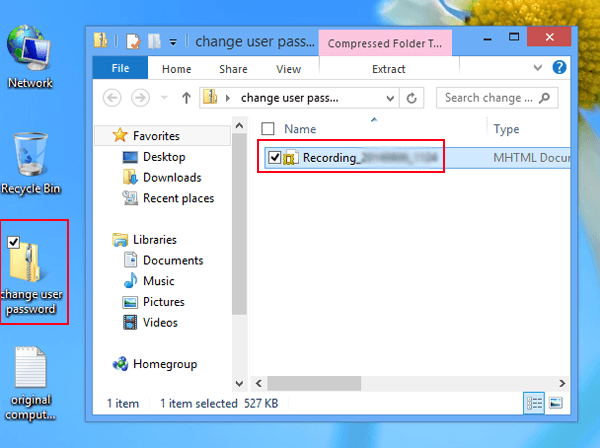
Tips 8: Check output file.
Go to the saved location previously specified, open the zip folder and find the file saving the steps.
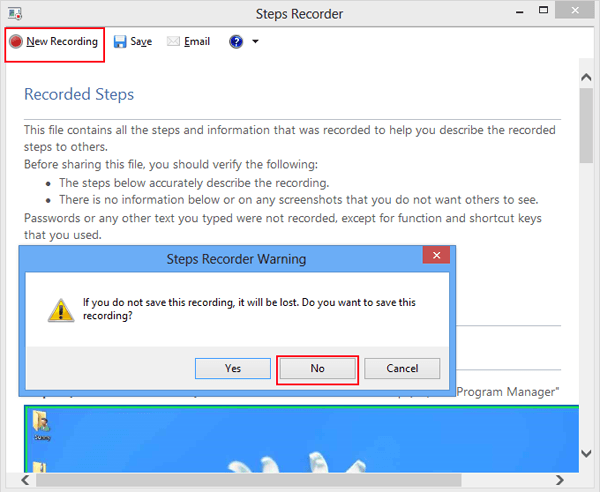
Tips 9: Discard old recorded steps and begin new recording.
If you directly start recording without making related settings in Steps Recorder, after you stop recording, the file saving the steps will immediately show up. Suppose you are unsatisfied with it, you can tap New Recording on the top left corner (or press Alt+N) and click No in the Warning window to discard the old recorded steps and start new recording.
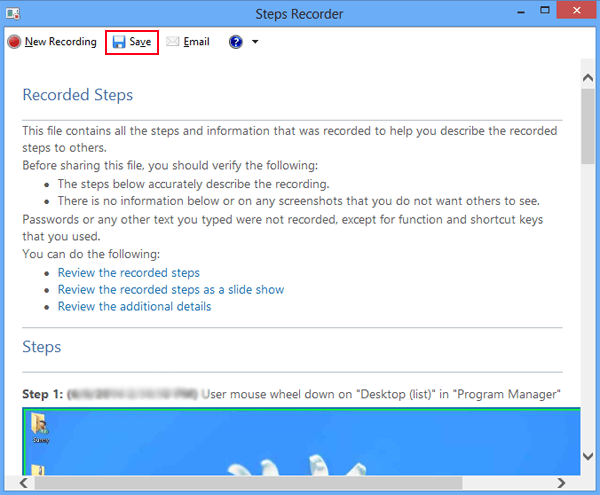
Tips 10: Save the file in Steps Recorder.
Step 1: Click Save option on the upper left.
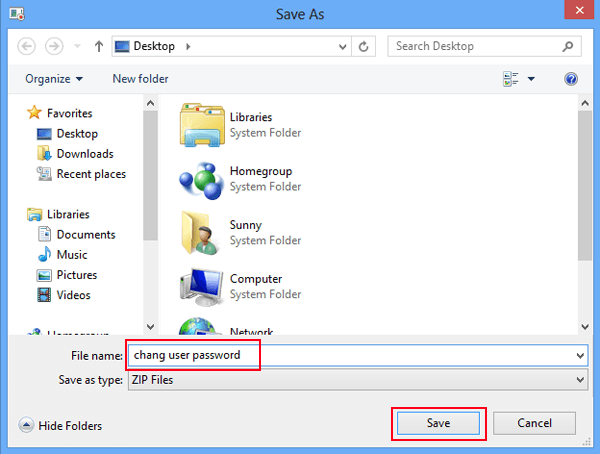
Step 2: In the Save As window, choose saved position, name the file and tap Save.
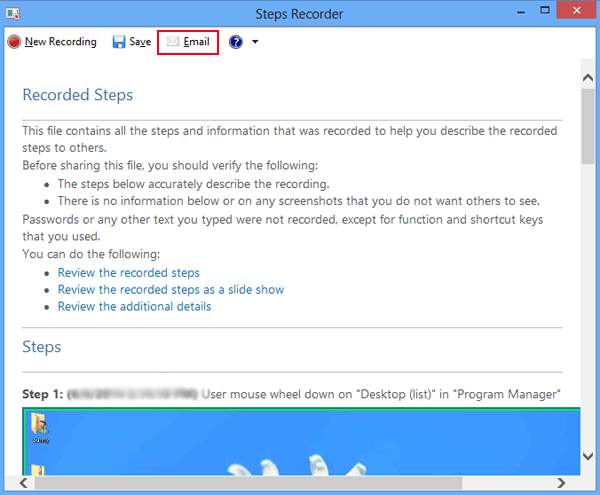
Tips 11: Send the file to other people by email.
Select Email option to send the file recording the steps to other people by email.