We use cookies for personalizing content and ads and providing social media features. Your usage information on our website will be used for social media, advertising, and traffic analytics, or shared with our partners. Clicking "Accept" means you agree to use our cookies .
For users who want to easily find some files and folders in their computers, they are likely to build or place the files and folders on the desktop. However, one thing should be paid special attention to is that as these materials pile up, the computer speed, especially the on-off speed, will be greatly affected since they are stored in the Desktop folder of the system disk (i.e. C disk). To avoid the inconvenience, it is indispensable to modify the Desktop folder path. In other words, if the Desktop folder is moved to another non-system disk, the files and folders will be stored not in C disk, but in another specified disk, which not only allows some users to create or put their materials on the desktop, but also greatly reduces the impact to computer operating speed. Now, this article will introduce the practical method step by step.
Video guide on how to modify Desktop folder path in Windows 8:
Steps to modify Desktop folder path in Windows 8 computer:
Step 1: Open Computer.
You can double-click the Computer icon on the desktop, or press Windows+E hotkeys to open it instantly.
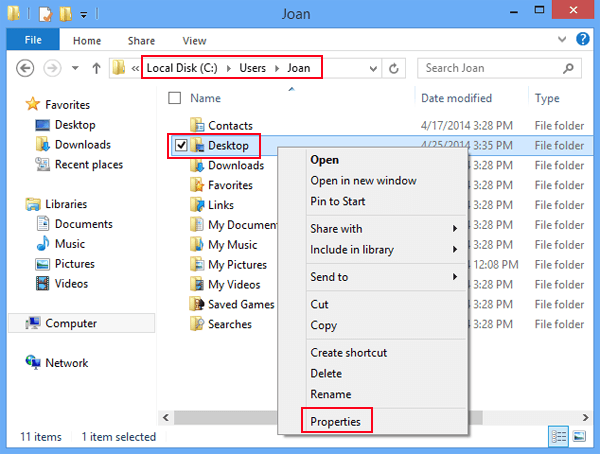
Step 2: Find the Desktop folder and open its properties.
For your reference, you can find it in Local Disk (C:)/Users/system account folder. Then, right-click the folder called Desktop and choose Properties in the context menu.
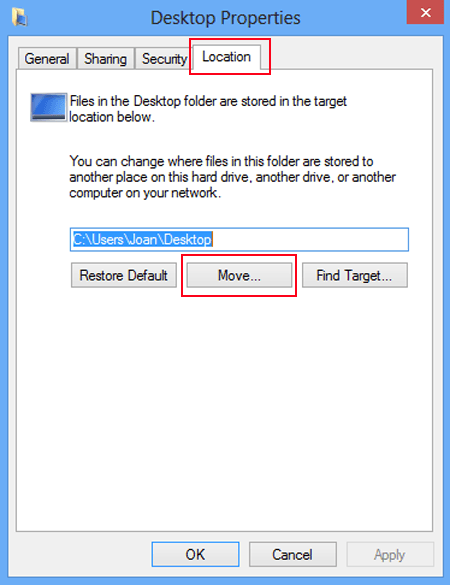
Step 3: Begin to modify the Desktop folder location in Desktop Properties.
When the Desktop Properties window turns up, choose Location on the top and click Move button in the middle.
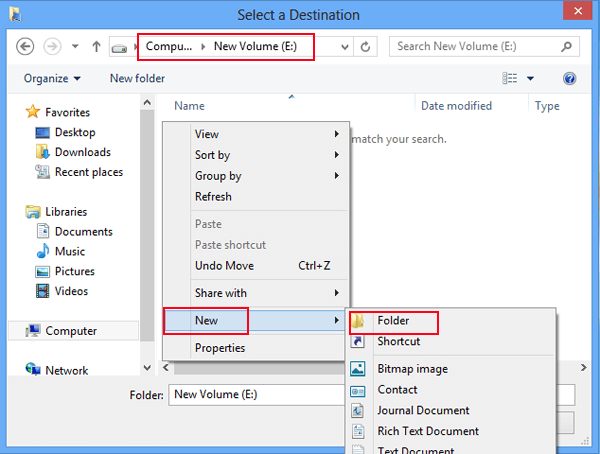
Step 4: Select another disk for the Desktop folder.
As the interface of Select a Destination appears, go to another disk (e.g. E disk) according to Computer/New Volume (E:), and create a new folder in it by right-clicking any blank area, taping New and choosing Folder.
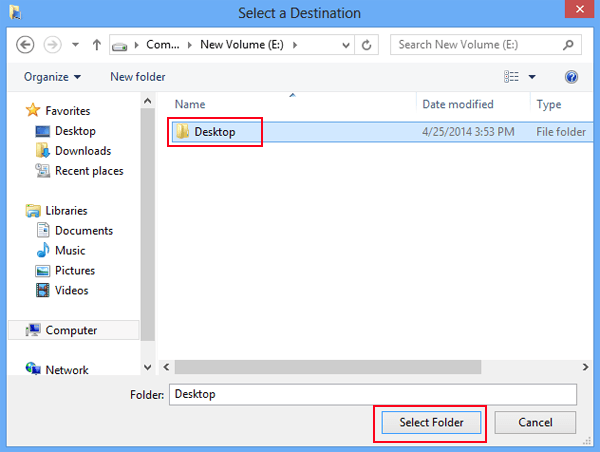
Step 5: Rename the new folder and choose it.
Rename the new folder as Desktop, click it and tap Select Folder to move on.
Step 6: Finish the modification to the Desktop folder location.
In the Desktop Properties window, choose OK.
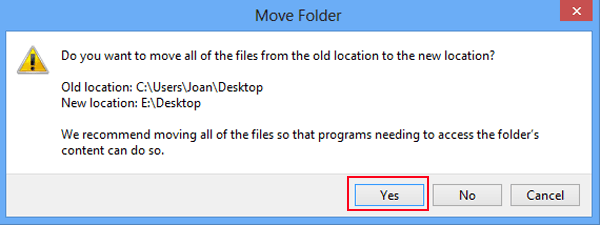
Step 7: Confirm the settings.
In the Move Folder dialog, hit Yes to confirm the settings and allow the system to move all of the files from C disk to E disk.
At last, another thing should be noticed is that the method illustrated by the steps above is also applicable to Windows 8.1, Windows 7 and Windows XP.