We use cookies for personalizing content and ads and providing social media features. Your usage information on our website will be used for social media, advertising, and traffic analytics, or shared with our partners. Clicking "Accept" means you agree to use our cookies .
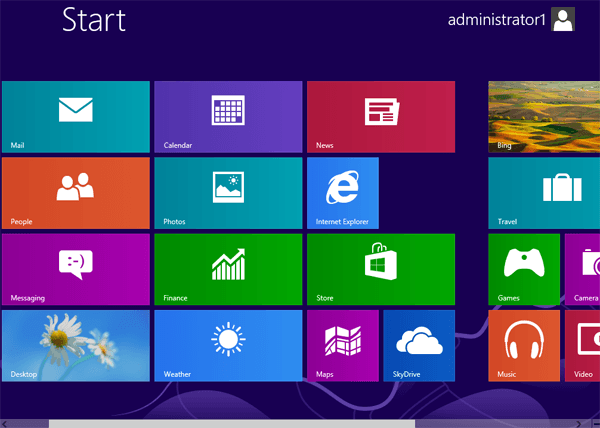
You might be at a loss when you see a lot of tiles (or apps) on the Start screen of Windows 8 computer. How can you make the apps more orderly and classified? It is suggested for you to group and name them. So the question now is how to name a group of tiles on Windows 8/8.1 computer. For your better reference, this text will answer the question by gradually illustrating the operational steps.
Video guide on how to name a group of tiles on Windows 8:
Steps to name a group of tiles on Windows 8/8.1 desktop or tablet:
Step 1: Group the tiles on the Start menu.
Press a tile and drag it in a group. Then repeat the procedure until you divide all tiles into different groups (see the following screen shot).
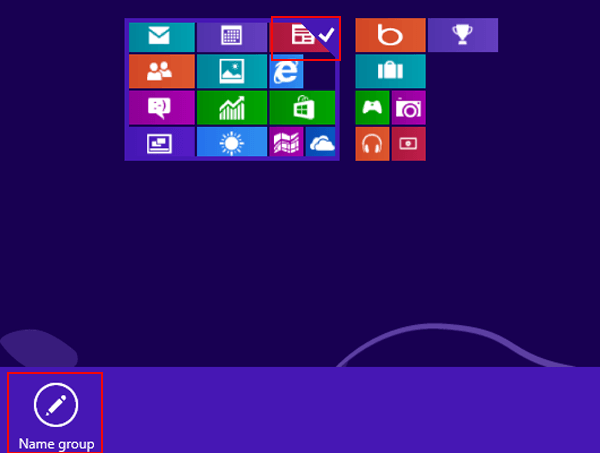
Step 2: Click the minus button (-) on the bottom right corner of the screen.
Step 3: Right-click a group of tiles and then select Name group option on the lower left corner.
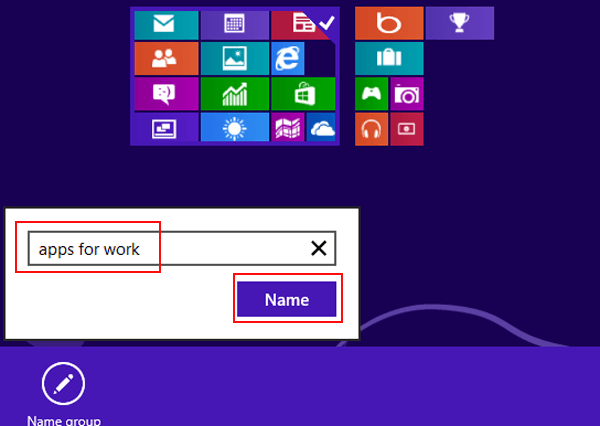
Step 4: In the following window, type a name for the selected group in the empty box, and click Name button to accomplish the named process, as shown in the screen shot below.
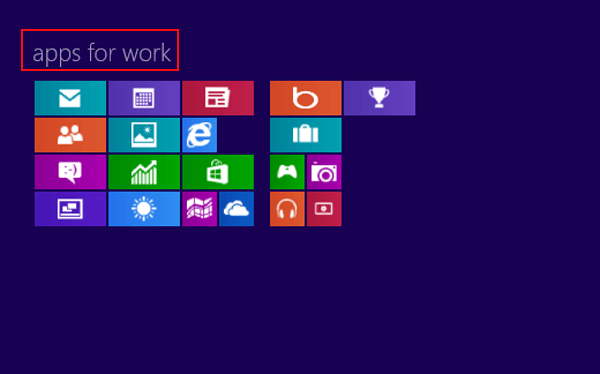
As you see from the following picture, the name appears on the top of the group of tiles.
Moreover, if you want to show all the groups in large icons, you can click any blank area on the Start menu and the apps will appear in large icons at once, as shown in the following photo.
To sum up, the skill to name a group of tiles in Windows 8 computer is concluded from practice. In turn, it can be strengthened through practice. Hence, it is time to strengthen this skill with the help of the above simple steps.