FaceTime provides us with a new way to communicate with our friends and family over Wi-Fi or cellular data. However, sometimes FaceTime doesn't work properly on the iPhone. Facetime may stop working on your iOS device due to problems with the configuration of the app or the operating system itself. This problem occurs when Facetime does not start, calls do not go through/come in, or calls come through/come out and are immediately dropped. Take it easy! In this article, I will provide a full guide to fix FaceTime not working on iPhone.
Video guide on how to fix facetime not working on iPhone:
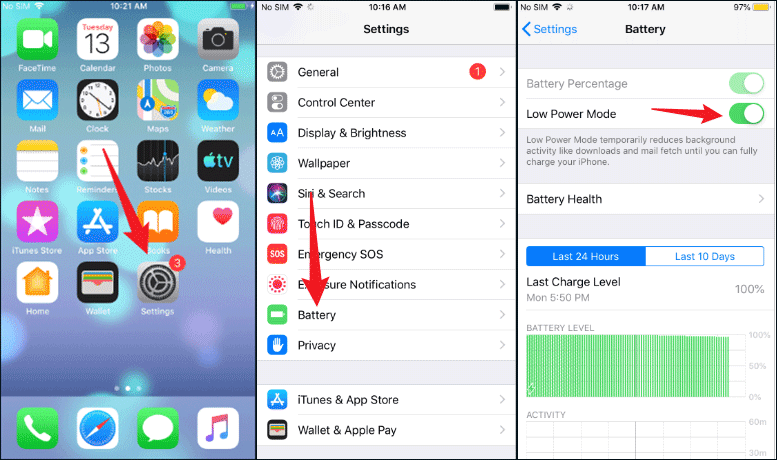
Fix 1: Turn off low power mode
If your iPhone is running in low power mode, the modules necessary for FaceTime to run may be disabled to save the iPhone's power. We can try to disable the low power mode to solve the problem of FaceTime not working.
Step 1: Move to iPhone's Settings > Battery, toggle the Low Power Mode switch to off, and then check if Facetime is working.
Step 2: If not, plug your iPhone into the charger and do a forced reboot on your iPhone while the phone is connected to the charger. Then wait until the iPhone is fully charged and after that, check if the issue is resolved.
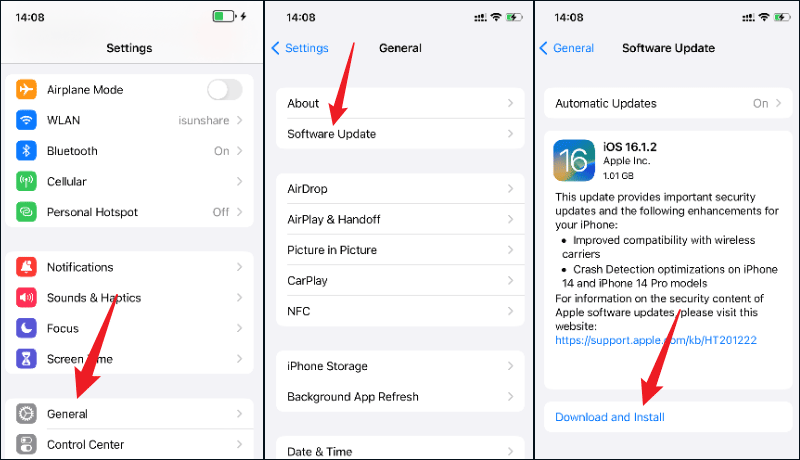
Fix 2: Update your iPhone to the latest version of iOS
FaceTime may not work if the iPhone's operating system is outdated, as it may make the device incompatible with Apple servers, and due to this incompatibility, the execution of Facetime's basic modules is limited. Therefore, it would be wise to upgrade the iOS to the latest version.
Step 1: Make sure your iPhone is fully charged and connected to a Wi-Fi network.
Step 2: Move to Settings > General > Software Update, if there is an update available for iOS, please Download and Install the update.
Step 3: Restart your iPhone and check if Facetime is working properly. If not, unregister your number from iMessage and check again afterwards if the FaceTime issue is resolved.
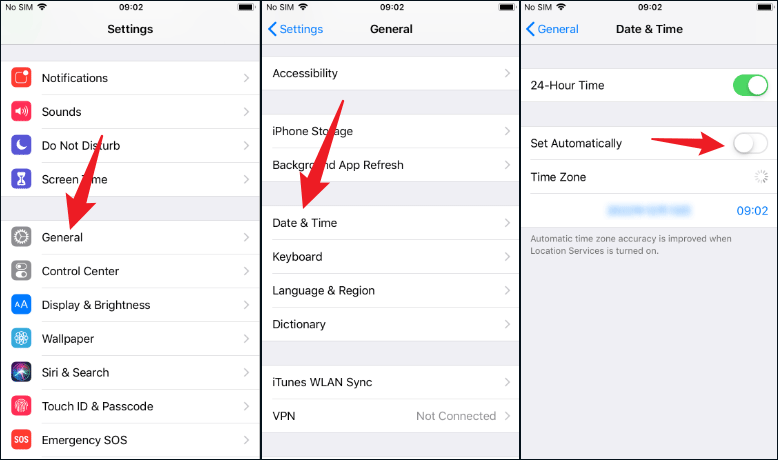
Fix 3: Change date and time settings
The FaceTime server may not be able to validate packets with incorrect date & time stamps. Thus, changing the date & time settings of the iPhone may fix the issue.
Step 1: Move to iPhone's Settings > General > Date & Time > toggle Set Automatically switch to off.
Step 2: Manually set the correct date & time on your iPhone and then force restart the iPhone.
Step 3: Check that Facetime is working properly. If it doesn't, check if enabling back the Set Automatically option in the Date & Time settings fixes the problem.
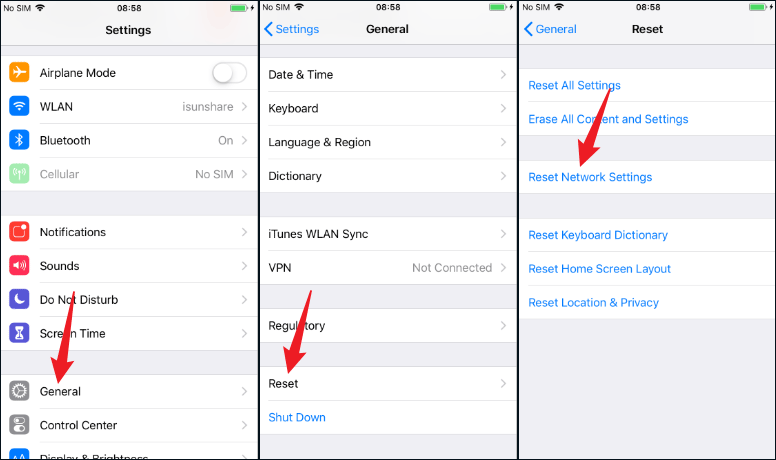
Fix 4: Reset Network Settings
Resetting network settings will delete all saved Wi-Fi networks, Bluetooth pairing records, VPN or APN settings, but will not delete other data and settings from the device, so it's worth trying if you can't connect to FaceTime.
Step 1: In Settings > General > Reset, select Reset Network Settings, then enter your passcode to confirm reset your network. This will take a few minutes.
Step 2: Once done, restart your iPhone, then reset the network on your iPhone, such as adding a Wi-Fi connection, then open FaceTime and check that it's working properly.
Fix 5: Use professional iOS repair tool
iSunshare iOS Repair Genius is so effective that it can fix various software issues on your iOS device. It can also get your FaceTime back to normal with or without data loss. So instead of looking for some temporary fixes, try using iSunshare iOS Repair Genius, which will eliminate most of the problems from your device and ensure its best performance.
Simply download and install this tool on your PC. Make sure your iPhone is always connected to the computer with a USB cable as well as iTunes should be installed on the computer.
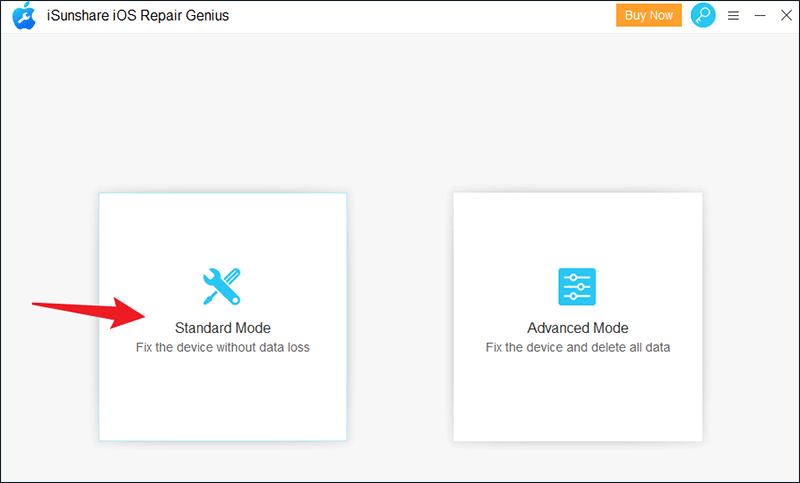
Step 1: In the main screen of the software, there are two modes to choose from, Standard Mode and Advanced Mode. Advanced Mode can fix any system problem but the data will be erased, and Standard Mode can fix your iPhone without data loss. Here, I will choose the Standard Mode as an example.
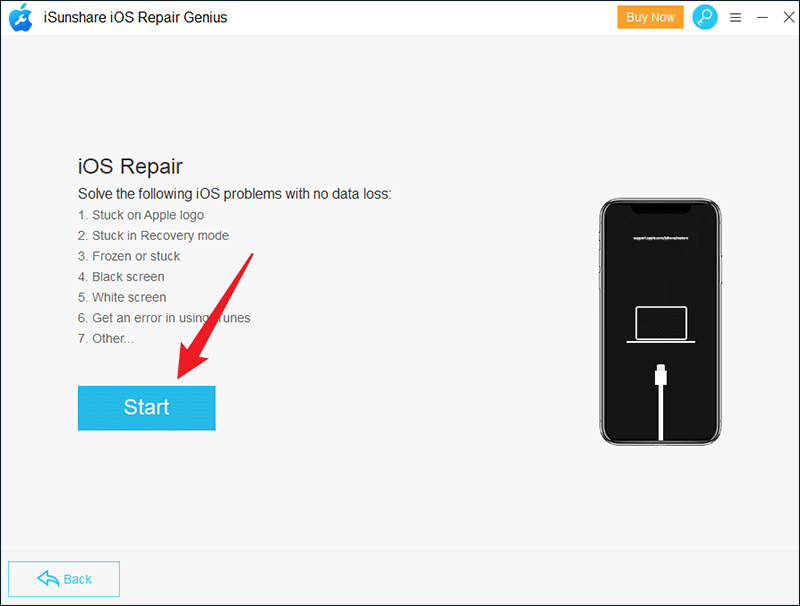
Step 2: Just click Start to continue.
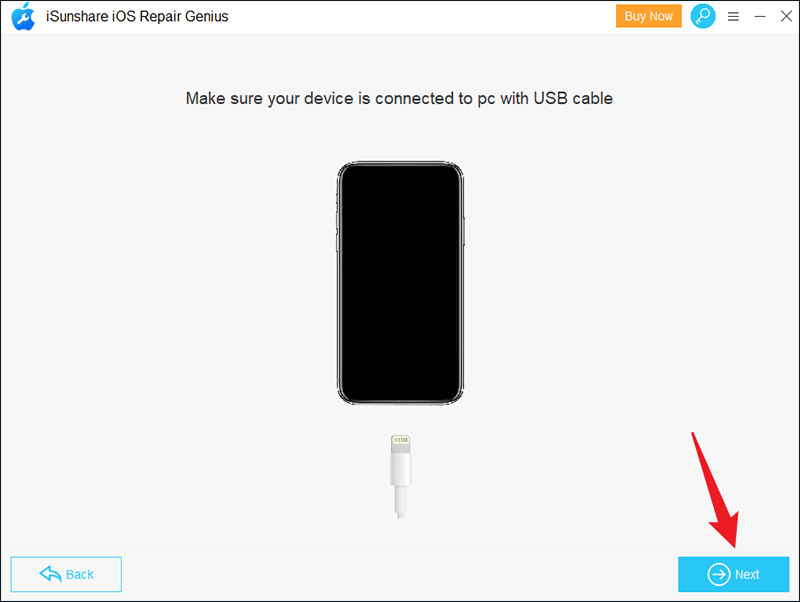
Step 3: Make sure your iPhone is connected to pc and click Next button at the bottom right of the interface. If your iPhone cannot be detected, you need to put your iPhone in DFU or Recovery Mode. You can follow the on-screen guide.
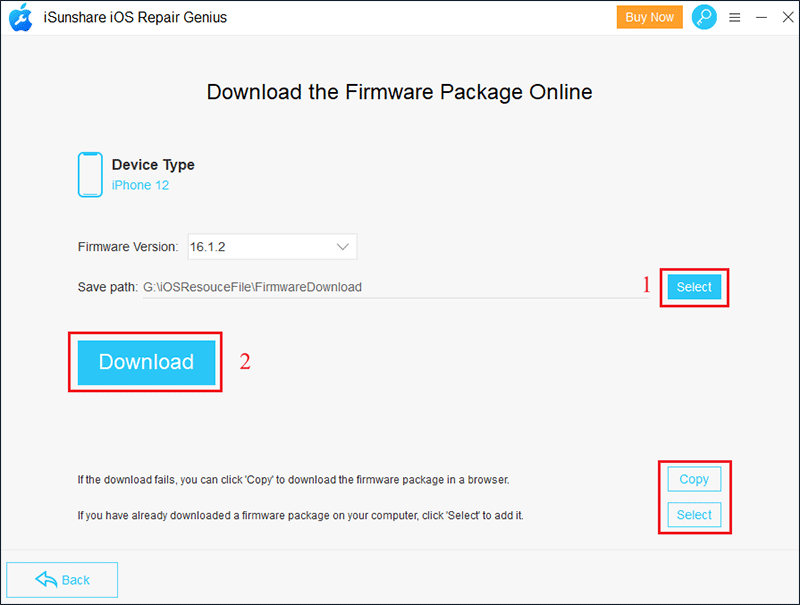
Step 4: The software will automatically identify your iPhone model and show you the latest available version of firmware. Click Select button to choose the location to save the package and then click Download button to download a firmware package. If the download fails, you can click the Copy button to download it on your browser. Then click the Select button at the bottom to import it. If you have already downloaded a firmware package on your computer, just click Select to add it.
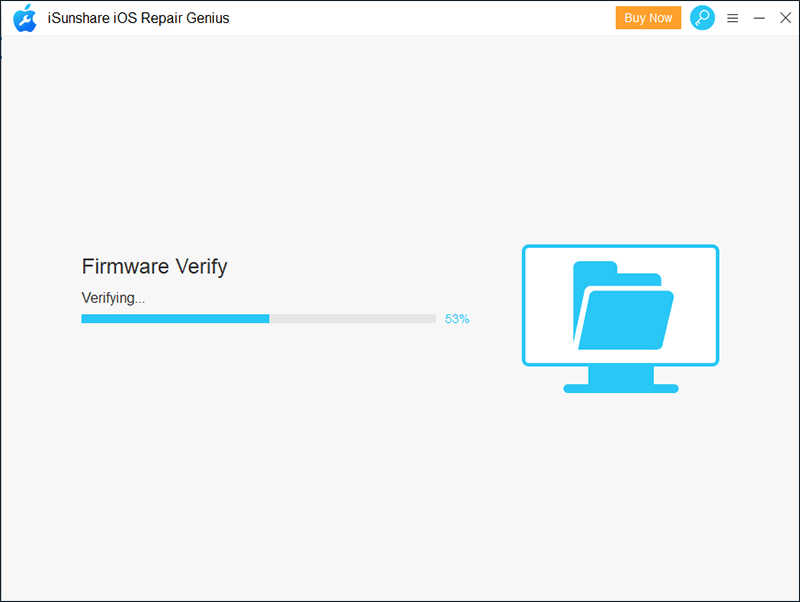
Step 5: Wait for firmware verify.
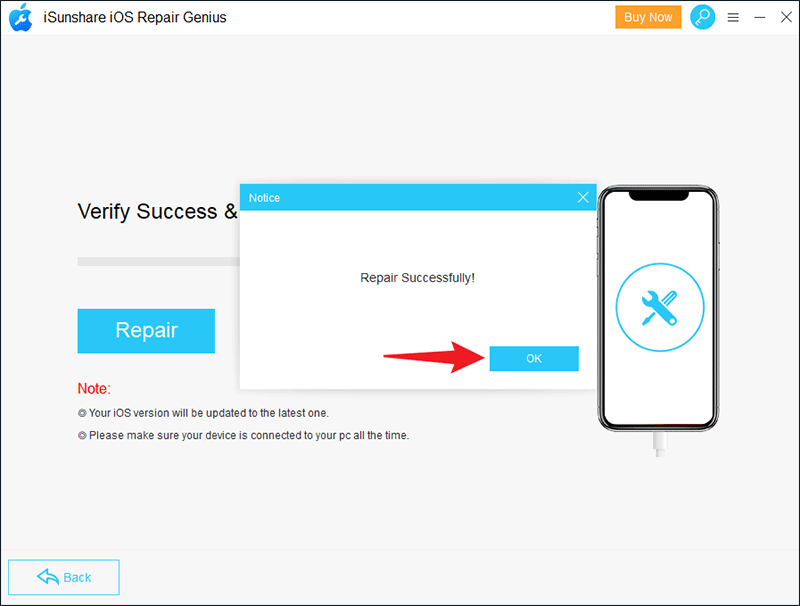
Step 6: After firmware verification is complete, click Repair button to start repairing.
Step 7: Wait for a while until a window pops up prompting that the device has been repaired successfully. Click OK to close the window. At last, your iPhone will work properly and boot up automatically.