Device Manager is a handy tool with many benefits. It is extremely essential to troubleshoot various errors. You can use it to fix device drivers, disable hardware or a software device, and identify unknown devices. However, this tool sometimes fails to load and does not respond. It can be very irritating if Windows 10/11 suddenly fails to open Device Manager. In this article, I will help you fix device manager won't respond in Windows 10 and 11.
1: Use Computer Management Tools to access Device Manager
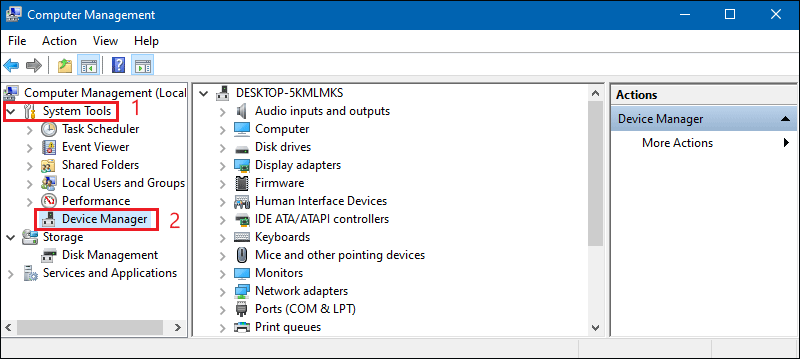
Step 1: Press Windows+X at the same time to launch the quick access menu and select Computer Management from it.
Step 2: Scroll down the System Tools option and choose Device Manager to open it.
2: Use Windows Troubleshooting
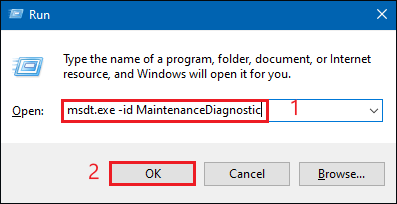
Step 1: Use Windows+R to open the Run dialog box and type msdt.exe -id MaintenanceDiagnostic. Then click OK to open System Maintenance troubleshooter.
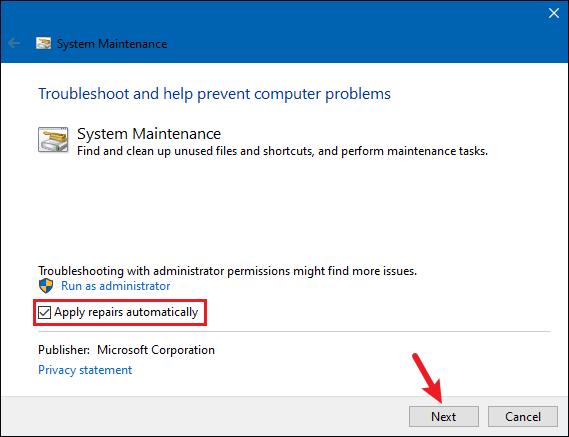
Step 2: Click on Advanced Options and check Apply repairs automatically. Click Next to ultimately complete the troubleshooting process.
3: Use administrative privileges to run Device Manager
Step 1: Use the keyboard shortcut Ctrl+Shift+Esc to open Task Manager and click Run New Task in the File.
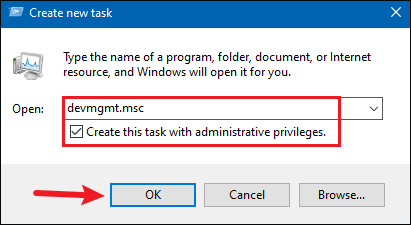
Step 2: Type devmgmt.msc in the Open box and check the box to Create this task with administrative privileges. Click OK to open the device manager.
4: Repair corrupt Microsoft Visual C++ programs
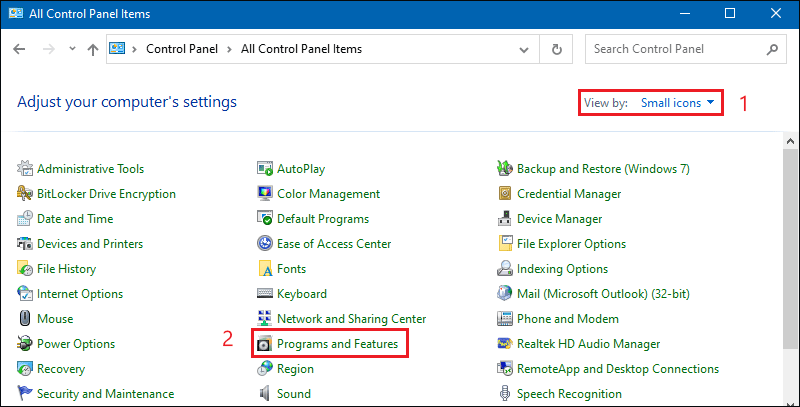
Step 1: Use Windows + S to type Control Panel in the search bar and open it.
Step 2: Select View by Small icons, then click Programs and Features.
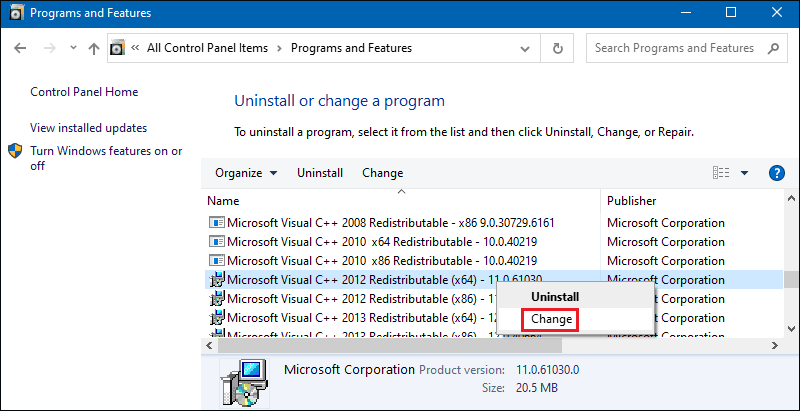
Step 3: Right-click on each Microsoft Visual C++ program and select Change.
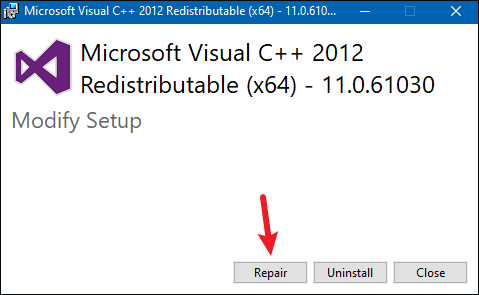
Step 4: Click Repair in the pop-up dialog box. Follow the on-screen instructions and then reboot your PC.
5: Perform a scan and repair the drive
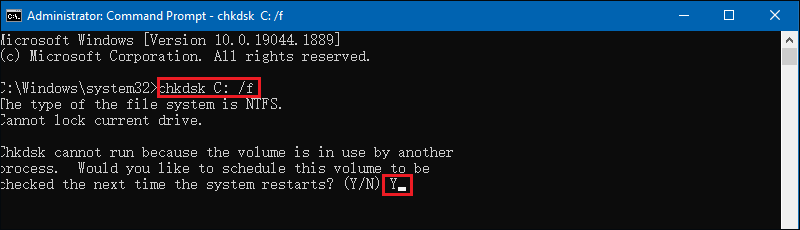
Step 1: Type CMD in the search bar and click Run as administrator.
Step 2: Type the following command. Type Y and it will automatically perform a disk check the next system restarts. This feature will scan your hard drive and try to fix any problems it may have.
chkdsk C: /f
6: Use a command prompt or PowerShell to open Device Manager
Step 1: Type CMD in the search bar and click Run as administrator.
Step 2: Type devmgmt.msc in CMD and press Enter to open Device Manager.
Step 3: Type PowerShell in the search bar and click Run as administrator.
Step 4: Type devmgmt.msc in PowerShell and press Enter to open Device Manager.
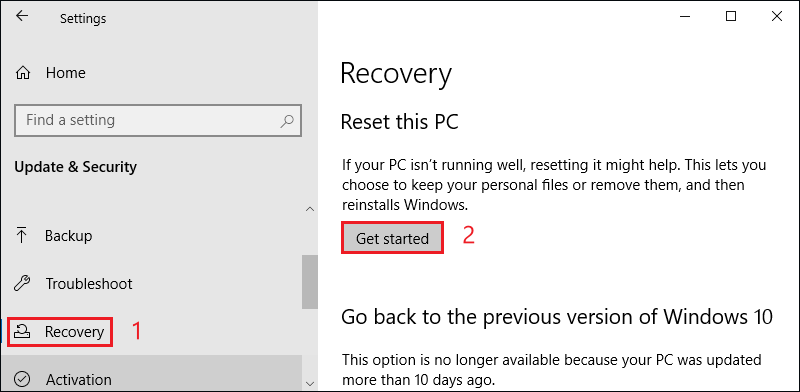
7: Reset your PC
Before resetting your windows device, try installing the latest Windows update to see if it helps. If not, please carry out the following steps.
Step 1: Use the Windows+I keys to open Settings and click Update & Security.
Step 2: Click Recovery in the left window and click on Get started in the right window. Follow the on-screen instructions to reset your PC.