What we need to know before USB/CD boot a VM in VMware?
Why we need to boot a virtual machine from USB or CD on VMware, such as boot Windows 10 or Mac OS X from USB or CD on VMware Workstation?
Virtual machine is an effective solution to improve system performance. By installing or running rarely-used programs on virtual machine but not your host machine, you can release the space the programs occupy while you close the apps or virtual machine. And the most attractive feature of virtual machine is that you can run it as you are using host machine.
For example, you can run iSunshare Windows Password Genius on Windows 10 to reset Windows password in VM Workstation. Firstly make sure whether the third-party Windows password recovery tools really works. And then take it to unlock your computer when it is locked because of incorrect login user or password.
But there are still some differences between them, such as booting virtual machine from external drive, USB drive or CD/DVD-ROM(ISO image) is different from booting host physical computer from USB or CD.
However, the virtual machine is still set to boot from hard disk at first by default, and then CD/DVD-ROM. So, in order to boot Virtual Machine from specified device, such as USB flash drive, you have to add the removal device, USB flash drive as hard disk on specified virtual machine.
How to boot a VM virtual machine from external drive, such as USB or CD(ISO image)? Follow the introductions in this article.
- Section 1: Boot a Virtual Machine from USB on VMware
- Section 2: Boot a Virtual Machine from CD/DVD(ISO Image) on VMware
After successfully booting virtual machine from USB/CD, you will be able to run OS or programs from USB/CD to install/reinstall/repair Windows system, or reset Windows password on VMWare workstation.
Section 1: Boot a VMware virtual machine from a USB drive
Open VMware workstation and choose the virtual machine you want to change boot order.
Step 1: Open target virtual machine you need to boot from USB on VMware.
Step 2: Add a hard disk to virtual machine via VM > Settings.

1. Open VM settings > Memory > Add.
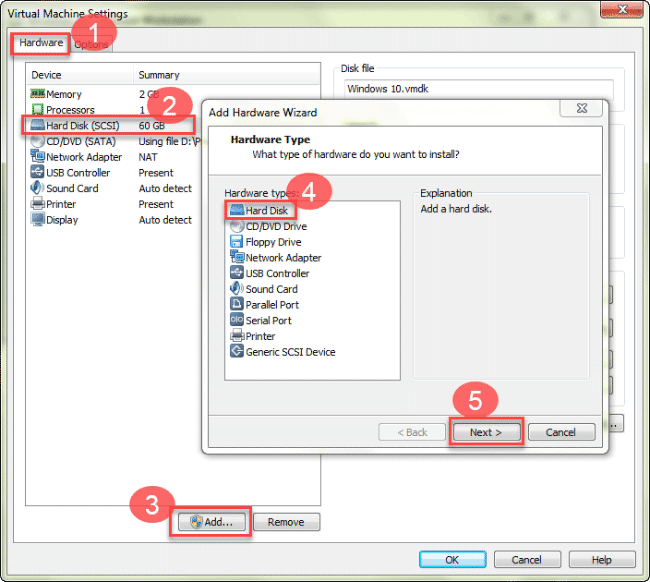
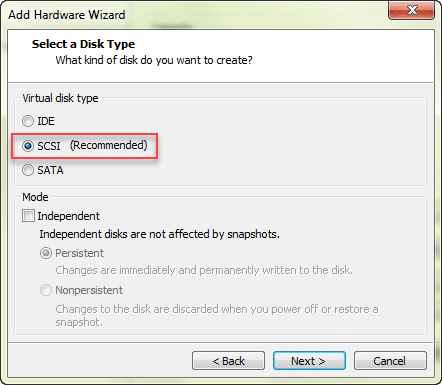
2. Select a virtual disk type: Recommended.
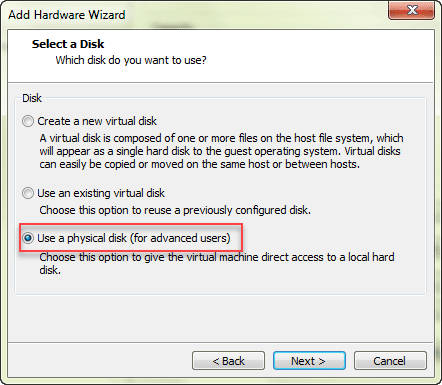
3. Use a physical disk (for advanced users).
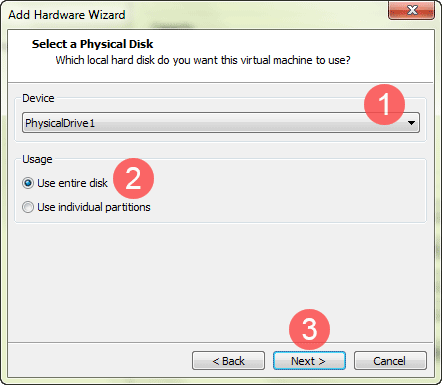
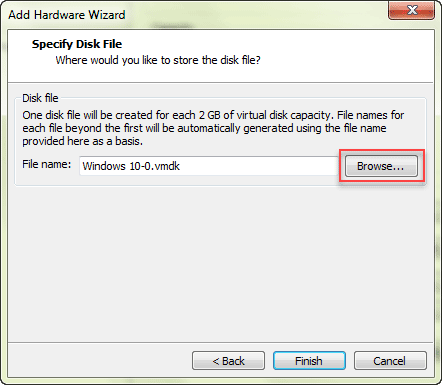
4. Select a physical disk for this virtual machine to use and use entire disk.
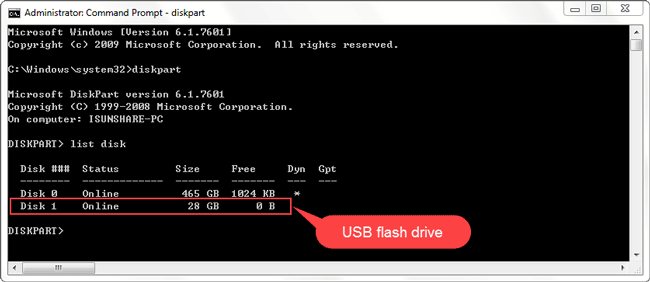
Q: How can you make sure which physical disk is the USB disk?
Run Command Prompt as administrator and type “diskpart” in CMD window to confirm the disk name of flash drive on your computer.
5. Click Next and a physical disk is created. Tap on Finish button.
Step 3: Power on to Firmware and change boot order.
1. Connect USB flash drive to virtual machine.
Remember firstly click USB drive at the right-bottom side to connect from host, because USB flash drive is usually connected to host but not virtual machine b default. Follow the same steps on how to connect USB to Mac OS X on VMware.
2. Click virtual machine and right-click Power > Power on to Firmware to open computer boot order settings.
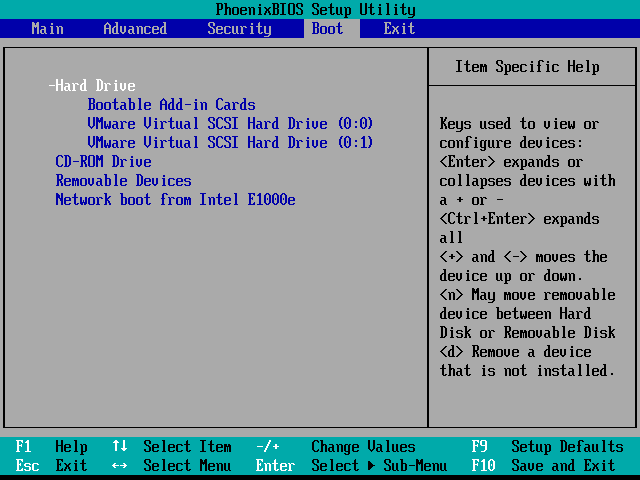
3. Move to Boot option, and use arrow key to choose boot device (USB drive). Now it is set as a hard disk, so please expand the hard disk and choose the USB disk from it.
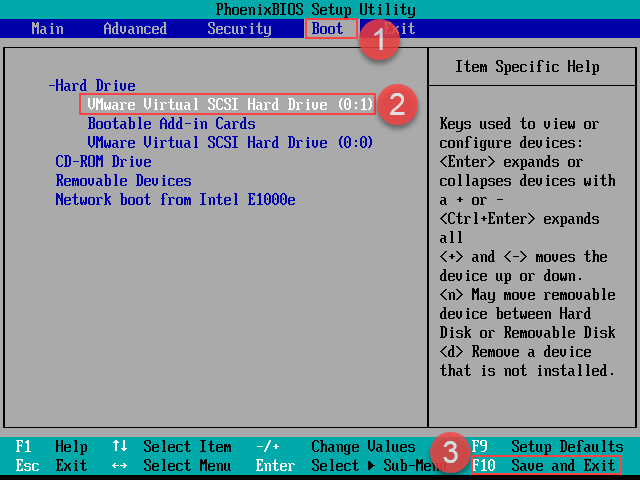
4. Use the “+” key to move the USB disk to the first place in the hard disk boot device.
5. Press F10 to save boot order changes in virtual machine.
Step 4: Boot virtual machine from USB drive.
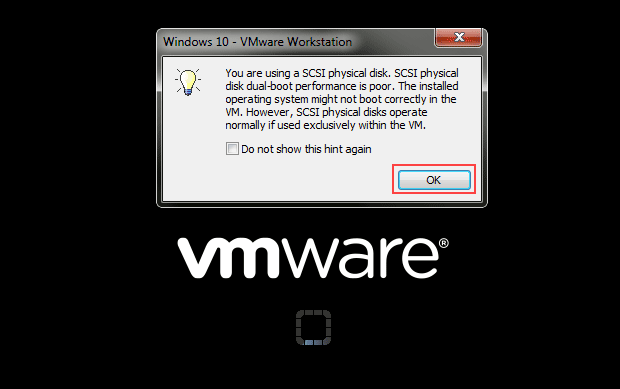
While a virtual machine boots on VMware station, and prompt that you are using a SCSI physical disk, please click OK and it will continue to boot from USB flash drive.
Section 2: Boot a VMware Virtual Machine from CD/DVD(ISO Image)
Note: The steps may be different if you use another virtual machine software, but not VMware virtual machine.
Related Articles: