Windows PE disk can be a great helper in dealing with computer problems. You can get helps from the Windows PE disk to deal with the system crashes and malfunctions, to recover lost files, to perform troubleshooting, to install a primary Windows OS and so as forth. Then as the PE disk is so good, how can we create a Windows PE disk in Windows 10? In this post, we would share the detailed steps to create a Windows PE disk.
Preparations:
Windows ADK:
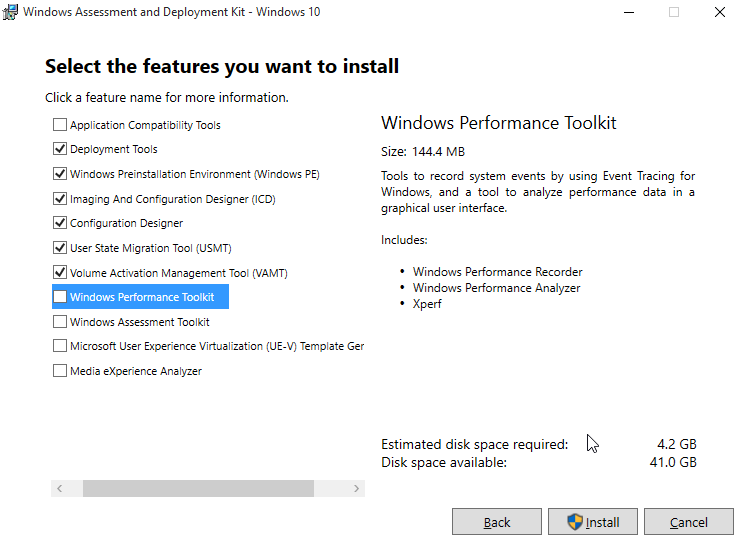
Before we navigate to create a Windows PE disk, we should first download the Windows ADK and install some features from the page of Windows Assessment and Deployment Kit(ADK). Be aware of that the Windows Assessment and Deployment Kit includes:
- The Windows Assessment Toolkit and the Windows Performance Toolkit to assess the quality and performance of systems or components.
- Deployment tools such as WinPE, Sysprep, DISM and other tools that you can use to customize and deploy Windows 10 images.
A USB drive.
The steps to create a Windows PE disk
Step 1: Install the features of Windows ADK on your computer.
Step 2: Prepare the USB drive to make sure it can be created as a Windows PE disk.
Here we would face a special situation due to the different versions of Windows.
We should pay special attention to Windows 10(version 1703)because the Windows ADK for this version of Windows 10 allows us to create multiple partitions on a USB drive, which means you can do a combination of FAT32 format and NTFS format partitions on one USB drive.
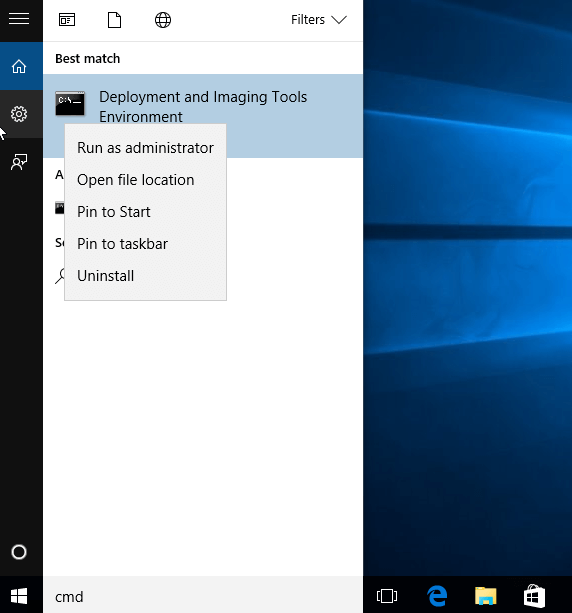
To make sure the USB drive can be created as a Windows PE disk in Windows 10 version 1703. We first launch the Deployment and Imaging Tools Environment window with administrator privilege.
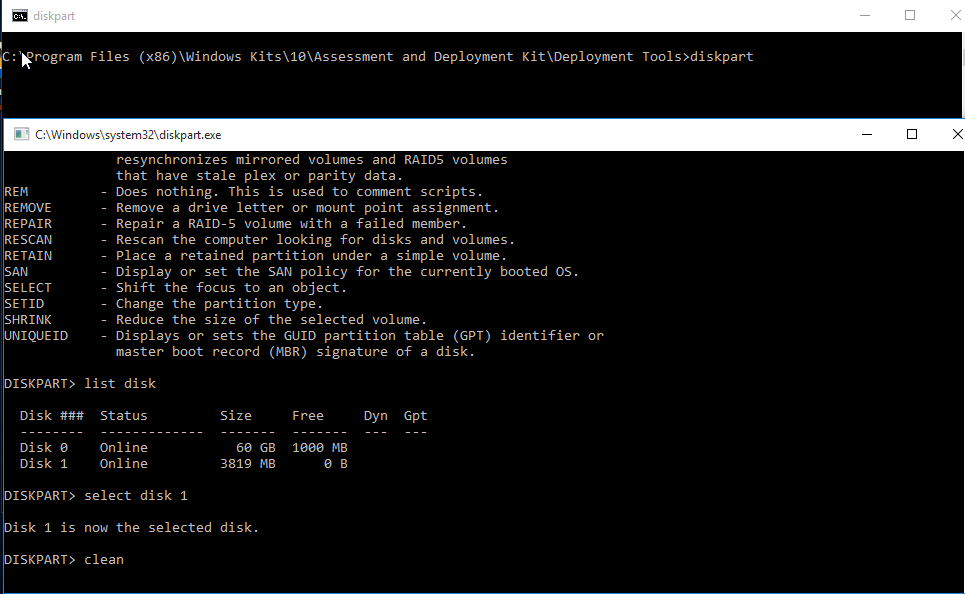
Then we could type diskpart to navigate to the DISKPART section. Use list disk command to show all the disks in this computer. Then select the target USB drive by typing select command, last, we should clean the target drive first. There possible commands are list below:
diskpart
list disk
select <disk number>
clean
Now we create the separate NTF32 and NTFS partition on a USB drive by coping and pasting the under commands, just be aware of that the following commands are to create two partitions on a USB drive; one 2GB FAT32 partition, and one NTFS partition that uses the rest of the available space on the drive. You should make sure that your USB drive has enough free space for the 2GB WinPE partiton and to hold large images on the NTFS partition.
create partition primary size=2000
format quick fs=fat32 label=”Windows PE”
assign letter=P
active
create partition primary
format fs=ntfs quick label=”Other files”
assign letter=O
list vol
exit
Attention: The size of the partition you give to store Windows PE depends on the capacity of your USB drive. What’s more, if the version of your Windows 10 is 1607 and earlier, you can’t use the Windows ADK to create multiple partitions on a USB drive. You can just create a single partition in a USB drive. The Windows ADK would format your drive as FAT32 entirely, which means you should do no preparations on your USB drive before creating a Windows PE disk.
Step 3: Create a Windows PE disk.
Now restart the Deployment and Imaging Tools Environment as an administrator, type the copy command to copy the specified Windows PE files. There are different types of Windows PE files, such as Windows PE files for x86, Windows PE files for amd64 and Windows PE files for the arm. You should just copy the specified files to your conditions.
For example, if my target Windows PE files is for x86, then the possible copy command should be:
copype x86 C:\WinPE_x86
Then Install the Windows PE to a USB drive by under command:
MakeWinPEMedia /UFD C:\WinPE_x86 P:
Attention: The P: in the above command means the letter of the USB you just select. You can change it to your condition. If you do not format your USB drive before, you can still use this command by just replacing the letter of the target USB drive P: with your USB drive name.
Then you can create a Windows PE disk.
Boot to Windows PE
When you find that your computer has some malfunctions, but you are not sure what happened, you can boot your computer to Windows PE to perform troubleshooting and steps are just shown below:
- Connect the USB Windows PE disk with the target computer.
- Turn on the PC, and press the key that opens the firmware boot menus and select the USB Windows PE disk as a boot option. you can refer to how to set computer boot form USB.
- Windows PE starts.
Then the Windows preinstallation environment would be load as you would find a prompted shows the wpeinit command running. After the Windows PE interface is loaded, you can simply perform troubleshooting or maintain your computer.