When iPhone becomes more and more intelligent, it is significant to back up the files on iPhone. As for the files you want to transfer, they could be photos, videos, contacts, messages, office documents, and so on. How can you transfer files from iPhone to PC? In this article, we will share with you 4 effective ways to transfer files from iPhone to PC.
- Way 1: Transfer files from iPhone to PC via iTunes File Sharing
- Way 2: Transfer files from iPhone to PC with iSunshare iSyncGenius
- Way 3: Transfer files from iPhone to PC wirelessly using iCloud drive
- Way 4: Transfer files from iPhone to Windows computer via File Explorer

Way 1: Transfer files from iPhone to PC via iTunes File Sharing
iTunes File Sharing enables users to transfer files between their computers and apps on their iOS devices. So you should make sure that the iOS app is compatible with File Sharing. Besides, you should update iTunes to the latest version and update iPhone to the latest version of iOS.
Step 1: Connect the iPhone to your PC via the USB cable. After that, if iTunes does not run automatically, go to launch iTunes manually.
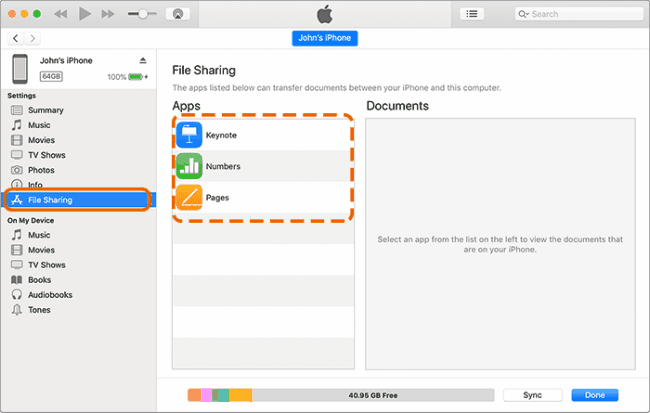
Step 2: Hit on your device on iTunes and then click on the File Sharing option on the left menu.
Step 3: In no time, you can see the apps which can transfer files between your iPhone and the computer. Now you can go to pick one app of which documents can be shared with the computer.
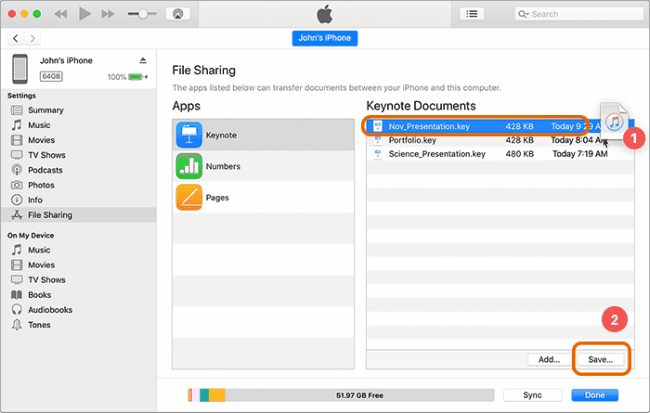
Step 4: Select the files and then click the Save button. Then you need to choose a location to save those files on your PC. Finally, you can have a copy of those files on your PC.
Way 2: Transfer files from iPhone to PC with iSunshare iSyncGenius
iSunshare iSyncGenius can help you to transfer local files from iPhone to PC easily. With this iPhone backup software, you can transfer all iPhone data at once or just copy files selectively from iPhone to your computer.
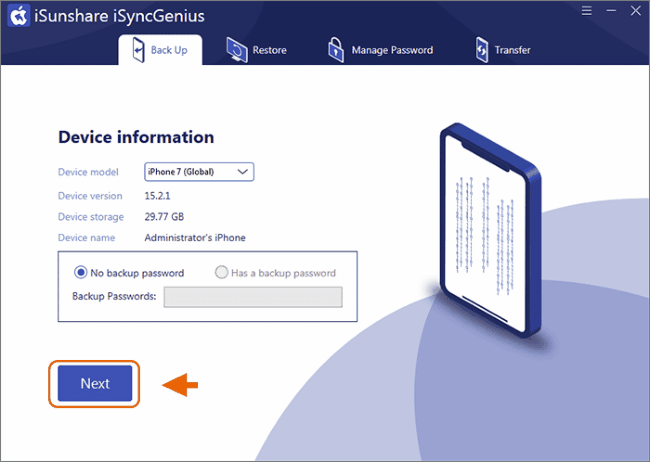
Step 1: Plug the iPhone to your PC and then run iSunshare iSyncGenius. Once the iPhone is detected, click on the Next button.
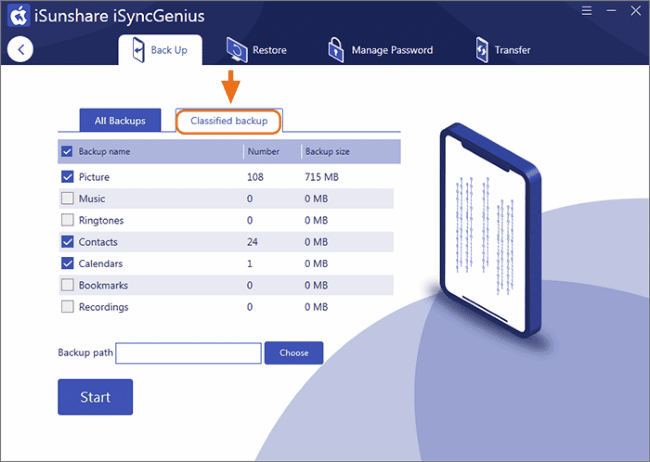
Step 2: Decide whether you want to backup all files on iPhone or just specific files. For All Backups, you are going to back up all iPhone data to the computer.
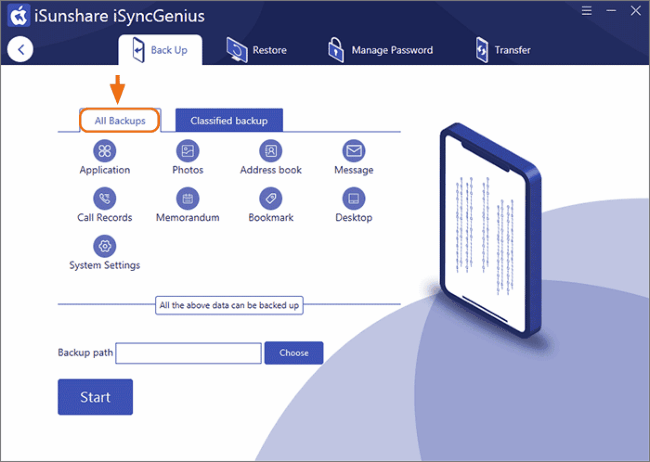
For Classified backup, you can tick the items to backup. It only supports Pictures, Music, Ringtones, Contacts, Calendars, Bookmarks, and Recordings.
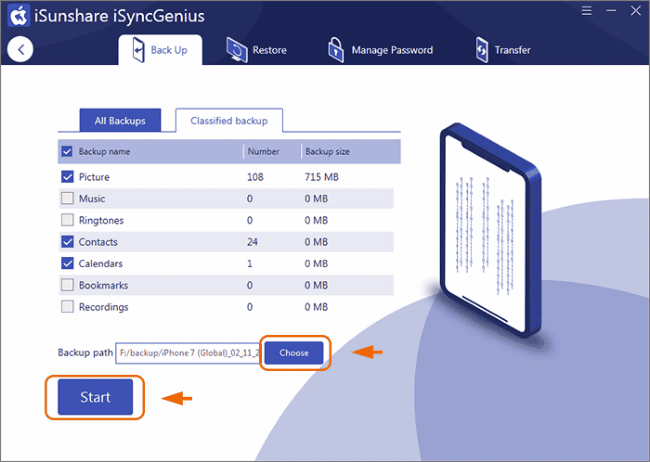
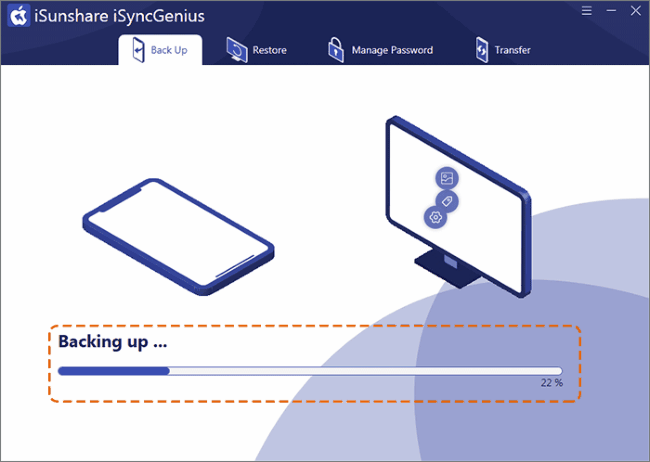
Step 3: Specify a location to save the transferred files by clicking the Choose button. Afterward, click the Start button and wait for the process to end.
Step 4: When the backup is done, you can go to the destination folder to check the transferred files.
Way 3: Transfer files from iPhone to PC wirelessly using iCloud Drive
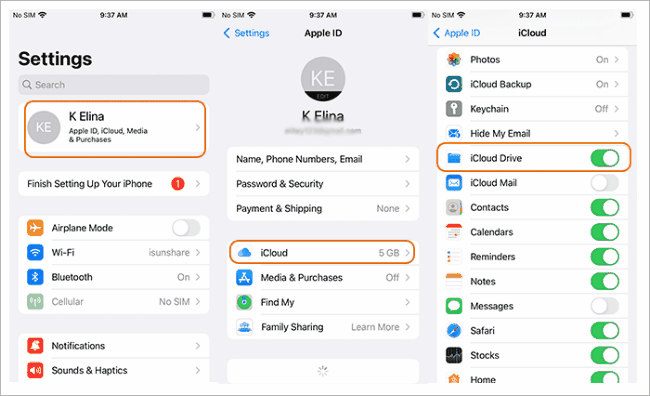
First of all, you should make sure that iCloud Drive is enabled on the iPhone so that you can download the iPhone files from iCloud Drive to PC. Go to turn on iCloud Drive, you just need to access Settings and then click your Apple ID account and find iCloud. Then tap the iCloud option and move down to find the iCloud Drive. If the iCloud Drive is not on, just tap the button and make it green.
After that, you can make good use of iCloud to get iPhone files wirelessly.
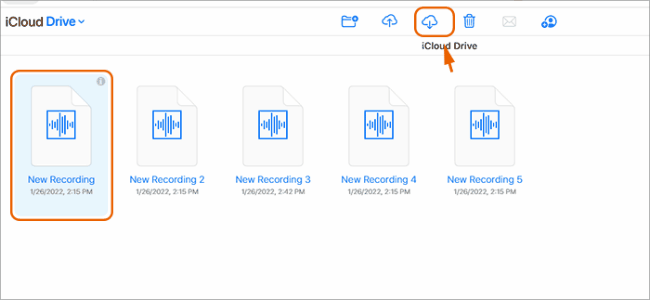
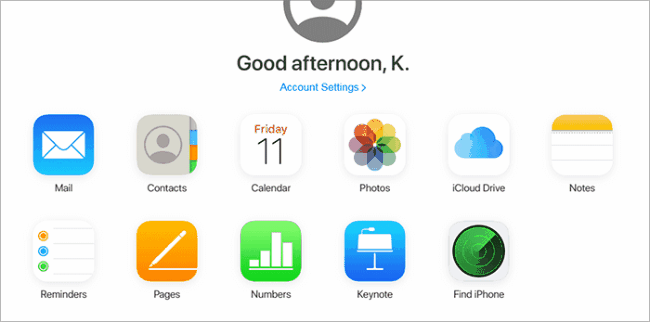
Step 1: Sign in to the iCloud Drive website with your Apple ID and password.
Step 2: Go to choose the files you want to download and then click the Download icon.
Step 3: In no time, the files will be downloaded on your PC. You can open it or save it to a specific folder.
Or you can sign into iCloud.com and then choose the category to view all backup files. After that, enter the category and select the files to download.
Way 4: Transfer files from iPhone to Windows computer via File Explorer
If you just want to transfer photos and videos from iPhone to PC, you can directly connect the iPhone to PC and copy them via File Explorer. It is the simplest way to back up photos and videos to your computer.
Step 1: Go to find a USB cable and connect the iPhone to the PC.
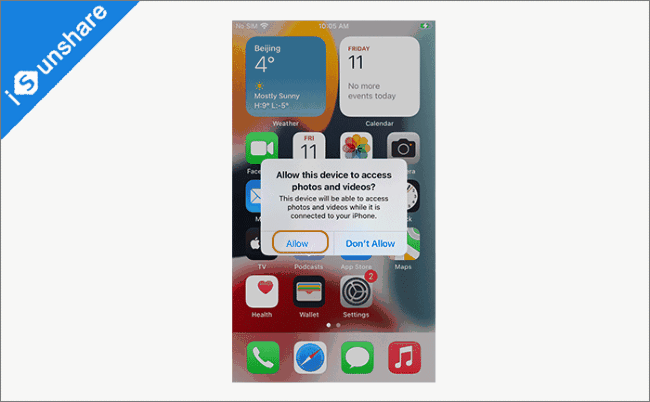
Step 2: If there is a screen lock, unlock the iPhone and then make it trust your computer. When there is a prompt asking you to allow this device to access photos and videos, you need to tap Allow to continue.
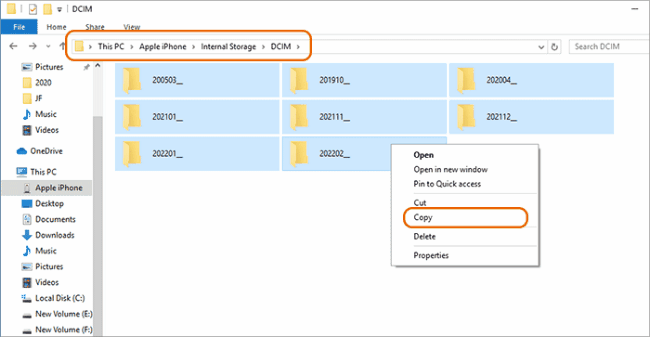
Step 3: Open This PC and find your iPhone device, click Internal Storage > DCIM. After that, there are folders to store photos and videos. You can manually choose the files to copy to your PC. Or you can press Ctrl + A and then right-click to copy all files to your PC.
Related Articles: