We use cookies for personalizing content and ads and providing social media features. Your usage information on our website will be used for social media, advertising, and traffic analytics, or shared with our partners. Clicking "Accept" means you agree to use our cookies .
"I have got a new iPhone, recently I want to sync my photos from my iPhone to HP laptop Windows 10 so that I can make my photos available for viewing on my computer. Does anyone could tell me how to achieve it?".
In today's digital age, taking photos is easier than ever with smartphones like the iPhone. But what do you do when your storage runs low? Or when you want to organize and edit your pictures on a bigger screen? That's where transferring photos from your iPhone to a laptop comes in handy, especially if you're using a Windows 10 computer. Let's dive into the various methods and steps to seamlessly transfer your precious memories.
If you're an avid photographer or just someone who snaps pictures of everything, you know how quickly space on your iPhone can fill up. Moving those pictures to a laptop helps free up valuable storage space on your phone, allowing it to run smoothly.
Keep a Backup of Your Memories
Your photos represent important memories—whether they're of your travels, family, or everyday life. Transferring them to your laptop ensures you have a backup in case your phone is lost, damaged, or corrupted.
Edit and Organize Photos on a Larger Screen
Editing and organizing photos can be much easier on a laptop. Windows 10 offers a variety of tools to help with editing and categorizing images, making the whole process smoother than working on the smaller iPhone screen.
Method 1—Transfer Photos from iPhone to Laptop with a USB Cable
The most straightforward method for transferring photos is by using a USB cable. This method is fast, requires no internet, and doesn't need third-party software.
Step 1: Get your iPhone Connected.
Take the USB cable to connect the iPhone and your Windows 10 laptop. Instantly, your laptop should recognize the device within a few moments. If your laptop fails to recognize the iPhone, try another USB port or change the USB cable.
Step 2: Trust the Device and Allow Access
Once connected, you'll see a prompt on your iPhone asking if you trust this computer. Tap the trust to allow your laptop to access the iPhone data. It requires the screen passcode for confirmation.
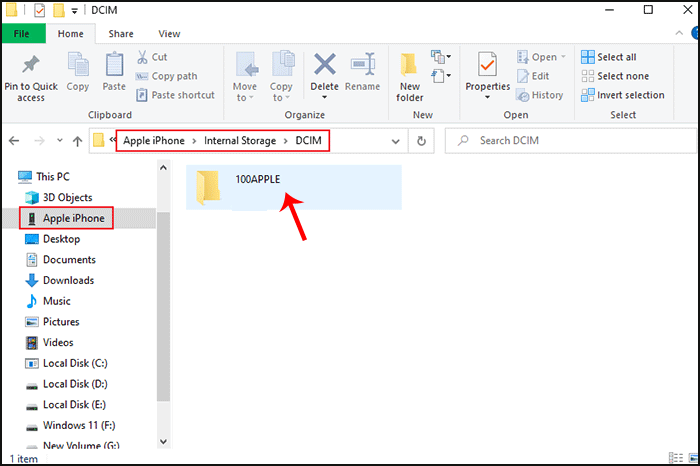
Step 3: Access the iPhone Photos via File Explorer
Open File Explorer on your Windows 10 laptop, and you'll find your iPhone listed as a connected device. Click Internal Storage > DCIM to locate your iPhone photos.
Method 2: Download Photos from iPhone iCloud Photos to Laptop
The iCloud provides an easy way to sync iPhone contacts, messages, photos, notes, calendars, etc. You can use iCloud to sync your photos wirelessly to the computer as long as you've backed up the photos on your iPhone to iCloud. Here's how to do it.
Step 1: You need to enable your iCloud Photos on your iPhone. Go to Settings>Photos>iCloud Photos.
Step 2: Launch the iCloud app on your Windows 10 laptop.
If there is no iCloud on your computer, you can access Microsoft Store from the Start menu and search for iCloud on it. From the search result, click the Get button and the iCloud will be downloaded to your computer soon.
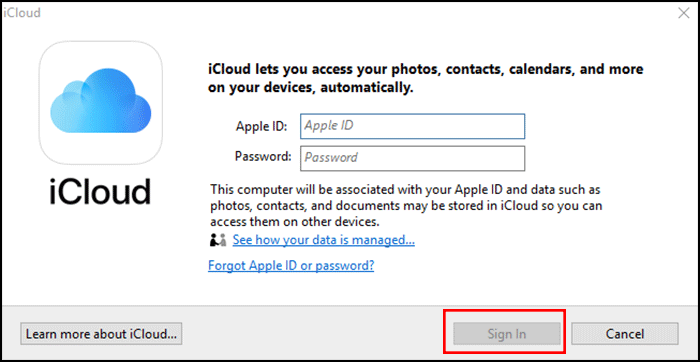
Step 3: Type in your Apple ID and Password. Click Sign in.
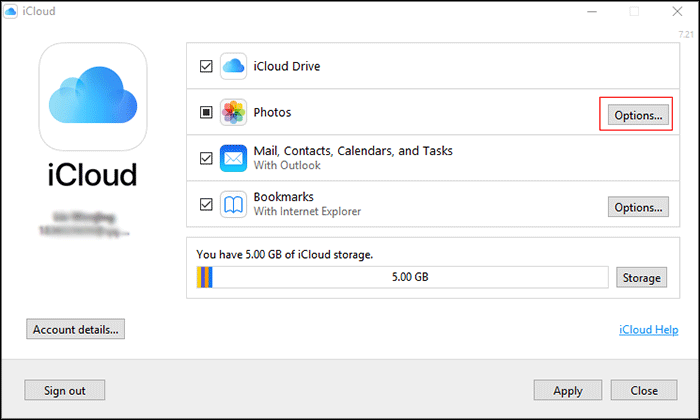
Step 4: Click the Options button next to Photos.
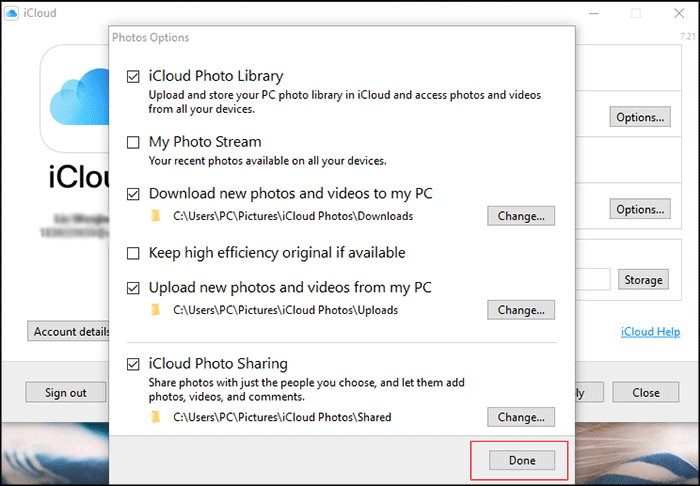
Step 5: You can click on these boxes according to your needs. Then click Done.
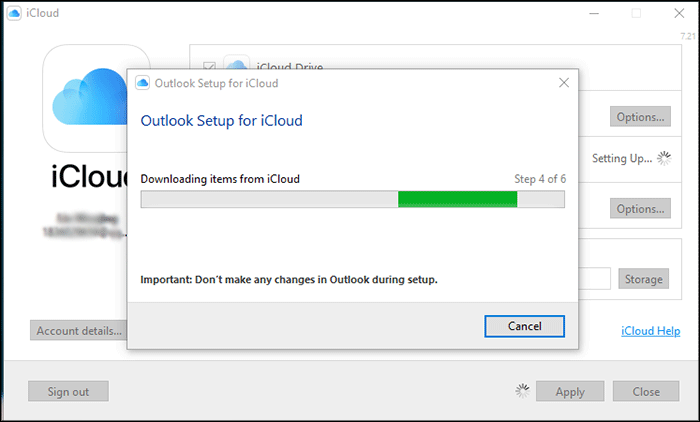
Step 6: Click Finish. Just wait a minute when downloading items from iCloud.
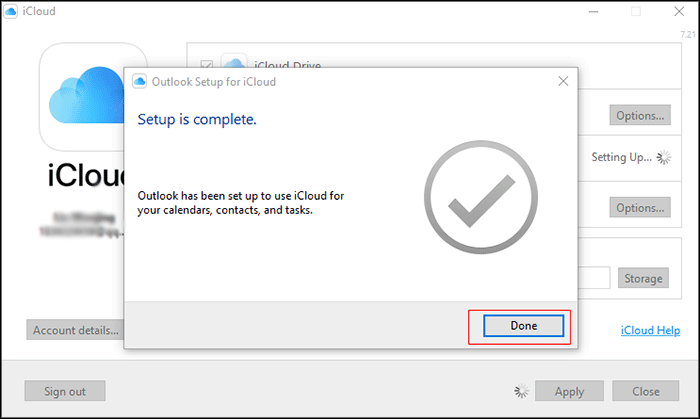
Step 7: After finishing it, you will see the Setup is complete peompt, then click Done.
Method 3: Transfer Photos from iPhone to Laptop with Third-party Software
There are several third-party apps that can facilitate photo transfers, such as iSyncGenius and iDevice Genius. These can be useful if you want more control or options during the transfer process.
How to Transfer Photos Using iSunshare iSyncGenius
If you want to transfer masss photos fron your iPhone to your Windows 10 PC easily, you can try this iPhone data backup software. It is easy to download the iSunshare iSyncGenius and sync your photos to computer.
The tool supports all models of Windows version computers. You can use it on HP/ Lenovo/ Dell/ Asus/ Acer/ Toshiba/ Philips computer to backup your photos, videos, contacts, and notes, and so on from your iPhone.
Step 1: Download and install iSunshare iSyncGenius, and then launch it.
Step 2: Connect your iPhone to your computer with a reliable USB cable.
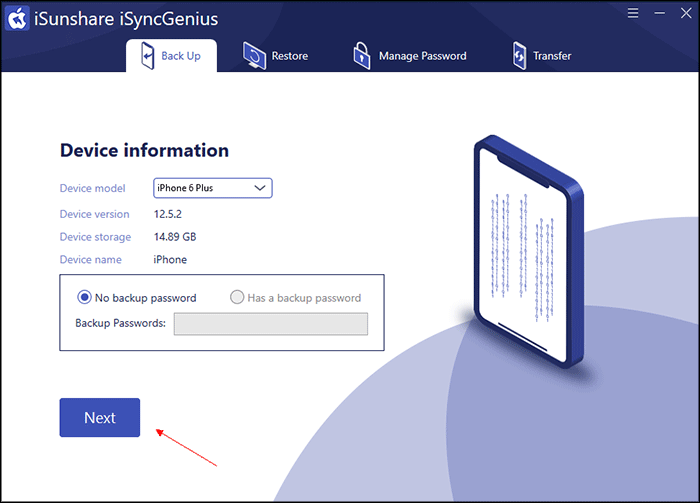
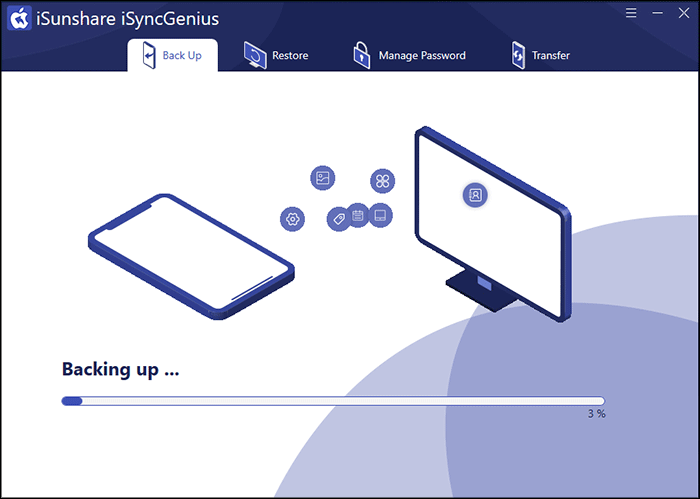
Step 3: Choose Back up and click Next.
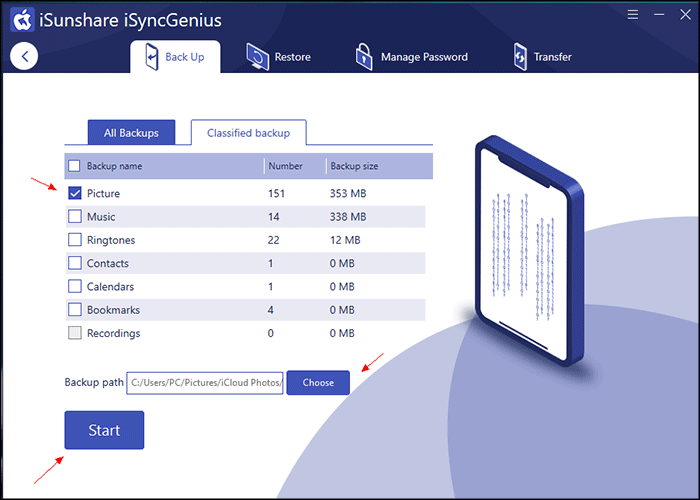
Step 4: Please choose Classified backup, it allows you to choose pictures that you want to transfer. Tick the Picture option and choose your backup path. Click Start.
Step 5: Just wait a minute until iSunshare iSyncGenius finishes backup.
Step 6: Please click Finished and your photos have been already transferred from your iPhone to your laptop on Windows 10 successfully.
Note: For your PC to recognize your iPhone, you should first install iTunes. This step by step guide will show you how to install iTunes:
Step 1: Please search for iTunes on Microsoft Store, then click Get.
Step 2: Then the iTunes will be downloaded on your PC, launch it.
Step 3: Please click Agree, then the iTunes software to be installed.
How to Transfer Photos Using iSunshare iDevice Genius
For transferring photos from iPhone to laptop Windows 10 according to the date, month or year, iSunshare iDevice Genius allows you to achieve it quickly. It can export photos to a computer to free up storage and speed up the iPhone within a short time. Let's see how it works now.
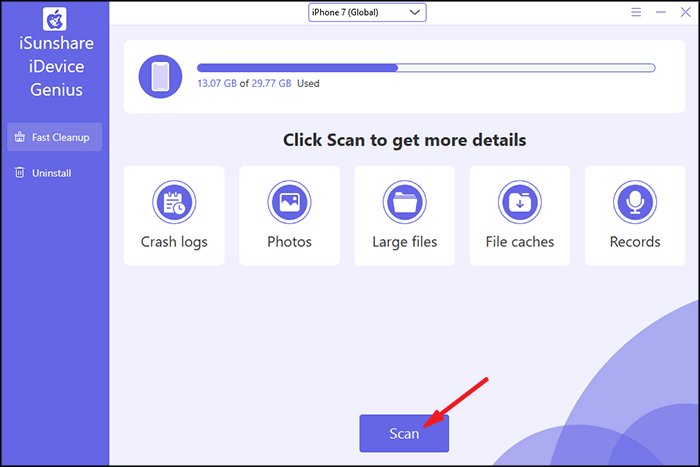
Step 1: Please download this software to your laptop Windows 10, launch it. Get your iPhone plugged into the mashine and then click the Scan option. If the device prompts that "Trust this computer", please tap "Trust".
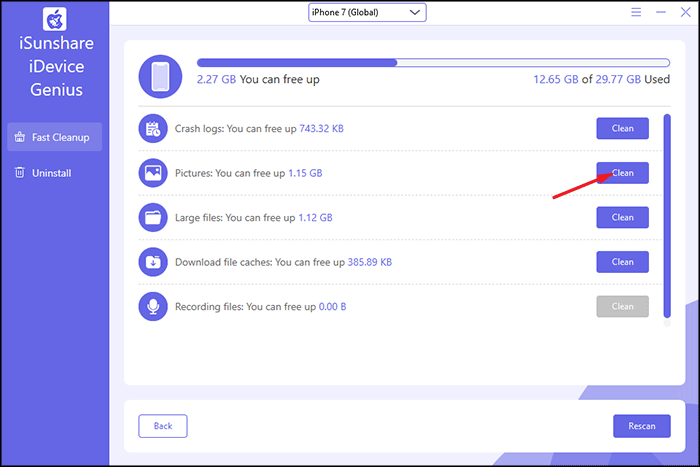
Step 2: Click on Clean next to the Pictures.
Step 3: In this step, you can click Check All to transfer all your pictures to the computer, or you can select some photos to the computer as required. You can classify the image you want to sync by year, month, or day. After selecting, please click the Export option to export your photos to your laptop Windows 10.
Step 4: Tap Yes when a prompt appears to indicate that your photos exported successfully. After that, you can see the picture you exported on your computer.
FAQs about Transferring iPhone Photos to Laptop
1. Is it possible to transfer photos from iPhone to Windows laptop without iTunes?
Yes, you can take advantage of Windows File Explore, iCloud photos or third-party software like iSyncGenius to finish the iPhone transfer.
2. Can I transfer HEIC photos from iPhone to the Windows computer?
Yes, of course. All above methods can help you. But you need to install a HEIC viewer or converter to open these files, as they aren't natively supported.
3. How to transfer photos from iPhone to laptop wirelessly?
If iCloud Photo is enabled on your iPhone, you can directly download iPhone photos from iCloud to your windows laptop, which does not need the USB cable.
Conclusions:
That it! Now, you can try all methods to transfer your photos from your iphone to your laptop on Windows 10 whether it'is Hp or Dell or Lenovo or Asus. Not only does this help free up space on your phone, but it also ensures your cherished memories are safely backed up and organized.