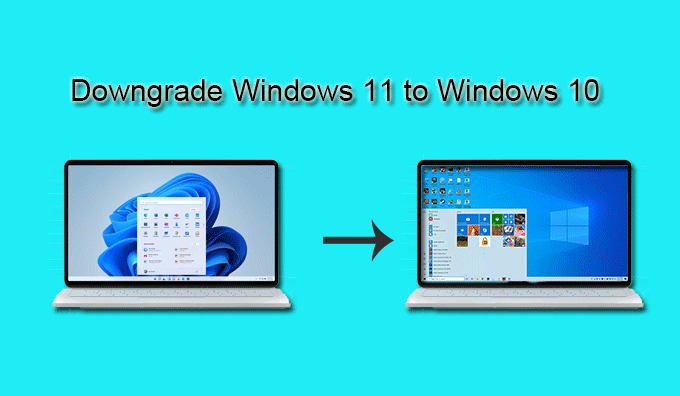
Windows 11 is the newly released operating system from Microsoft. And many Windows 10 users are eager to have a try for it is easy and free to upgrade from Windows 10 to Windows 11. There are many new features on Windows 11, which will bring the users a totally different user experience. However, some Windows 10 users are not used to the new system and want to roll back Windows 11 to the previous version. Is it possible for them to go back to Windows 10 from 11? Yes, you can learn 3 ways to downgrade Windows 11 to Windows 10 in the following content.
- Way 1—Downgrade Windows 11 to Windows 10 via Go Back Function in 10 Days
- Way 2 – Roll Back Windows 11 to Windows 10 via Clean Install after 10 days
- Way 3– Go Back to Windows 10 from Windows 11 via Previous System Backup
Way 1—Downgrade Windows 11 to Windows 10 via Go Back Function in 10 Days
Microsoft has taken this into consideration so that it allows users to go back to its previous version within 10 days of the upgrade. So, if you do not like the new Windows 11 system after the upgrade, you can go back to Windows 10 immediately. And you should know that there will be data loss after downgrading. It is better to back up the files you created after upgrading to Windows 11.
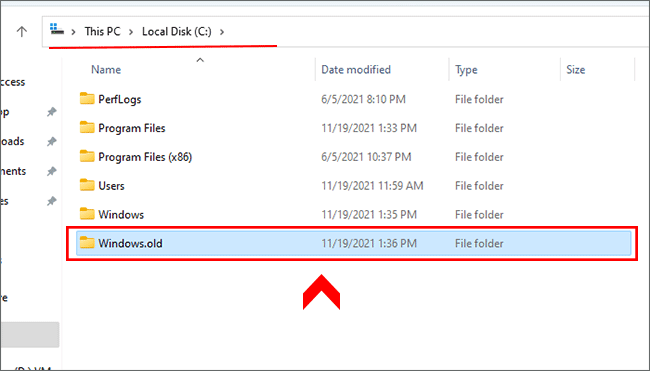
Before downgrading from Windows 11 to Windows 10, you should make sure that the previous Windows version file is saved on your Windows 11 computer. Just go to open This PC and then select Local Disk C drive. Now you can check whether there is a folder named Windows. Old. If you have such a folder, you can go ahead to go back to Windows 10 system.
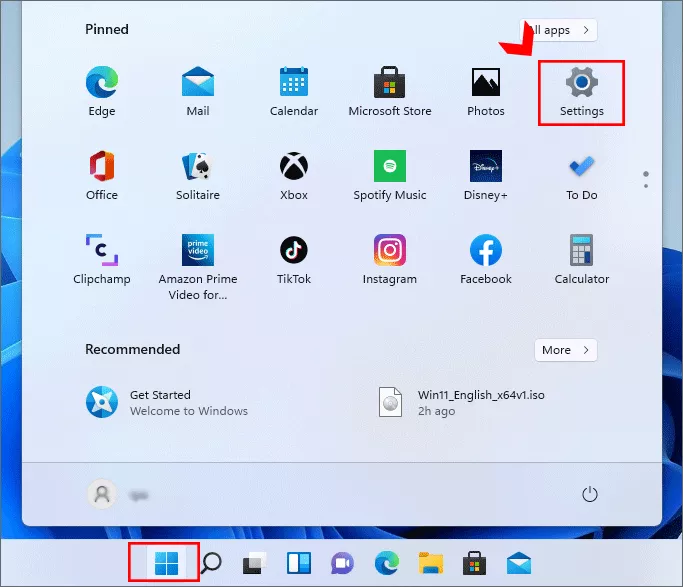
Step 1: On Windows 11 desktop, click the Windows icon and then choose Settings.
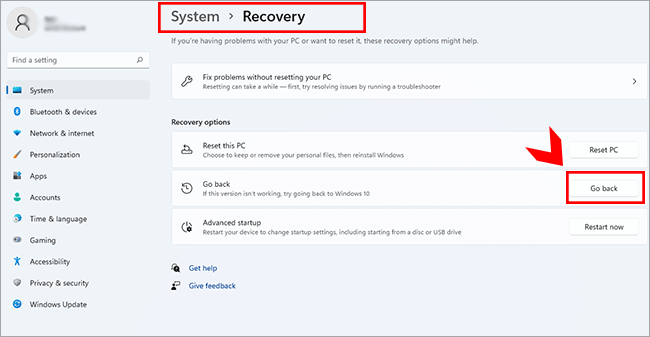
Step 2: Choose System > Recovery in the Windows setting interface. After that, you can click Go back option under Recovery options.
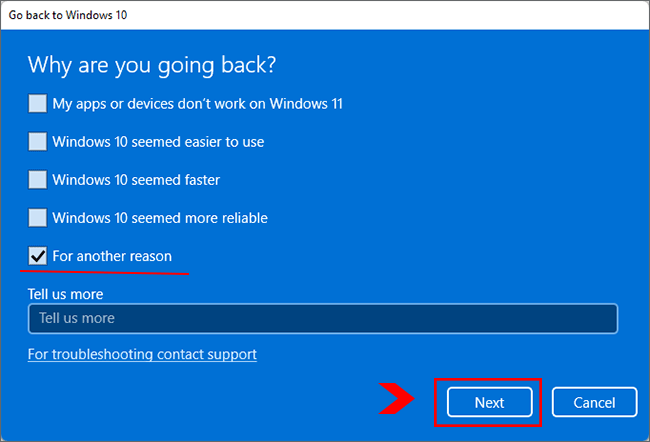
Step 3: At this time, you can check the reason why you want to go back to Windows 10. Afterward, click the Next button.
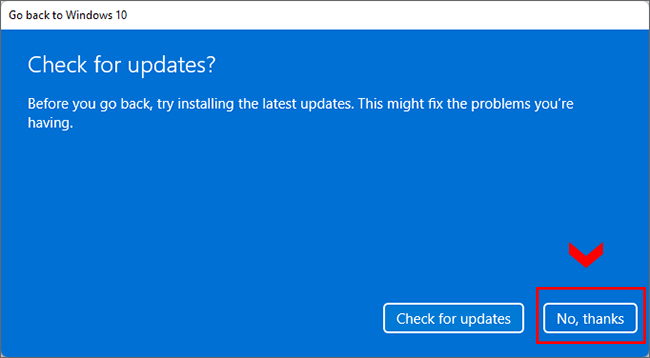
Step 4: When it asks you to check for updates, you can choose No, thanks option without hesitation if you make up your mind to roll back to Windows 10.
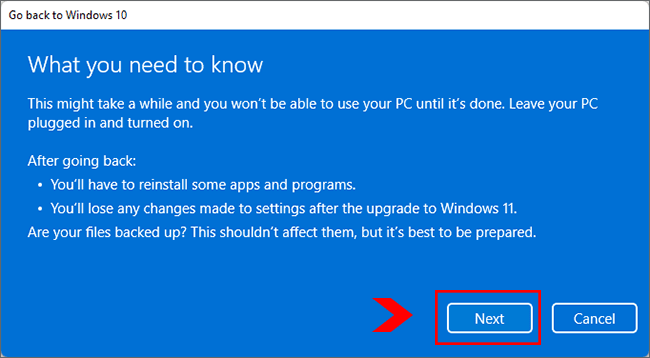
Step 5: Read the information and then click Next to continue.
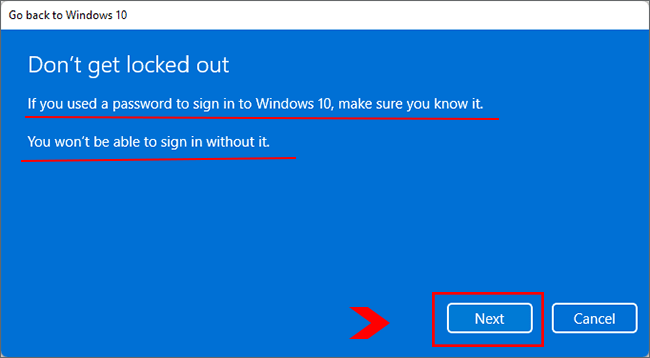
Step 6: This screen tells you to find out the Windows 10 login password in order not to lock out of Windows 10 if there is password protection. Then click Next to go ahead.
Step 7: At last, click Go back to Windows 10.

Wait patiently and you can see the system restarts and logs into Windows 10 systems.
Way 2 – Roll Back Windows 11 to Windows 10 via Clean Install after 10 days
If you want to roll back Windows 11 to Windows 10 after 10 days or the Go back function does not work for you, you can clean install Windows 10 from the Windows 10 installation media.
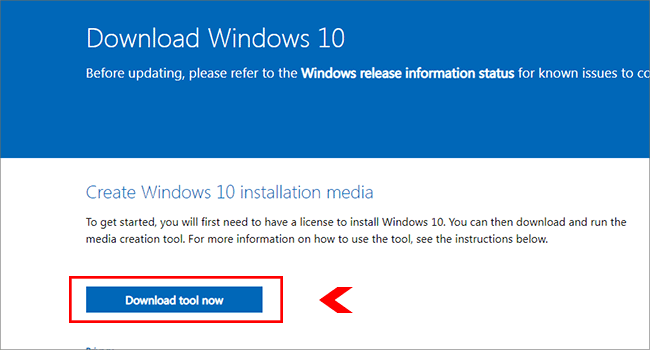
Step 1: Visit the Microsoft software download page and then download Windows 10 media creation tool.
Step 2: After downloading, run the media creation tool and then click Accept to agree on the Applicable notices and license terms.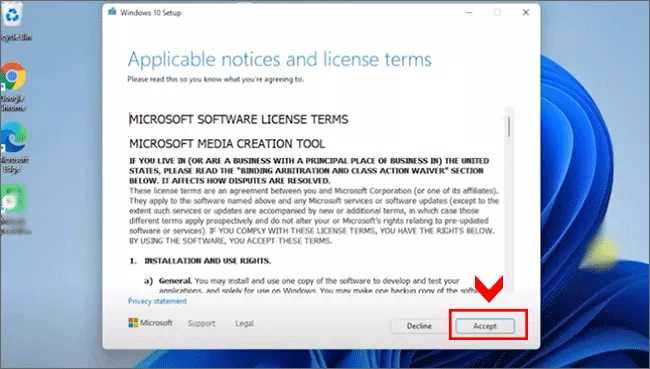
Step 3: Choose Upgrade this PC now option and then hit the Next button. After that, it will begin downloading Windows 10.

Step 4: When the download process ends, click Next and then Accept on the following screen.
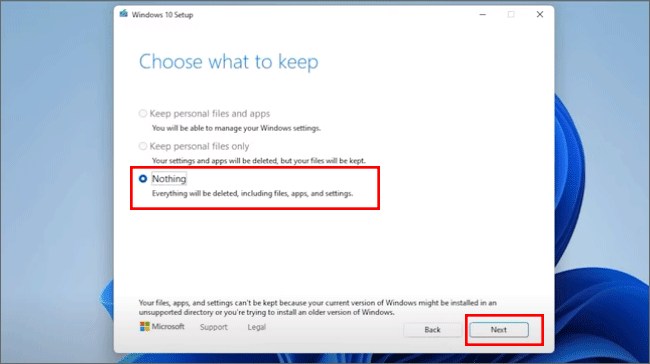
Step 5: When it comes to Choose what to keep option, choose Nothing and then click the Next button.
Step 6: Finally, click on Install to start the Windows 10 installation. Wait for minutes and you can get your Windows 11 back to the latest version of Windows 10.
Way 3– Go Back to Windows 10 from Windows 11 via Previous System Backup
If you are an iSunshare CloneGo user, there is a more reliable way for you to downgrade Windows 11 to Windows 10 without losing data. But you need to back up the Windows 10 operating system before upgrading to Windows 11.iSunshare CloneGo is the professional Windows backup and restore which allows you to backup and restore the Windows data completely without logging into the computer. Thus, if you have the Windows 10 OS backup before upgrading to Windows 11, you can downgrade Windows 11 to Windows 10 at any time you want without losing data.
Backup Windows 10 system before upgrading to Windows 11
Step 1: Launch iSunshare CloneGo and then click the Make Boot Disk option on the top right corner.
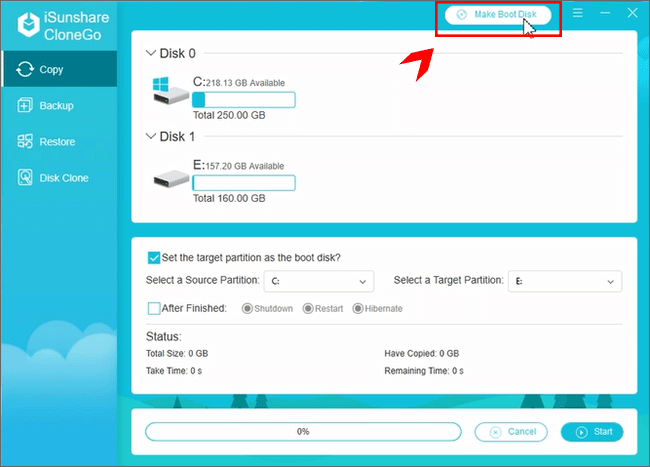
Step 2: Here two options are offered to make PE. You can select the one according to your situation.
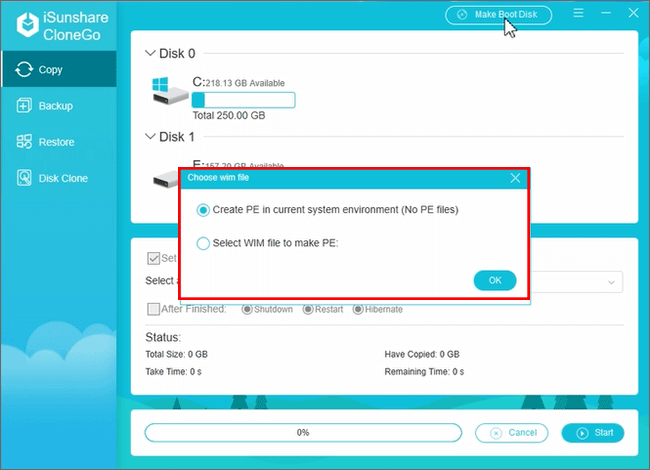
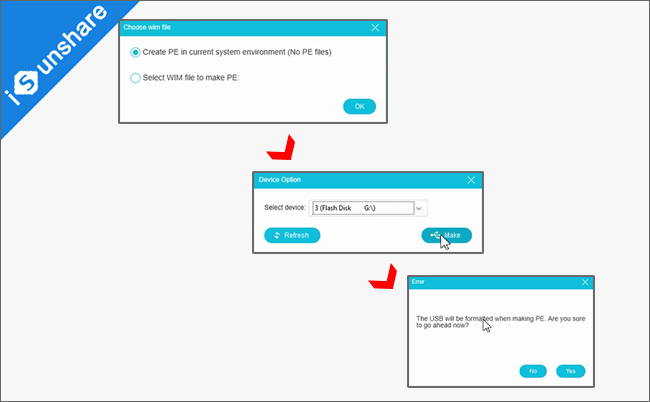
Option 1: Create PE in current system environment
You need to choose to Create PE in current system environment (No PE file) and then click the OK button. After that, select the USB device and click the Make button. It will pop out the formatting prompt and click the Yes button to continue. The PE is being generated and you just need to wait for the ending.
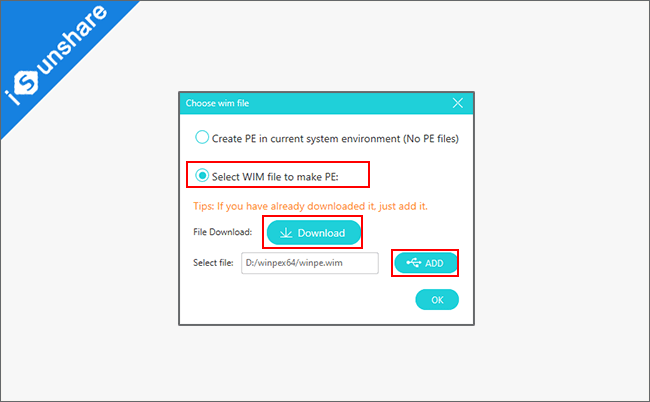
Option 2: Make PE with a WIM file.
Choose Select WIM file to make PE and then click the Download button. After the PE file is downloaded, you need to extract it on your computer. Next, click the Add button on iSunshare CloneGo screen and add the wim file you extract just now.
After that, you can select the USB and click the Make button. Yes, it will format the USB and you can click the Yes button to begin the PE production.
Step 3: Shut down your computer and then set it to boot from USB.
Step 4: Here iSunshare CloneGo is running and you need to choose the Backup option. Make sure the Windows system drive is selected to back up.
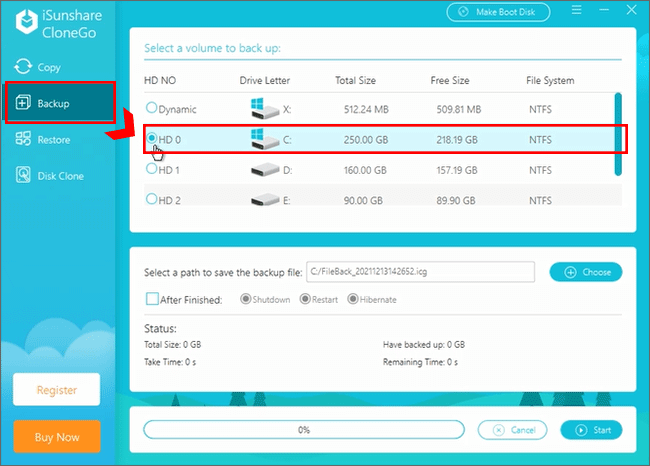
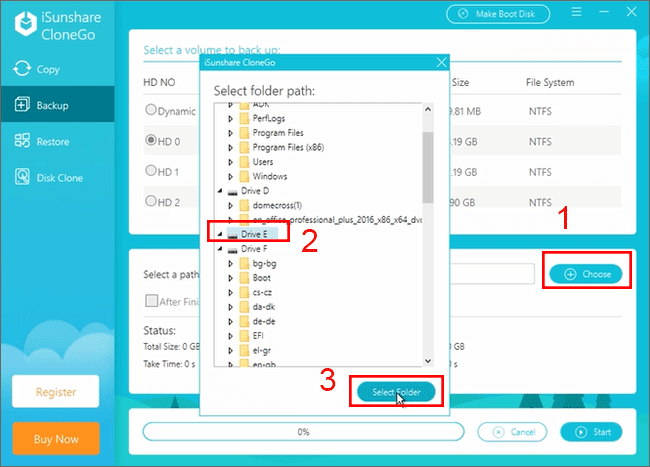
Step 5: Hit the Choose button and select a folder to save the backup file. It is better to keep the backup file in another partition. By the way, you need to keep this location in mind in case you need to restore this backup file.
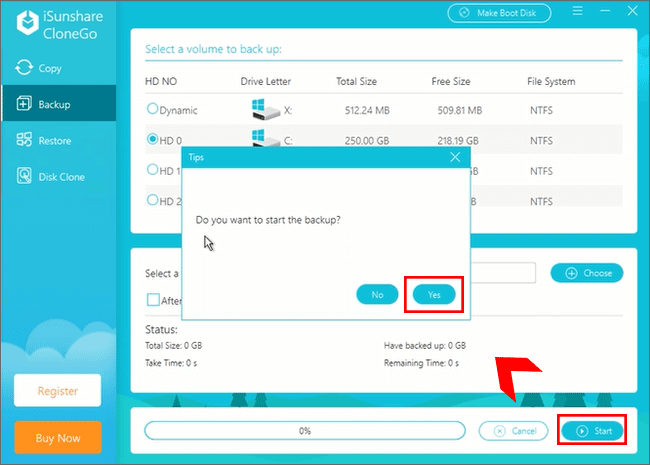
Step 6: Click the Start button and Yes button in the following prompt.
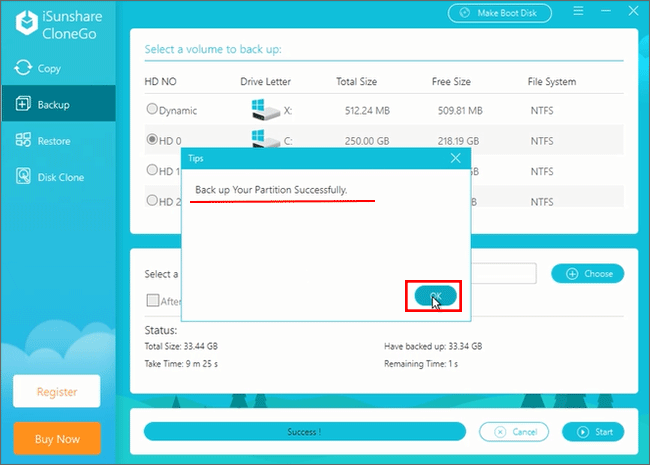
Minutes later, the backup is finished.
Revert Windows 11 to Windows 10 without losing data
If you do not want to use Windows 11 anymore and are going to downgrade it to the previous Windows 10, you can restore the previous Windows 10 backup in PE mode with iSunshare CloneGo.
Step 1: Boot the computer from a USB device and then iSunshare CloneGo is on.
Step 2: Click Restore and then go to choose the system drive as the restoration destination.
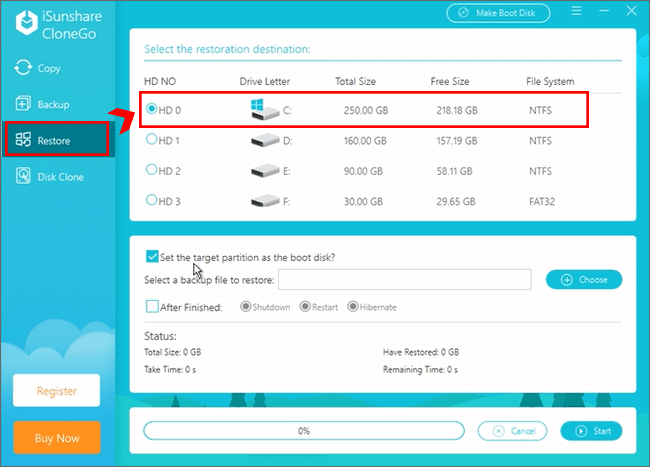
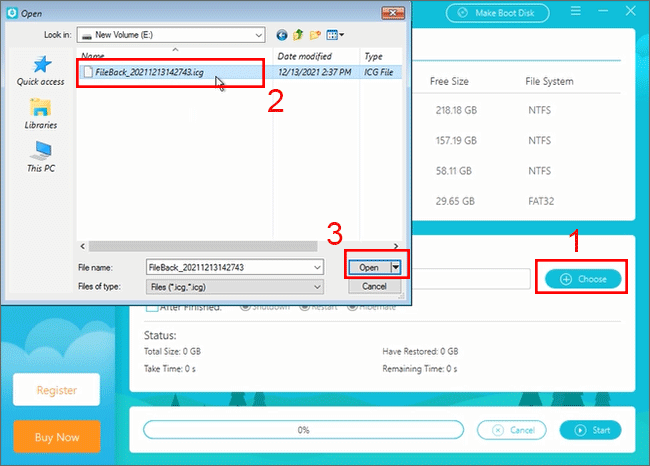
Step 3: Hit the Choose button and then import your previous Windows 10 OS backup file.
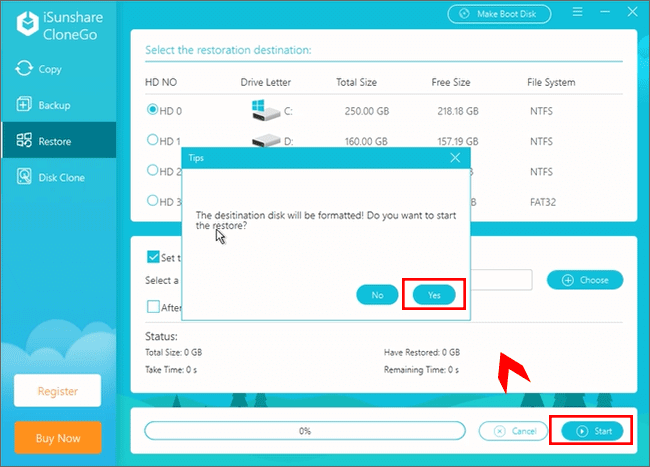
Step 4: Click the Start button and the formatting prompt comes. Just click the Yes button to restore the previous Windows 10 OS to Windows 11 computer.
When the process ends, you can plug out the USB device and then restart the computer. There is no doubt that you will enter the previous Windows 10 computer smoothly.
Tips: You can check details in the video tutorial: https://www.youtube.com/watch?v=F7rZzg7fYp4
Related Articles:
When I click to restart screen is black? For how long?
Which method do you use to downgrade Windows 11? In fact, It takes minutes to go through the black screen when you restart the computer.