We use cookies for personalizing content and ads and providing social media features. Your usage information on our website will be used for social media, advertising, and traffic analytics, or shared with our partners. Clicking "Accept" means you agree to use our cookies .
When you have many computers and only one available modem, but you just need more network routers so that others can connect to the internet through it, you maybe want to convert a laptop to a router, and now we talk about the way to convert a laptop to a router. The steps are shown in the under place.
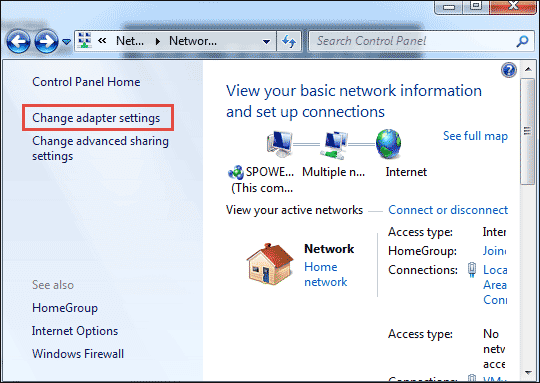
Open the Control Panel and click on Network and Sharing Center. Make sure you are in icon view and not category view. Click on Change adapter settings in the left-hand menu.
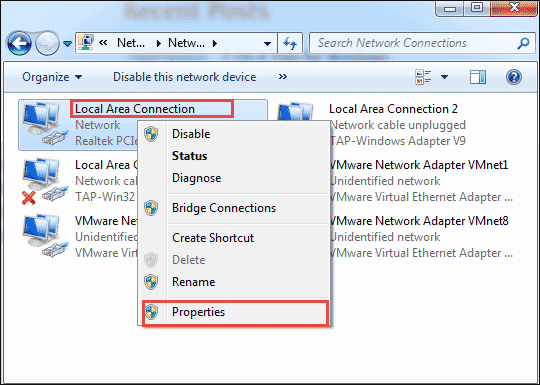
Right-click on Local Area Connection and choose Properties. Note that on some other sites state that you should right-click on Wireless Network Connection, but this would mean the wireless connection would be shared and all clients would have to connect via Ethernet.
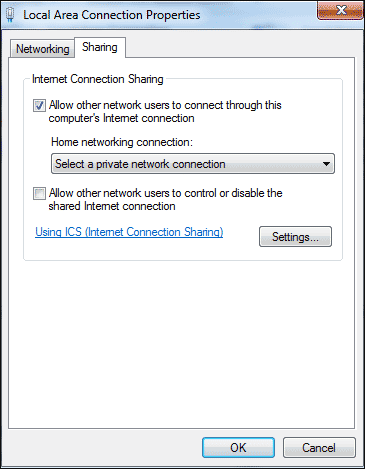
Click the Sharing tab and there is only one box labeled with the text: Allow other network users to connect through this computer's Internet connection. Then check the box.
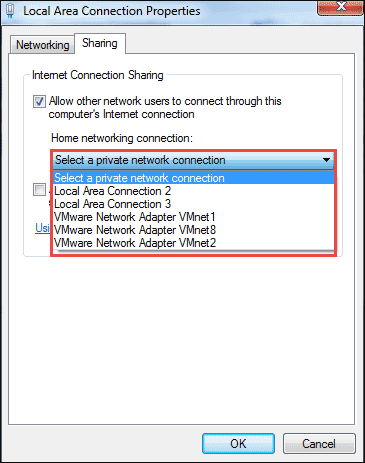
Go to the dropdown options bar under Home networking connection after you check the box. You can select the wireless network connection you like for your wireless card at here.
Click OK to close the properties window. After the above operations, a LAN connection will be created as a shared connection.
Step 2: Create a new ad-hoc wireless network
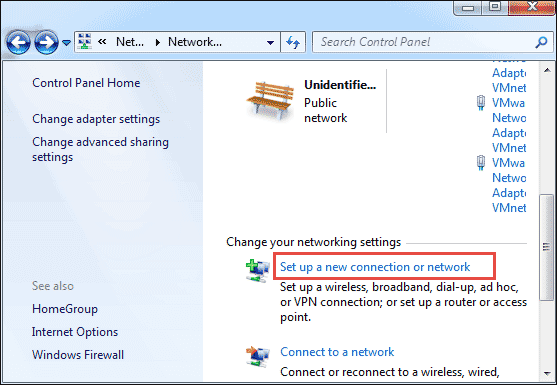
Go to Network and Sharing Center window, find and click the option called Set up a new connection or network.
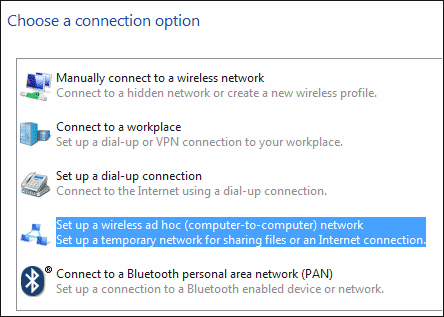
In the coming window, find and click the option called Setup a wireless ad-hoc (computer-to-computer) network.
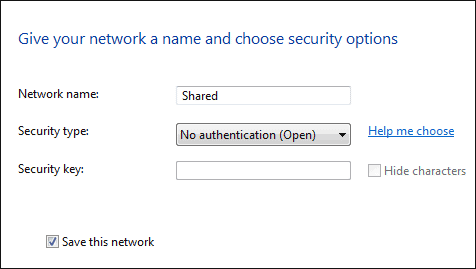
Click next and then name after your network.
Attention: This name will be the SSID for the network that other users will see on their computers. For Security type, choose None authentication and ignore the Security key textbox.
Last but not least, make sure to check the Save this network box. Click Next to finish this operation.
Step 3: Connect to shared network
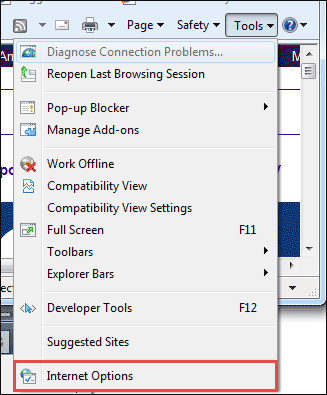
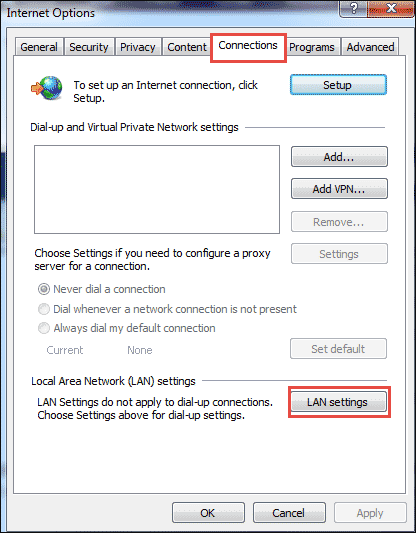
Find the shared network and choose it to connect. You should connect automatically without any issues. Open IE or any other browser that you currently use. Find and click the option called Internet Options which usually listed in the toolbar located in the right-top of the window.
Click on the Connections tab and then click LAN Settings.
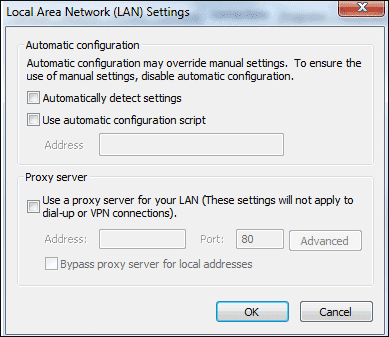
In the LAN settings window, the box called Automatically detect settings will likely be checked automatically, so make sure to uncheck this box. Then click OK.