We use cookies for personalizing content and ads and providing social media features. Your usage information on our website will be used for social media, advertising, and traffic analytics, or shared with our partners. Clicking "Accept" means you agree to use our cookies .
Sometimes the motherboard in your desktop PC is corrupted but you don't want to buy a new PC or just want to get a better experience by installing a new motherboard, what can you do? First, you should buy all essential components, then you can assemble these components together to make a PC with your ideas. The most important part of this process is installing a motherboard. We illustrate some steps of the assembling process.
How to Install a New Motherboard in Desktop PC
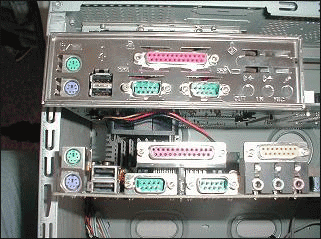
Step 1: Confirm the replacement motherboard will be compatible with the I/O shield.
You should compare the old motherboard with the replacement motherboard to see whether they have something physically in common. This comparison can help you avoid many troubles when installing the motherboard.
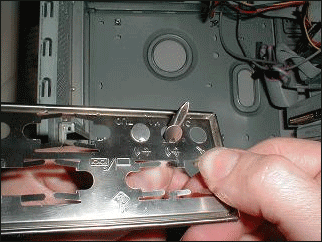
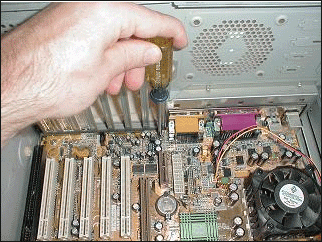
Step 2: Pop out tabs for proper use.
You should be careful when removing sharp pieces of tin of a flimsy shield. Screwdriver would be a recommended tool when you want to control the amount of force carefully. And if the shield has a prefabricated shape, you should just use a screwdriver to pop out the tabs over it.
Step 3: Install the I/O shield in the case after confirming that it is compatible with new I/O core.
Tips: You need to get the shield firmly fixed in place, otherwise, it will just slip when you're trying to align the motherboard ports and making installing the motherboard a pain.
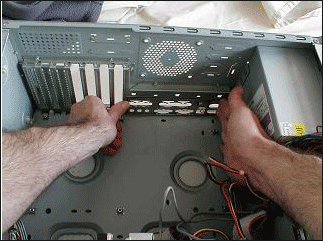
Step 4: Check the standoffs by standing motherboard in the case.
Put new motherboard in the case to check out whether the holes in the motherboard can be fixed with the standoffs in the case. Then you should count the number of standoffs before installing the motherboard and determine the number of screws that you use to secure the motherboard.
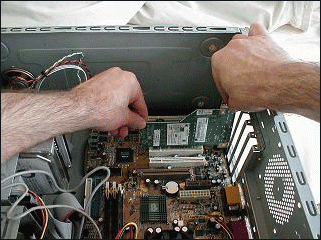
Step 5: Push the motherboard in the case and make sure it is fixed in place.
The motherboard is installed into the case, you should make sure the I/O core is properly aligned with the shield when pushing the ports through the openings and set the motherboard down on the standoffs.
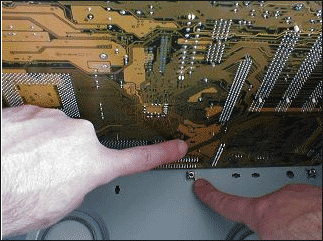
Step 6: Secure the motherboard with screws.
You should clear about what you are going to use every one of those screws to secure the motherboard. If there's a screw leftover when you're done, it means that there's a metal standoff that didn't end up under a hole in the motherboard. In case of that situation, you need to visually inspect the motherboard and the standoff locations. If you figure out the screw isn't being used, remove it.
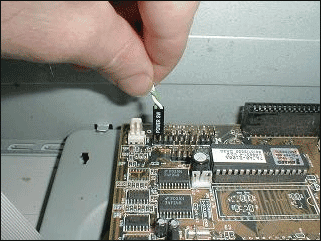
Step 7: Connect the power switch to the motherboard.
It is important to make the power switch connect to the motherboard. The switch normally labeled "PW SW" or "Power SW" and the motherboard will be labeled with "PW SW", "P-ON" "PW" or something similarly cryptic. You won't hurt anything if you attach the power switch to the wrong connector in the board, but you won't be able to get the PC to turn on either. Now nobody uses reset switches or keyboard locks anymore, most motherboards have a built-in piezoelectric speaker.
Step 8: Load the adapter back in the motherboard.
When loading the adapters back in, you should confirm that all of the adapters are compatible with the motherboard and load them one by one. If you were doing a serious motherboard upgrade, with PCI Express or AGP 8X video, you'd need a new video card as well.
Step 9: Secure the adapters with screws.
As soon as all the adapters are in place, secure them with a single hold down screw on the back rail. If you installed the adapters and secured them one at a time, you might have to loosen the screws up later in order to get another adapter to seat in the motherboard and make sure the adapters are seated in the motherboard properly when you're done.
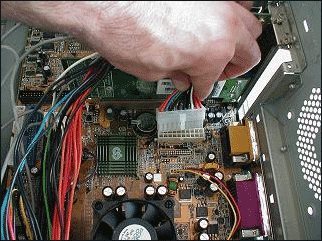
Step 10: Make an addition power supply in the motherboard.
Tips: Standard ATX motherboards all use the 20 pin ATX power connector, but newer motherboards for Pentium 4 and Athlon 64 will always require at least one more connection.
Step 11: Reconnect all drive cables.
Reconnect all the rest drive cables, power and data cables that you have removed from the old motherboard. The recent ATA ports are color coded for use with 80 wire cables and auto selecting master/slave on ATA drives. If you have serial ATA (SATA) drives, it's even easier, just one slim data cable per drive. And now after that, you have finished the process of installing a new motherboard.
Tips: You can buy all the necessary components in some websites like Ebay, Alibaba, Amazon, etc.