We use cookies for personalizing content and ads and providing social media features. Your usage information on our website will be used for social media, advertising, and traffic analytics, or shared with our partners. Clicking "Accept" means you agree to use our cookies .
Upgrading your PC's graphic card can improve your PC's performance with a world of differences. It can give you a fantastic experience when playing games or watching HD movies. Can't wait to upgrade new graphic card? We offer step-by-step guidelines to make sure you won't get stuck.
Steps on Upgrading Graphic Card in Desktop PC
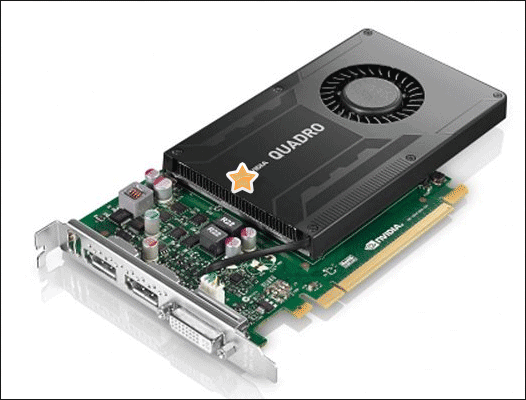
Step 1: Choose the right graphic card for your desktop PC
You have to first make sure the graphic card fits inside your PC case before buying it because some of them are different with the standard ones. In addition, the new graphic card should be confirmed that it will not block the existing cables or port in your PC. Last but not least, you should check the supply requirement of the new graphic card against your current power supply.
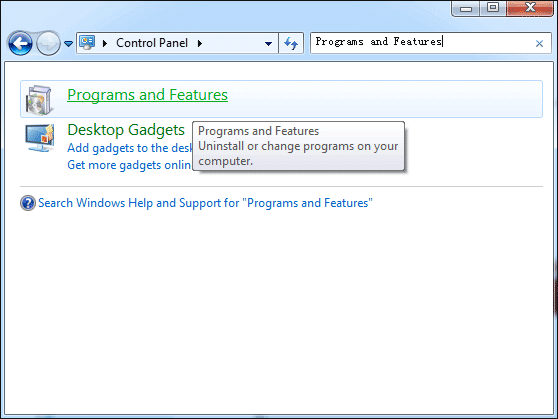
Step 2: Remove the existing graphic driver
Find Programs and Features
Open the Start Menu. Find Control Panel and click it, then type Programs and Features in the search bar located in the top-right of the window. You will find Programs and Features coming in the first line and click it.
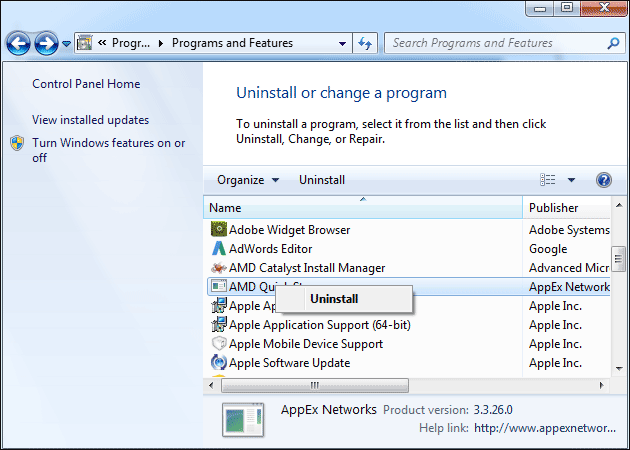
Find existing graphic driver and uninstall it
Then you will see the Programs and Features window, find entry beginning like ATI, NVIDIA, AMD. Right-Click it to begin the uninstallation.
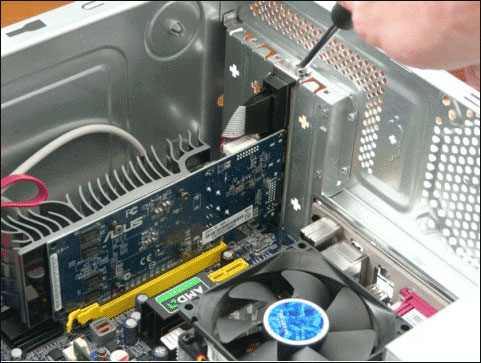
Step 3: Remove the existing graphic card
Be careful when removing the existing graphic card in case of the electricity. We recommend leaving your PC unplugged from the wall and switched off at the socket. Touch a bare metal part of the case to ground yourself.
Start by unplugging the monitor cable and any cables connecting the card to your motherboard in PC. Open up the case. First, if there are some cables connected to the existing graphic card which is plugged into the motherboard and you need to remove them separately. Next, remove any screws secure the graphics card to the case. Finally, pull the existing graphic card gently.
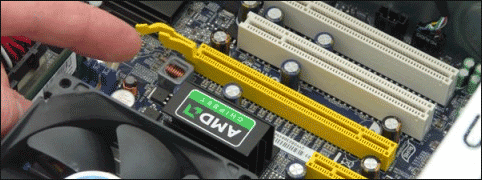
Step 4: Choose the right slot
You should clear which slot is fit for your new graphic card. If you're replacing an existing card, simply plug it into the slot left by the old card. If you're upgrading from integrated graphics to a dedicated card, you'll need to identify the correct slot. There is a thin blue or yellow long slot called a PCI-Express (or PCI-E) slot. If there's more than one, use the slot marked PCIE-X16 on the motherboard.
Step 5: Load new graphic card
Press the new card gently and firmly into the PCI-E slot. If there's a latch, it should click into place when the card is fitted correctly. Reconnect all essential cables to the motherboard, making sure they don't interfere with any cooling fans, then secure the card to the case with screws. Finally, plug the monitor cable into the correct port on the new graphics card. Carefully place the cover back on your PC.
Step 6: Power up and set up
Start your PC. You would find the Windows boot normally, and your new graphics card should be detected. Don't panic if the screen appears rather large and cramped because it will be improved once the drivers are installed.
Tip: Windows is able to locate and install the required drivers automatically. If not, insert the driver CD or run the setup file you downloaded to install the drivers manually. Once done, restart your PC to complete the installation. You can buy all the necessary components in some websites like Ebay, Alibaba, Amazon, etc.