We use cookies for personalizing content and ads and providing social media features. Your usage information on our website will be used for social media, advertising, and traffic analytics, or shared with our partners. Clicking "Accept" means you agree to use our cookies .
Windows 10 allows users to customize how many lines are scrolled when using the mouse wheel. This can enhance navigation efficiency, especially when dealing with lengthy documents or web pages.
Way 1: Choose the number of lines to scroll each time in PC settings.
Step 3: Click Mouse from the sidebar, and select "Multiple lines at a time" under Roll the mouse wheel to scroll section. After that, you can roll the mouse wheel to scroll multiple lines at a time.
Step 4: Move the slider to choose the number of lines to scroll per notch.
Tips: If you want to roll the mouse wheel to scroll one screen at a time, you can select One screen at a time option from the drop-down menu under Roll the mouse wheel to scroll section.
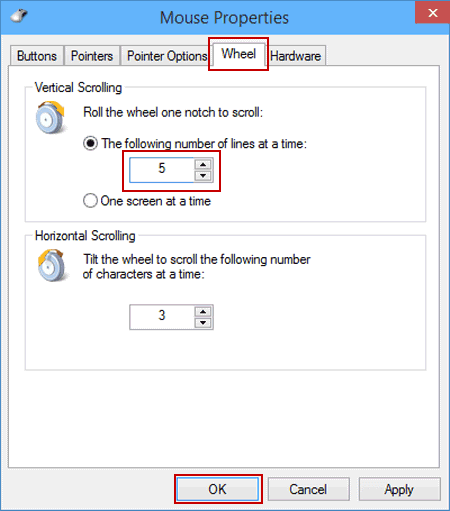
Way 2: Choose the number of lines to scroll each time in Mouse Properties.
Step 1: Press Window key + R key, then input main.cpl and press Enter to open Mouse Properties.
Step 2: Select Wheel, choose or manually change the number of lines in the Vertical Scrolling settings and tap OK. You can also set the wheel to scroll one screen at a time by ticking the One screen at a time option.