We use cookies for personalizing content and ads and providing social media features. Your usage information on our website will be used for social media, advertising, and traffic analytics, or shared with our partners. Clicking "Accept" means you agree to use our cookies .
"Low Disk Space" warning will appear at the right side of your Windows taskbar from time to time when a certain partition on your computer is going to run out of free disk space. This notification reminds you that you are running out of disk space or you are running very low on disk space, check if you can free space on this drive. As this message pops up very frequently, it is really annoying. Here you'll learn how to disable "Low Disk Space" warning in Windows 10.
"Low Disk Space" is a warning notification appearing in the Windows operating system at times which prompts users that the free space of a hard drive is going to be run out, followed by is a link where you can see if you can free space on this drive. After you see "Low Disk Space" message, you should take some actions to clean up the corresponding partition such as deleting some old or unnecessary files or removing them to other drives with enough storage space. There are several degrees of this warning respectively when free space less than 200 MB, 80 MB, 50 MB and no space remaining:
You are running out of disk space on [drive]
You are running very low on disk space on [drive]
You are running very low on disk space on [drive]
You have run out of disk space on [drive]
The notification is the same when free space less than 80 MB and 50 MB, but the less free space, the more frequently this warning appears and longer times the message stays. So is there any way to turn off Low Disk Space warning in Windows 10? Actually you can disable it through Windows Registry.
Part 2: How to Disable Low Disk Space Warning in Windows 10
How to make Windows 10 stop Low Disk Space warning? Look at here and implement this operation as per the below instructions:
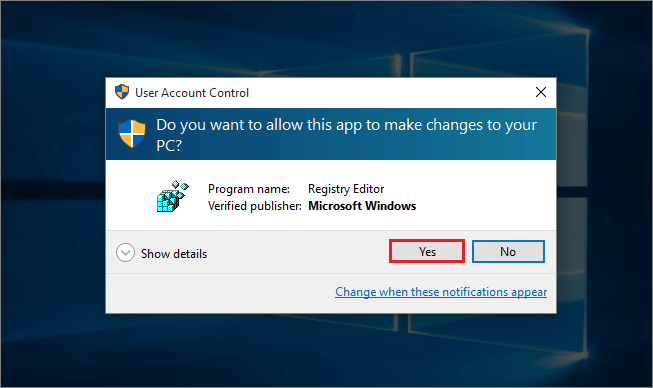
Step 1: Launch the Registry Editor.
You can type regedit in the Start menu search box, double click it and tap Yes in the popup window to allow Registry Editor to make changes to your PC.
Step 2: Navigate to the following registry key in the Registry Editor panel: Computer>HKEY_CURRENT_USER
>Software>Microsoft>
Windows>CurrentVersion
>Policies>Explorer
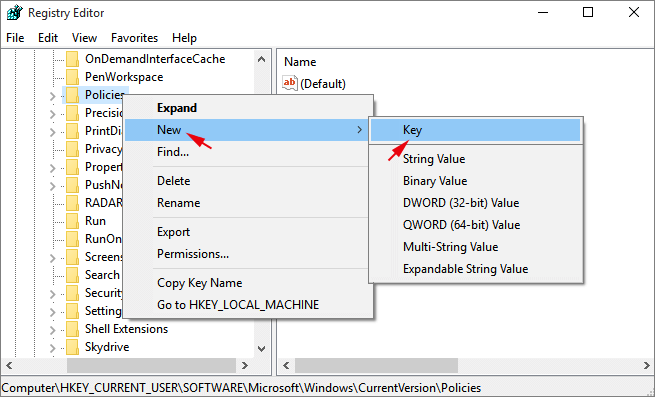
What if there is no Explorer key under the Policies key? Create it manually! Right click Policies, click New>Key, and then rename the new key to Explorer.
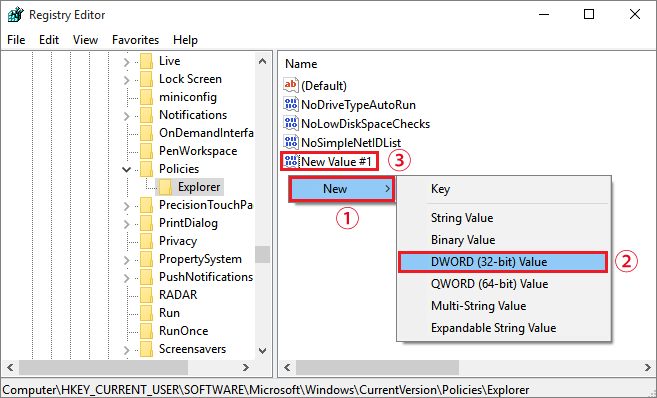
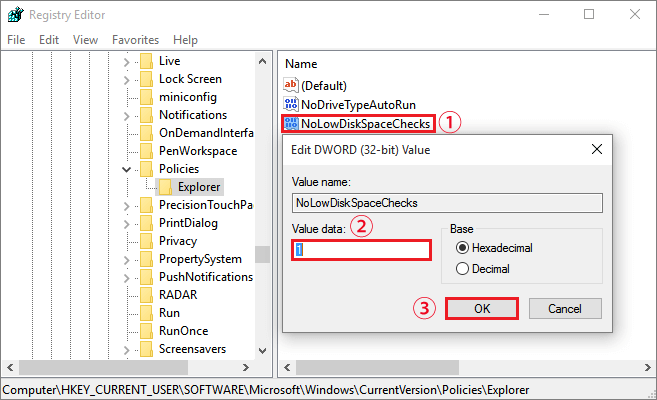
Step 3: Double click to open Explorer, right click a blank space with your mouse on the right ribbon and click New>DWORD (32-bit) Value. And it will be named New Value #1 by default.
Step 4: Rename new DWORD Value from the default name to NoLowDiskSpaceChecks. Double click it and then change the Value data from 0 to 1. Then click OK to save changes.
Step 5: Then you can close Registery Editor. You need to restart your computer for the new DWORD value to take effect. The above steps will help you disable Low Disk Space warning in Windows 10.
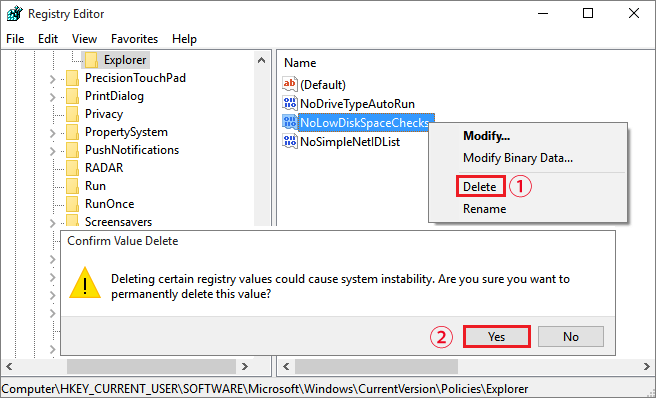
Now you know how to get rid of Low Disk Space warning in Windows 10. But if you want to re-enable Low Disk Space warning, go back to the location in Registry Editor, right click the NoLowDiscSpaceChecks value and then choose delete and verify to remove it.
Bonus Tips: How to Fix Low Disk Space without Disabling Alerts
Disabling alerts doesn't free up space. Thus, you can manage your storage to make such warning alerts not appear. How can you free up space on the specific drive? You can get the tutorial below.
Option 1: Extend the Low Disk Drive
This is the direct way to make the low disk space warning disappear. You can allocate the available space to extend the drive with large space. But you need to make sure this is unallocated space in your disk. For detailed tutorial: How to Resize or Extend Partition in Windows.
Option 2: Upgrade the Low Disk Drive to a Larger Disk
If you do not want to get a larger disk, it makes sense to manage the drive space. You can move the large files to external drives or OneDrive to release more available space. Of course, it is useful to remove the duplicate files.