We use cookies for personalizing content and ads and providing social media features. Your usage information on our website will be used for social media, advertising, and traffic analytics, or shared with our partners. Clicking "Accept" means you agree to use our cookies .
If you want to install Windows 11and do not want to give up the current Windows 7 OS, you can keep both these two Oss on your PC. But most Windows 7 does not meet the requirements to run Windows 11. How to dual boot Windows 11 and Windows 7 bypass TPM and secure boot? You can learn two effective ways to install Windows 11 on Windows 7 computer and make it dual boot.
In this method, you need to get Windows 11 ISO image file downloaded, 7 zip tool and DISM tool installed on your computer in advance. You can search online to download it from reliable website.
Step 1: Create a Virtual Hard Disk for Windows 11 on Windows 7 PC.
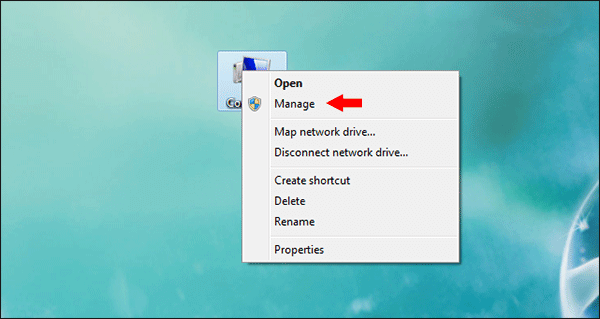
1. Right-click the Computer icon and choose the Manage option to access Disk Management.
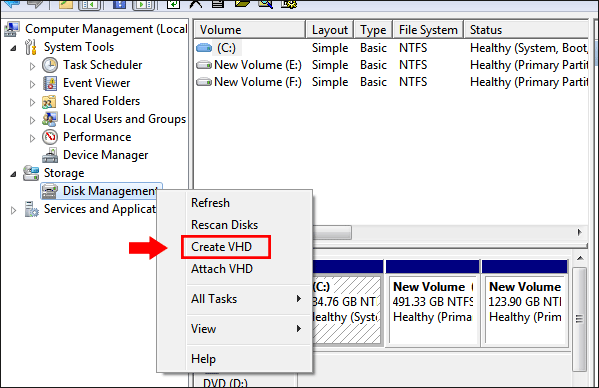
2. Right-click Disk Management and hit on Create VHD. Then the Create and Attach Virtual Hard Disk window comes.
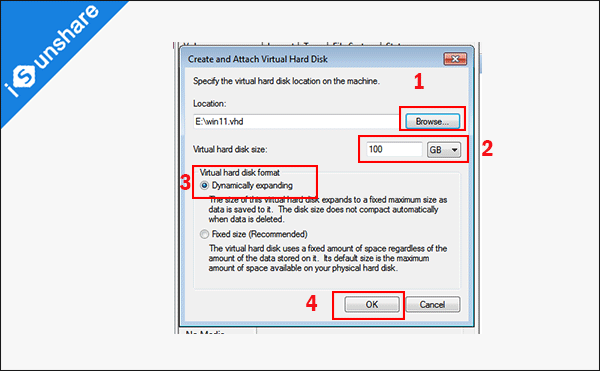
3. Click the Browse button to specify the location to store VHD files. After that, set the virtual hard disk size to 100GB. Finally, choose the Dynamically expanding option and click the OK button to create the VHD.
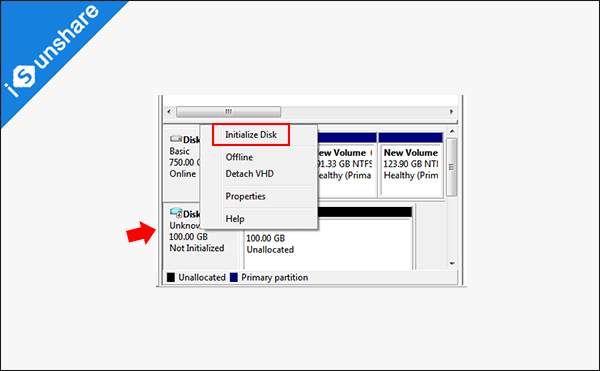
4. Now, you can see the VDH is created. You can right-click it and choose Initialize Disk to initialize it.
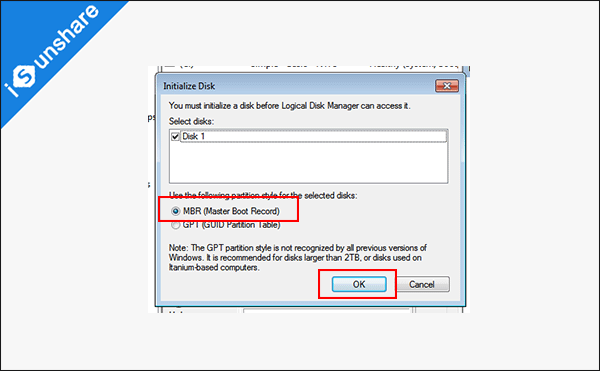
5. Set the partition style to MBR and click OK to finish the initialization.
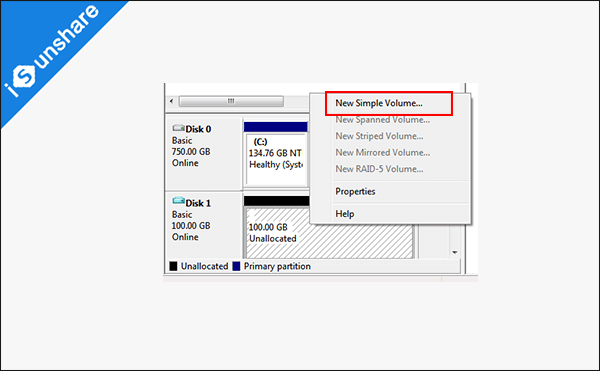
6. Right click the unallocated space on this disk and choose New Simple Volume. Then you can follow the New Simple Volume Wizard to create new volume for this VHD.
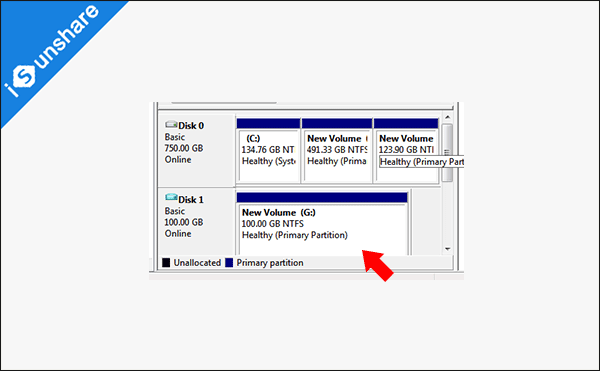
7. The VHD with new volume is created.
Step 2: Apply Windows 11 ISO Image to VHD
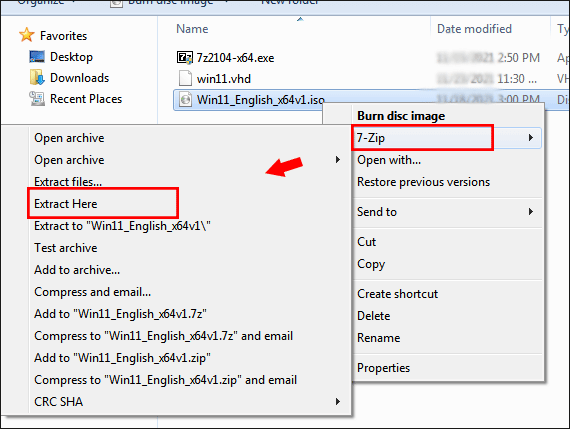
1. Go to where the Windows 11 ISO image file lies. Right-click the ISO file and choose 7-Zip > Extract Here to extract the ISO file to your current folder.
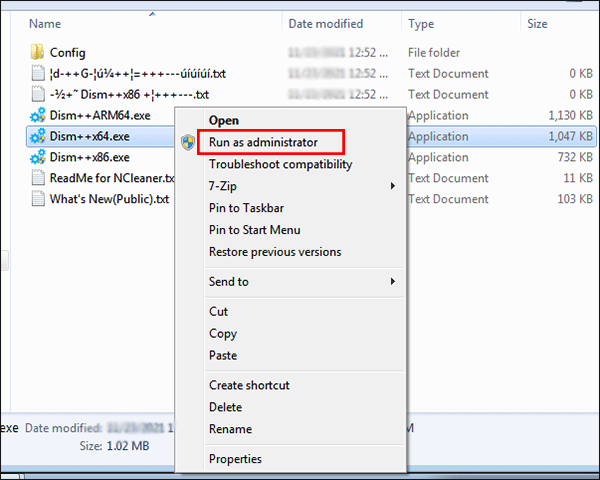
2. Run the DISM ++x64 program as the administrator.
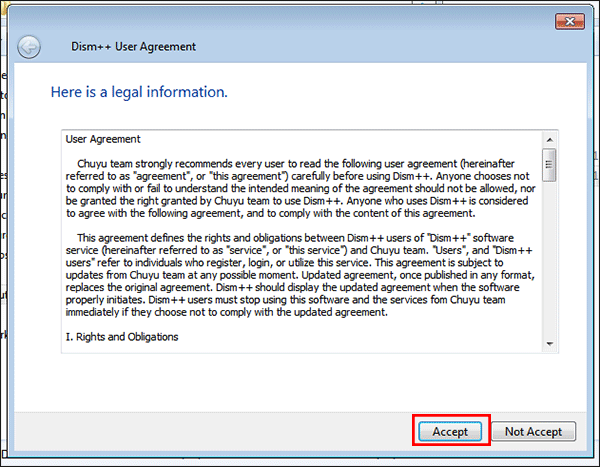
3. Accept the User Agreement.
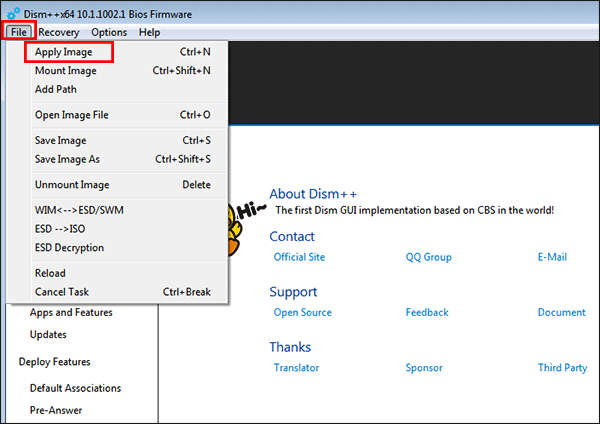
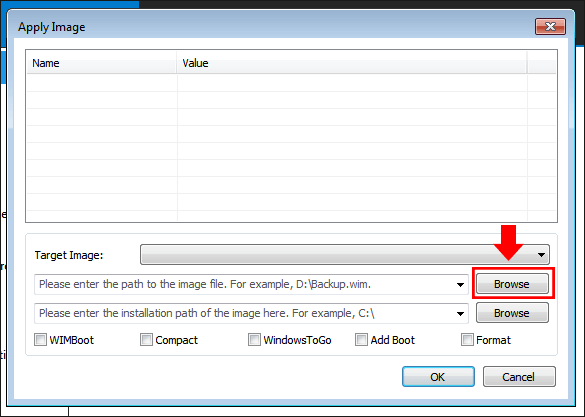
4. Click File > Apply Image option from Dism program top menu.
5. Click the first Browse button to add the install.wim file which is extracted from Windows 11 ISO file.
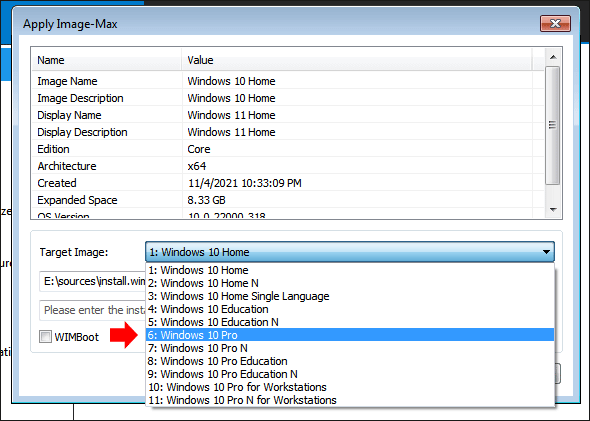
6. After that, select the Windows 11 edition from Target Image drop-down menu. Because this Dism ++ version has not updated Windows 11 option, so you can just see the Windows 10 version. It is OK and you will install Windows 11 corresponding version in the end.
7. Click the second browse button and then select the VHD volume as the destination. After that, check Add Boot option and click the OK button.
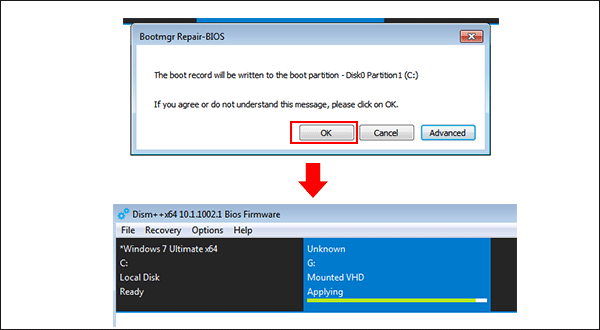
8. Click the OK button in the pop-out Bootmgr Repair-BIOS box. After that, the install.wim file is applying to your VHD volume.
Step 3: Check whether Windows 11 is added to boot menu and install Windows 11
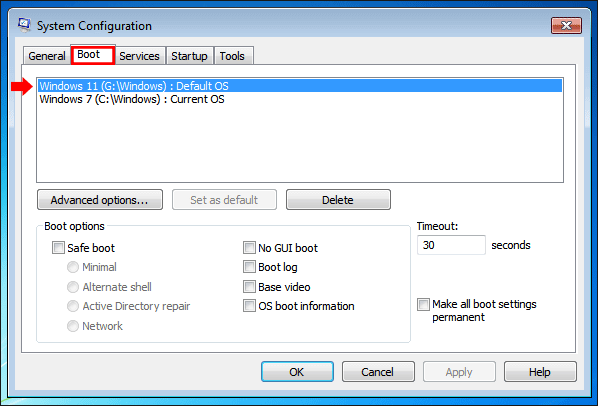
1. Press Windows and R key on your keyboard and then enter msconfig to access System Configuration.
2. Check whether there is Windows 11 option under the Boot tab.
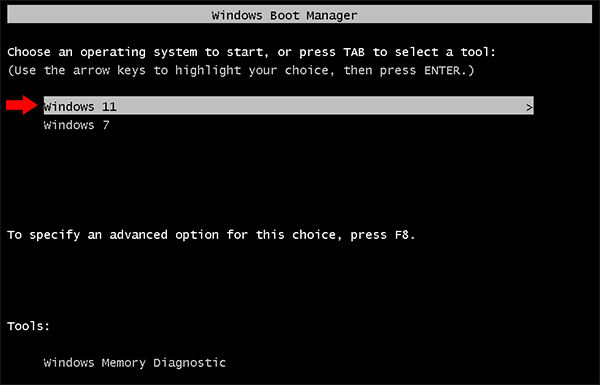
3. Restart the computer and then choose Windows 11 to boot.
4. Wait for minutes and then follow the guide to set up Windows 11 on your computer.
Tips: If you want to boot from Windows 7, you can restart the computer and then choose Windows 7 to boot. Then you can enter your working Windows 7 operating system again.
Way 2—Make Dual Boot Windows 11 and Windows 7 with Rufus
In this process, you need to download Windows 11 ISO image file and Rufus program ahead of time.
Step 1: Create a new partition for Windows 11
1. On your Window 7 computer, right-click Computer icon and then select Manage option.
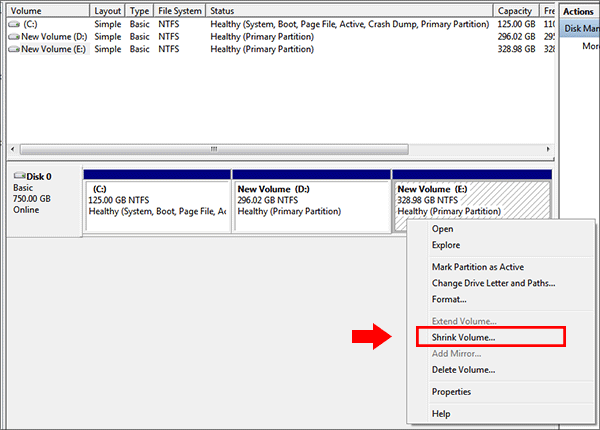
2. In Computer Management interface, click Disk Management and then choose a volume that has some extra space on it. Right-click the volume and choose Shrink Volume. (Tips: If you have unallocated space in the disk, you can also right-click and choose New Simple Volume to make the partition for Windows 11.)
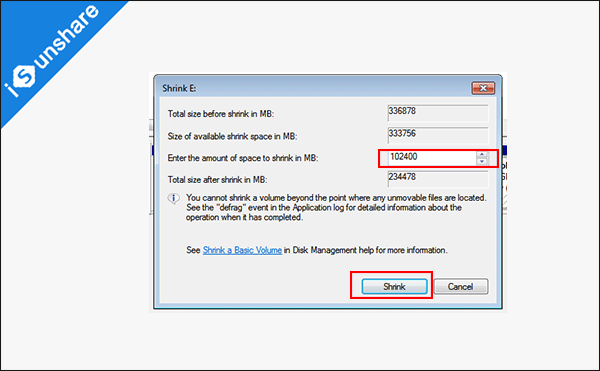
3. Set 102400 MB space to shrink. The amount of space to shrink is at least 20GB. You can set it according to your hard disk capacity.
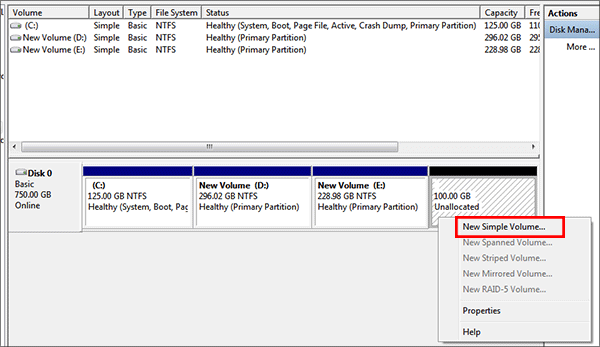
4. After that, you can see there is 100GB unallocated space. Right-click it and choose New Simple Volume. Then follow the New Simple Volume Wizard to create a new partition.
Step 2: Create the Windows 11 bootable USB with Rufus.
1. Plug the USB flash drive into your computer.
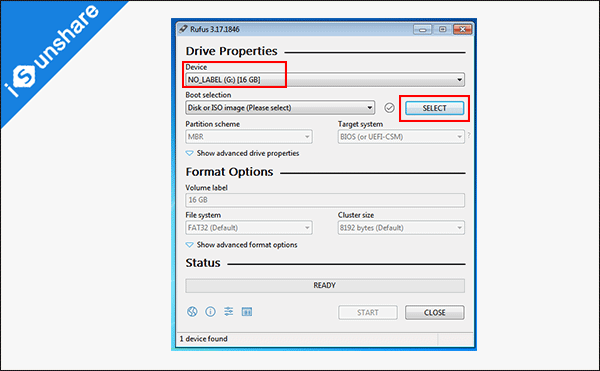
2. Open Rufus and you can check the USB flash drive is detected on the Device box. After that, click the Select button to open your downloaded Windows 11 ISO image file.
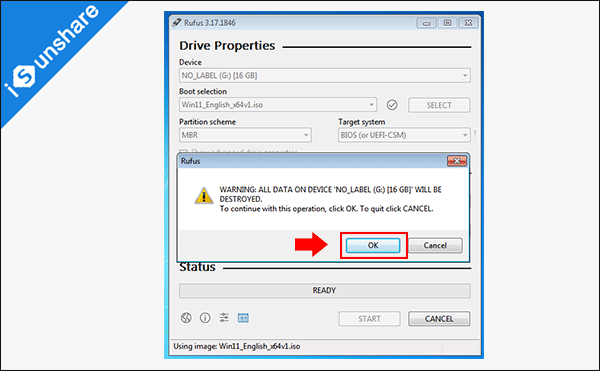
3.Change the partition scheme to MBR. Next, click the Start button.
4. The warning box comes out. Click the OK button to format the USB flash drive.
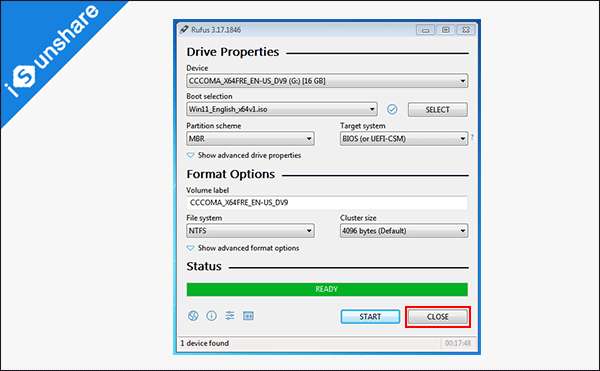
5. The bootable USB is burning. You just need to wait it to the ending. Finally, click the Close button.
Step 3: Add reg file to USB flash drive
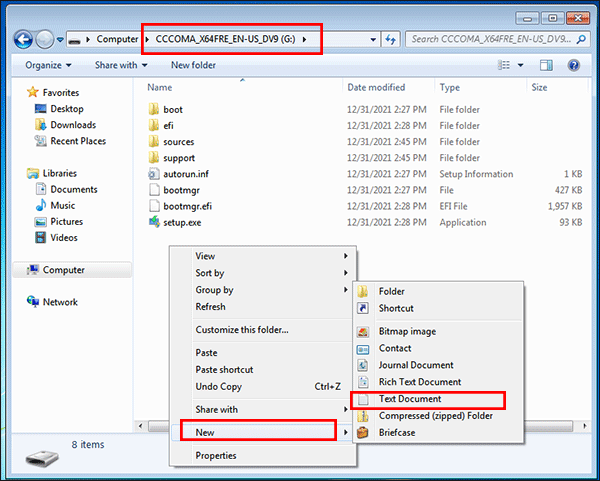
1. Open the bootable USB drive you created with Rufus and then right-click the blank space. Choose New > Text Document to create a new TXT document on it.
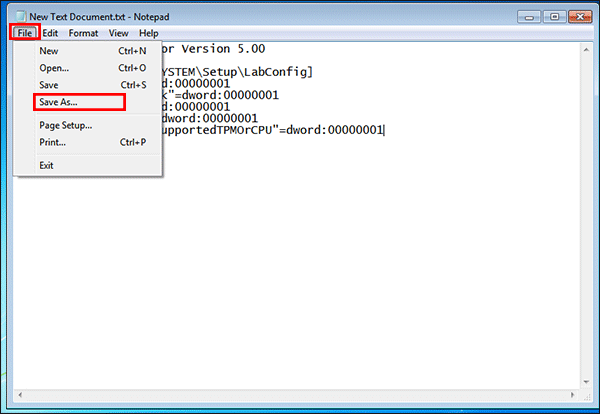
2. Open the New Text Document and then copy the following commands to it.
Windows Registry Editor Version 5.00

[HKEY_LOCAL_MACHINE\SYSTEM\Setup\LabConfig]
"BypassTPMCheck"=dword:00000001
"BypassSecureBootCheck"=dword:00000001
"BypassRAMCheck"=dword:00000001
"BypassStorageCheck"=dword:00000001
"AllowUpgradesWithUnsupportedTPMOrCPU"=dword:00000001
3.Click the File and then choose Save As… option.
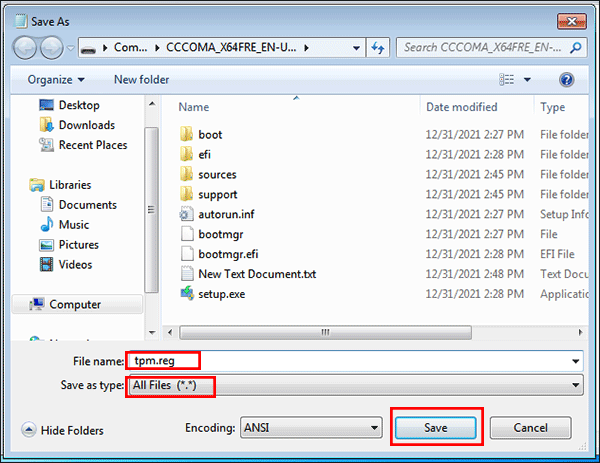
4. Rename the file as tpm.reg and change the save type to All Files. After that, click the Save button.
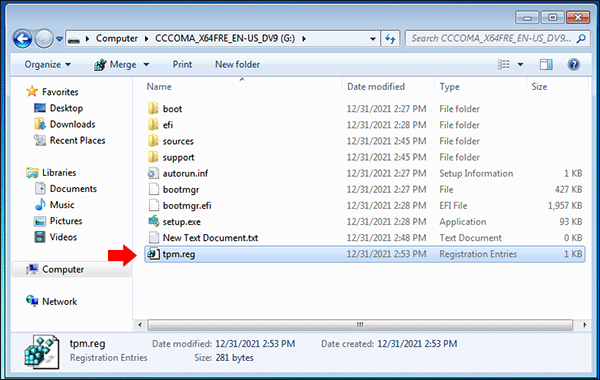
5. Now the tpm.reg is saved on your USB flash drive.
Step 4: Boot from the USB flash drive and install Windows 11 on your Windows 7 partition
1. Restart the computer and then press F12 to enter the boot menu. Then choose the USB flash drive to boot.
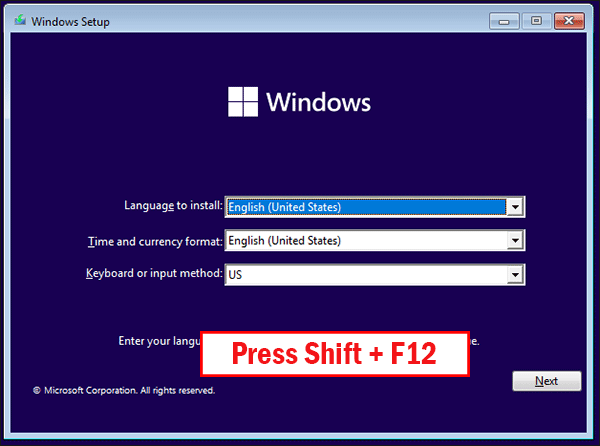
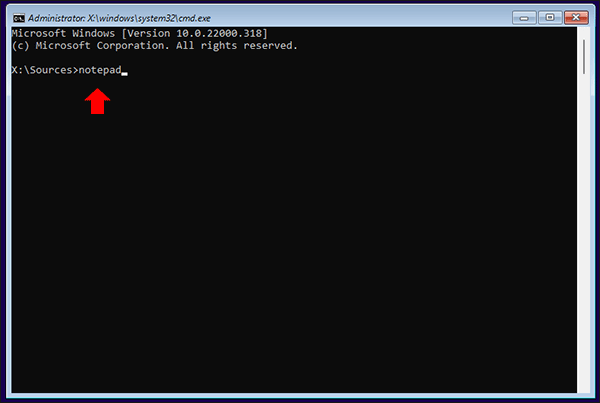
2. When it comes to Windows installation interface, do not click Next. Instead, press the Shift and F10 key on your keyboard to open CMD.
3. Execute notepad command to open Notepad.
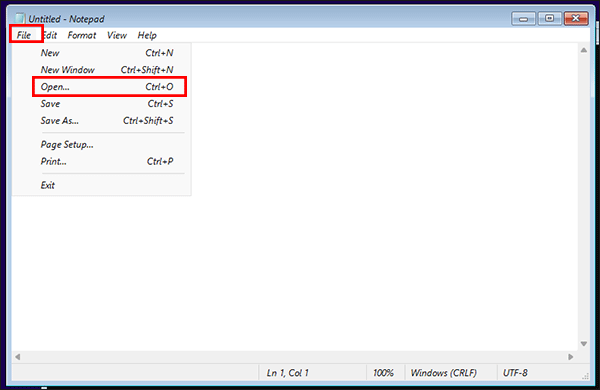
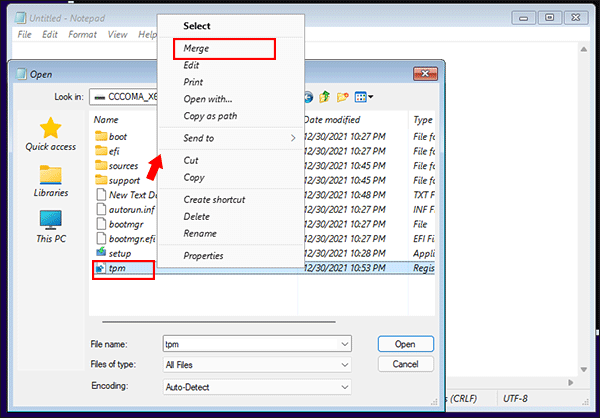
4. A new Notepad opens and you can click the File option on the top and then select Open….
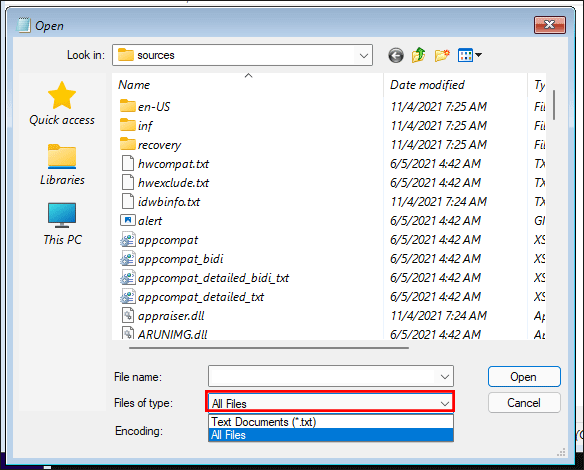
5. Change Files of type to All Files.
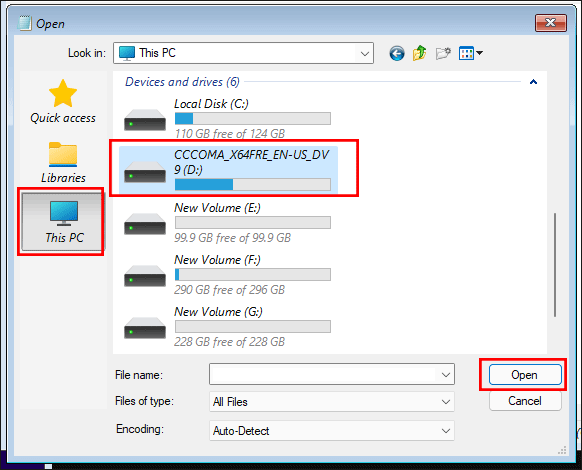
6. Click This PC on the left menu and then find your USB flash drive to open.
7.Find the tpm.reg file and right-click to choose Merge option.
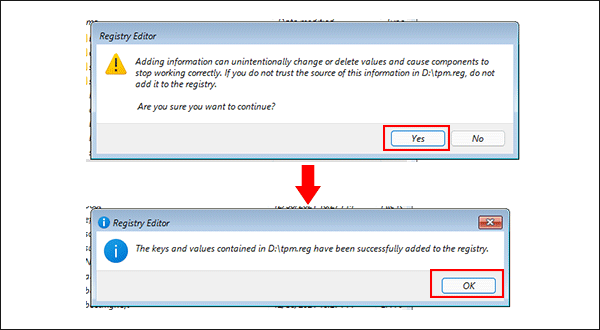
8. Click Yes and then click the OK button to add tpm.reg to the registry.
9. Close the Open, Notepad and CMD windows.
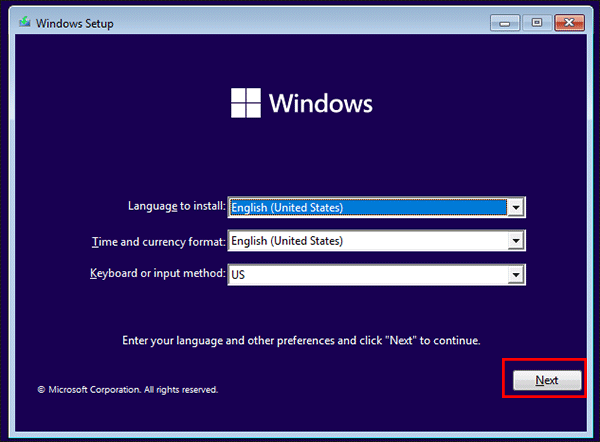
10. Come back to the Windows 11 setup program and click the Next button.
11. Click on Install now button.
12. When it asks you to activate Windows, choose I don't have a product key option.
13. Select the edition you want to install and click the Next button.
14. Accept the applicable notices and license terms and hit on Next.
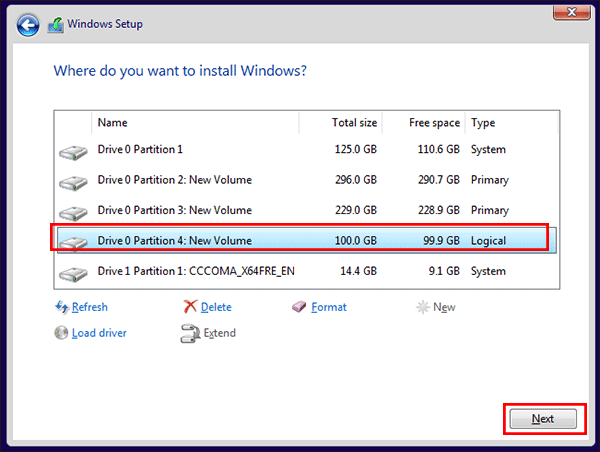
15. Choose Custom: Install Windows only (advanced) option.
16. Choose the new created partition to install Windows 11 and hit on Next.
17. Instantly, the Windows 11 is installing on your computer.
18. When it finishes the installing, the computer will be rebooted. And you need to choose Windows 11 to start and then follow the guide to complete the configuration.