We use cookies for personalizing content and ads and providing social media features. Your usage information on our website will be used for social media, advertising, and traffic analytics, or shared with our partners. Clicking "Accept" means you agree to use our cookies .
A bootable USB drive for Windows 11 can help you to troubleshoot the crashed computer or reinstall Windows 11 after the system failing to work. Besides, you can also clean install Windows 11 on the new PC. What's more, you can even directly boot into the Windows 11 working environment with the bootable USB no matter your original computer runs in Windows 11/10/8/7. Thus, how to create Windows 11 bootable USB? You can learn 5 effective ways to create a Windows 11 bootable USB in this article.
Way 1—Create a Windows 11 Bootable USB with iSunshare WinToGo Genius
If you are going to create the Windows 11 bootable USB drive which can run without installing on a PC, iSunshare WinToGo Genius can help you to do that in minutes. It is extremely easy to burn the Windows 11 ISO image file into the USB drive to make the portable Windows on USB so that you can take it to anywhere. iSunshare WinToGo Genius can work in all editions of Windows 11/10/8/8.1/7. Besides, it supports the USB flash drive in large size and the USB hard disk. If you have less time in waiting, you can set the computer to shut down after the bootable USB is made.
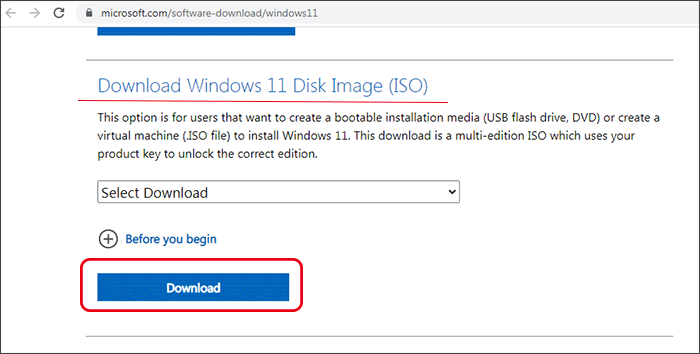
Step 1: Go to Microsoft official website to download Windows 11 ISO image and save it on your computer.
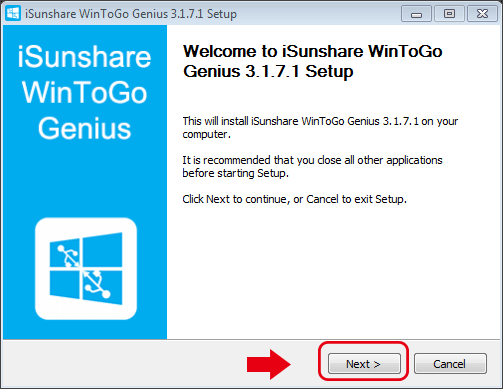
Step 2: Download and install iSunshare WinToGo Genius on your computer. At the same time, plug the USB drive into your computer.
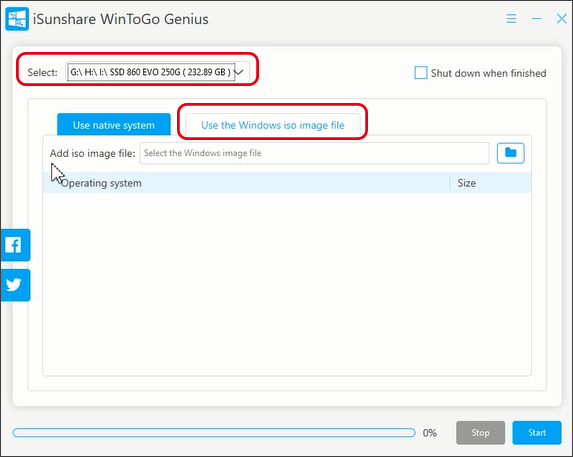
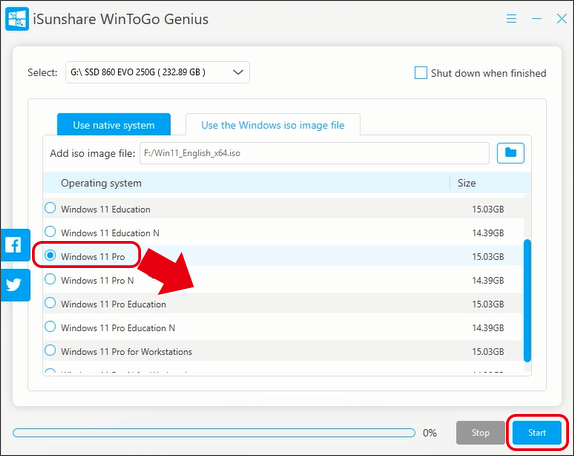
Step 3: Open iSunshare WinToGo Genius and then select your USB drive to go ahead. Next, you can click the Use the Windows iso image file option.
Step 4: Hit the folder icon to add the Windows 11 ISO image file. After that, the program will decompress the image file to get all editions of Windows 11.
Step 5: Decide the Windows 11 edition you want to install on USB. After choosing the Windows 11 edition, you can go to click the Start button.
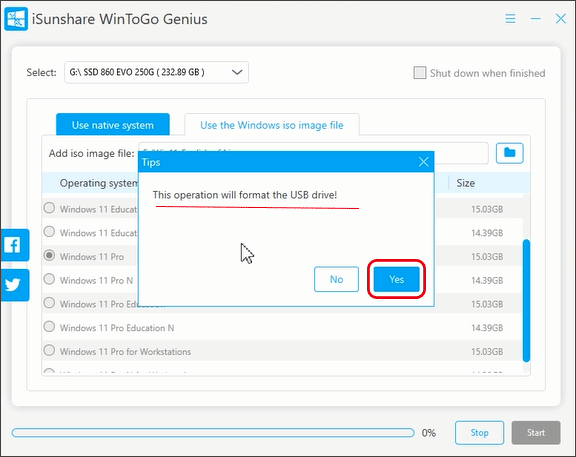
Step 6: The software will warn you that this process will format the USB and erase all data. You can click Yes to continue.
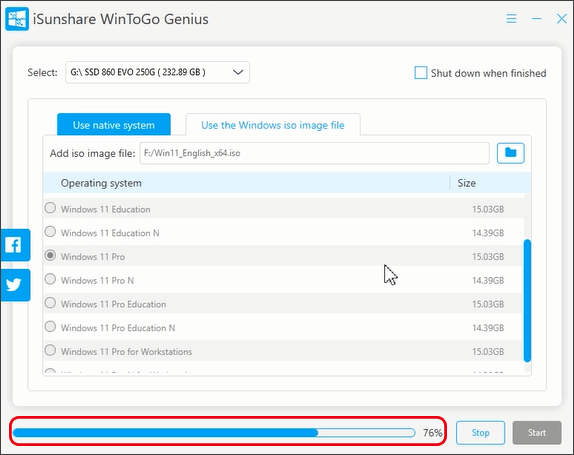
Step 7: Now the bootable USB of Windows 11 is creating. This process can be finished in a short time.
After the successful creation, you can disconnect the USB drive and take it to boot any Windows computer to run Windows 11 OS on USB without installing it on PC.
Way 2—Create a Windows 11 Bootable USB with Rufus
Rufus is the useful utility that can help you to create the bootable USB drive for installing Windows 11. Or you can create the Windows 11 To Go USB drive with this utility. It is up to you to decide what the bootable USB is used for. Also, both USB flash drive and the USB disk can be used in this utility.
Step 1:Go to Rufus website and download the latest Rufus software. Also, get the Windows 11 ISO image file ready in advance.
Step 2: Run the software and connect the USB drive to the computer. After it is connected, the software can detect it instantly.
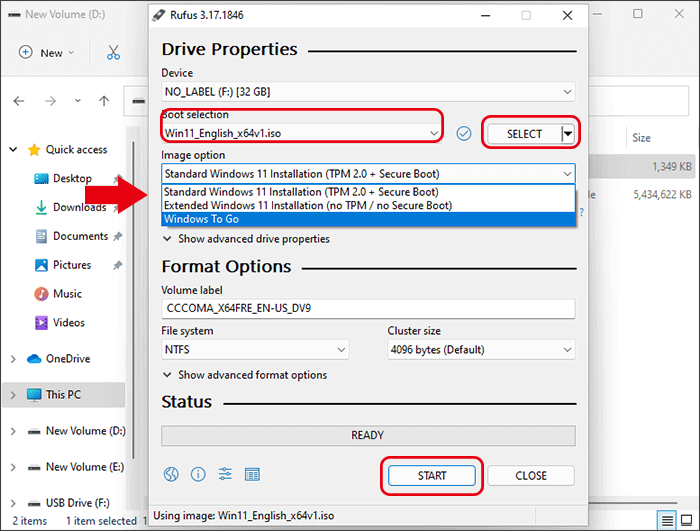
Step 3: Click the Select button to add Windows 11 ISO file.
Step 4: For the Image option, you can check three options from the drop-down menu: Standard Windows 11 Installation (TPM2.0 + Secure Boot); Extended Windows 11 Installation (no TPM/no Secure Boot); Windows To Go. You can select it according to your need. Afterwards, click the Start button to proceed.
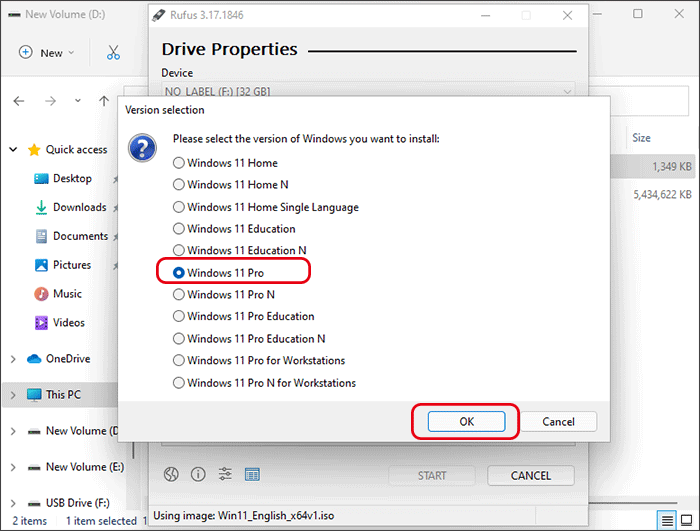
Step 5: Then you need to select the Windows 11 edition and click the OK button.
Step 6: At this time, Rufus is creating the bootable Windows 11 USB. You just need to wait patiently until it finishes the creation.
Way 3—Create a Windows 11 Bootable USB with Media Creation Tool
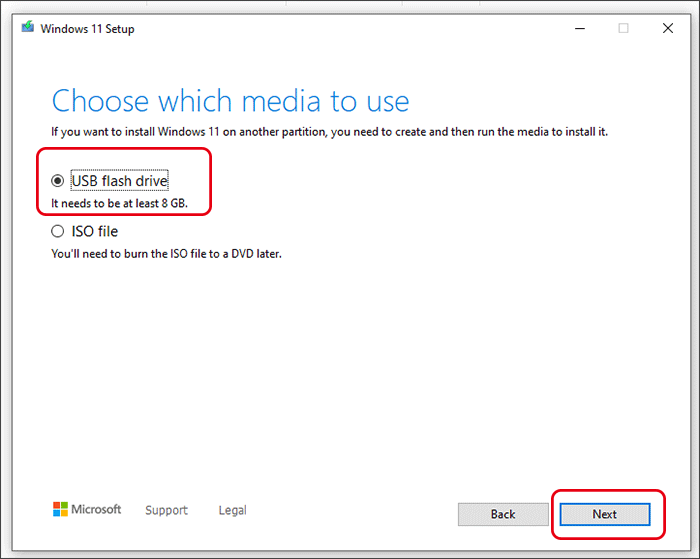
With the Media Creation Tool, you can create the bootable USB to reinstall or clean install of Windows 11 on a PC. In addition, you need to make sure that the USB drive is larger than 8GB.
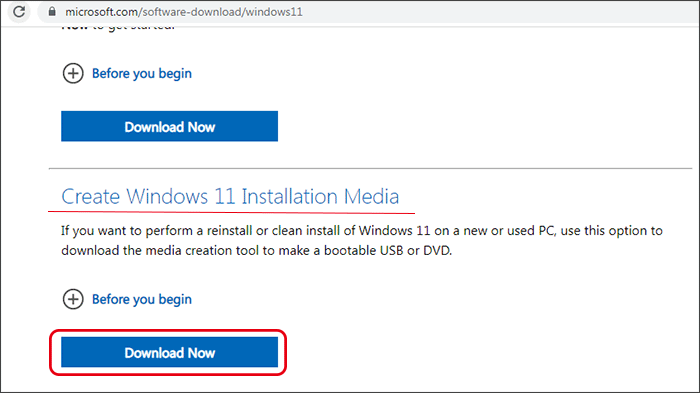
Step 1: Access Microsoft Windows 11 software download website, click the Download button under Create Windows 11 Installation Media section.
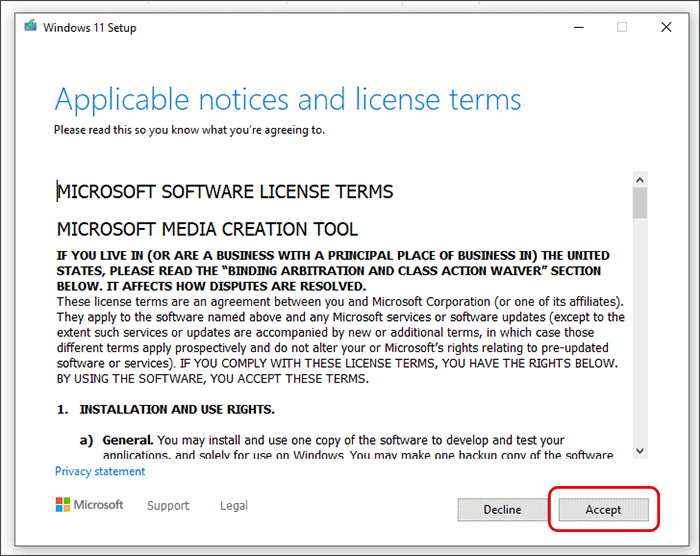
Step 2: Run MediaCreationToolW11 tool and then accept the Applicable notices and license terms.
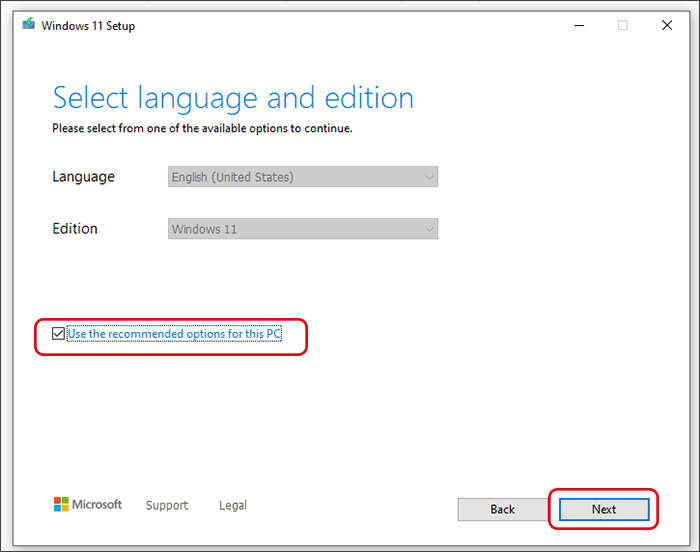
Step 3: Select the language and edition. If you are making the bootable USB drive for other computer, you should go to uncheck the option Use the recommended options for this PC. After that, click the Next button.
Step 4: Choose the option—USB flash drive to use and then click the Next button.
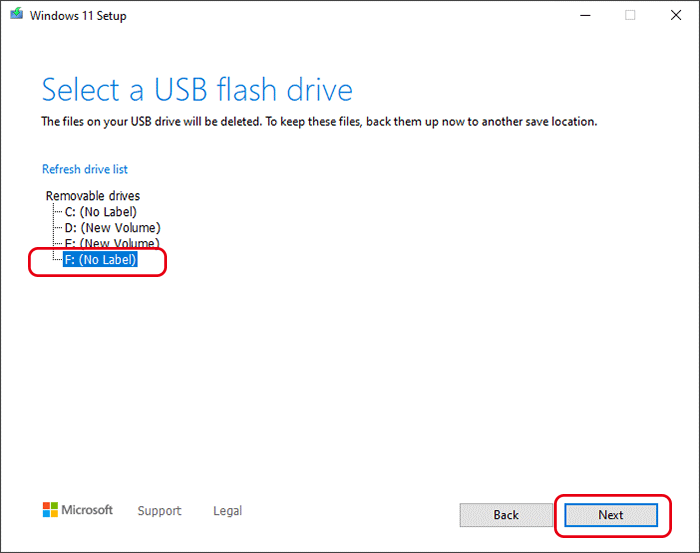
Step 5: Then you can select the USB drive from the list and click the Next to download your Windows 11 edition.
About 10 minutes later, the bootable USB is burned. And you just need to click the Finish button. When you need to use this bootable USB, you need to start the computer from the USB and then reinstall or clean install Windows 11 on your PC.
Way 4—Create a Windows 11 Bootable USB with ISO Genius
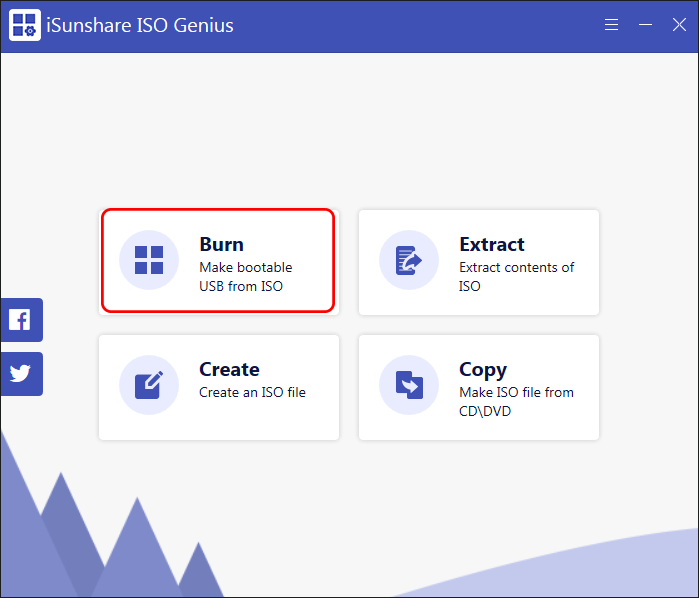
If you want to burn Windows 11 ISO image to a USB drive and make it bootable, iSunshare ISO Genius can help you to do it within simple clicks. This free ISO to USB burner enables you to create the bootable USB for Windows 11 installation or reinstallation.
Step 1: Prepare the Windows 11 ISO image file and ISO Genius on your computer. What's more, you should connect the USB drive to your computer and create a copy of its data in advance.
Step 2: Run ISO Genius and then choose the Burn option.
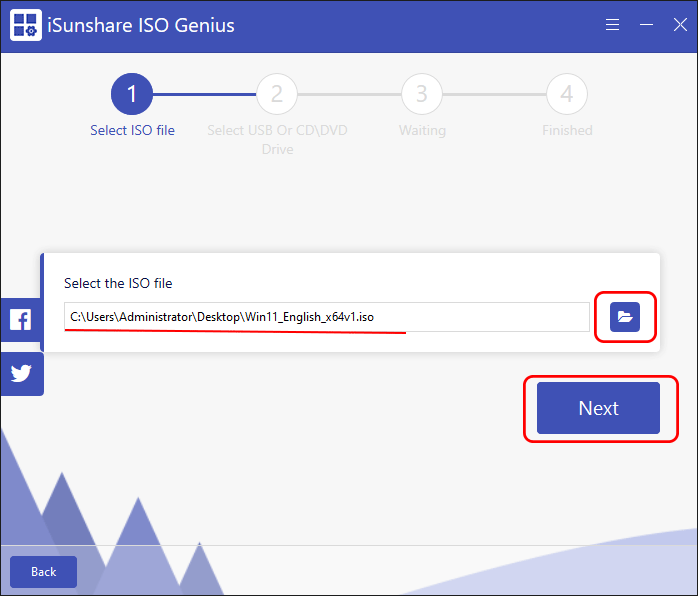
Step 3: Click the folder icon and then choose the Windows 11 ISO image file to add. Then, click the Next button.
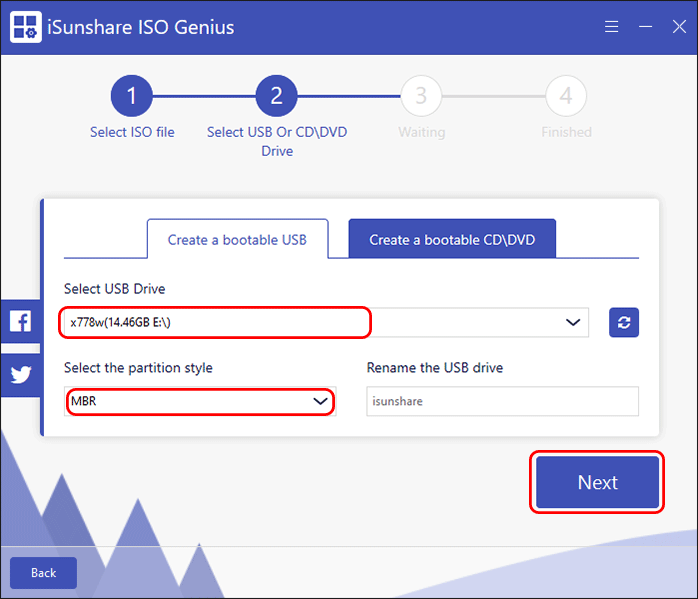
Step 4: Choose your USB drive and the partition scheme—GPT or MBR. After that, click the Next button to continue.
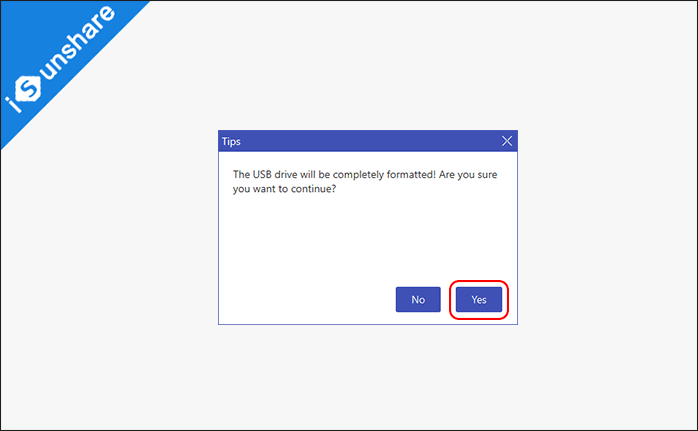
Step 5: A formatting prompt pops out to tell you that the USB drive will be formatted. Click the Yes button to start burning the ISO to USB drive.
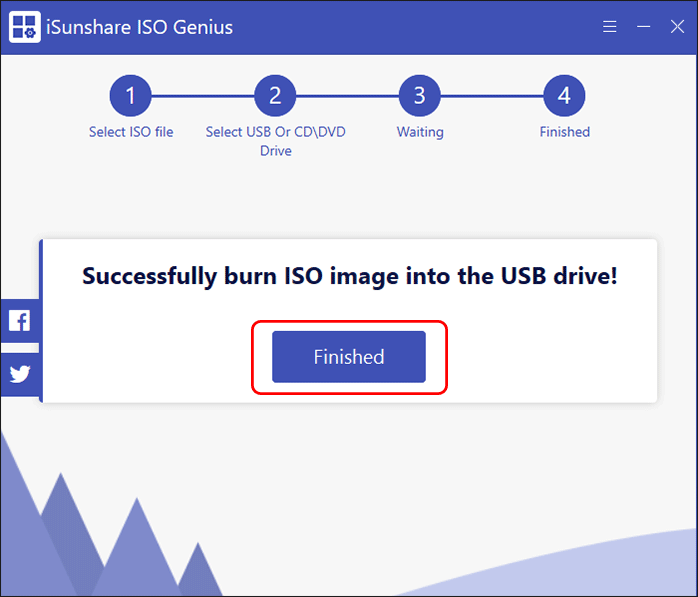
Step 6: The bootable USB for Windows 11 installation is created successfully.
Way 5—Create a Windows 11 Bootable USB with Command Prompt
This procedure will be a little complicated and it will always fail because the wim file is larger than 4GB to copy to the FAT32 USB. If you want to have a try, go ahead download the Windows 11 ISO image file from Microsoft website at the very first time. To ensure you conduct the command lines smoothly, you should make sure that this computer supports UEFI.
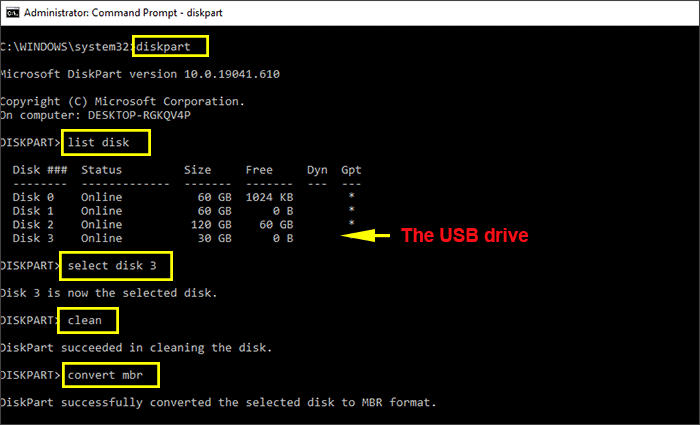
Step 1: Format your USB.
1. You need to connect the USB to your computer and then run command prompt as the administrator.
2. Input "diskpart" to open Diskpart and then press Enter.
3. Input "list disk" to find the USB drive and then press Enter.
4. Input "select disk 3" (change "3" to the number of your USB) and then press Enter.
5. Input "clean" to format the USB and press Enter.
6. Input "convert mbr" to convert the USB drive to MBR format.
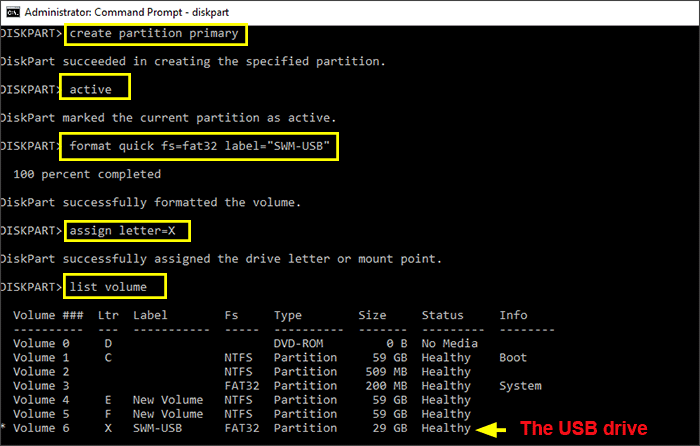
Step 2: Create a primary partition for your USB drive.
3. Execute command line: format quick fs=fat32 label="SWM-USB".
4. Execute command line: assign letter=X (X is the letter of your partition, you can choose one letter you like to use)
5. Execute command line: list volume.
6. Input exit and press Enter to close diskpart utility.
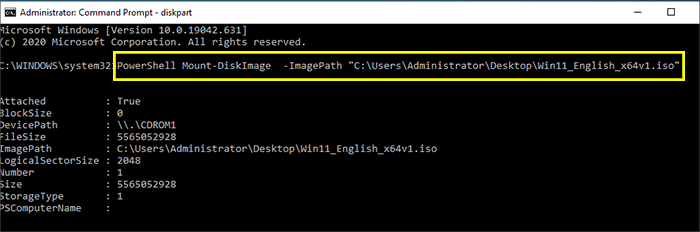
Step 3: Mount ISO file to USB drive.
1. Run Command Prompt again and then conduct this command line: PowerShell Mount-DiskImage -ImagePath "C:\PATH\Windows 11.iso" ( You need to change this path to your real ISO image saving path)
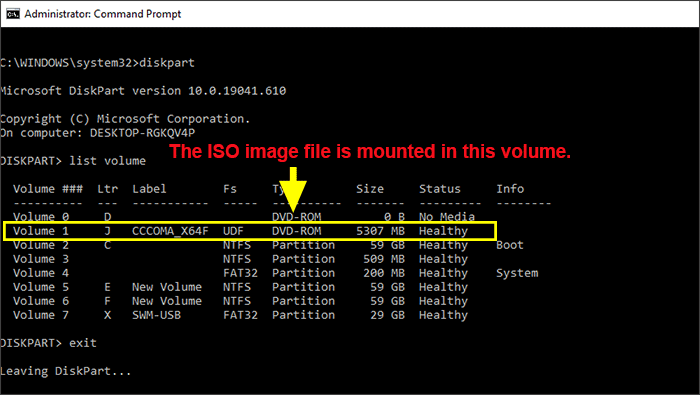
2. Conduct command line: diskpart.
3. Conduct command line: list volume. Then you can know the drive letter of the mounted Windows 11 ISO file. And you should remember this drive letter.
4. Conduct command line: exit.
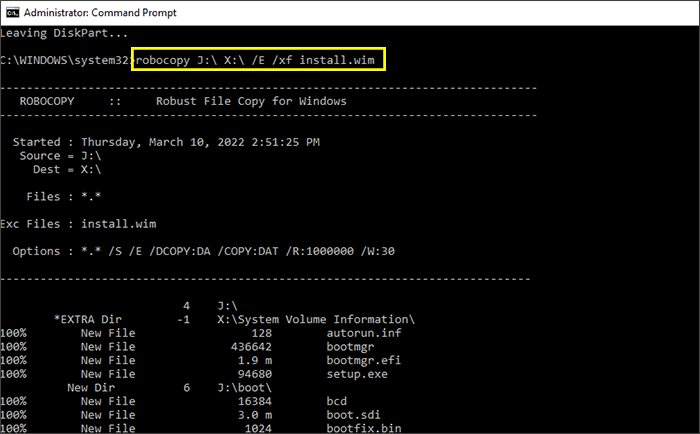
Step 4: Copy the Windows 11 installation files to USB drive.
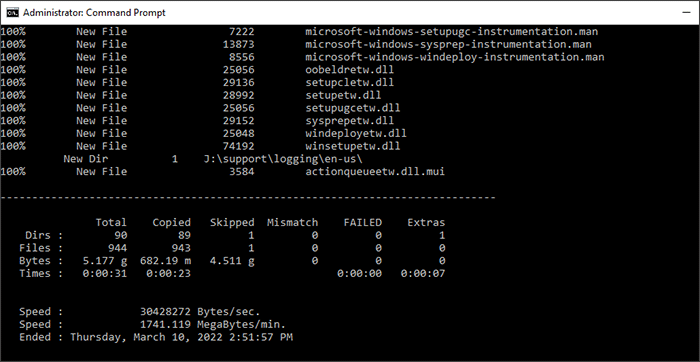
1. Conduct command line to clone all the Windows 11 installation files expect install.wim file to the USB drive: robocopy J:\ X:\ /E /xf install.wim .(J is the drive letter for Windows 11 ISO image file and X is the drive letter for the USB drive.)
This cloning process will last for minutes. You just need to wait patiently.
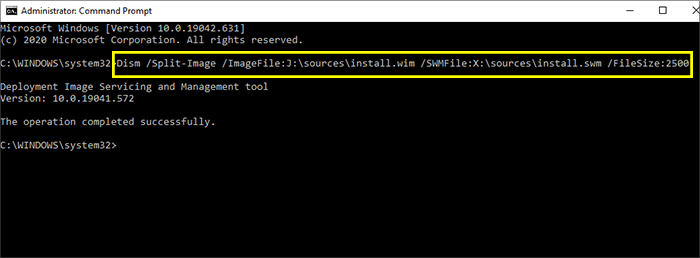
2. As the install.wim file is over 4GB, you need to split this file into several install.swm files and each swm file should not over 2500MB. All the install.swm files should keep on the source folder in USB drive. Here, you should conduct command line:
Dism /Split-Image /ImageFile:J:\sources\install.wim /SWMFile:X:\sources\install.swm /FileSize:2500 .
(J is the drive letter of which the ISO image file is mounted, X is the drive letter which you assign to the USB drive in the step 2.)
After that, the bootable drive is made and you can boot another PC from USB to reinstall or clean install Windows 11.
Conclusion:
To create the Windows 11 bootable USB, above 4 methods can be applied. If you want to run Windows 11 from USB without installing, iSunshare WinToGo Genius would be the best option. If you want to bypass the secure boot and TPM 2.0 to install Windows 11 from USB, there is no doubt that Rufus is the good choice. If you want to troubleshoot the computer to reinstall or install the Windows 11, ISO Genius and Media Creation Tool can help you to do that safely.