We use cookies for personalizing content and ads and providing social media features. Your usage information on our website will be used for social media, advertising, and traffic analytics, or shared with our partners. Clicking "Accept" means you agree to use our cookies .
Since Windows 11 was released, many people have updated Windows 11 for the first time. If you also want to try the new Windows 11 operating system, but you may be more used to the previous system and want to keep it, installing Windows 11 on a virtual machine is a great way to go. In this article, I will show you how to install Windows 11 on VMware and Hyper-V virtual machines.
Part 1: How to Install Windows 11 on VMware Virtual Machine
VMware is a virtualized computer that installs other Windows systems you want on it outside your host machine. When you need to install Windows 11 in VMware, the following steps can help you to a large extent.
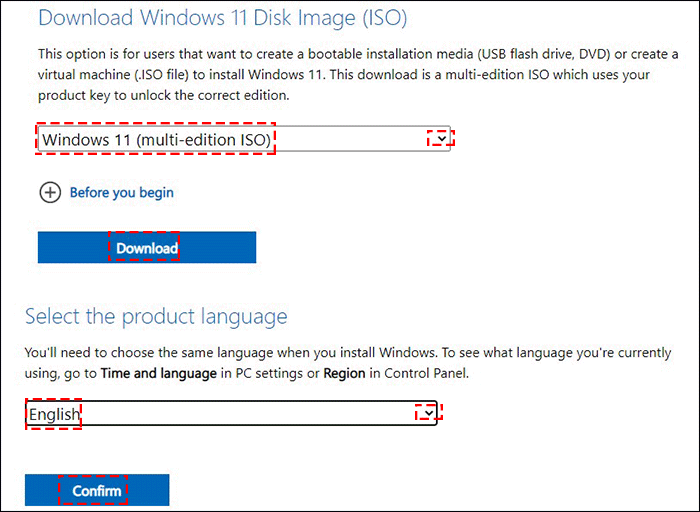
It is simple to do this. First, you need to select Windows 11 edition, then choose the language you're using. After confirming it, you need to choose Windows 11 64 bit and then download it to your PC.
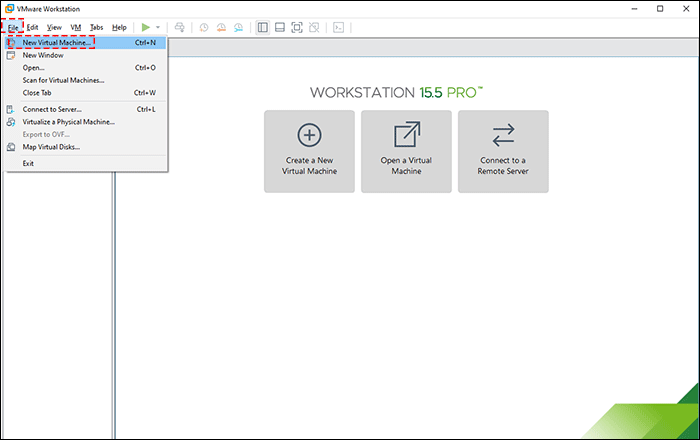
Step 2: Now, you need to create a new virtual machine. Open VMware on your PC, and click "File" on the left menu and then click the "New Virtual Machine".
Step 3: Choose the virtual machine hardware compatibility, and click "Next".
Step 4: Click on "Installer disc image file(iso)" and then click "Browse" to select Windows 11 image file. After that, click "Next".
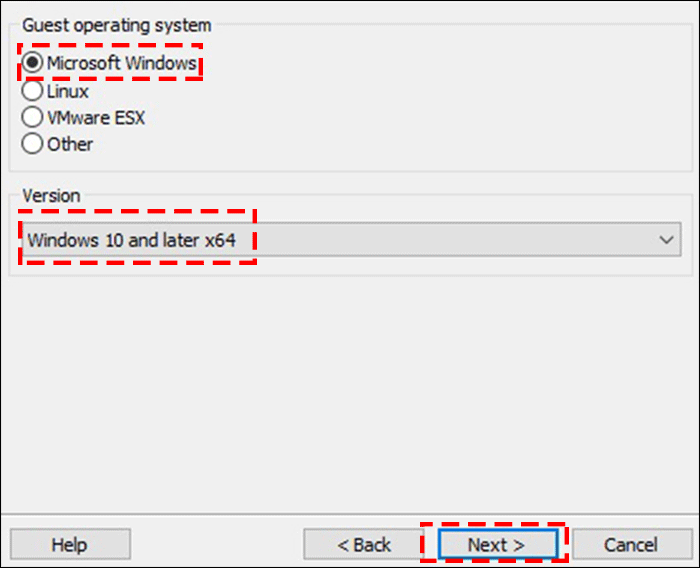
Step 5: Select a operating system will be installed on this virtual machine and then click "Next".
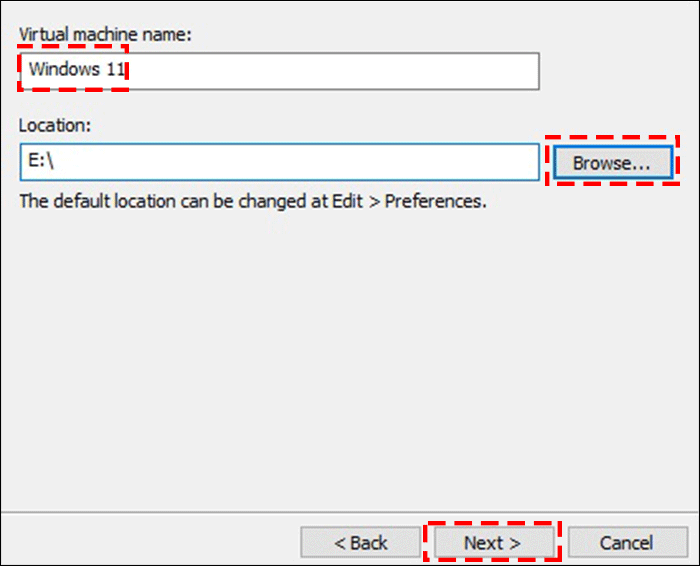
Step 6: You can name the virtual machine and choose location for this virtual machine. Afterward, click "Next".
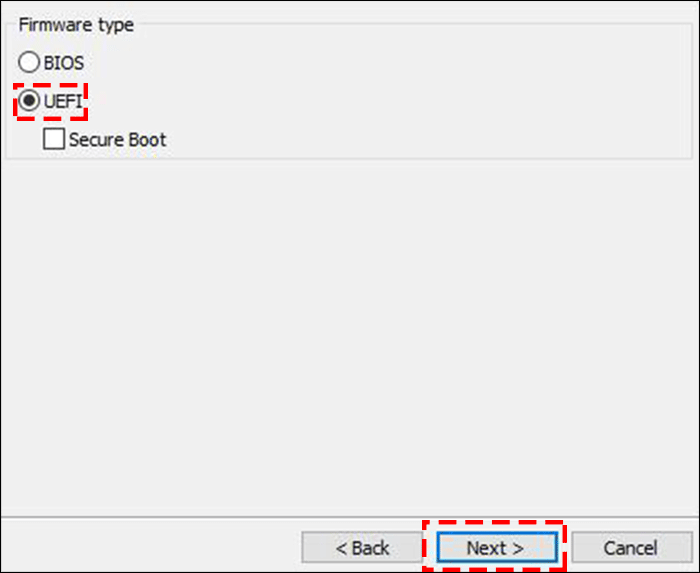
Step 7: Select a firmware type for this virtual machine and click "Next".
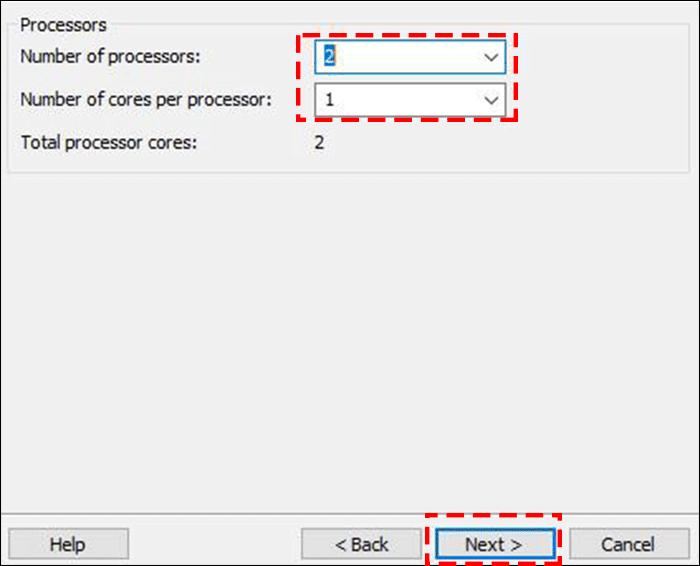
Step 8: Specify the configure processors of this virtual machine and click "Next".
Step 9: Specify the memory you would like to use for this virtual machine, and select "Next".
Step 10: Choose a network type you want to add and click "Next".
Step 11: Select a SCSI controller type you want to use and click "Next".
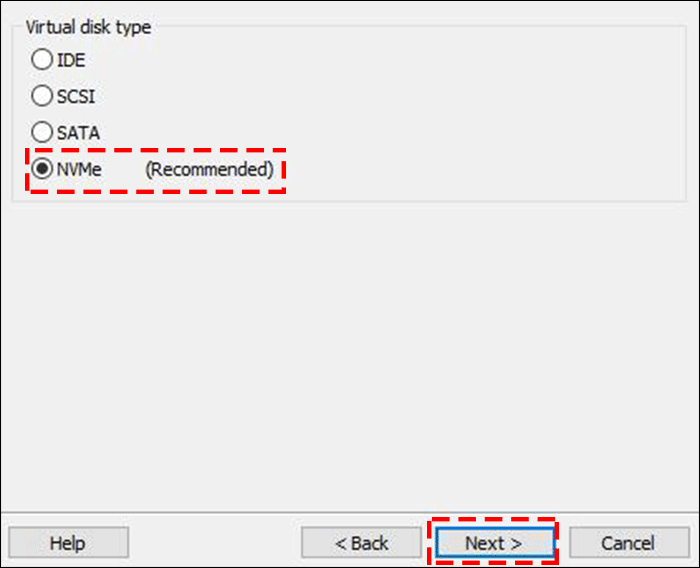
Step 12: Select a disk type you want to create and click "Next".
Step 13: Select "Create a new virtual disk" to use and then click "Next".
Step 14: Specify disk capacity you want this disk to be and click "Next".
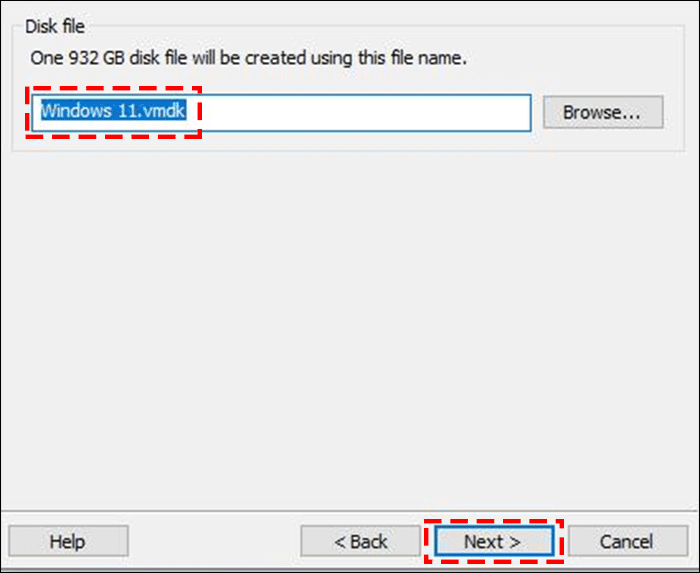
Step 15: Specify the disk file name and then click "Next".
Step 16: Now, click "Finish" when you finish setting. The virtual machine will be created with the settings.
2. Steps to Install Windows
Step 1: Click the virtual machine you created and then click "Edit virtual machine settings".
Step 2: After confirming, click "OK" to exit.
Step 3: Click "Power on this virtual machine".
Note: My VMware is 16.2.2 edition, for this version, you have two methods to power on this virtual machine smoothly. You can specify the password for this virtual machine however you need to enter it every time or you can add TPM module. It is conveniently to add TPM.
1: Make sure you've updated to 16.2.0 edition.
2: Remove the virtual machine you just now created.
3: Go to where the virtual machine you stored in your PC.
4: Find the file with the .vmx extension and open with notepad.
5: Add managedvm.autoAddVTPM = "software" on the notepad and save it.
6: Double click the file and you will going into the Windows 11 virtual machine.
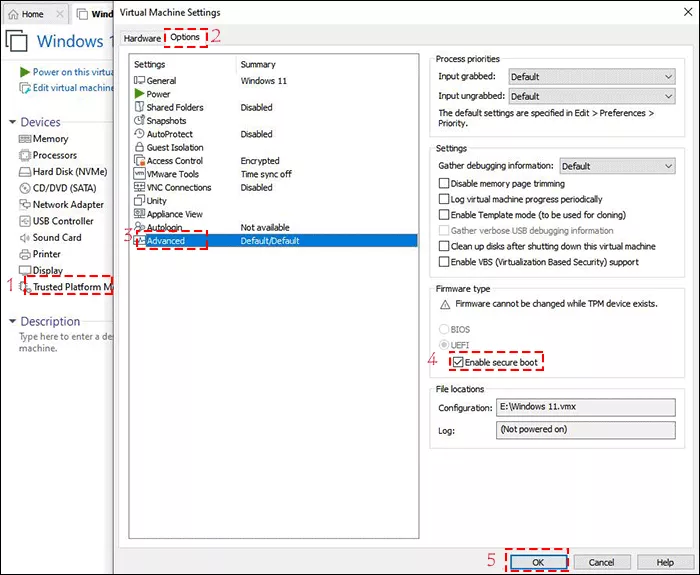
7: Click "Trusted Platform Module", then click "Option". On this section, click "Advanced" to enable secure boot. Last, click "OK" to complete. Now, you can power on this virtual machine successfully.
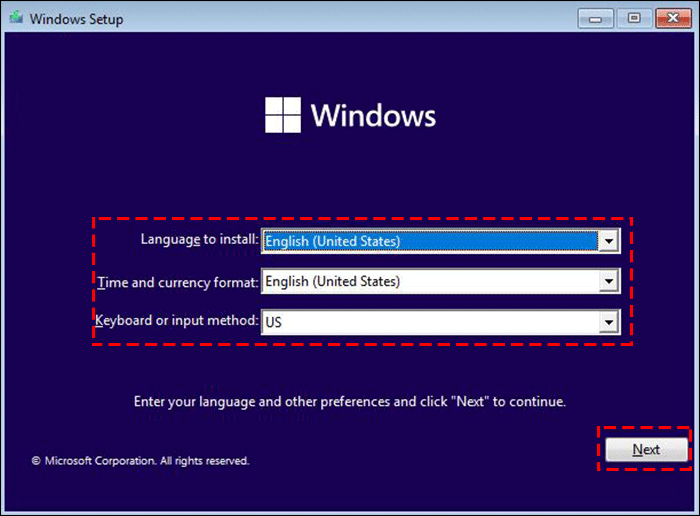
Step 4: Make sure the language and other preferences and click "Next" to continue.
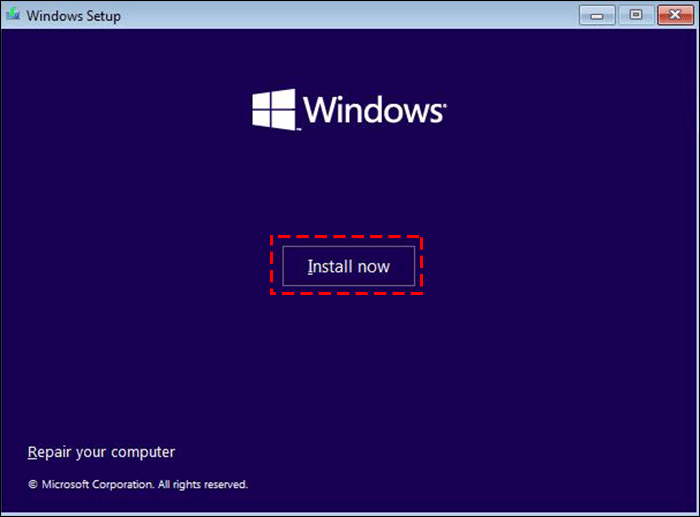
Step 5: Click "Install now" to prepare to install Windows on your virtual machine.
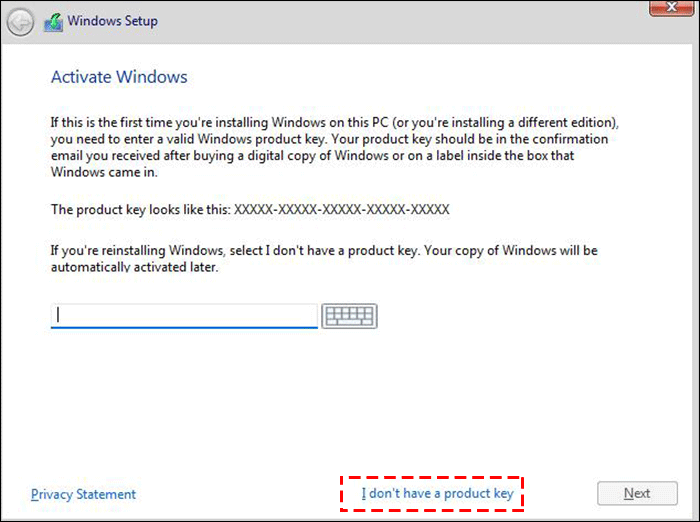
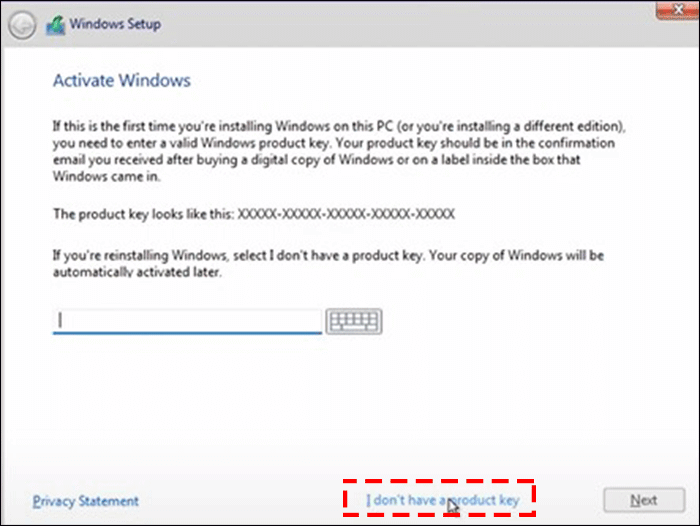
Step 6: If you don't have a product key. Click "I don't have a product key" to continue to the next step.
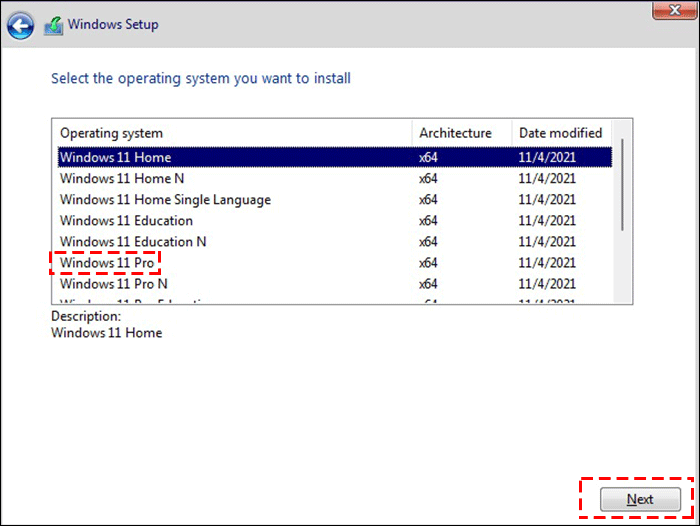
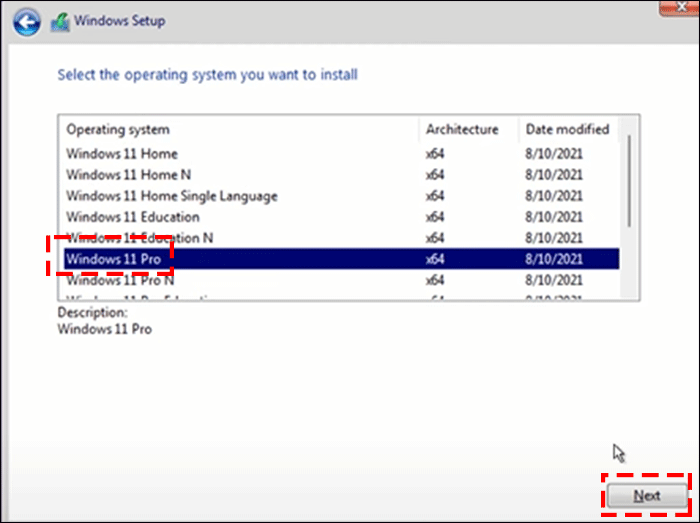
Step 7: Select the operating system you want to install, here I recommend you select Windows 11 Pro.
Step 8: Tick the checkbox to accept the license terms. Moreover, click "Next".
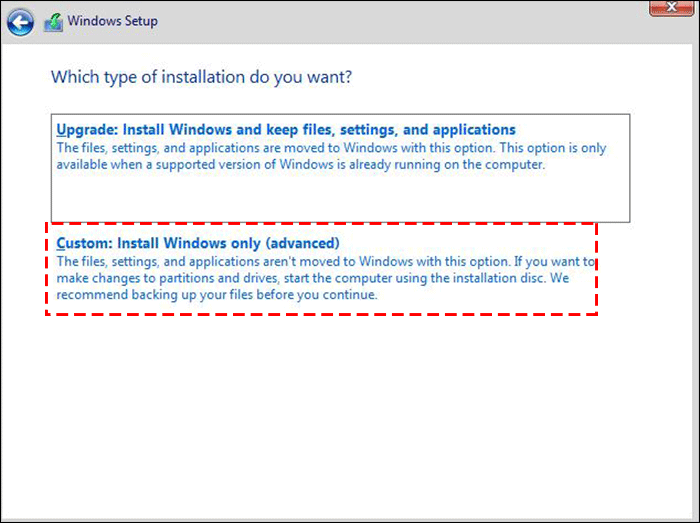
Step 9: Select a type of installation you want.
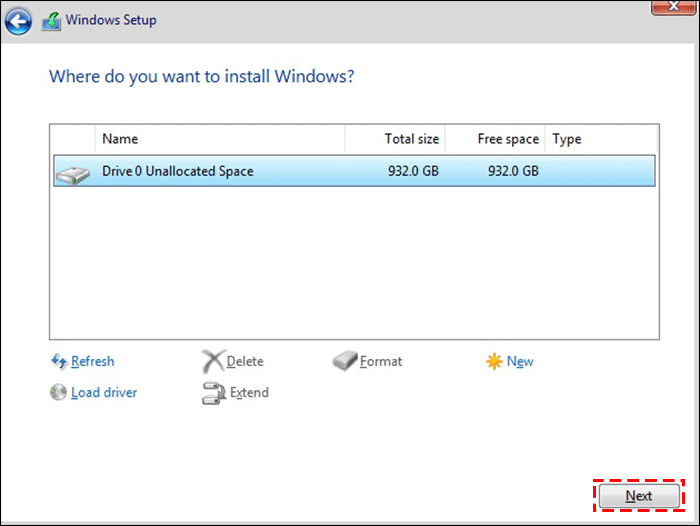
Step 10: Click "Next" to ready to install Windows.
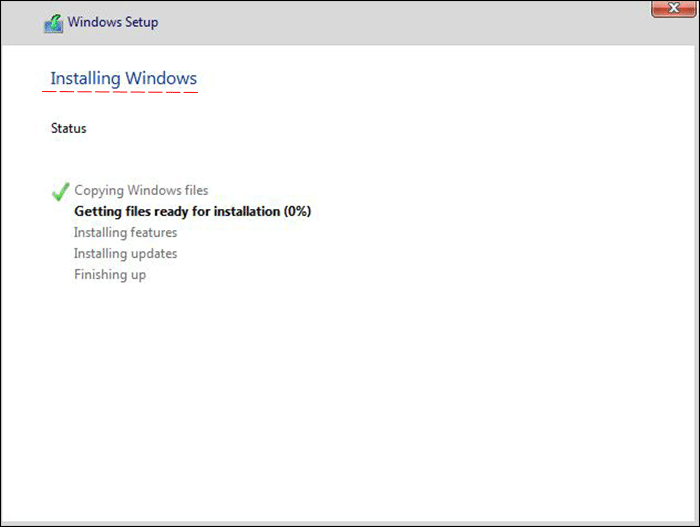
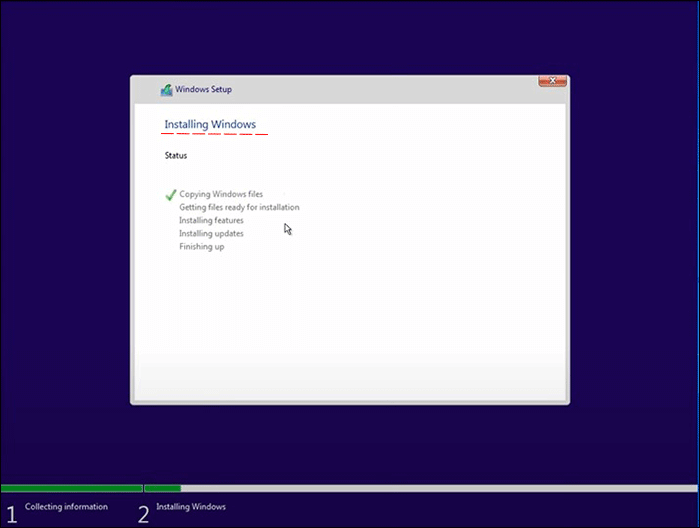
Step 11: Now, wait for installing Windows patiently.
Step 12: Minutes latter, the new Windows 11 has been successfully installed in your VMware virtual machine. At this time, you can start to launch it to use.
Part 2: How to Install Windows 11 on Hyper-V Virtual Machine
Hyper-V is Microsoft's virtual machine. If your computer has Hyper-V enabled or you prefer to use a Hyper-V virtual machine, you can install Windows 11 on a Hyper-V virtual machine and use it. Let's discuss how to install Windows 11 on Hyper-V.
Step 1: There's no doubt that you should download Windows 11 image to your PC so that you can use it latter when you create Windows 11. The method is the same as step 1 of the first part.
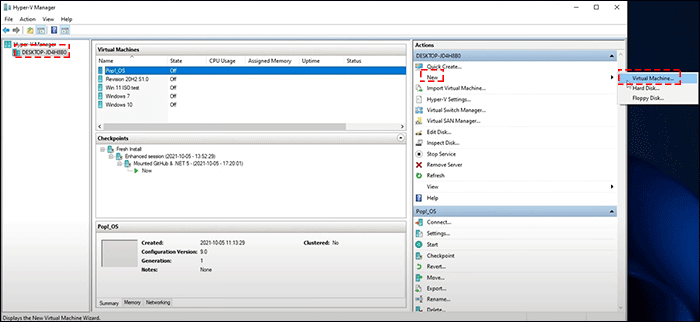
Step 2: Open the Hyper-V manage and create a new virtual machine.
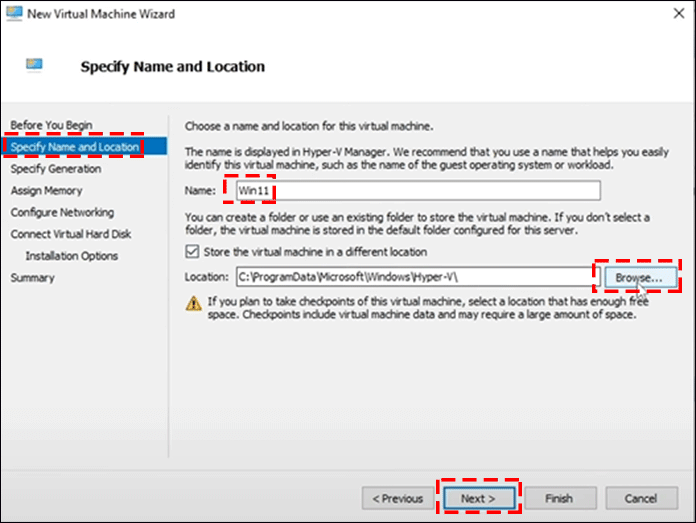
Step 3: Before you beginning the new virtual machine, you need to complete the new virtual machine wizard. First, to specify name and location of the new virtual machine. After that, click "Next".
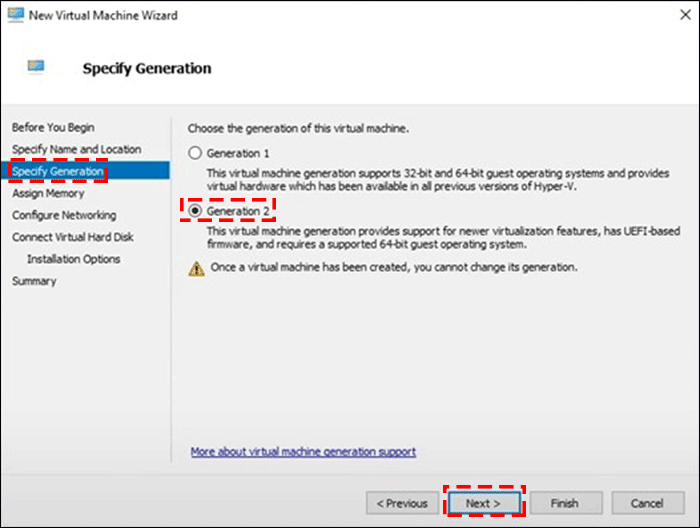
Step 4: Specify generation of this virtual machine and click "Next".
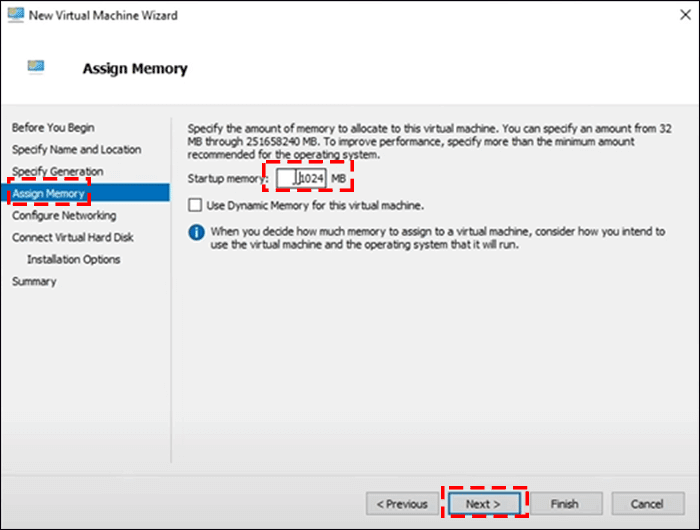
Step 5: Specify the amount of memory to allocate to this virtual machine and click "Next".
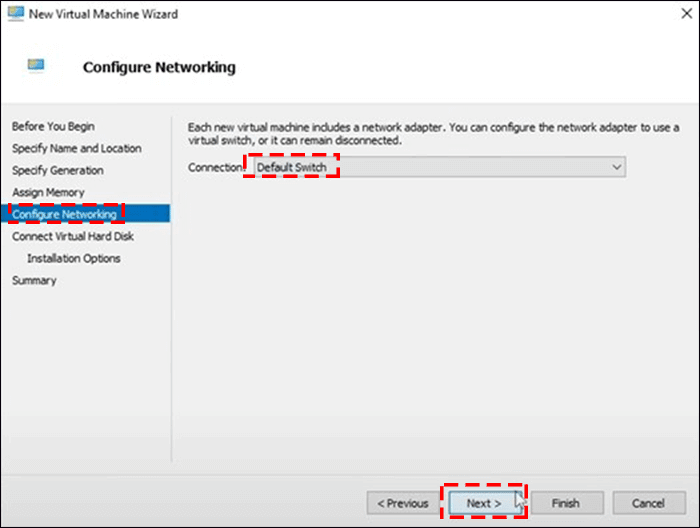
Step 6: Configure the network adapter to use a virtual switch and click "Next".
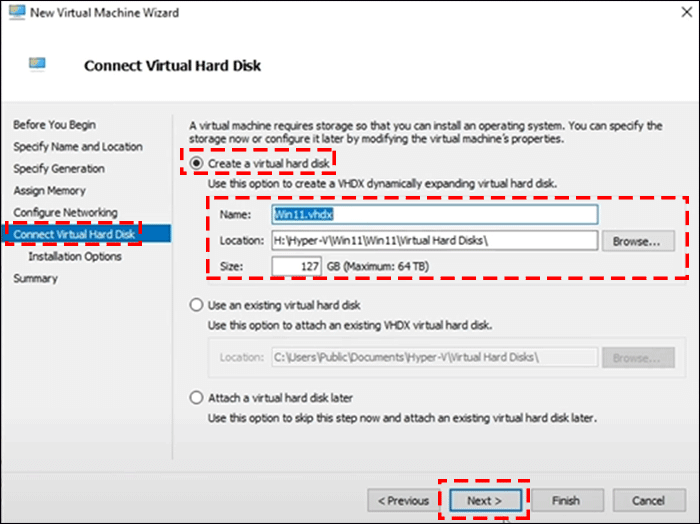
Step 7: Create a VHDX hard disk and click "Next".
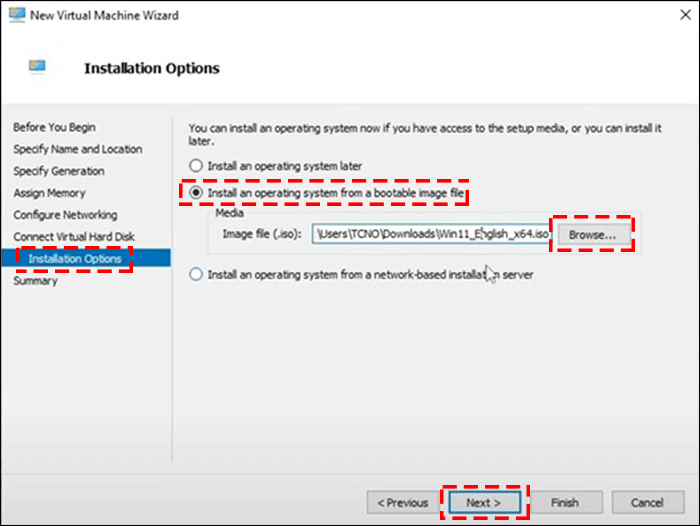
Step 8: Click "Browse" to select the Windows 11 image file to install Windows 11 system and then click "Next".
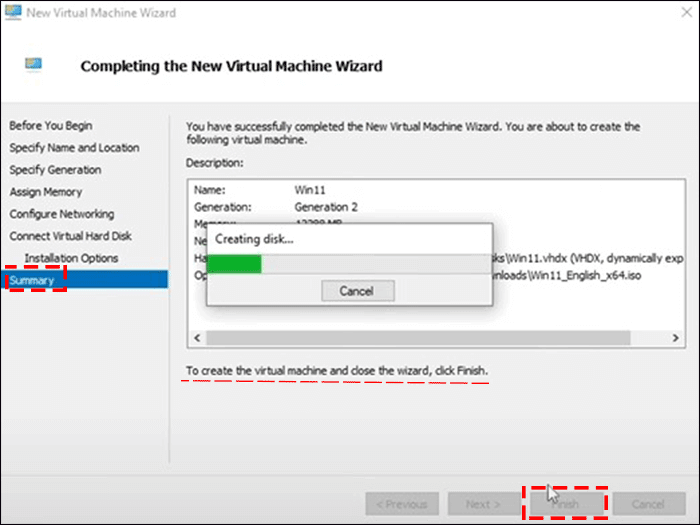
Step 9: Click "Finish" and start to create the following virtual machine.
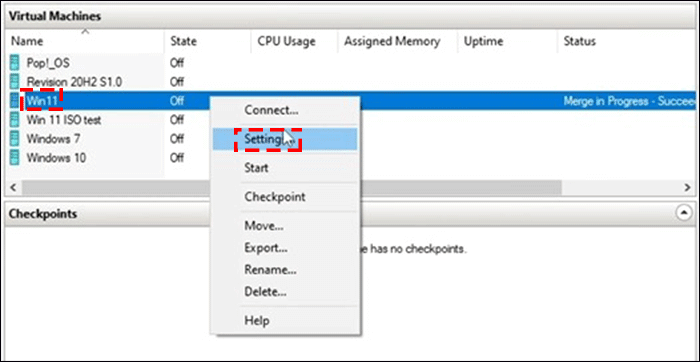
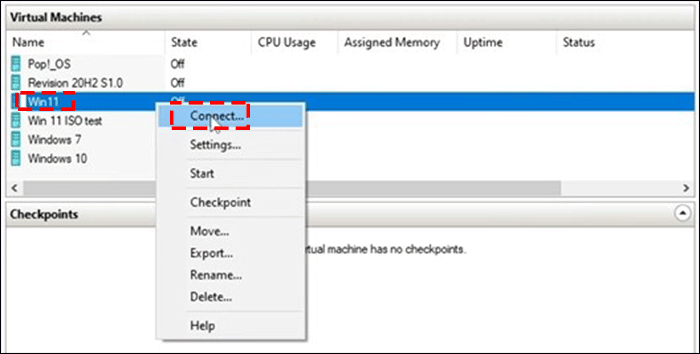
Step 10: Hover the mouse over the virtual machine that you created and right-click "Settings".
Step 11: Click "Processor" on the left pane and modify the number of virtual processors based on the number of processors on the physical computer. For resource control, you can use it to balance resources among virtual machines. Afterward, click "OK".
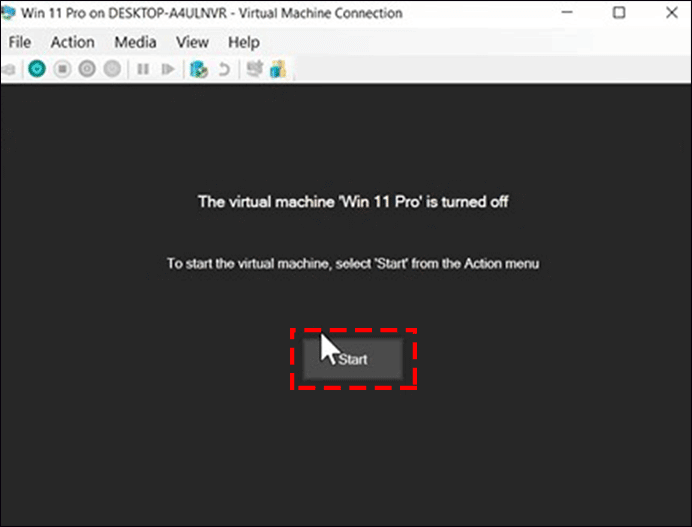
Step 12: Hover the mouse over the virtual machine again and right-click "Start" to start running.
Step 14: You can then start running the installation process of Windows 11.
Step 15: Enter your language and other preferences and click "Next".
Step 16: Enter a valid product key or click "I don't have a product key" if you don't have one.
Step 17: Select the operating system you want to install. Moreover, click "Next".
Step 18: Accept the license terms and then click "Next".
Step 19: Now wait for the progress start installing Windows 11 on Hyper-V and let it run through to completion.
Step 20: After installing, the following step-by-step is to enter the system and then set the initialization. You need to complete a series of information about your Windows 11 until check for updates.
Step 21: Waiting for system initialization for several minutes with patience. You've now successfully installed Windows 11 on Hyper-V virtual machine.
It is a common problem that the Windows 11 search bar not working. What can I say, however, is that it can be fixed in several ways. If you want to know how to fix the Windows 11 Search not working, try some of the ways above.