We use cookies for personalizing content and ads and providing social media features. Your usage information on our website will be used for social media, advertising, and traffic analytics, or shared with our partners. Clicking "Accept" means you agree to use our cookies .
When you have multiple accounts on your Windows 11 PC, you can run applications as different users without logging out. You can easily switch users while using the app to prevent others from accessing your personal data. From this article, you can learn how to run and enable apps as different user in Windows 11.
Note: Your Windows 11 PC should have two or more accounts so you can run apps as a different user.
Run as Different User under the Show More Options from the Desktop Context Menu
Step 1: Choose the app you want to run on the desktop, right-click it and tap on Show more options from the context menu.
Step 2: After opening Show more options, click on Run as different user.
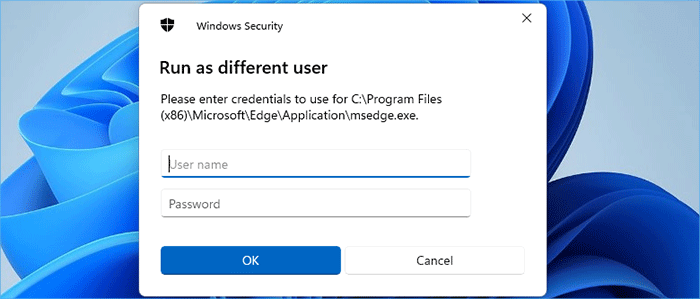
Step 3: Then you open the Run as different user window.
Step 4: Enter the account and password in it and click OK to complete.
Run as Different User from Start Menu
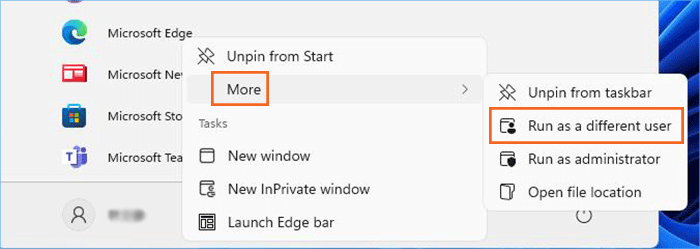
Step 1: Click the Start menu on the taskbar and click All apps to select what app you want to run as different user.
Step 2: Right-click the app you want to run and tap on More and then tap Run as a different user option.
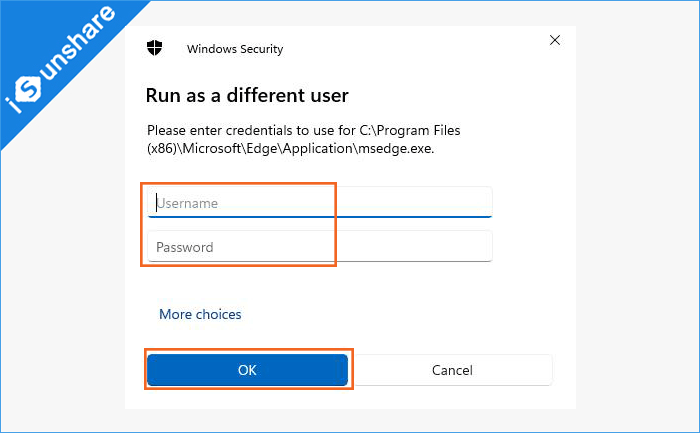
Step 3: After that, a Run as a different user windows appears, please enter your username and password and click OK to complete.
Option 2: How to Enable "Run as different user" in Windows 11
If you want to run the app as different user from the Start menu and you find the "Run as different user" option isn't there, you can follow the methods below to enable "Run as different user" in Windows 11.
Enable "Run as different user" from the Local Group Policy Editor
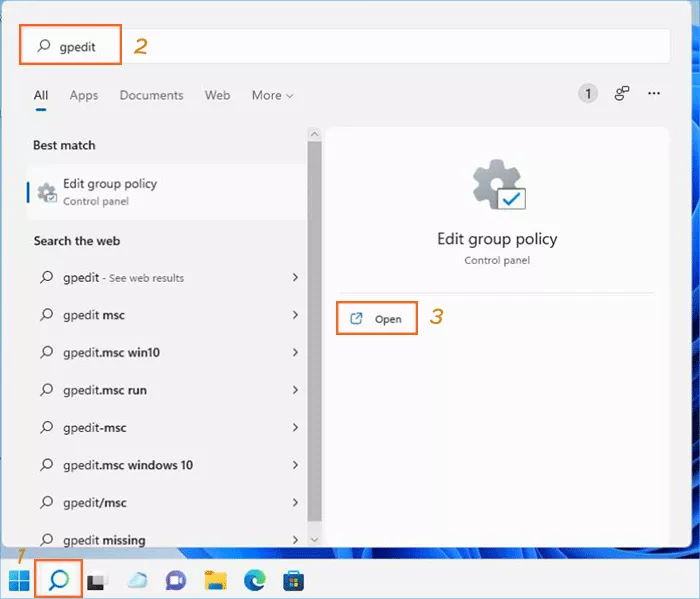
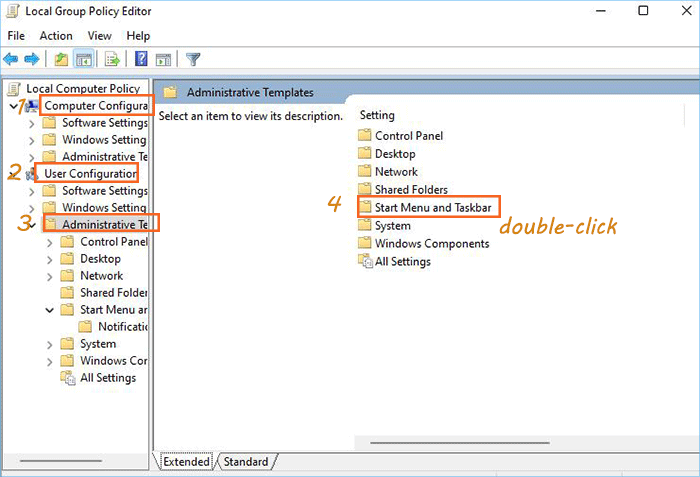
Step 1: Search for gpedit to open Local Group Policy Editor.
Step 2: In Local Group Policy Editor, double-click User Configuration>>Administrative Templates>>Start Menu and Taskbar step-by-step.
Step 3: Then scroll down to open Show "Run as different user" command on Start in Start Menu and Taskbar screen.
Step 4: Click Enabled, then click Apply and OK at the bottom to complete. By doing so, you can see the "Run as different user" option shows in Start.
Enable "Run as different user" from Registry Editor
In addition to enabling "Run as different user" from Local Group Policy Editor, You can also enable it from Registry Editor.
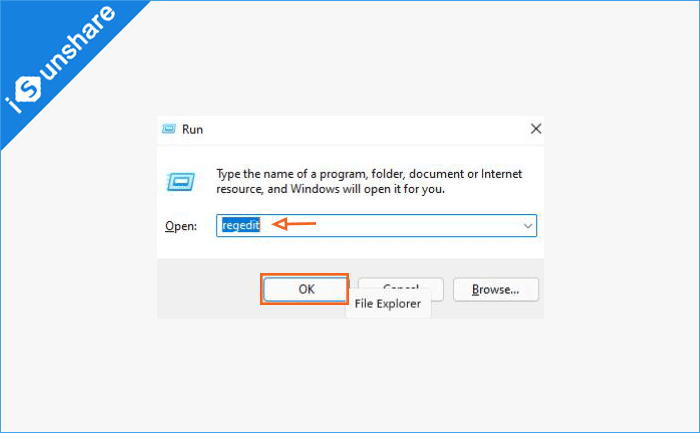
Step 1: Press Win + R simultaneously to open the Run box and to run the regedit command.
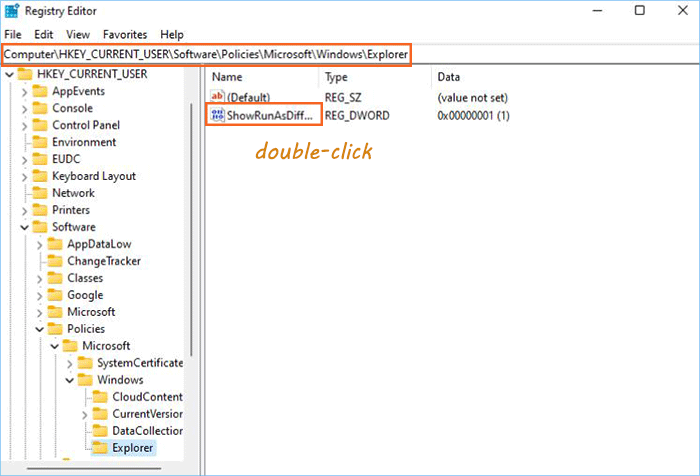
Step 2: In Registry Editor screen, double-click Computer\HKEY_CURRENT_USER\Software\Policies\Microsoft\Windows\Explorer. Then double-click ShowRunAsDifferentUserInStart.
Step 3: After doing this, enter "1" inside the value data and then click OK to complete.
That are simple ways on how to run apps as different user and how to enable "Run as different user" in Windows 11. Hope this post guides you through simple but best ways you can do it!