We use cookies for personalizing content and ads and providing social media features. Your usage information on our website will be used for social media, advertising, and traffic analytics, or shared with our partners. Clicking "Accept" means you agree to use our cookies .
As we all know, USB Drive is a common storage device that can be used to store files. Sometimes, the files stored in our USB are important and private to us, at this time, we do not want others to get and see them accidentally. Therefore, we need to encrypt the USB for protecting these files. In this article, learn how to encrypt and decrypt a USB Drive in Windows 11.
Option 1: How to Encrypt USB Drive and Turn on BitLocker
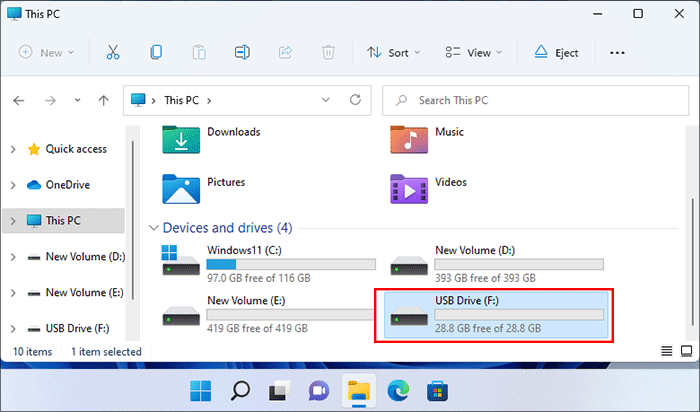
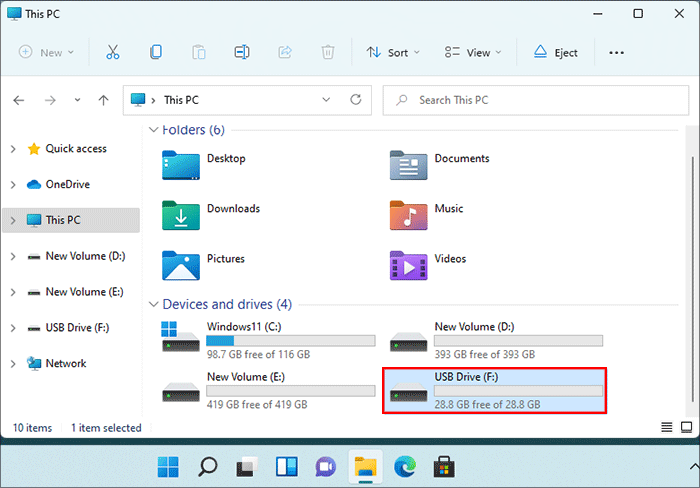
Step 1: Plugged the USB into your computer, open File Explorer and tap on This PC, and you can see the USB Drive(F:) under Devices and drives.
Step 2: Right-click the Start menu on taskbar and click on Windows Terminal(Admin).
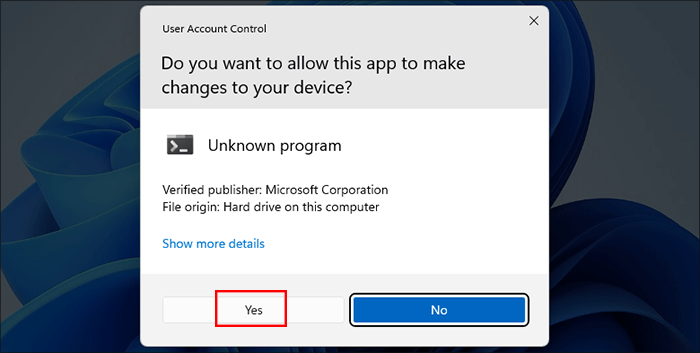
Step 3: Click Yes to allow this app to make changes to your device.
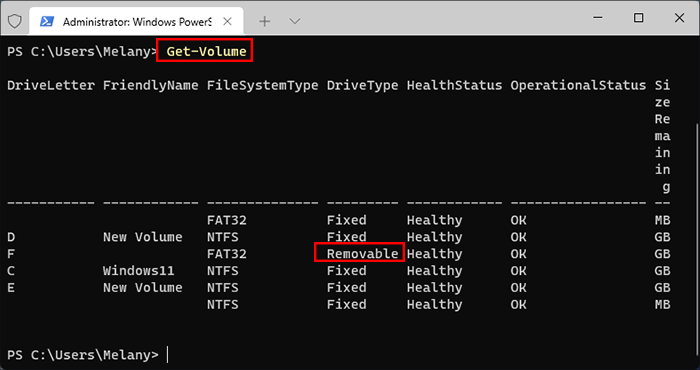
Step 4: Input the command Get-Volume in the Windows PowerShell and click Enter key. Next, you can see that the DriveType of the F drive is Removable, that is, the USB drive is F disk.
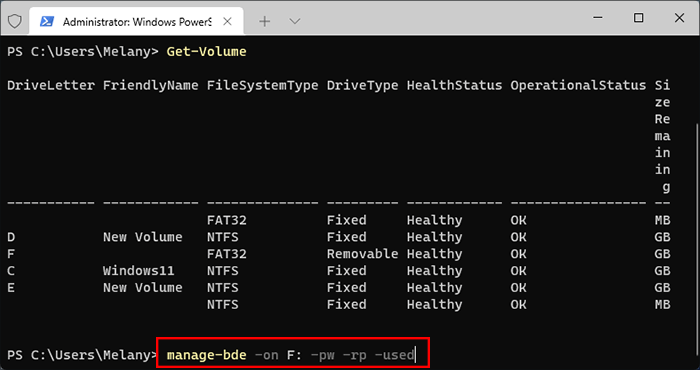
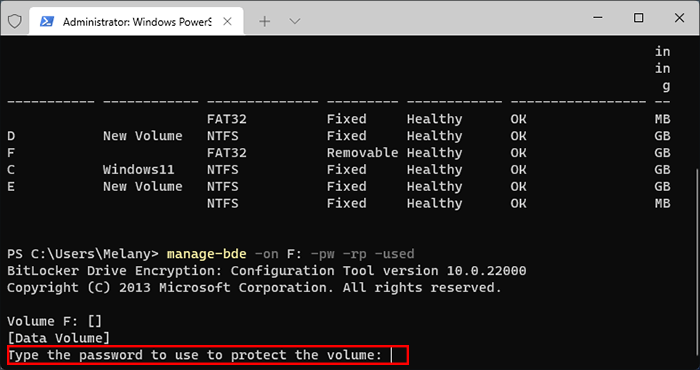
Step 5: Continue to type the command manage-bde -on F: -pw -rp -used in the Windows PowerShell and click Enter key to encrypt the USB and turn on BitLocker.
Step 6: Now, you can start typing the password for protection, and the password is hidden when you enter it. Then click the Enter key.
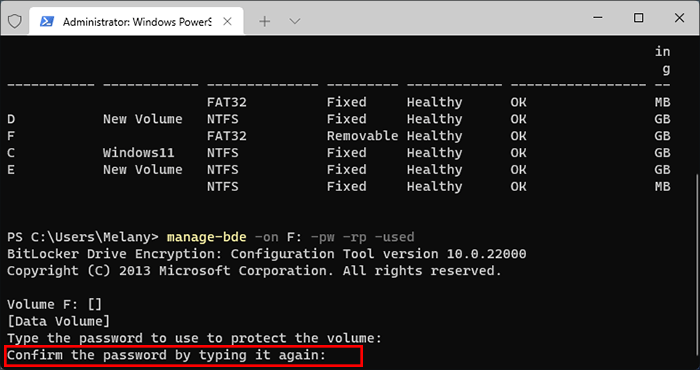
Step 7: Type the password again and click Enter.
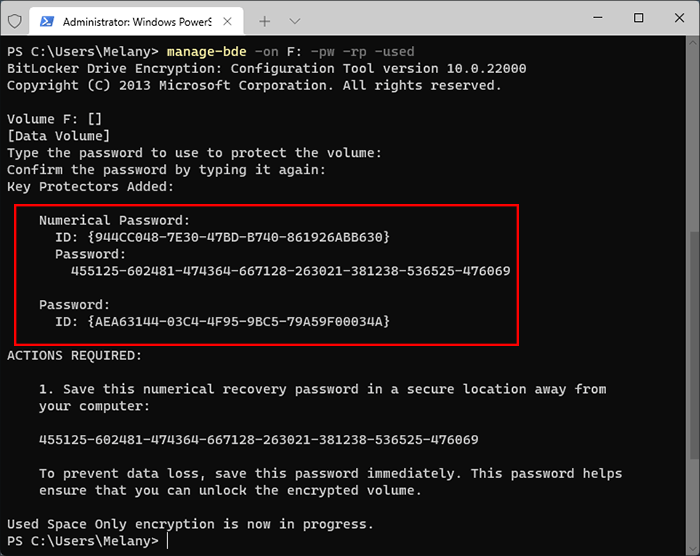
Step 8: After typing the password, you will be prompted to save the recovery password. Please be sure to save the ID: {944CCe48-7E3e-47BD-B746-861926ABB63e} under Numerical Password and the 48-digit Password: 455125-602481-474364-667128-263021-381238-536525-476069.
Step 9: After that, you can see the state of the USB Drive(F:) in File Explorer is changed to an opened lock, which means you've successfully turn on BitLocker to protect the USB.
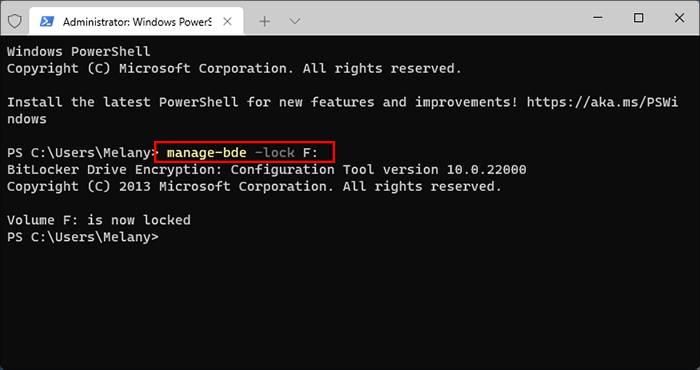
Step 10: Open Windows PowerShell again, type the command manage-bde -lock F: in Windows PowerShell and click Enter to lock the USB protected by BitLocker.
Step 11: Now, you can see the icon of the USB Drive(F:) is locked. That is, how to turn on BitLocker and lock the USB.
Option 2: How to Decrypt USB Drive and Turn off BitLocker
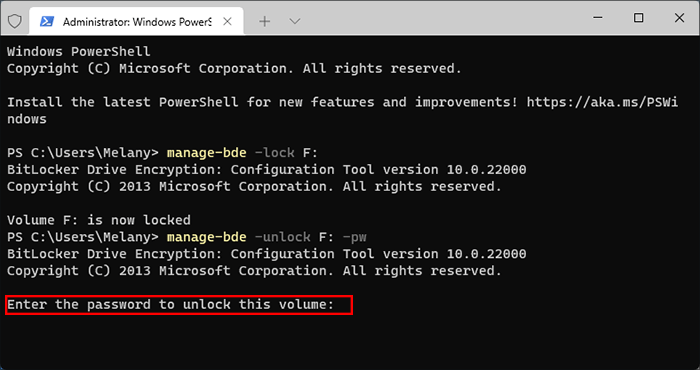
Step 1: Type the command manage-bde -unlock F: -pw in Windows PowerShell and click Enter.
Step 2: You will then be prompted for a password to unlock the USB. The password will be hidden when entered.
Step 3: After completing unlocking, you can see that the icon of the USB Drive (F:) is unlocked.
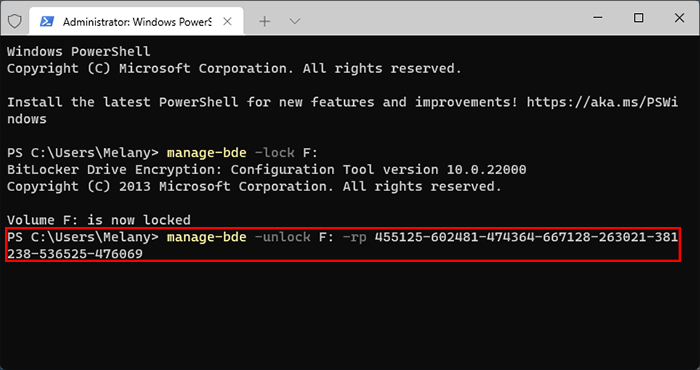
2: Decrypt USB Drive with Recovery Key
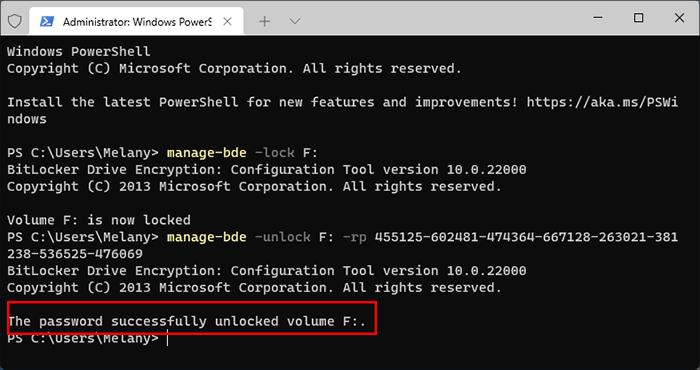
Step 1: Type the command manage-bde -unlock F: -rp 455125-602481-474364-667128-263021-381238-536525-476069 in Windows PowerShell and click Enter to run.
Step 2: Then the password successfully unlock the volume.
Step 3: Afterward, you can see the USB Drive(F:) is unlocked.
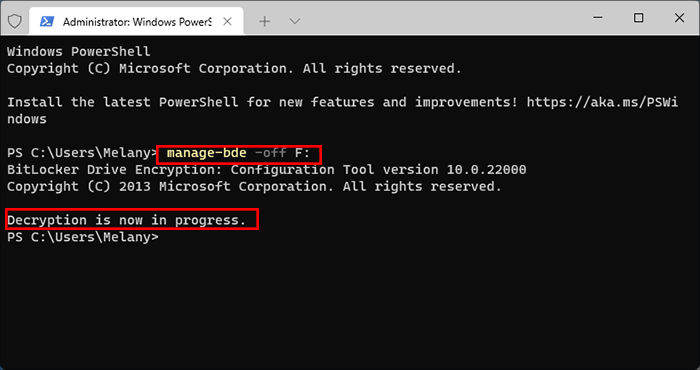
3.How to Turn off BitLocker
Open your Windows PowerShell again, type the command manage-bde -off F: in it and press Enter to run. Then go back to File Explorer> This PC, the USB Drive(F:) is changed the default state. It means you've decrypted the USB drive and turn off BitLocker.
Method 2: Encrypt and Decrypt a USB Drive with BitLocker
If there is the built-in BitLocker utility on your computer, you can take advantage of it to encrypt and decrypt the USB drive with the following operations. But if your computer does not support BitLocker, such as the computer in Windows 11 Home edition, you can enable BitLocker with iSunshare BitLocker Genius for Windows. Check article: How to Turn on BitLocker on Windows 11/10 Home.
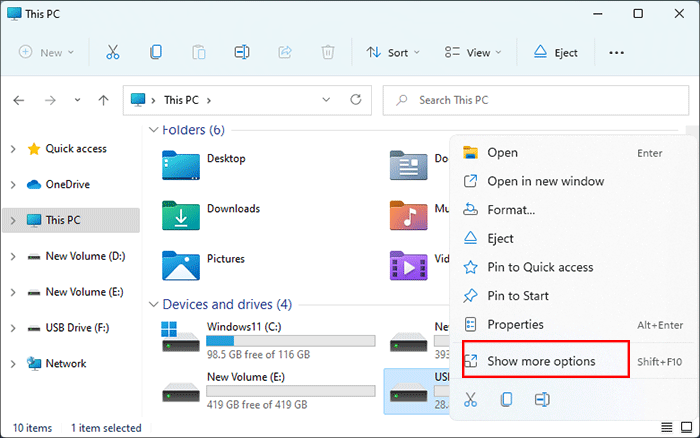
Step 1: Plugged the USB into your Windows 11 PC. Click on the File Explorer on the taskbar. Then click This PC on the left sidebar and find the USB Drive(F:) under the Devices and Drives.
Step 2: Right-click the USB Drive(F:) and select Show more options from the context menu.
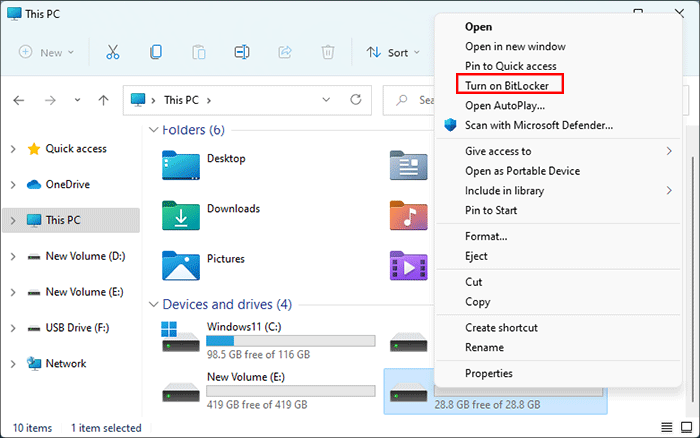
Step 3: Then click the Turn on BitLocker option.
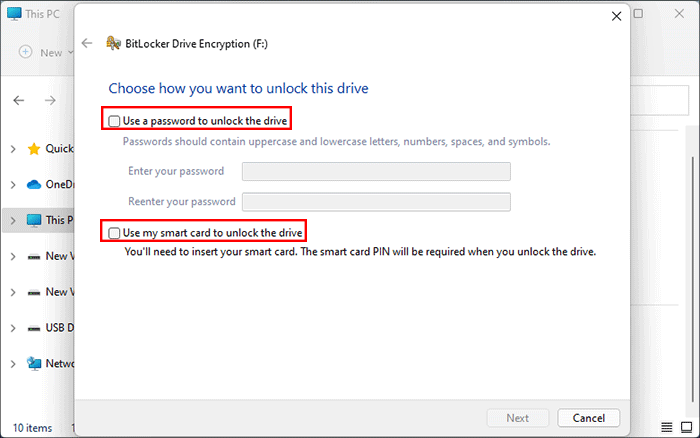
Step 4: After hitting that, you'll go to the BitLocker Drive Encryption(F:) window. Choose how you want to unlock this drive, use a password or smart card.
Step 5: If you want to use a password to unlock the drive, check the box and set the passwords containing uppercase and lowercase letters, numbers, spaces, and symbols. Then click Next to continue.
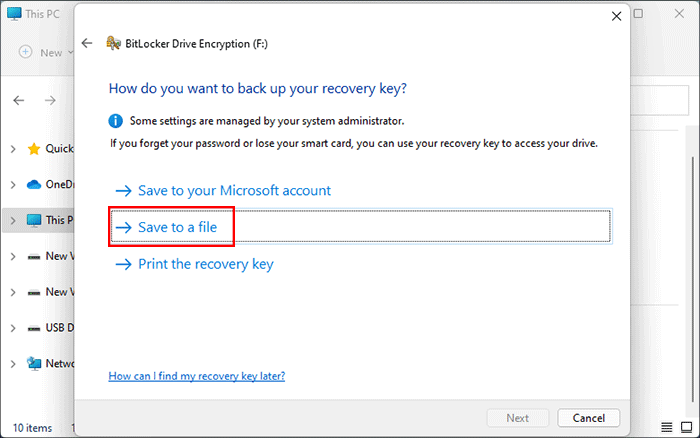
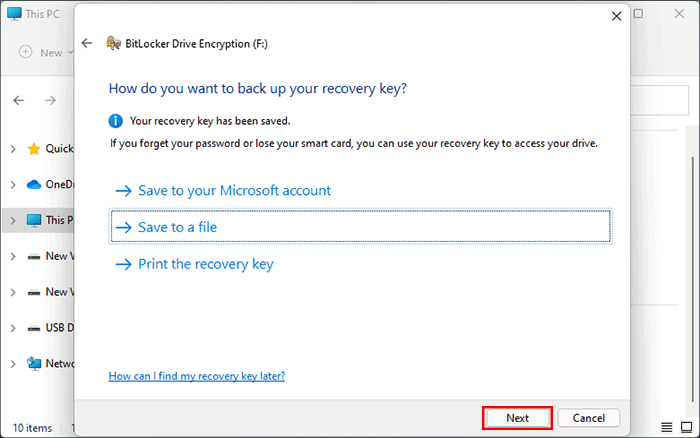
Step 6: Click "Save to a file" to back up your recovery key if you forget your password.
Step 7: Choose the path you save the BitLocker recovery key. Please note that to remember where you save as.
Step 8: After you save it, click Next.
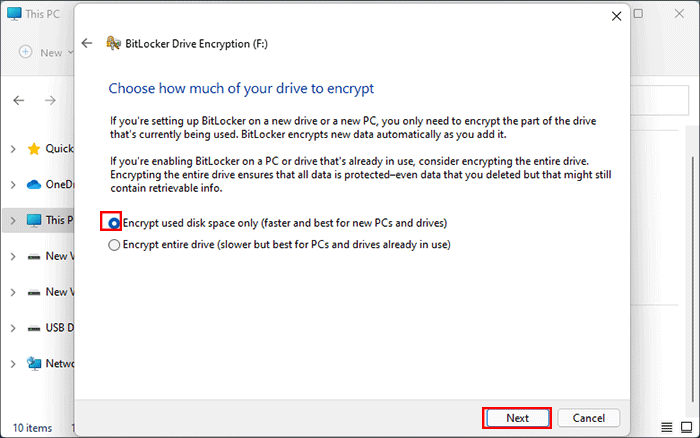
Step 9: Choose how much of your drive to encrypt, then click Next.
Step 10: Choose which encryption mode to use. After confirming, click Next.
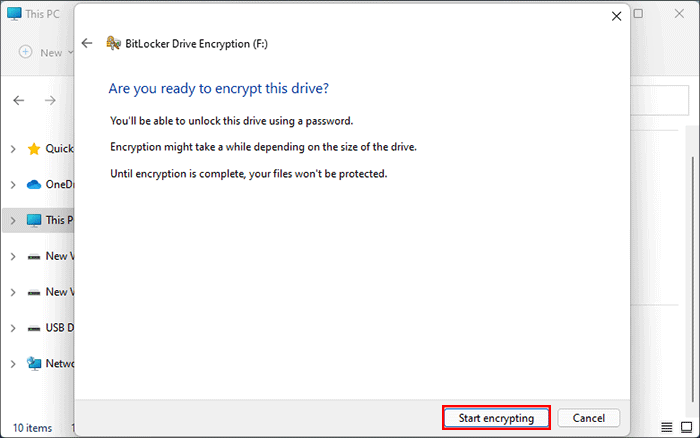
Step 11: Click Start encrypting to be ready to encrypt this drive. You also will be able to unlock this USB drive using a password.
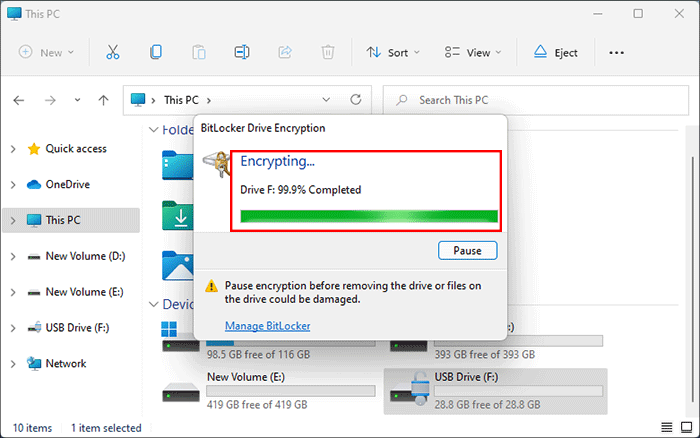
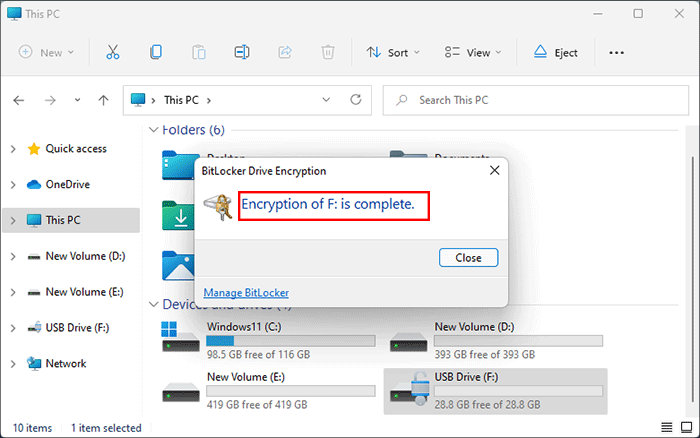
Step 12: Wait for encrypting patiently.
Step 13: This time you've completed encrypt the USB.
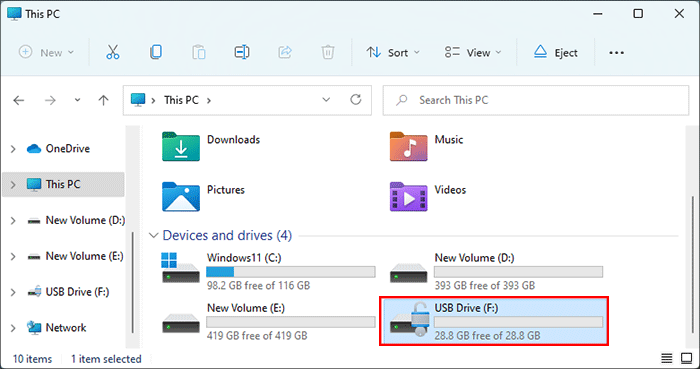
Step 14: Now you can see the USB Drive(F:) has become the state of unlocking.
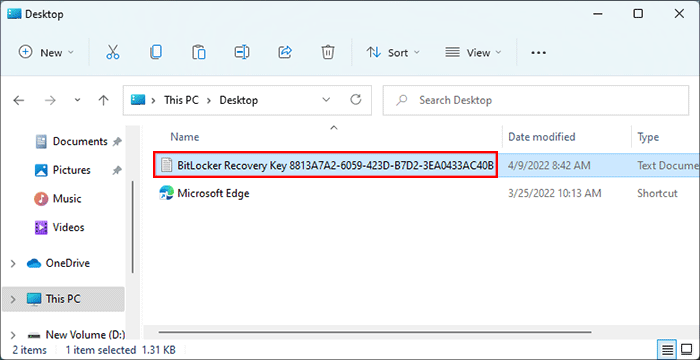
Step 15: Go to the file where you've saved the recovery key and you can see that the document has been saved.
Step 1: When you eject the USB and plug it into the computer again, you can see the icon for the USB drive (F:) is locked.
Step 2: Double-click the USB, and there appears the BitLocker window. Enter the password you've set and click Unlock, then the USB Drive(F:) will be unlocked.
2. Decrypt a USB Drive using BitLocker Recovery Key
If you forget the password you have set, you can use the recovery key to unlock the USB Drive(F:) protected by BitLocker.
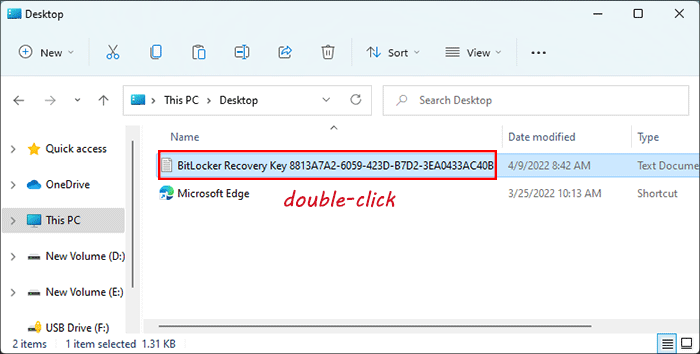
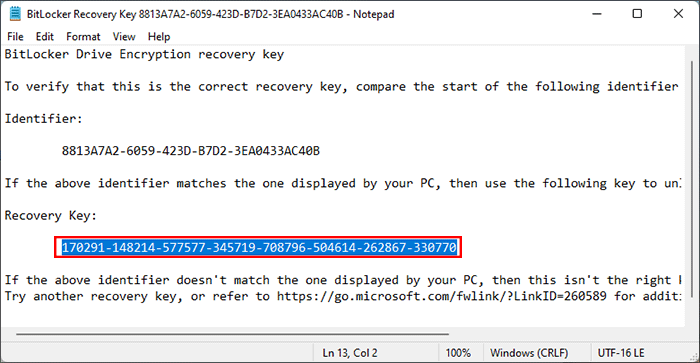
Step 1: Go to the file where you have saved the recovery key and double-click the recovery key document.
Step 2: In the Notepad, copy the 48-digit recovery key.
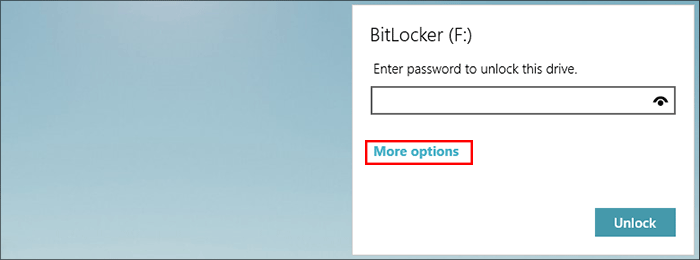
Step 3: Double-click the locked USB Drive(F:) from File Explorer, then click on More options in the pop-up BitLocker(F:) window.
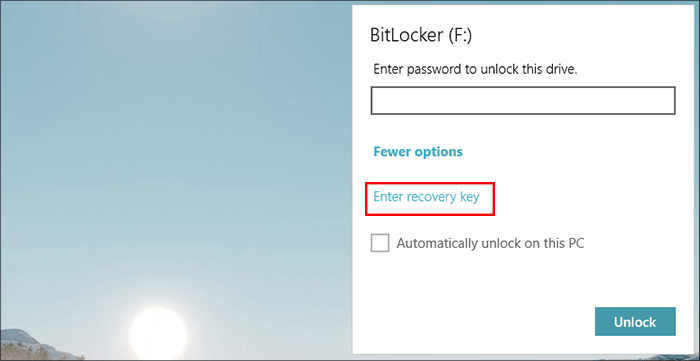
Step 4: Next, click on Enter recovery key.
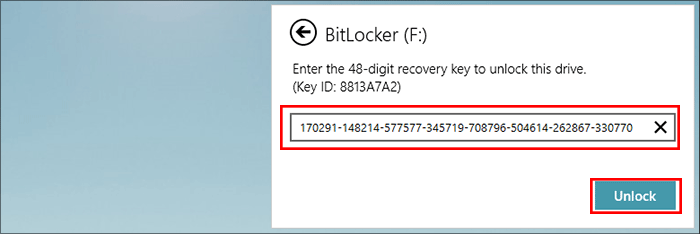
Step 5: Now you can paste the 48-bit recovery key you copied from Notepad to unlock the USB drive. After doing this, the encrypted USB drive is unlocked.
Option 3: How to Turn off BitLocker
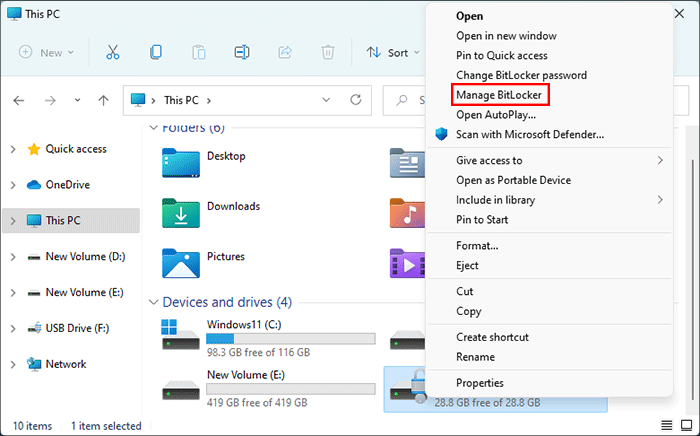
Step 1: In File Explorer, right-click the USB drive (F:), click Show more options.
Step 2: Next, click on the Manage BitLocker option.
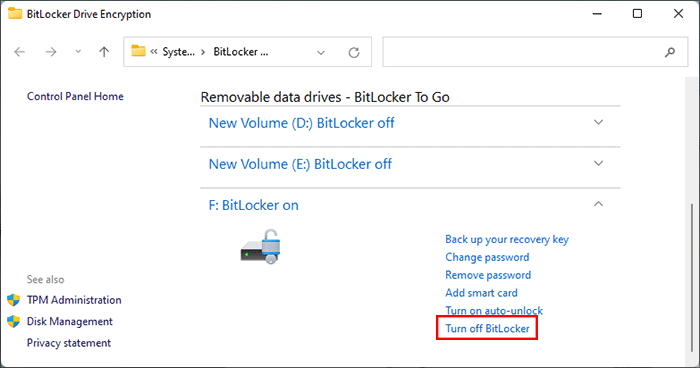
Step 3: After clicking it, click Turn Off BitLocker in the bottom right corner of the BitLocker Drive Encryption screen.
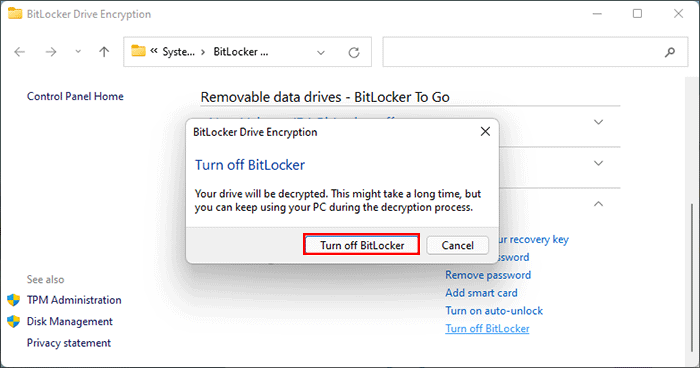
Step 4: Turning off BitLocker can take a long time. If you are sure you want to do this, click Turn Off BitLocker.
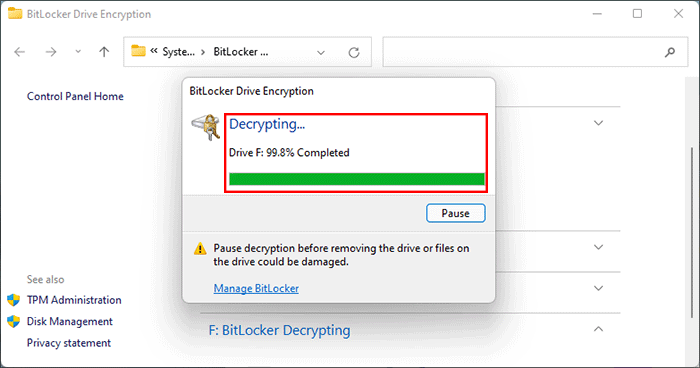
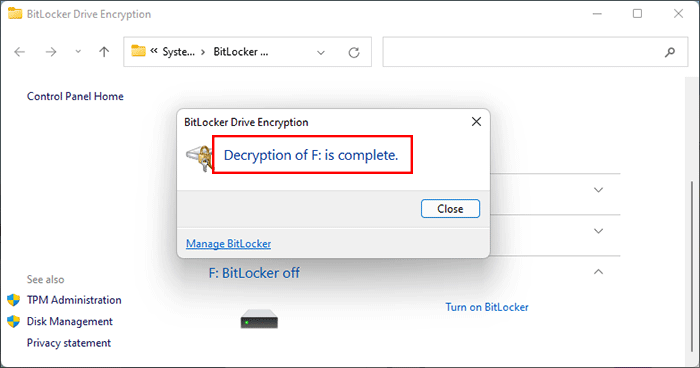
Step 5: Please wait patiently for decryption.
Step 6: After completing decrypting the USB, click Close in the pop-up dialog.
Step 7: Now you can go to File Explorer again and you will see the USB Drive(F:) is back to its default state.
Method 3: Encrypt and Decrypt a USB Drive with iSunshare SafeUSB Genius
In addition to encrypting and decrypting a USB drive with Windows PowerShell and BitLocker in Windows 11, you can also password protect a USB drive with iSunshare SafeUSB Genius, powerful encryption software for protecting your USB drive. Now, let's discuss the steps on how to encrypt and decrypt a USB drive with iSunshare SafeUSB Genius in Windows 11.
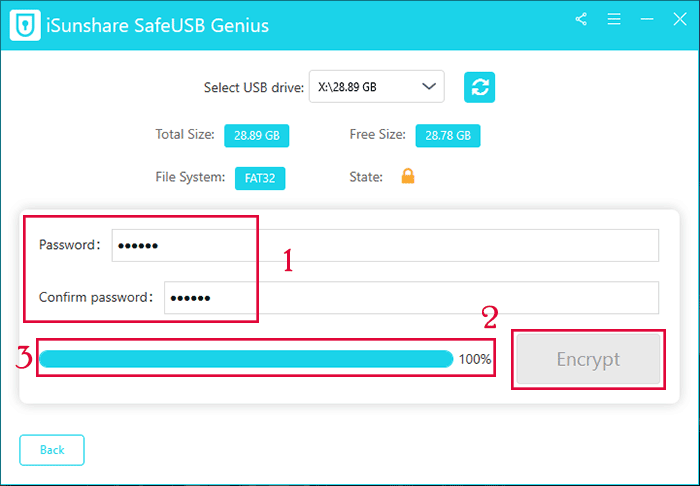
Step 1: Connect your USB drives to your computer. Then the software will auto-identify your USB drive and its total size, free size, file system, and current state. Click "Encrypt" to continue.
Step 2: After clicking the "Encrypt" button, you need to enter the encryption password twice, and the password contains 6 or more characters. Next, click "Encrypt" and wait for the encryption process to complete.
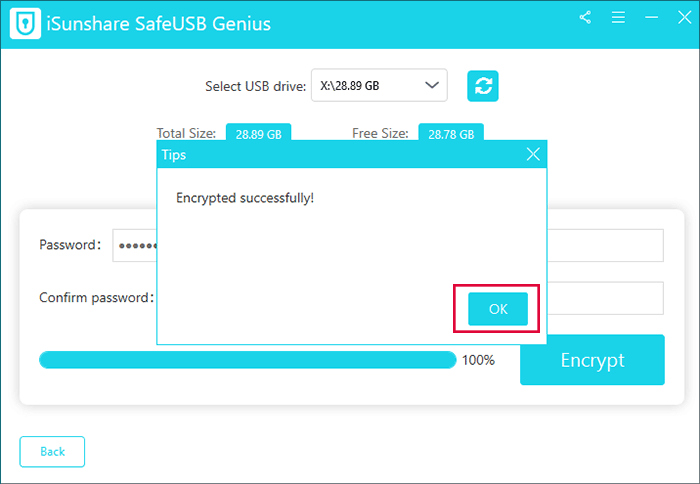
Step 3: It will be soon encrypted, then you should click "OK" in the pop-up dialog box.
Option 2: How to Decrypt USB Drive with iSunshare SafeUSB Genius
It is also simple to decrypt the encrypted USB drive with iSunshare SafeUSB Genius. You need to plug the encrypted USB drive into the computer which has installed iSunshare SafeUSB Genius first.
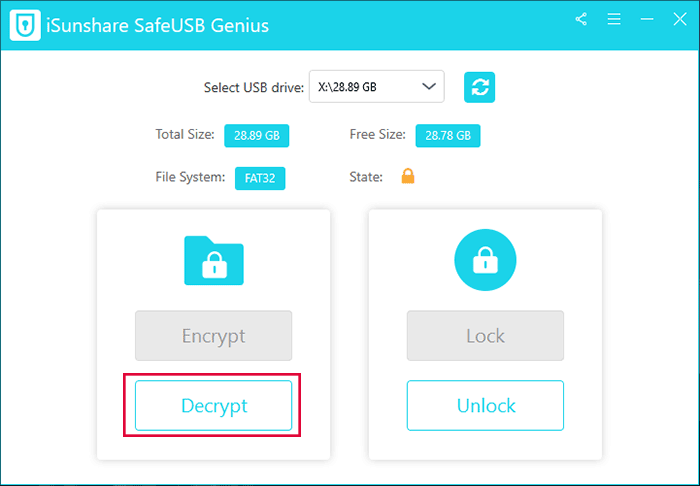
Step 1: After opening the software, click the "Decrypt" button to continue.
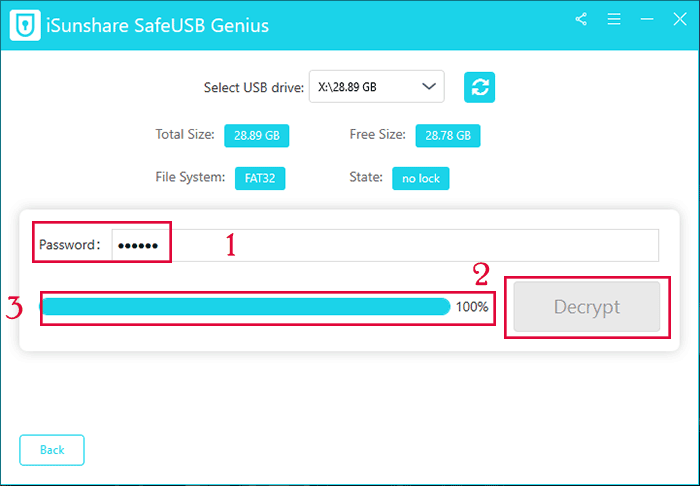
Step 2: Enter the password you've set up to encrypt the USB drive and then click the "Decrypt" button to start decrypting the USB drive.
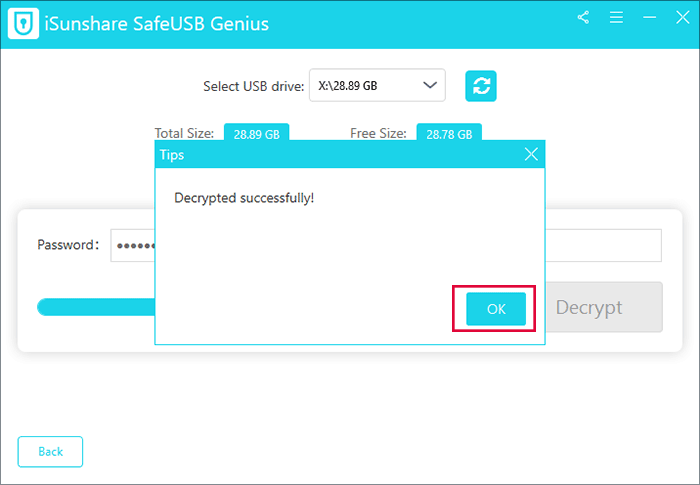
Step 3: When completing decrypting the USB, a prompt will pop up on this software saying that the USB drive is decrypted successfully. Click "OK" to complete all these decryption steps.