We use cookies for personalizing content and ads and providing social media features. Your usage information on our website will be used for social media, advertising, and traffic analytics, or shared with our partners. Clicking "Accept" means you agree to use our cookies .
If your computer has upgraded to Windows 11 but find it run slowly, how would you do to make Windows 11 run faster? Will you get a new hard drive or SSD and move Windows 11 to it? If there is less space on your computer, it is a good idea to install a new hard drive on your computer. It is no need worrying about TPM and secure boot requirement for Windows 11 on new hard drive. You can simple migrate Windows 11 to a new hard drive or SSD without reinstalling. Two ways are listed below with specific steps.
You need to get a new hard drive that is suitable for your computer. When it comes to the size, it should be larger than the used size of Windows 11 volume. Besides, you should install it on your computer or connect it via the USB-to-SATA adaptor or others. After that, go to initialize it with the following steps. Here the new disk will be initialized, partitioned and allocated drive letter via command lines.
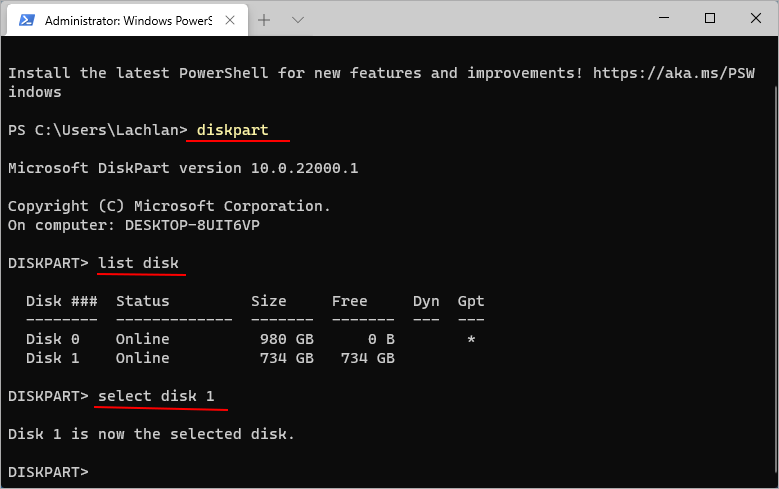
Step 1: Open Windows PowerShell as the administrator.
Step 2: Execute the command lines one by one:
diskpart
list disk
select disk Your Disk Number
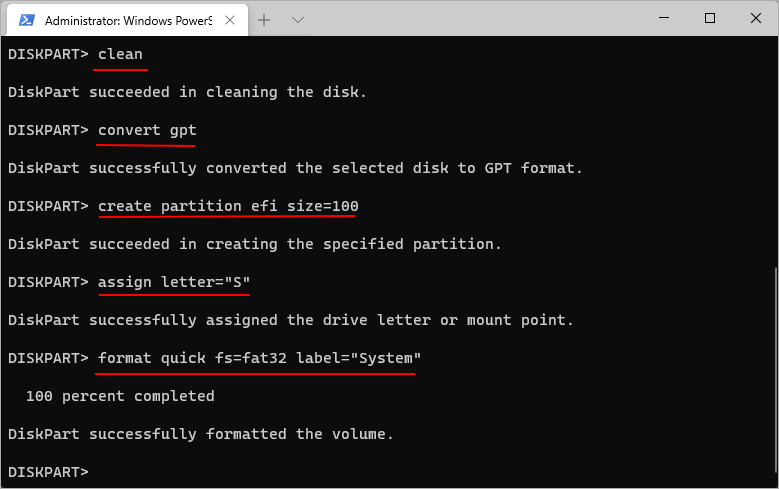
Step 3: Execute the following commands one by one to create the EFI partition and assign S as the drive letter:
clean
convert gpt
create partition efi size=100
assign letter=”S”
format quick fs=fat32 label=”System”
Step 4: Conduct the commands to create the primary partition and assign W as the drive letter:
create partition primary assign letter=”W”
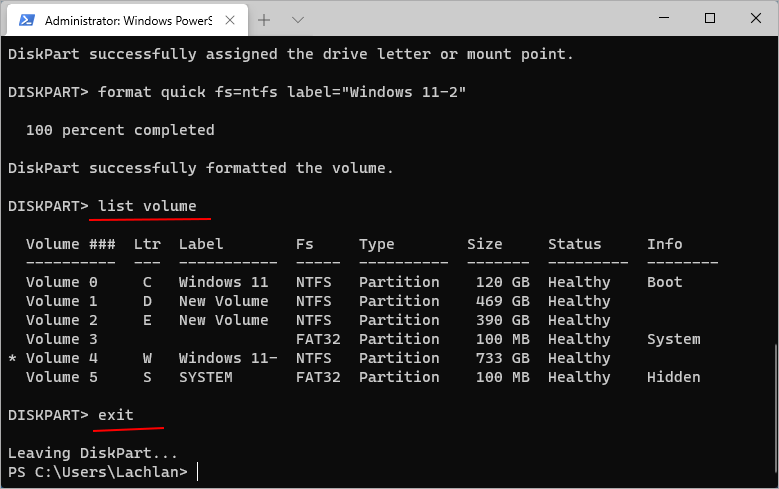
format quick fs=ntfs label=”Windows 11-2”
Step 5: Conduct commands to check volume details and exit diskpart:
list volume
exit
After that, your new disk can be used normally in your Windows 11 computer.
Part 2—Free Way to Move Windows 11 to a New Hard Drive or SSD
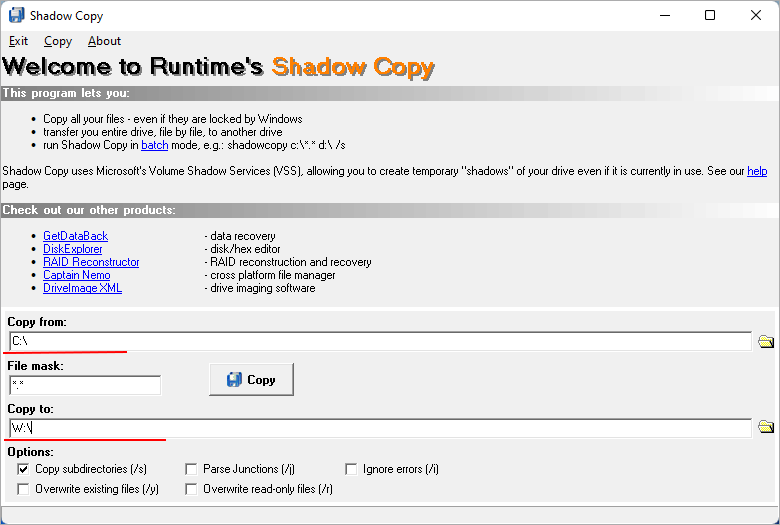
ShadowCopy is a simple program that allows you to copy your entire system to another disk. It is free to use and compatible with all Windows operating system. First of all, you need to search this program online and then get it downloaded and installed on your Windows 11 computer (you can download from here: https://www.runtime.org/shadow-copy.htm). After that, follow the guides below to move Windows 11 to your new hard disk.
Step 1: Double click to run ShadowCopy program on your computer.
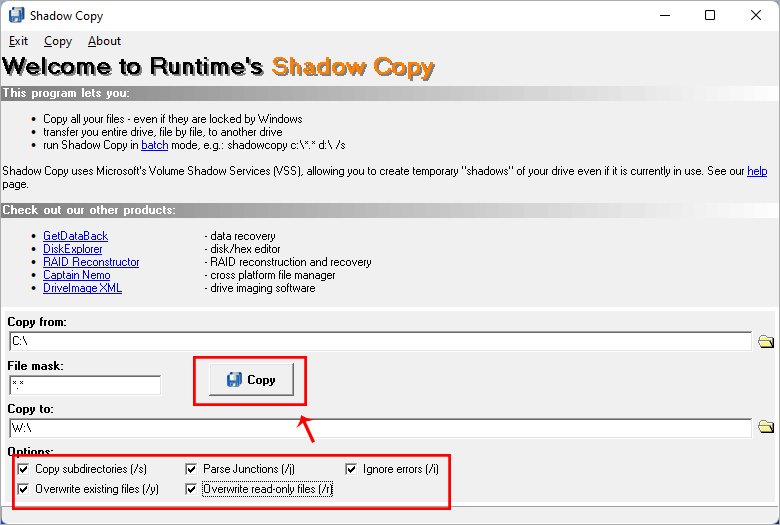
Step 2: Go to the box under Copy from field and change it to your system drive: C:\. Then set the location of your hard disk primary partition as the destination under Copy to field.
Step 3: Tick all the checkbox of Options and then click the Copy button.
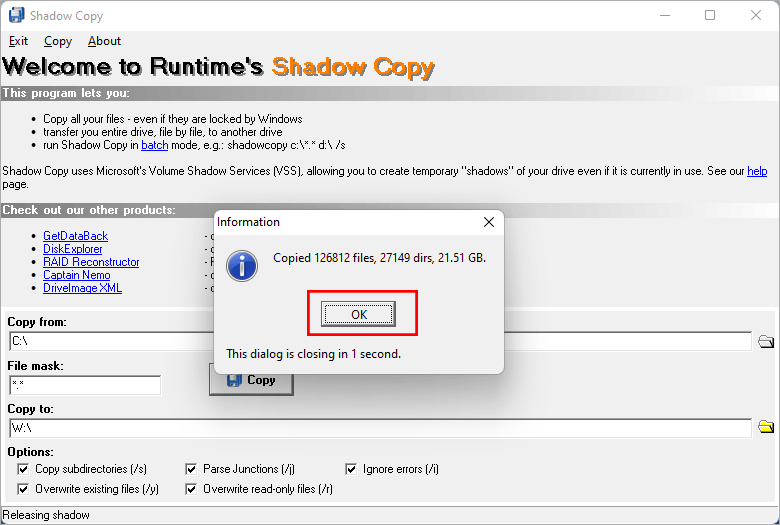
Step 4: Minutes later, all files in system drive are copied to the target partition. Click OK and close this program.
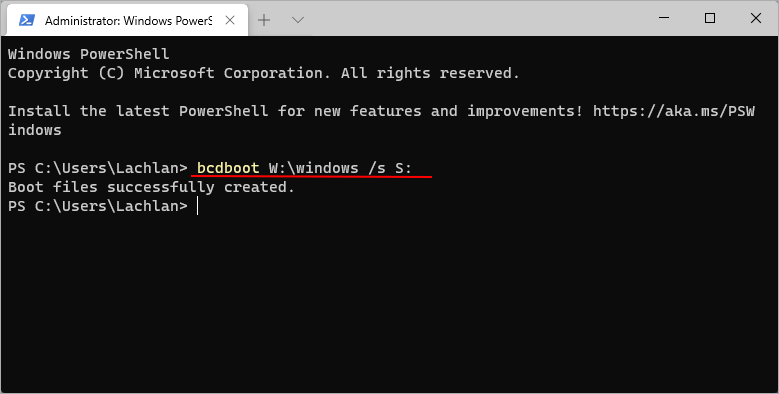
Step 5: Run Windows PowerShell and then input the command: bcdboot W:\windows /s S: and press Enter key. You can replace S with the EFI drive letter of the new hard disk. After that, the boot files are added to the new disk.
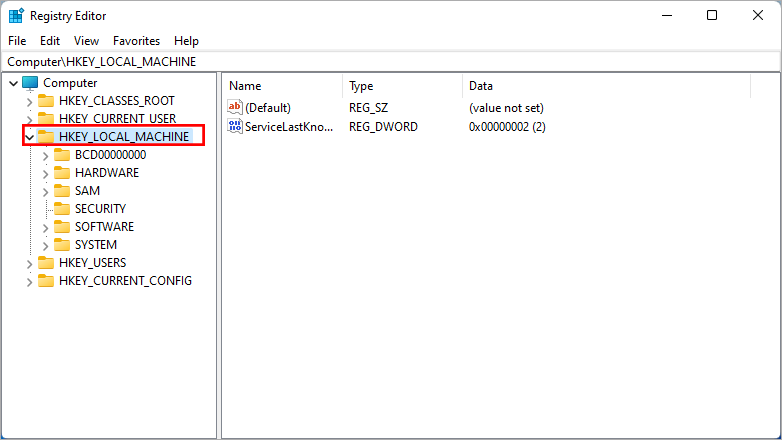
Step 6: Search regedit and choose Registry Editor to run.
Step 7: Choose HKEY_LOCAL_MACHINE folder and open it.
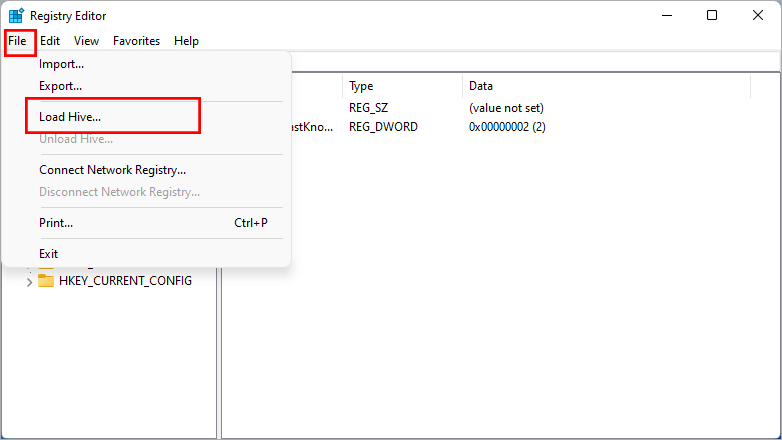
Step 8: Click the File option on the top and then choose Load Hive option.
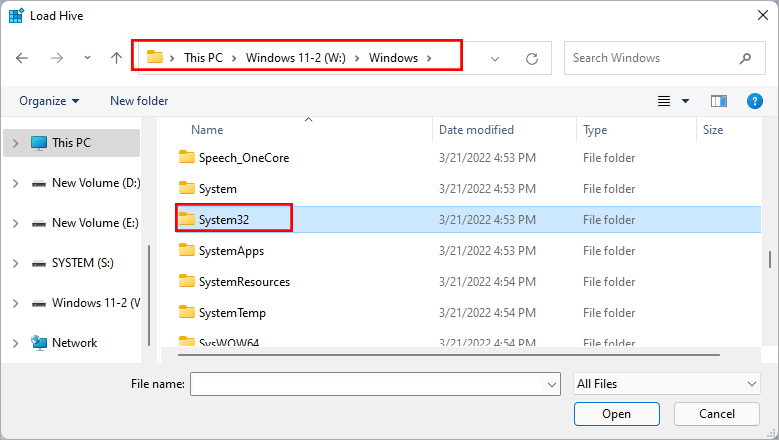
Step 9: Head to This PC > Your Windows 11 system drive in new disk > Windows > System 32.
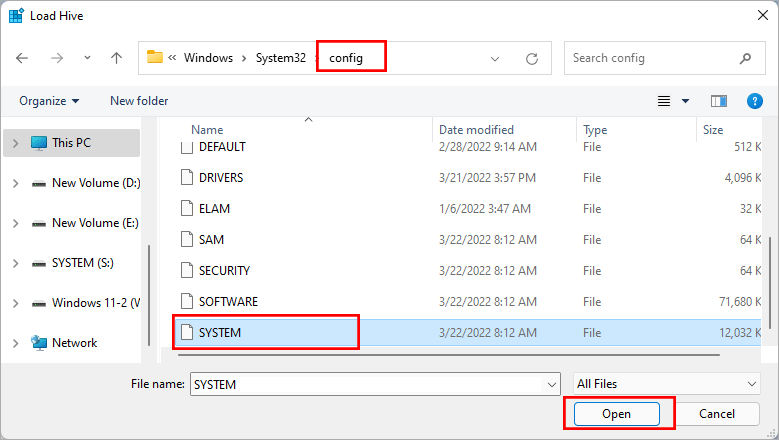
Step 10: Then access config > SYSTEM.
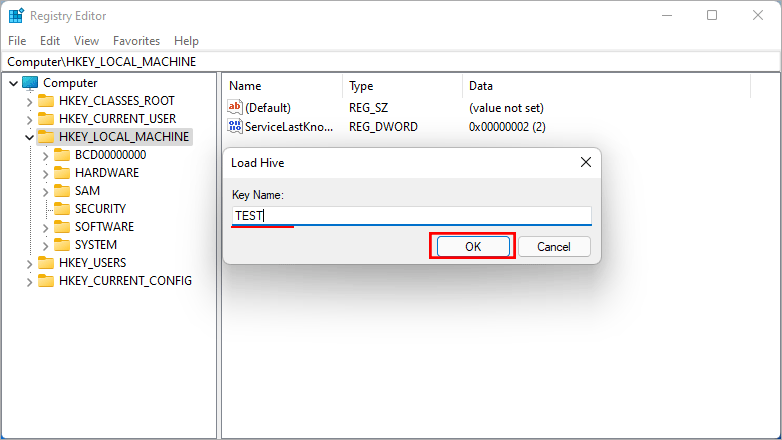
Step 11: Enter a name and then click the OK button.
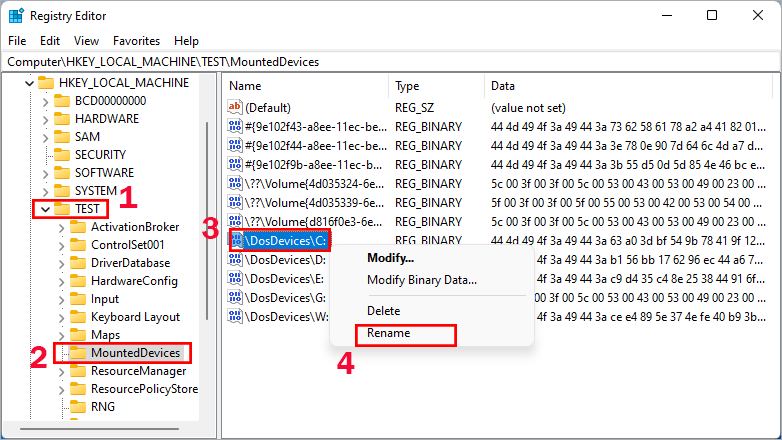
Step 12: Click and unfold TEST > MountedDevices folder on the left menu. After that, go to right-click \DosDevices\C: file and choose Rename option on the right menu. Next, enter \DosDevices\P: as the new name.
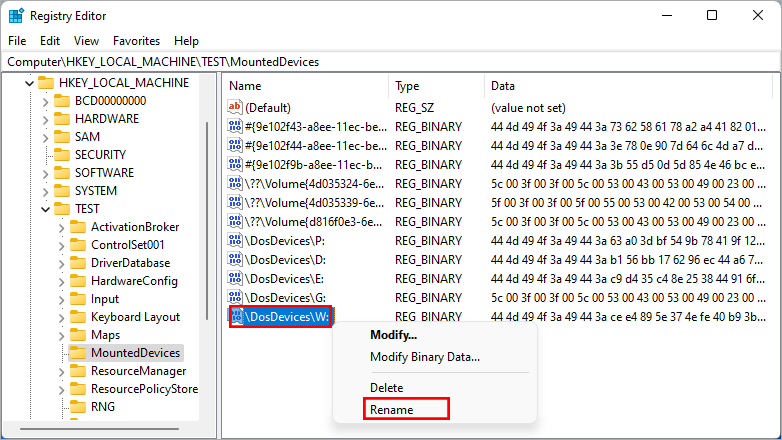
Step 13: Go to right-click \DosDevices\W: file and choose the Rename option to rename it as \DosDevices\C: .
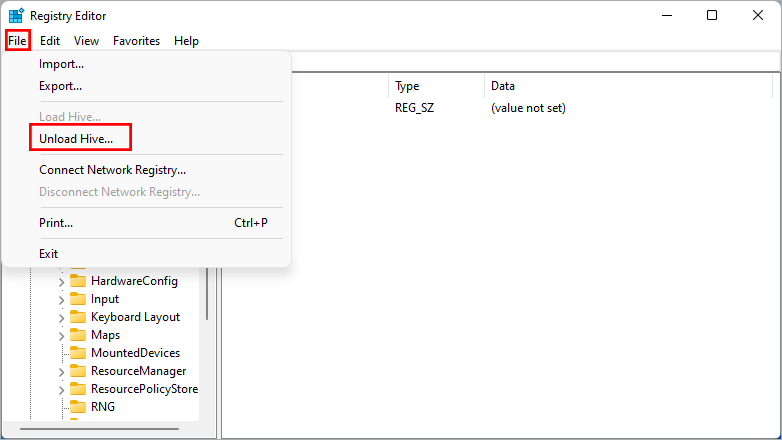
Step 14: Choose the TEST folder on the left menu and click the File option on the top. Then, choose Unload Hive option.
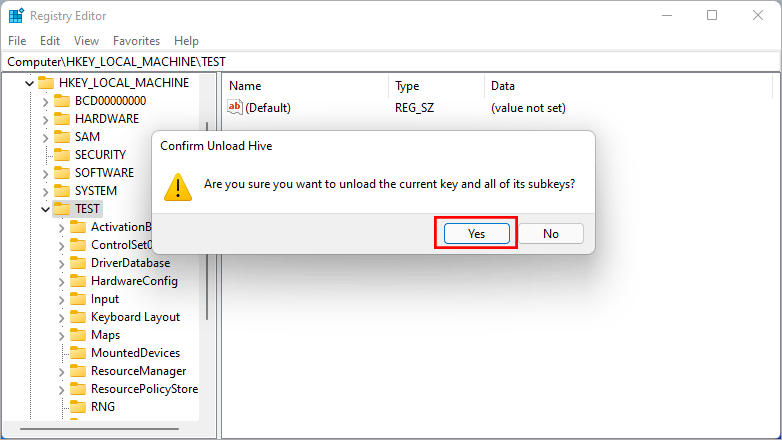
Step 15:Click the Yes button.
Now the new disk –HDD or SSD is bootable. You can shutdown the computer and boot Windows 11 from the new hard disk.
Part 3—Transfer Windows 11 to a New Hard Drive or SSD with iSunshare CloneGo
Although ShadowCopy is the free utility, it is complicated to make the Windows 11 on new disk bootable. Is there any easier way to clone Windows 11 to a new hard drive or SSD without reinstalling? Yes, you can use a professional Windows cloning tool—iSunshare CloneGo. This software enables you to easily migrate all contents of Windows 11 operating system to the new hard disk partition. After the migration, you can easily boot Windows 11 from the new disk.
Step 1: Download and install iSunshare CloneGo on your Windows 11 computer.
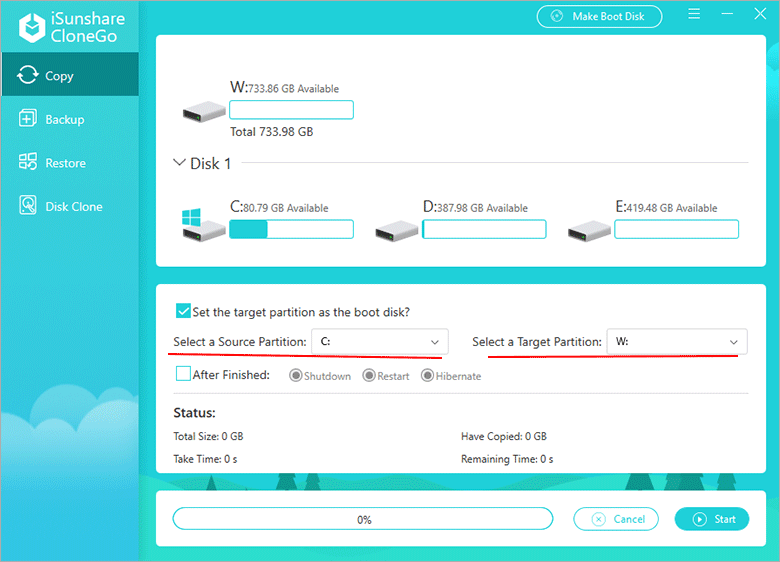
Step 2: Run CloneGo and you are in the Copy interface. Then choose C drive after the Select a Source Partition field. Meanwhile, select your new disk partition as the target partition. Besides, you should make sure the checkbox of Set the target partition as the boot disk is checked.
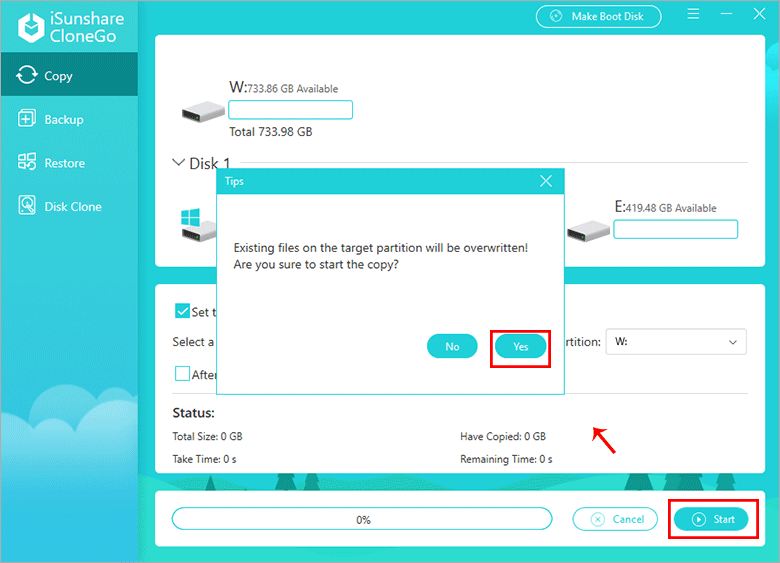
Step 3: Click the Start button and you will get such tips: Existing files on the target partition will be overwritten! Are you sure to start the copy? Click the Yes button to start copying Windows 11 OS to your new hard drive.
Step 4: Minutes later, the cloning process ends. You can click OK and close the software. Now you can shutdown the computer and restart it to boot from the new disk.
Part 4—Bonus Tips: How to Boot Windows 11 from the New Hard Drive or SSD
If you want to check whether the cloned Windows 11 OS can work normally on new hard drive or not, you can restart the computer and set to boot from new hard drive or SSD.
Step 1: Restart the computer and keep pressing the boot menu key to enter BIOS setting when you see the vendor logo.
Step 2: Set the new hard drive or SSD as the first boot option.
Step 3: Save the changes and restart the computer. Now the computer will be booted from Windows 11 on the new hard disk.