Due to strict mail server authentication, sometimes the iPhone Mail app will throw an error that it cannot verify the identity of the server. Due to this error, you will not be able to send or receive email on your iPhone.
Generally, the "Cannot verify server identity" error on iPhone is lost because the server is not trusted. However, sometimes iOS errors and incorrect email settings can also be the culprit. The error usually occurs after setting up a new email account. Every time a new email account is added, SSL verification is performed.
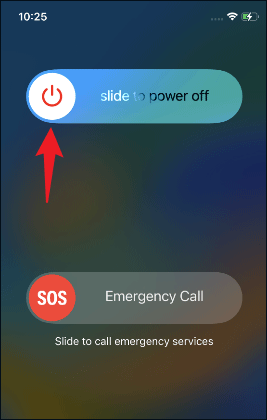
Restarting your iPhone is a common and widespread troubleshooting trick, just press and hold the volume up and side buttons until you see "slide to power off", then move the slider until your iPhone turns off. Then press and hold the side button to turn the iPhone back on.
Fix 2: Delete the e-mail account and re-add it
Some server identity issues will only be resolved if you delete your email account. You can delete the current e-mail and re-add it. Don't worry, you just unlink the e-mail account. All your e-mails and other da ta will remain intact.
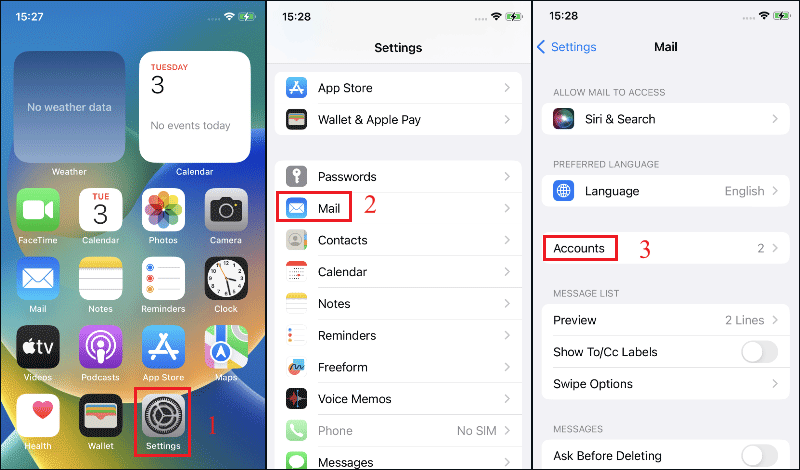
Step 1: Move to Settings > Mail > Accounts.
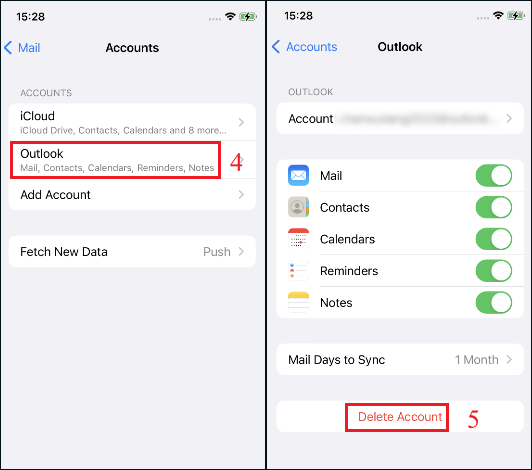
Step 2: Select your e-mail account, on the next screen, select the Delete Account option.
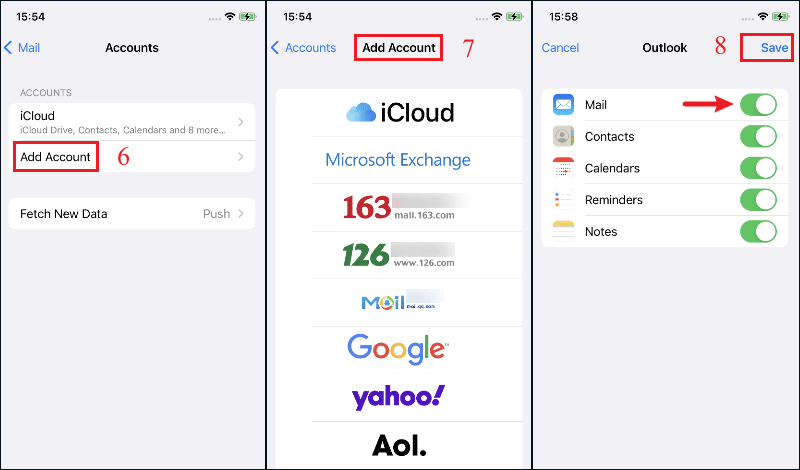
Step 3: Navigate to Settings > Mail > Accounts > Add Account > select your e-mail service provider. Enter your email address and password to sign in. Move the switch next to Mail to the ON position, then click Save. If desired, you can also enable Contacts, Calendars, Reminders, and Notes.
Fix 3: Reset network settings
Misconfigured network settings may cause connection problems between your iPhone and the server. Some users have reported that resetting the network settings helped them to solve this error. So, it is worth to try this solution.
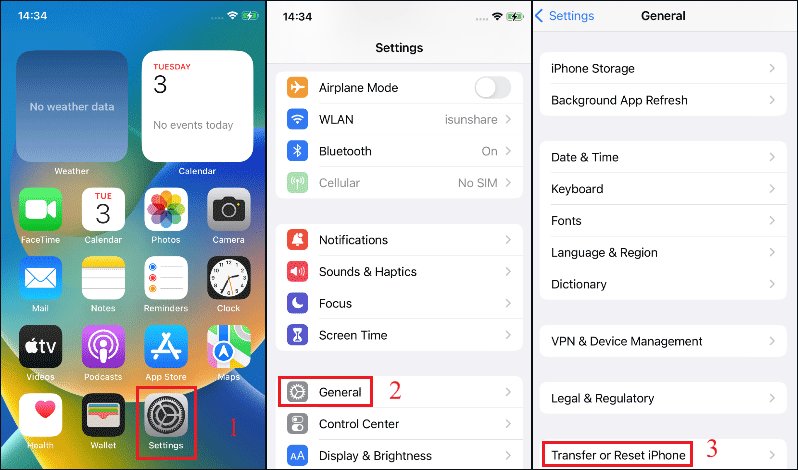
Step 1: Move to Settings > General > Transfer or Reset iPhone.
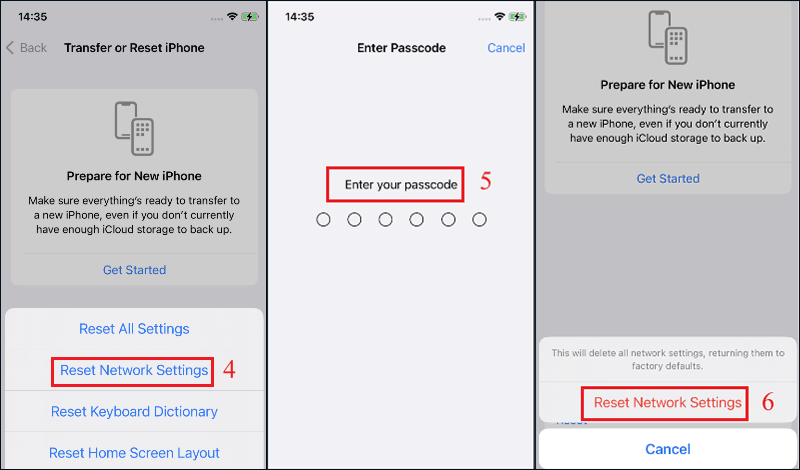
Step 2: Tap Reset > Reset Network Settings > Enter your passcode and confirm to Reset Network Settings. Your iPhone will be restarted and you should re-add your network manually. Now check if you cannot verify the server identity error on iPhone is resolved.
Fix 4: Update your iPhone to the latest version
In most cases, an outdated version of the software on your iPhone may cause this error. Outdated versions can create several problems over time, and “cannot verify server identity” error is one of them. Therefore, we can try to handle this situation by updating the iOS to the latest available version of the iPhone to get rid of this error.
Moreover, updating your iPhone to the latest version can fix various iPhone issues and include various features to make your iPhone more stable and secure.
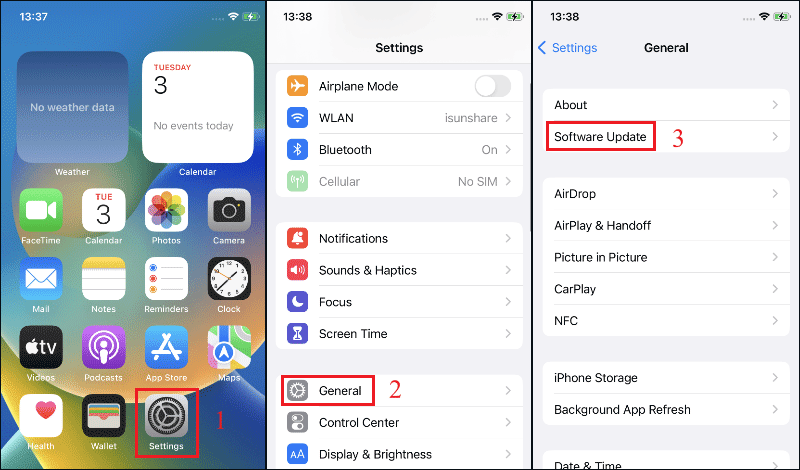
Simply move to Settings > General > Software Update, on the next page, check if there is a software update available. If so, click the Download and Install option and wait until the device installs the latest updated software on your iPhone.
Fix 5: Update iOS carrier settings
Conflicts in network settings may cause problems with email syncing. The best course of action is to update the iOS carrier settings.
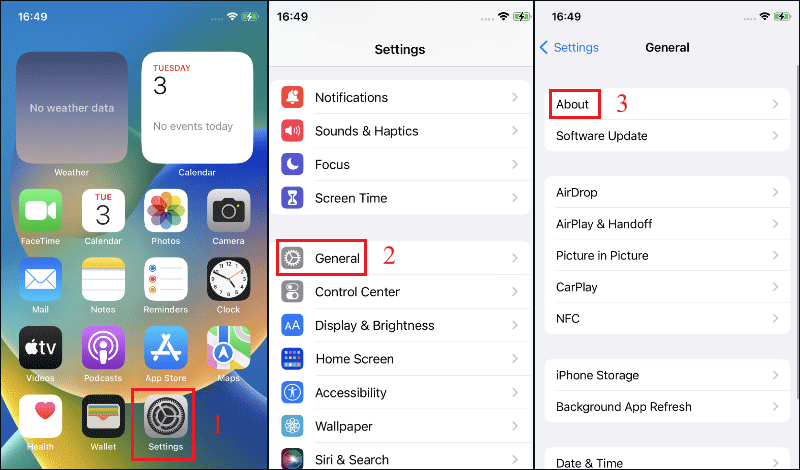
Update the carrier settings by going to Settings > General > About. Follow the on-screen instructions to update the carrier settings.
Note: Carrier updates are automatically displayed when opening About. This feature was introduced in iOS 14.3.
Fix 6: Use a professional iOS recovery tool -- iOS Repair Genius
iSunshare iOS Repair Genius is a powerful tool to repair iPhone with or without data loss. It can easily fix more than 50 common iOS problems like stuck in Apple logo, black screen of death, cannot verify server identity, etc. It can fix any problem occurring on your iOS device except hardware issues. It can also get your iPhone to normal with or without data loss.
Tip: Before performing the following steps, you need to download and install this tool on your computer and make sure iTunes is the latest version.
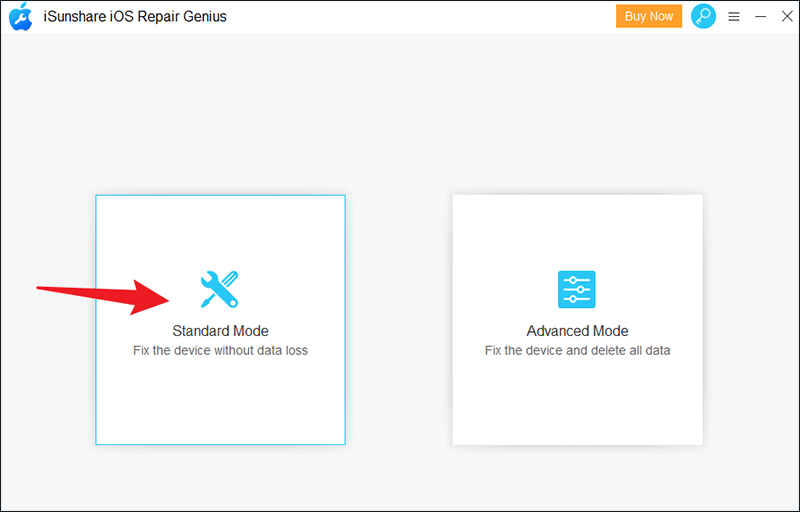
Step 1: The main interface of the software has a choice of standard and advanced modes. Standard Mode allows you to fix most of common system issues without data loss, while Advanced Mode can fix almost all the system issues at the cost of losing the data. If you have never backed up your iPhone via iCloud or iTunes, I suggest you choose Standard Mode.
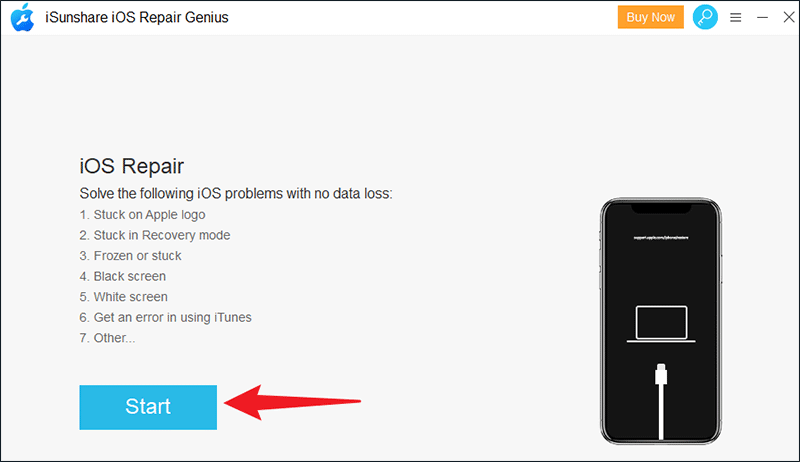
Step 2: Hit Start button to continue.
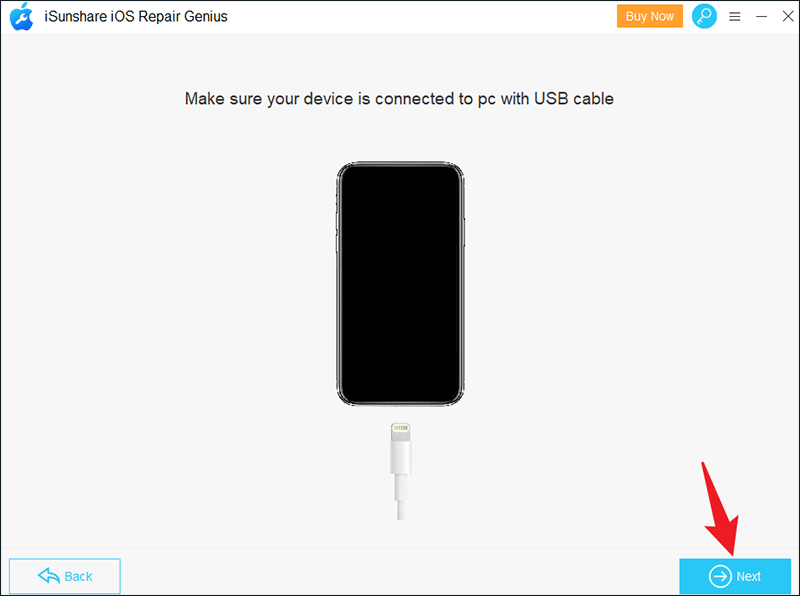
Step 3: Make sure your iPhone is connected to pc with USB cable, and click Next button. If your iPhone cannot be detected, you need to put your iPhone in DFU or Recovery Mode. On the screen you can see a very clear guide and follow it.
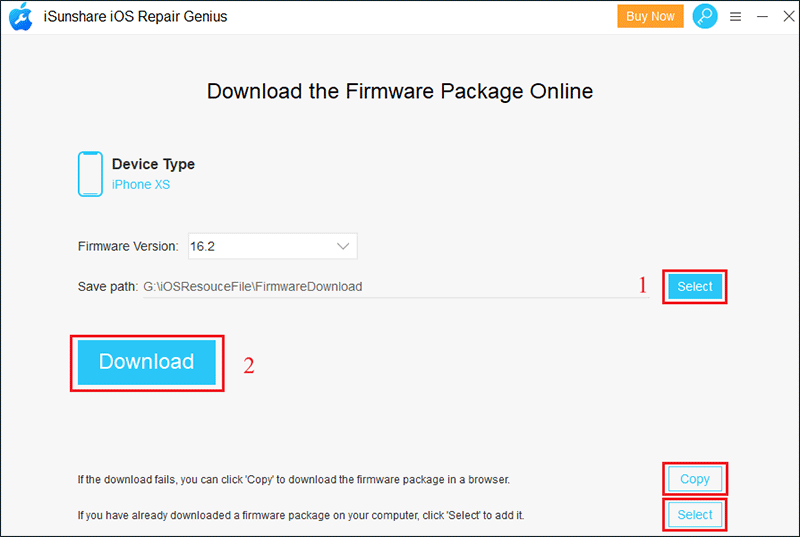
Step 4: The software will automatically identify your iPhone model and show you the latest available version of the firmware. Click Select button to choose the location from your PC where to save the package, and then click Download button to download the firmware package online. If the download fails, you can click the Copy button to download it on your browser. Then click the Select button at the bottom to import it. If you have already downloaded a firmware package on your computer, just click Select to add it.
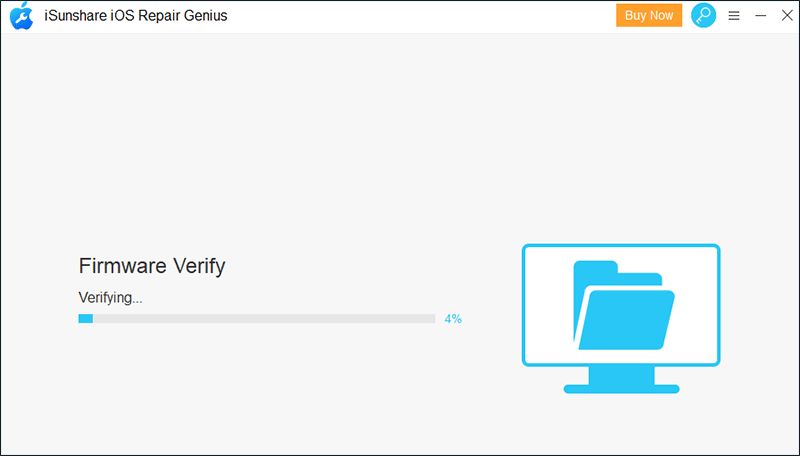
Step 5: Wait patiently for the download to complete and the firmware to be verified.
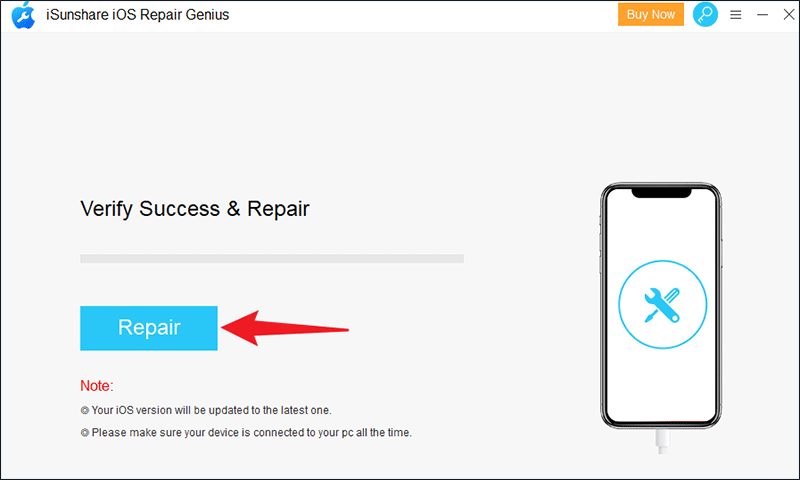
Step 6: All preparations have been completed. Click Repair button to start repairing.
Step 7: Wait for a while until a window pops up prompting that the iPhone has been repaired successfully. Click OK to close the window. At last, your iPhone will work properly and boot up automatically.
Conclusion:
If the error persists after you have tried the above fixes, it may be due to a technical failure of that email server that is under maintenance fix, in which case you can get further information by contacting that server operator, you can also ask your service provider to help you check and reconfigure your SMTP settings or incoming and outgoing server settings.
You can also troubleshoot Apple server issues by referring the issue to Apple Support for further support and assistance.