We use cookies for personalizing content and ads and providing social media features. Your usage information on our website will be used for social media, advertising, and traffic analytics, or shared with our partners. Clicking "Accept" means you agree to use our cookies .
Need to perform a complete system restore on your iPhone or troubleshoot serious software issues? Entering DFU (Device Firmware Update) mode is a powerful tool that allows you to restore your iPhone from any state—even when regular restore options don't work. Whether you're troubleshooting a bricked iPhone, updating firmware, or resolving iOS issues, DFU mode gives you deeper access to your device.
This mode is mainly used to fix iPhone stuck on Apple logo , iPhone stuck in recovery mode, or iPhone constantly rebooting and other basic system failures. It works with all iPhone, iPad and iPod touch devices and all versions of iOS.
Before entering DFU mode, we need to remind you that after putting iPhone into DFU mode, all data on device will be completely deleted and you need to make a data backup in advance. Different models of iPhone have different operations to enter DFU mode.
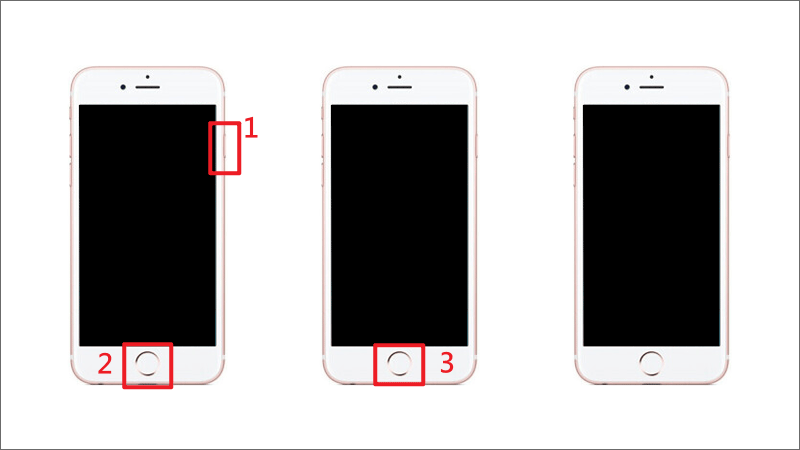
Step 1: After your device is turned off, press and hold the side power button for 3 seconds, then press and hold the Home button for 10 seconds while holding the side button.
Step 2: Release the power button and continue to press and hold the Home button for 5 seconds until the computer detects your iPhone.
Step 3: This works with iPhone 6/6S and earlier models.
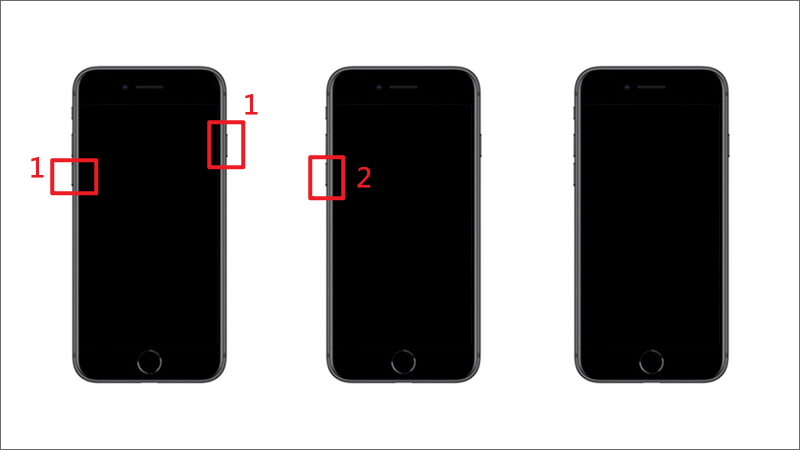
Option 2: How to put iPhone 7/7 plus into DFU mode
Step 1: Turn off your iPhone, connect it to your computer with a USB cable and run iTunes.
Step 2: Press the power button and "Volume Down" button at the same time, release the power button when the Apple logo disappears, and continue to hold the "Volume Down" button.
Step 3: You should see a prompt that "iTunes has detected an iPhone in recovery mode". Then release the volume button and while the device is in DFU mode, the screen will be black and will not show anything. If the Apple logo appears, you will need to repeat the same step.
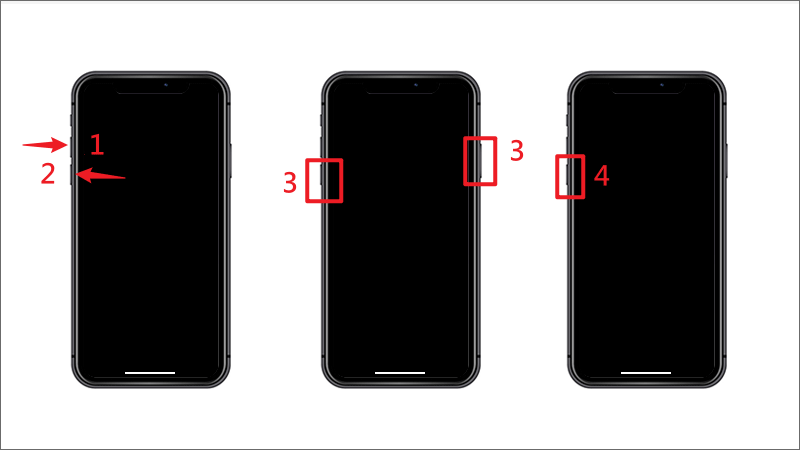
Option 3: How to put iPhone 8/X/11/12/13/14/15/16 into DFU mode
Step 1: Turn off your iPhone and connect it to your computer with a USB cable and run the latest version of iTunes on your computer.
Step 2: Press the "Volume Up" button, then press the "Volume Down" button, then press and hold the iPhone power button and "Volume Down" button at the same time for about 10 seconds.
Step 3: After 5 seconds, release the power button and continue to press and hold the "Volume Down" button. When iTunes pops up "iPhone in recovery mode has been detected" and the iPhone screen is black, the device has successfully entered DFU mode.
Step 4: This operation is applicable to iPhone 8 and later iPhone devices.
Part 2: How to get iphone out of DFU mode
To exit DFU mode, you can force restart your iPhone by following the specific button combination for your model. For most recent models (iPhone 8 and later), press and quickly release the Volume Up button, press and quickly release the Volume Down button, and then press and hold the Side button before the Apple logo appears. For older models, the button combinations differ slightly.
Part 3: Troubleshooting DFU mode entry problems
Problem 1--My iPhone shows the Apple logo instead of a black screen.
This usually means that you've held the buttons for too long or not long enough. Try restarting the process and ensure you release the buttons exactly as described.
Problem 2--iTunes/Finder doesn't detect my iPhone
Make sure your cable is properly connected and try using a different USB port or cable. You may also need to update iTunes/Finder or restart your computer.
Part 4: FAQs on iPhone DFU mode
1. What is DFU mode used for?
DFU (Device Firmware Update) mode is a low-level recovery mode that allows you to restore or update your iPhone's firmware. It's particularly useful for troubleshooting severe software issues, such as when your device is unresponsive, bricked, or if you want to downgrade or upgrade iOS.
2. Can DFU mode fix all iPhone problems?
DFU mode can resolve many severe software-related issues, including boot loops, software crashes, and failed updates. However, it may not fix hardware problems, such as a broken screen or malfunctioning buttons. In those cases, professional repair may be necessary.
3. What happens when you restore an iPhone in DFU mode?
Restoring an iPhone in DFU mode erases all data and settings on the device, returning it to factory conditions. This means you will lose all personal data, so it's essential to have a backup before proceeding with the restore.
4. My iPhone won't enter DFU mode. What should I do?
If your iPhone isn't entering DFU mode, ensure you're following the button combinations accurately and timing them correctly. It may help to practice the steps a few times. If it still doesn't work, check your device connection to the computer and ensure iTunes or Finder is updated.
Part 5: How to fix iOS failures without getting into iPhone DFU mode
If you find the operation of entering the iPhone DFU mode to fix the device failure problem too complicated, then you can try to fix it using an iOS repair tool like iSunshare iOS Repair Genius. It is a powerful IOS device repair tool that you can use at home to fix various iOS system problems such as stuck in Apple logo or recovery mode, black screen, white screen, etc. And more than 50 common system problems.
To be able to fix your iPhone malfunction problems smoothly, please download and install iSunshare iOS Repair Genius on your computer for free. In addition, please upgrade iTunes on your computer to the latest version.
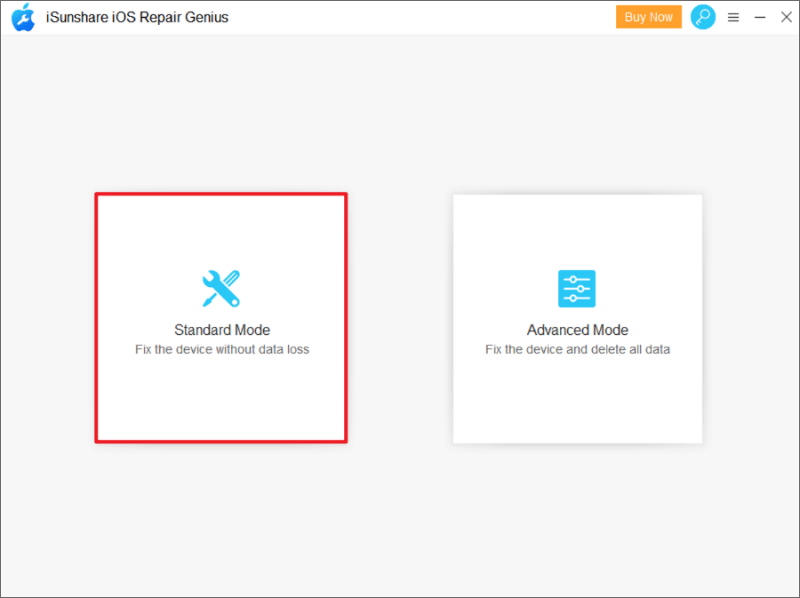
Step 1: Select the standard mode. After running iSunshare iOS Repair Genius, you will see 4 function modules on the main interface of the software. Then select the System Repair function. After that, in order to repair your device without losing any data stored on your iPhone, you should first select "Standard Mode".
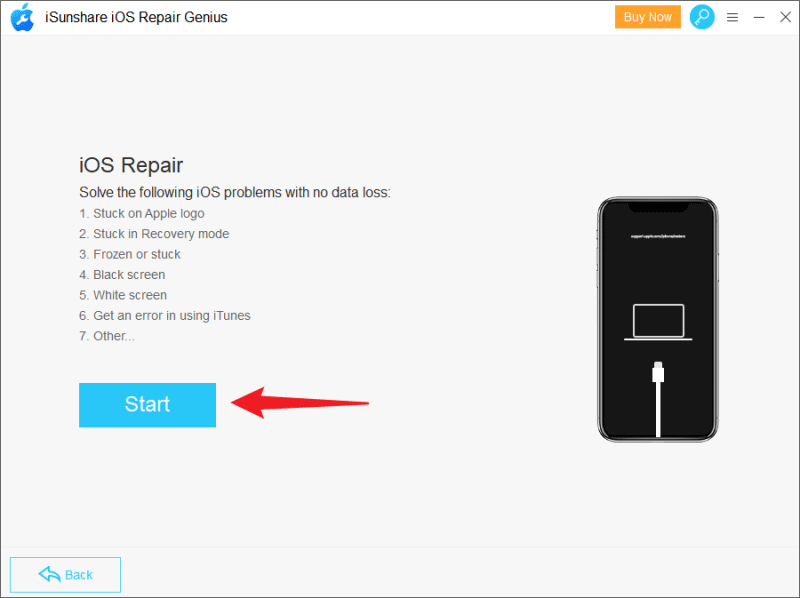
Follow the instructions of the software and click "Start" to proceed. Connect your iPhone to PC using a data cable and click "Next", the tool will automatically recognize your iPhone, if the iPhone cannot be recognized, follow the software instructions to put it in recovery mode.
Step 2: Download a firmware package. You will see that the software has prepared the latest firmware package for your iPhone, please select its storage path and click "Download" to download the firmware package. This will take a few minutes.
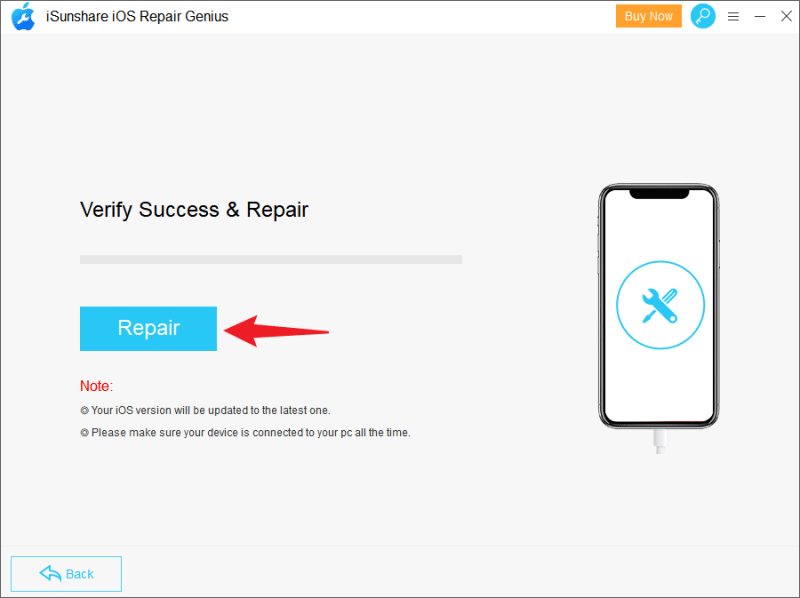
Step 3: Start fixing iPhone faults. Once the firmware package is ready, you can click on the "Repair" button to start fixing your iPhone, please note that you should not disconnect your iPhone from the PC during this time.
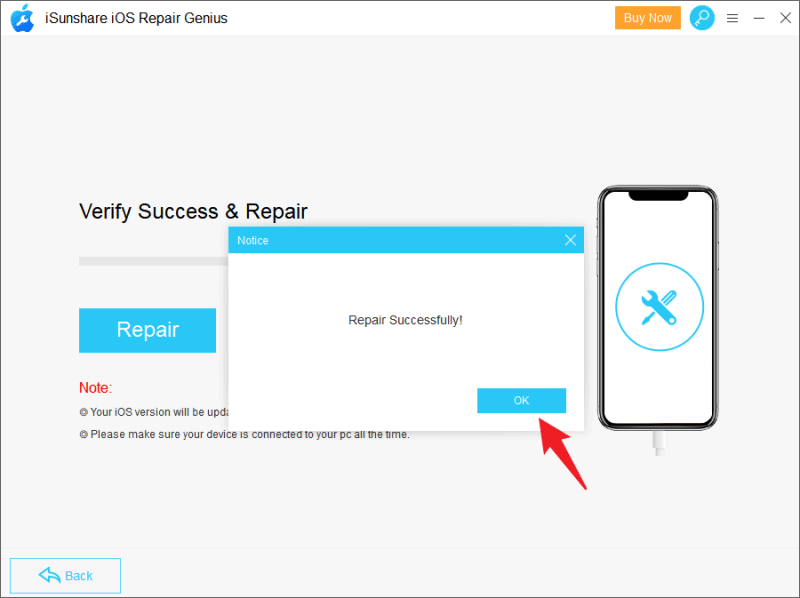
Soon, your iPhone will be successfully repaired. The device will work properly and start automatically and you can access it again.
Conclusion
Note that DFU mode may damage the device's system, which is not covered by Apple's warranty. If you wish to enter DFU mode to fix iPhone stuck in Apple logo, black screen, etc., then please try other fixes first, such as iOS Repair Tool. After that, if you have to put your iPhone into DFU mode, please do it carefully.