As is known to all, when we delete a folder or file simply, we just send it to the recycle bin. And we can restore it at any time if we do not empty the recycle bin. It is not secure when it comes to some confidential files. Is it possible to make the deleted files not going to recycle bin and completely delete it from the computer instantly? Yes, of course. We will show you three simple ways about how to delete files without sending to recycle bin on Windows computer.
- Way 1: Use Shift + Delete/Del to delete without going to recycle bin
- Way 2: Set recycle bin properties to delete without sending to recycle bin
- Way 3: Utilize File Deletion Genius to permanently delete files without recovery
Way 1: Use Shift + Delete/Del to delete without going to recycle bin
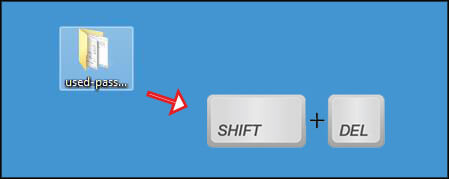
Step-1: Click the folder or the file which you want to delete forever. Then press Shift and Delete/Del key on the keyboard.
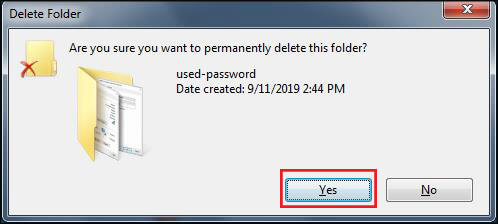
Step-2: After that, it will pop out a window to ask “Are you sure you want to permanently delete this folder”. If you click Yes, it will help you to delete the folder or file without going to recycle bin. And so it is, you cannot view the folder/file in the recycle bin after the deletion.
Way 2: Set recycle bin properties to delete without sending to recycle bin
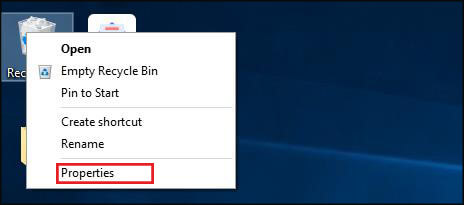
Step-1: Right-click the Recycle Bin icon and choose Properties from the context menu.
Step-2: Firstly, choose the volume which you don’t want deleted folders/files going to recycle bin. Then you can directly check the option “Don’t move files to Recycle Bin. Remove files immediately when deleted”. Also, you need to check the option “Display delete confirmation dialog”. Finally, click the Apply and then the OK button.
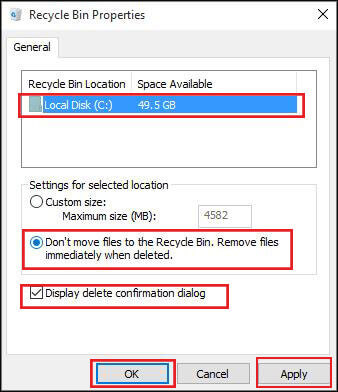
Notice: You just set the files on C drive to be removed immediately when deleted in the above screenshot. And the files/folders on other drives will still be in recycle bin after deleting. You can repeat the above steps to set the properties for other volumes.
After that, you can directly remove the files with simple delete action. Also, you can check whether the file lies in recycle bin or not by double-clicking the recycle bin icon on the desktop.
Way 3: Utilize File Deletion Genius to permanently delete files without recovery
Although the above two ways can help to permanently delete files from the computer, the deleted files still can be recovered with the data recovery tools. If you want to delete the data forever and make it unrecoverable, it is better to try the third party tool.
File Deletion Genius is the complete file delete software that can help you delete the files/folders without sending to the recycle bin and with no recovery. It can 100% force delete the files/folders to protect the safety of your deleted data. And you can not recover the files with any recovery software.
Step-1: Download and install the software on your computer.
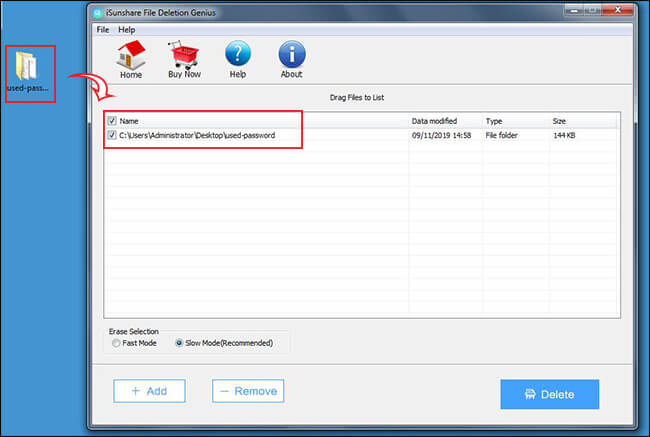
Step-2: Launch File Deletion Genius and add the files/folders into the software.
Option 1: You can directly drag and drop the files/folders into the software.
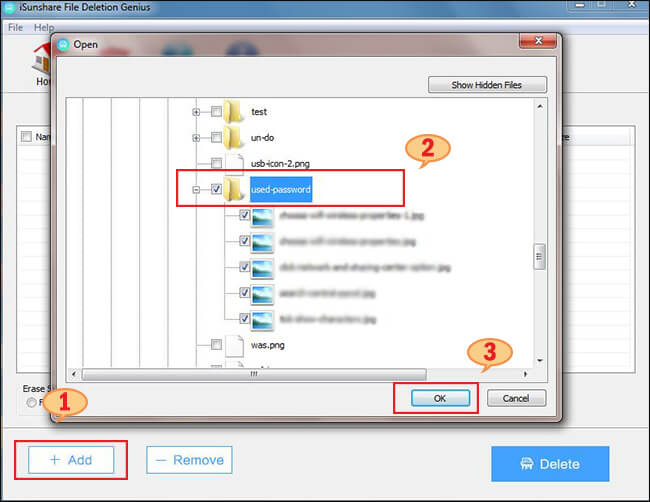
Option 2: You can click the Add button on the bottom left corner and find the location of your files/folders. Then, tick the box next to the files/folders you want to delete. After that, hint the OK button.
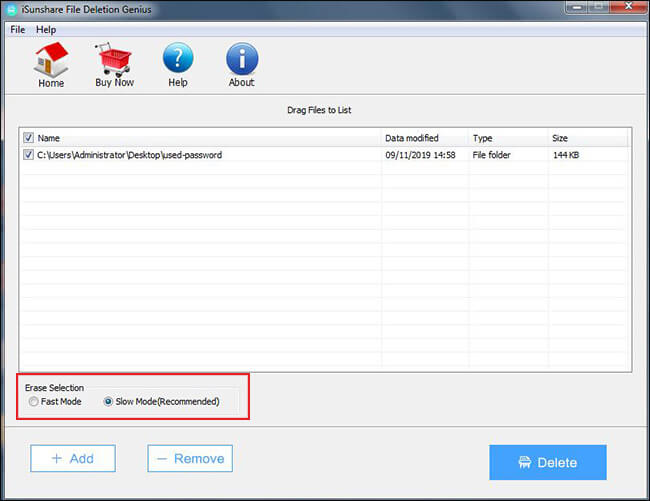
Step-3: Do the erase selection.
There are two modes for deletion: Fast Mode and Slow Mode. It is better for you to choose the Slow Mode although it will cost you more time. The Slow Mode will make the deletion more completely.
Step-4: Click the Delete button.
After you click the Delete button, you will get a warning box which says “Warning! The deleted files cannot be recovered with software or other ways”. Click the OK button and the files/folders will be deleted immediately and permanently.

You can check this video tutorial on Youtube: https://www.youtube.com/watch?v=T6JKp4GFWlY
That’s all. Now you can choose the way you prefer to delete the files/folders permanently on your computer.
Related Articles:
It’s a good practice to clean-up unnecessary files from your system, on a regular basis. It is always the important things to delete the private and sensitive files from computer and worry about the information leakage. The last method sounds great, no one can recover will make people feel safer.
Hello Pretty! This has been an incredibly wonderful post. It seems that the simple deletion is not safe if I download confidential files on computer and delete it after reading. I will download the software and try.