We use cookies for personalizing content and ads and providing social media features. Your usage information on our website will be used for social media, advertising, and traffic analytics, or shared with our partners. Clicking "Accept" means you agree to use our cookies .
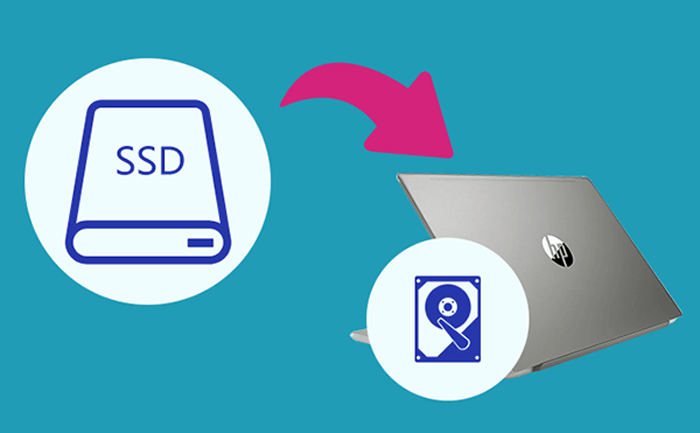
"By default, my HP Pavilion X360 comes with 256GB storage. Now it runs slowly. How do I replace HP laptop hard drive with SSD? How can I transfer the system, programs and etc. to the SSD? My friend told me to upgrade the laptop SSD, I need to reinstall Windows again and lose all the data. Is it possible to replace HP laptop hard drive with SSD without reinstalling Windows?"
Don't worry, here we will show the details to replace HP Pavilion laptop HDD with SSD in Windows 10/8/7. It is much easier than you think. You do not need to install Windows after HP laptop hard drive upgrade and even you will not lose any data. The whole process includes three parts:
Some HP laptops don't support M.2 SSD so that you need to check whether your HP mainboard has the M.2 slot or not before you buy the SSD. Also, you can replace the hard drive with SATA SSD. As you are going to upgrade the laptop with larger space, you need to take the capacity into consideration. You can learn to check the security elements to pick out the well performance SSD: How to Buy a Good Performance SSD.
2. Clone Windows System or Entire Drive from HP Laptop to New SSD
You may need to buy a USB to SATA cable to connect the new SSD with HP laptop for data migration. And here, we are going to use iSunshare CloneGo to either clone the Windows system partition (C drive) or the entire hard disk from your HP Pavilion laptop to the external SSD.
Option 1: Clone Windows System Partition to the New SSD
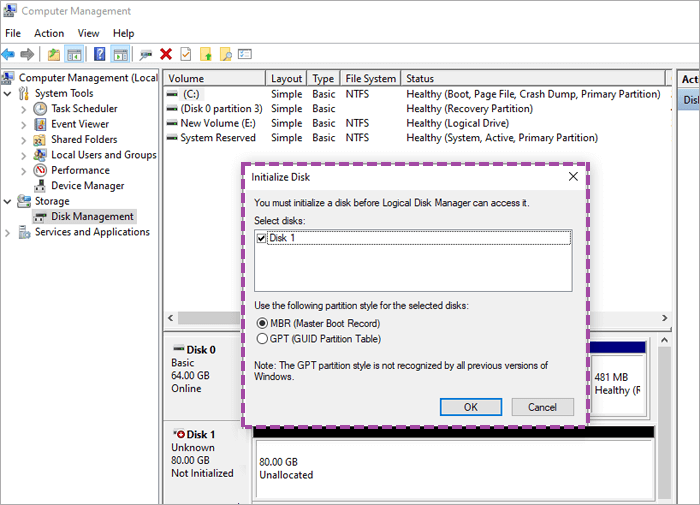
Step 1: Firstly, use the USB to SATA cable to build the connection between HP laptop and the SSD. Then open disk management and initialize the SSD. After initializing it, you need to allocate volumes to the SSD according to your needs.
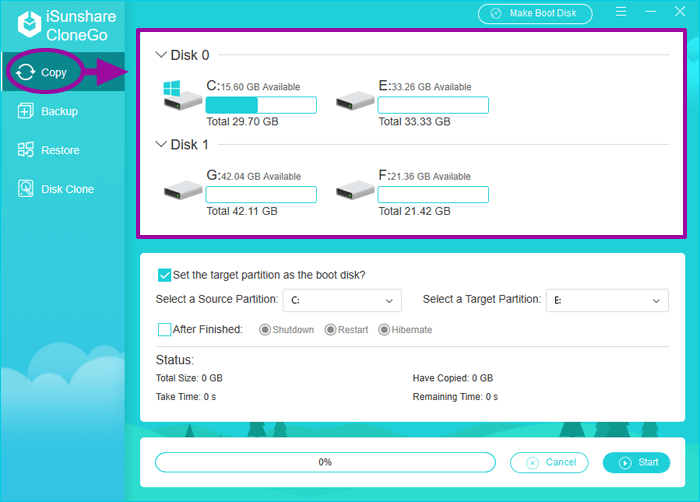
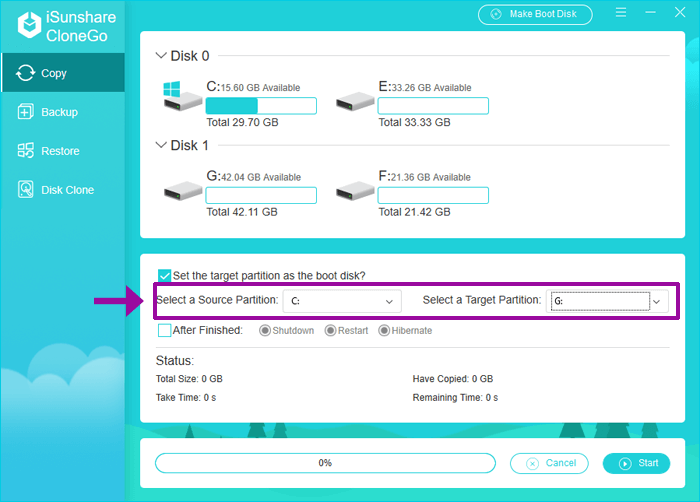
Step 2: Double click to start CloneGo and you will get the whole partitions listed on the Copy interface.
Step 3: Select the C drive (the system partition) as the source partition and any volume from the SSD as the target partition for system cloning. There is one point to note that the copy operation will format the target partition. So if there are some important data in the partition, you should back up them in advance. If not, ignore the hint.
Note:
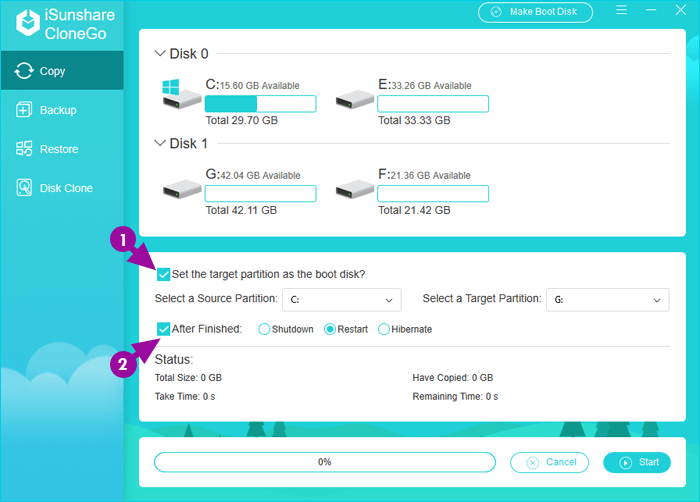
On the Copy interface, you are provided with two further options. You can check the option of Set the target partition as the boot disk to launch the Windows OS if the selected source partition is the system partition. And, you can choose to set your laptop to shutdown/restart/hibernate after the process of system partition clone is finished.
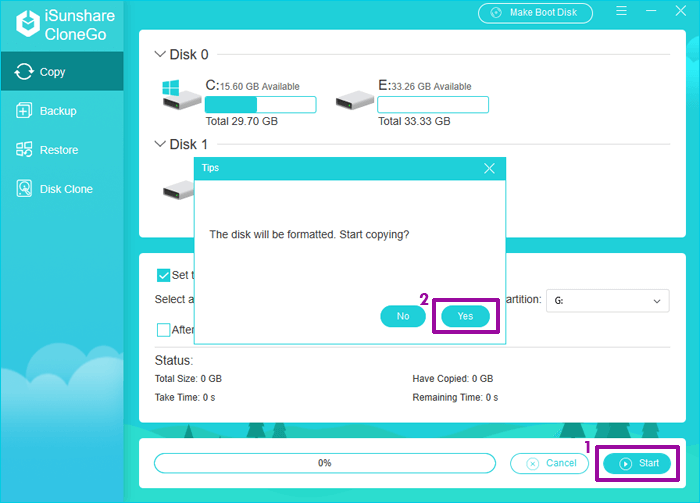
Step 4: Click the Start button and then CloneGo will warn you that the disk will be formated, click Yes to continue.
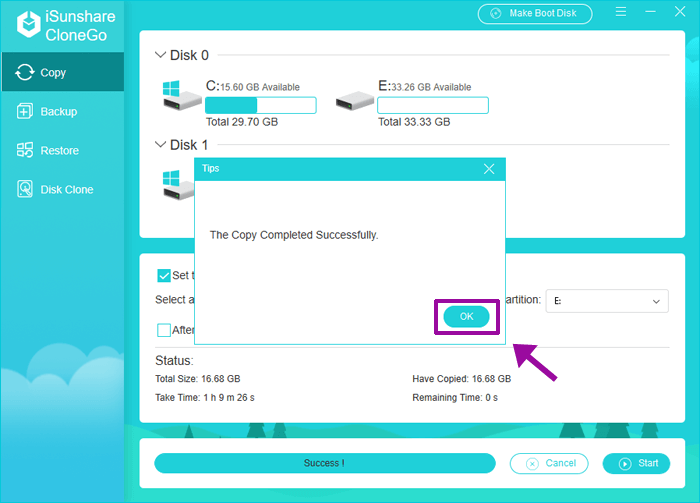
Step 5: You will get the system partition cloned successfully after the process is finished.
Option 2: Clone the Whole Hard Disk to the New SSD
Step 1: In the same way (just like Step 1 in Option 1), connect the larger new SSD to your PC, and then open your laptop and go to the Disk Management in order to initialize and allocate the new SSD.
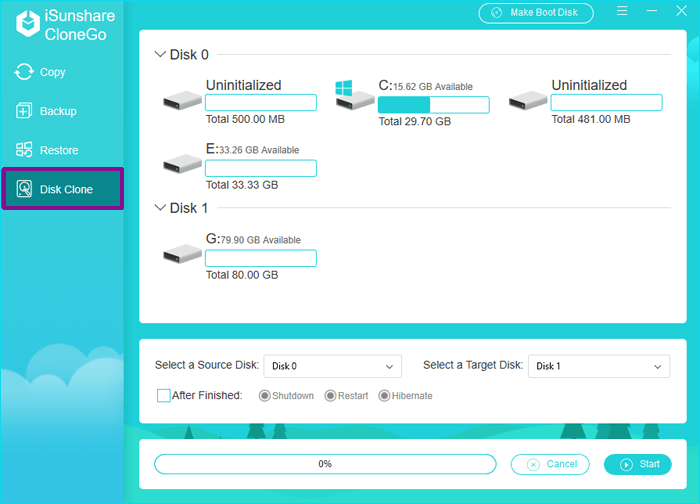
Step 2: Open the software of iSunshare CloneGo, select the function of Disk Clone on the left menu bar, and then all the disks and partitions on your computer will be displayed on the software interface.
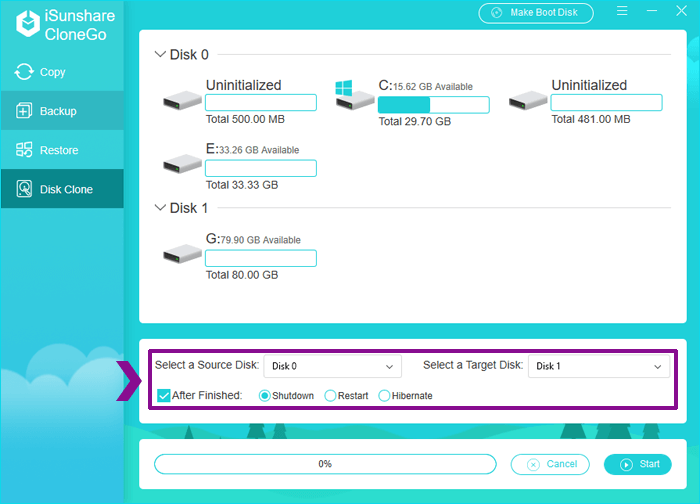
Step 3: Select the hard disk that you want to clone as the source disk and select the new SSD as the target disk. If you don't have enough time to wait for the cloning process to complete, you can tick the option of After Finished and select Shutdown to have your computer turned off after the process ends. You can also select Restart or Hibernate or even don't do any choice as you want.
Step 4: Clik the button of Start > Yes to confirm to start the disk cloning process and patienly wait for the process to complete. If you don't want the existing files and data on the target disk to be overwritten, you should make a backup before this step.
After the disk cloning process is completed, all your data in HP Pavilion X360 is copied to the new SSD. You can restart the laptop and press the ESC or F9 to enter the Boot menu and set to boot from the SSD. If you can successfully boot from the SSD and enter Windows, you can turn off the laptop.
3. Install New SSD on HP Pavilion X360 Laptop
First of all, you need to turn off the power and disconnect the new SSD. If you are not sure you can handle this process, you can find a friend who learns computer or are talented in computer to teach you. You need to remove HP laptop base enclosure, and remove the original hard drive step by step. Also, you need to put the SSD into the place where original hard drive lies.
After that, you can start the computer with the new SSD and enjoy the faster and more comfortable using experience. No Windows system reinstalling and the same using experience as before, how amazing it is!