We use cookies for personalizing content and ads and providing social media features. Your usage information on our website will be used for social media, advertising, and traffic analytics, or shared with our partners. Clicking "Accept" means you agree to use our cookies .
Driver Verifier Manager is a built-in tool in Windows 10 that helps identify problematic drivers by testing their behavior. It's a powerful utility commonly used by advanced users and IT professionals to troubleshoot system stability issues related to faulty or incompatible drivers.
If you're looking to open Driver Verifier Manager on your Windows 10 PC, here are four simple methods to get started.
What is Driver Verifier Manager?
Before jumping into the methods, it's helpful to understand what this tool does. Driver Verifier Manager checks installed drivers for any irregularities by putting them under stress. If a driver fails under this pressure, it may lead to a Blue Screen of Death (BSOD) — helping you isolate the faulty driver for troubleshooting.
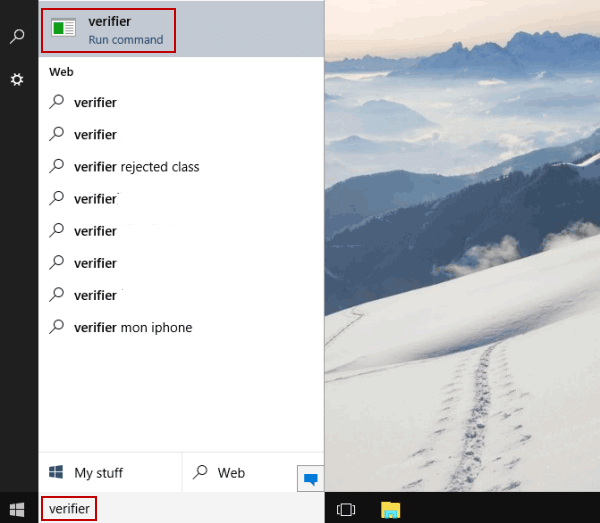
Way 1: Turn it on by searching.
Input verifier in the search box on taskbar, and choose verifier on the top of the result.
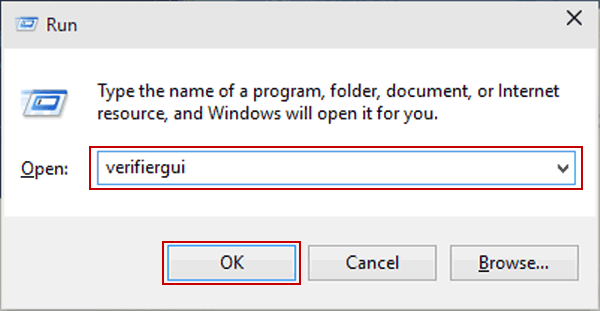
Way 2: Open it through Run.
Enable Run using Windows+R, type verifiergui and click OK.