We use cookies for personalizing content and ads and providing social media features. Your usage information on our website will be used for social media, advertising, and traffic analytics, or shared with our partners. Clicking "Accept" means you agree to use our cookies .
Changing your desktop background (wallpaper) in Windows 10 lets you personalize your PC—whether you'd like a single picture, a solid color, or a rotating slideshow. Here are the main steps to do it, plus options if you run into issues.
Steps to change desktop background on Windows 10:
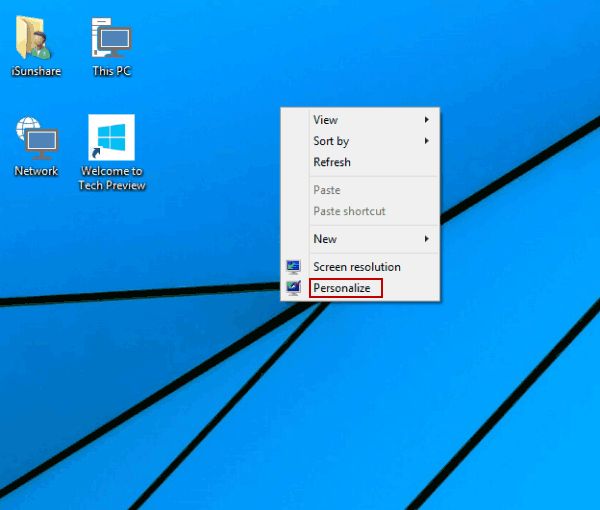
Step 1: Right-click desktop, and select Personalize on the context menu.
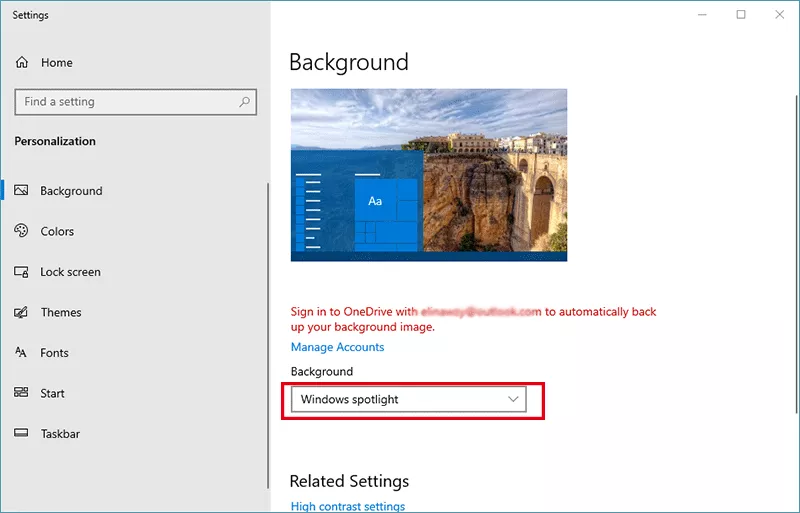
Step 2: On the left sidebar, click Background. Under Background, choose from Picture, Solid Color, Slideshow and Windows spotlight.
Option 1: Set a picture as your background
If you prefer a single picture as your desktop background, just choose Picture from the drop-down menu. After that, you can hit the Browse button to choose your picture.
Besides, you can decide how the image fills your screen (Fill, Fit, Stretch, Tile, Center, Span) in Choose a fit section.
Note:
You can quickly set an image as the desktop background by right-clicking the image and choosing Set as desktop background option from the context menu.
Option 2: Set Solid color as your desktop background
If you choose Solid color as the background, you can pick the color or add your custom color.
Option 3: Create a slideshow as desktop background
For the slideshow option, you can choose albums of your slideshow by clicking the Browse option. After that, you can choose how often the picture change and whether to shuffle them or not.
Option 4: Choose Windows spotlight as the desktop image
The Windows spotlight will automatically update your desktop background every day with a new image from the world. In other words, you can get a unique working experience every day.
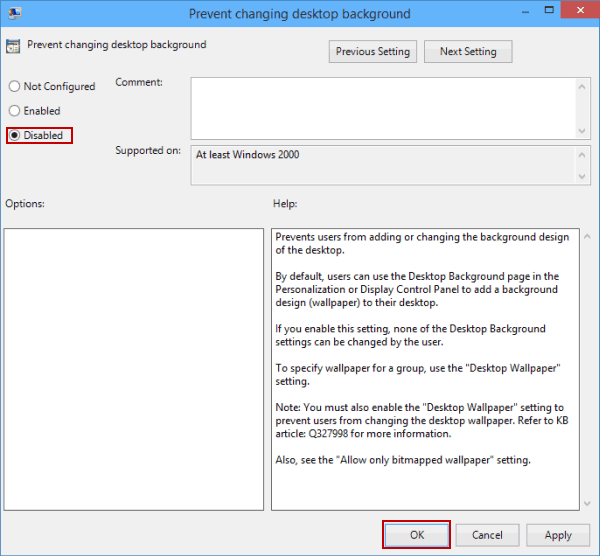
Cannot Change the Desktop Background—What to Do
If you find the Set as desktop background option greyed out or cannot change the desktop background, it is also caused by the group policy restrictions. You can fix the issue with below steps.