We use cookies for personalizing content and ads and providing social media features. Your usage information on our website will be used for social media, advertising, and traffic analytics, or shared with our partners. Clicking "Accept" means you agree to use our cookies .
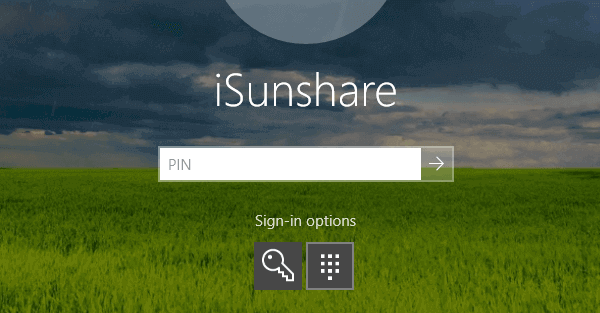
Windows Hello PIN is one of the sign-in options for users, which can protect the computer from authorized access. If you fail to sign in your Windows 10 PC with the PIN option or even cannot add a Windows 10 PIN, what can you do? In this article, we will go through a short guide to fix Windows 10 PIN setup and login not working issue effectively.
There are many factors that will lead to this issue. But most of the time, it is caused by the corrupted files in NGC folder. Sometimes, this is caused by the bugs after Windows 10 updates. So, you need to remove the NGC folder and then set up a new PIN to login in.
Solution 1: Delete the NGC folder
1. Get the Permissions to Manage the Ngc Folder
First of all, you need to get the permission to manage the Ngc folder. There are two ways to do it.
Way 1: Take Ownership in Properties
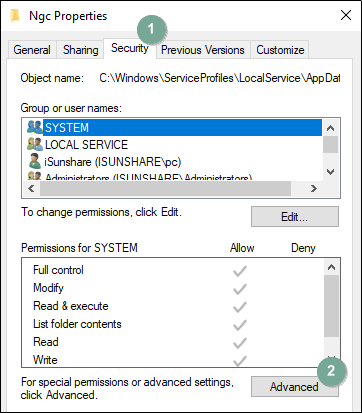
Step 1: Open File Explorer and locate to C:\Windows\ServiceProfiles\LocalService\AppData\Local\Microsoft.
Step 2: Right-click the Ngc folder and select Properties.
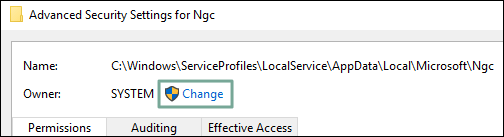
Step 3: Click Security in the tab panel and choose Advanced.
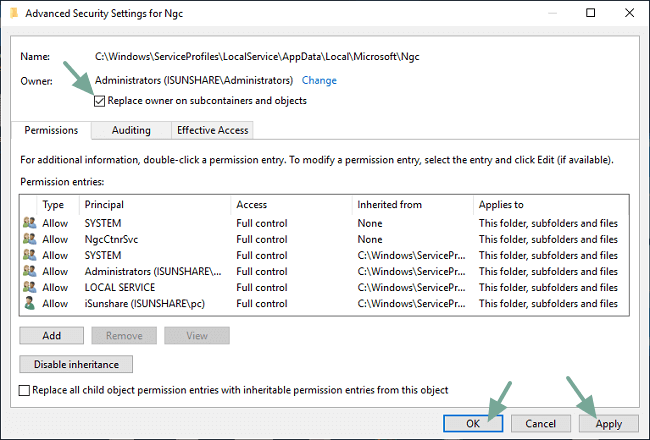
Step 4: Click Change in the Owner option.
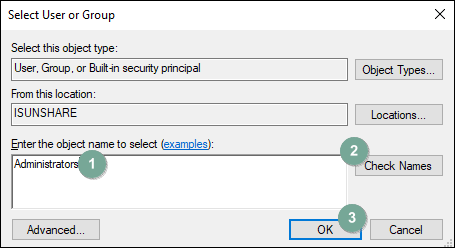
Step 5: Enter the account name of the administrator user > click Check Names > hit OK.
Step 6: Tick Replace owner on subcontainers and objects and then click Apply & OK to save the change.
Way 2: Take Ownership in CMD
If you are familiar with running the Command Prompt, you can use it to take the ownership with simple steps.
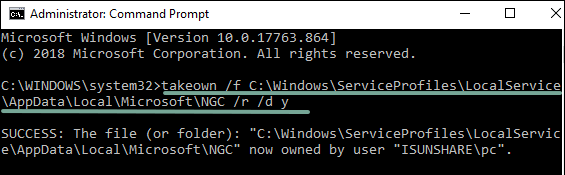
Step 1: Search command prompt in the start menu and run it as admin.
Step 2: In the CMD window, enter takeown /f C:\Windows\ServiceProfiles\LocalService\AppData\Local\Microsoft\NGC /r /d y.
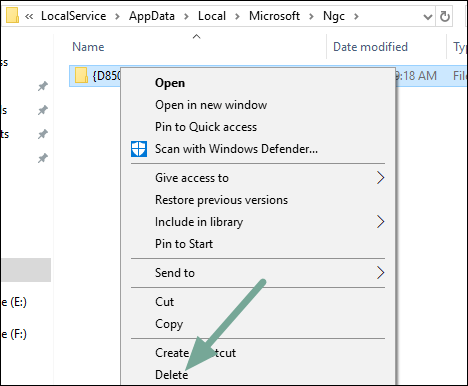
After that you gain the permssion, you can run File Explorer again and head to C:\Windows\ServiceProfiles\LocalService\AppData\Local\Microsoft\NGC to delete all files in Ngc folder.
Note:
Emptying the Ngc folder will remove all PINs in your Windows 10 computer.
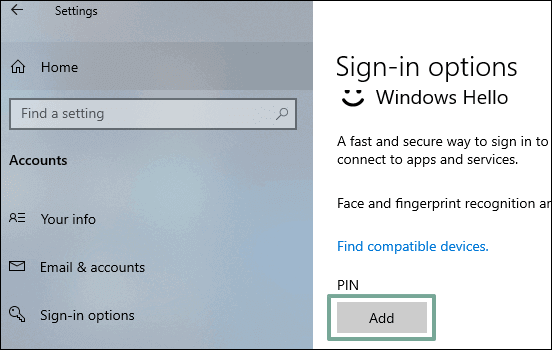
At last, the problem "Windows 10 PIN setup and login not working" is solved successfully. You can add a new PIN in Settings window and sign in Windows 10 with it now.
Solution 2: Reset Your PIN
If you are using a local account, you can sign in using alternate options, such as password, to reset the PIN.
Step 1: On the lock screen, click Sign-in options, and then change other option to sign in.
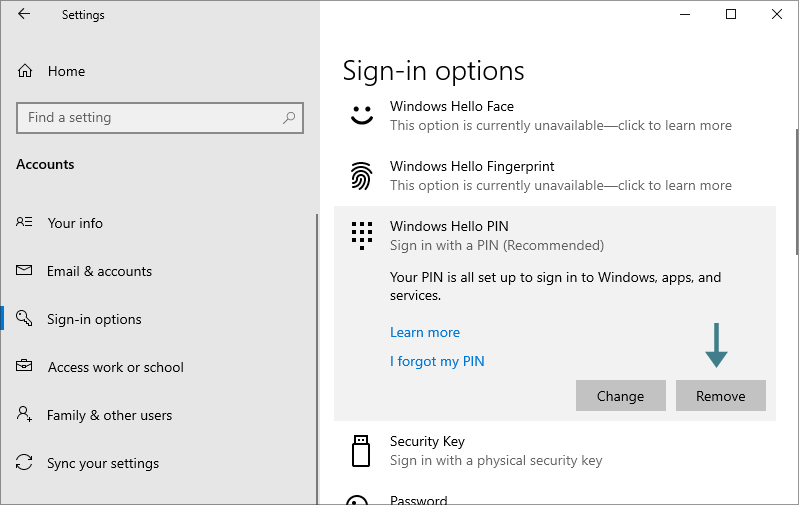
Step 2:Open Settings, and then choose Accounts on the left menu. After that, you can see many setting on the right panel. Go to click the Sign-in options.
Step 3: click the down-arrow of PIN option. It offers two options: Change or Remove option. Click the Remove button to continue.
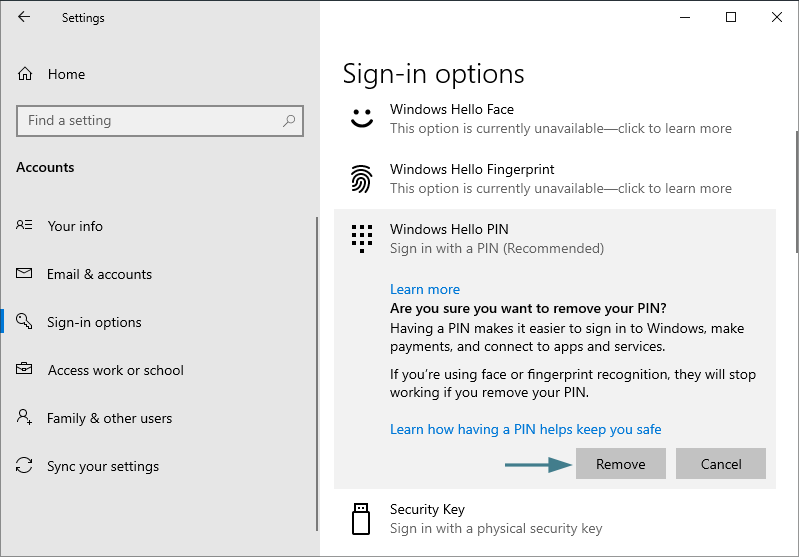
Step 4: Click Remove to confirm your option.
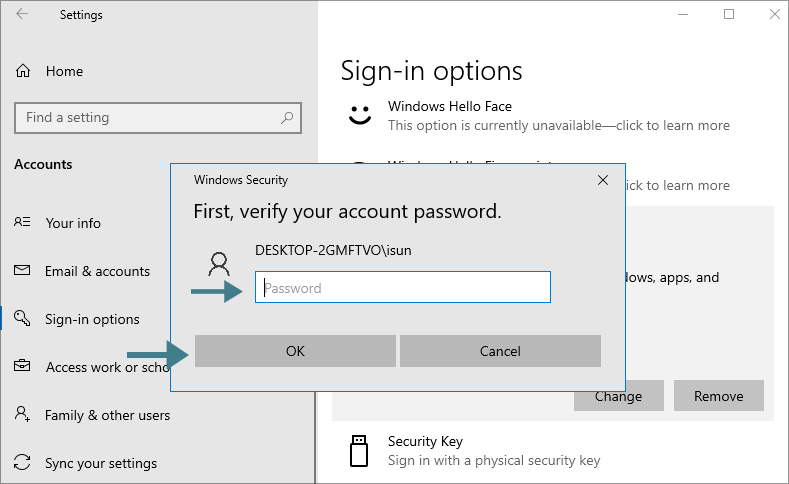
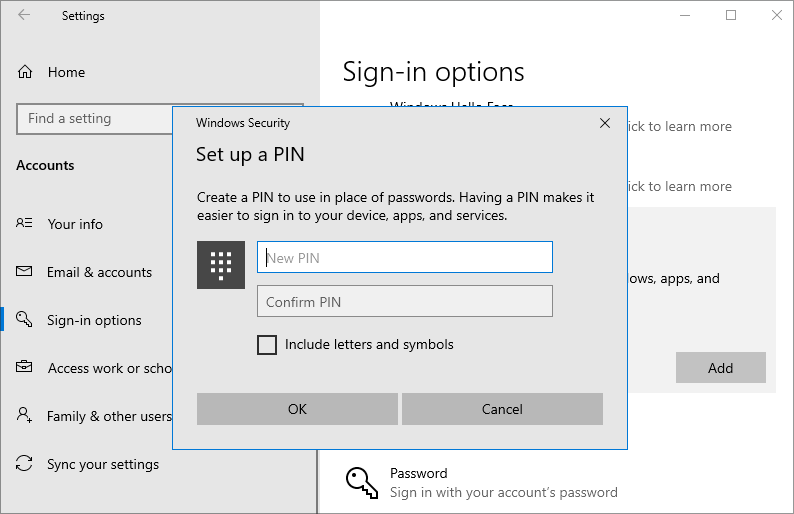
Step 5: Then the Windows Security prompt comes. You need to enter the password and click OK. In minutes, the previous PIN is removed from your computer. Now you can set up a new PIN again.
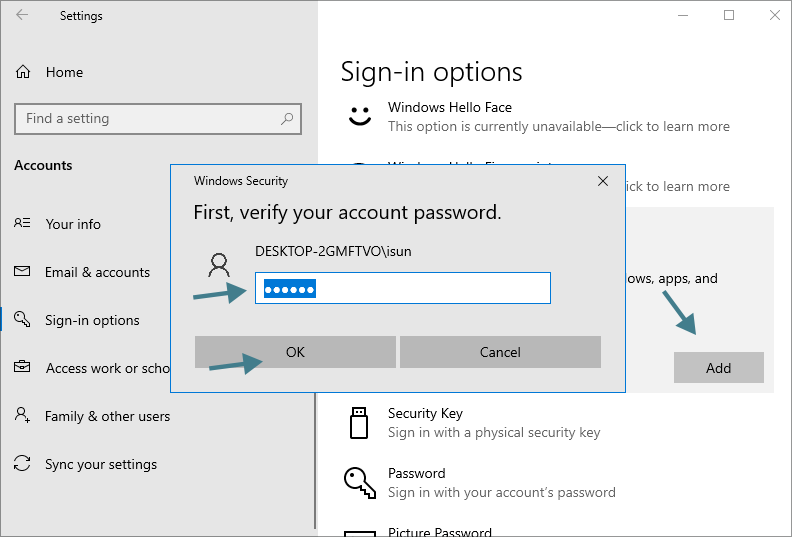
Step 6: Click the Set up button or Add button under the Sign-in options. Then input the account password to go ahead.
Step 7: Enter the new PIN and confirm it. Then click OK to save the change. Finally, you can restart the computer and check whether you can login with the PIN or not.
Solution 3: Check and Make Sure TPM is on
TPM—Trusted Platform Module is a chip on the motherboard of your Windows 10 computer. If it is disabled in your computer's UEFI or BIOS settings, the Windows 10 PIN setup or login will not working. So you need to ensure the TPM is enabled.
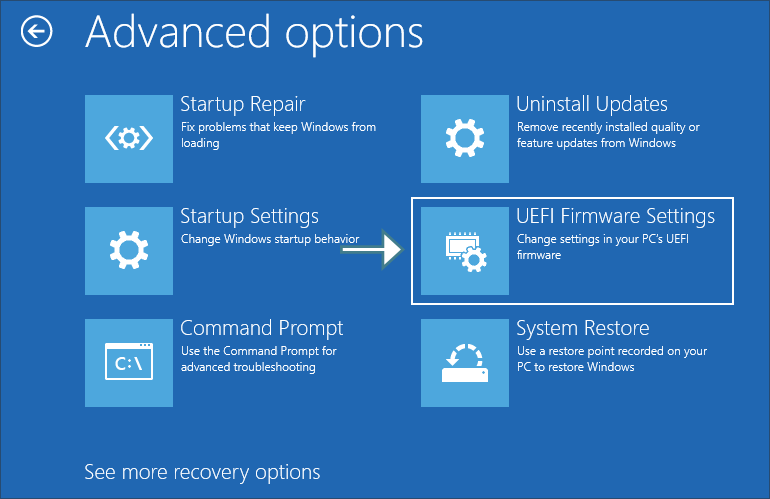
Step 1: Restart your computer and then hold pressing the F2 key. Then click Troubleshoot> Advanced options> UEFI Firmware Settings> Restart. If there is no UEFI Firmware Settings on the screen, your PC does not support TPM.
Step 2: Click the Classic tab.
Step 3: Click Advanced Frequency Settings.
Step 4: Click Peripherals tab and then enable Intel Platform Trust Technology.
Step 5: Finally, you can click the Save & Exit tab and then go to click Save & Exit Setup. Click Yes on the pop-out prompt and then press Enter to boot Windows again.
Solution 4: Perform a System Restore
The system restore can help you to remove the corruptions or malware that lead to Windows 10 PIN setup not working. You can undo system changes by reverting your computer to a previous restore point.
There are multiple ways for you to fix Windows 10 PIN setup and login not working. As a matter of fact, if you cannot fix the issue, you can try to remove the PIN password with iSunshare Windows Password Genius when you are locked out of Windows and have no idea. The unlocking process will not cause any data loss. You can have a try!