We use cookies for personalizing content and ads and providing social media features. Your usage information on our website will be used for social media, advertising, and traffic analytics, or shared with our partners. Clicking "Accept" means you agree to use our cookies .
Windows 10 offers multiple sign-in options for users, including user password, picture password and PIN. You can apply any of them to protect your Windows 10 computer from unauthorized access. You can learn how to manage the sign-in option on Windows 10 in this article.
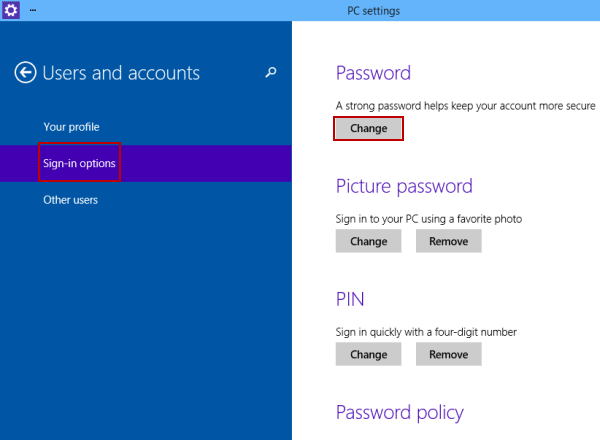
Step 3: Open Sign-in options and tap the Change button under Password.
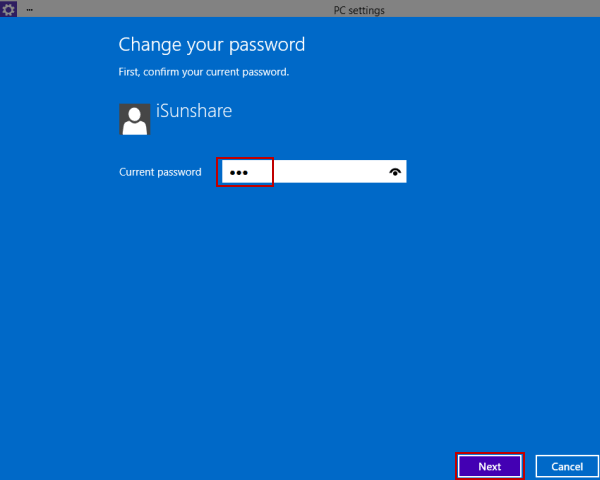
Step 4: Enter current user password and tap Next.
Step 5: Type a new password, re-type it, input password hint and click Next. If you are going to remove the sign-in options, do not enter any password and directly click Next to continue.
Step 6: Choose Finish to complete the change.
Tip: If you do not enter the password, you'll find that your user password has been removed in the end. Besides, the PIN and picture password have been removed automatically. That is, the sign-in options are removed at one time.
Option 2: Change or Remove Picture Password on Windows 10
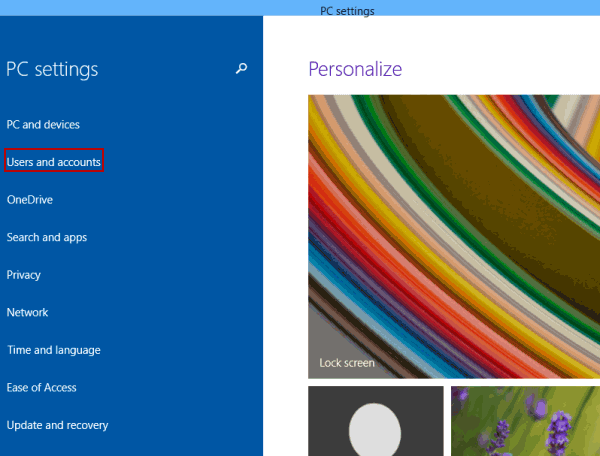
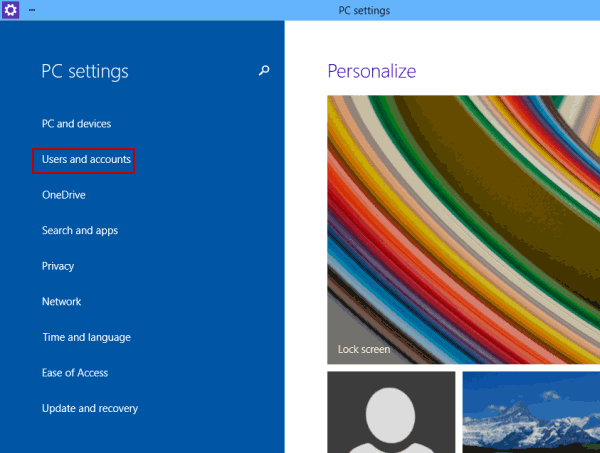
Step 1: Access PC settings and open Users and accounts.
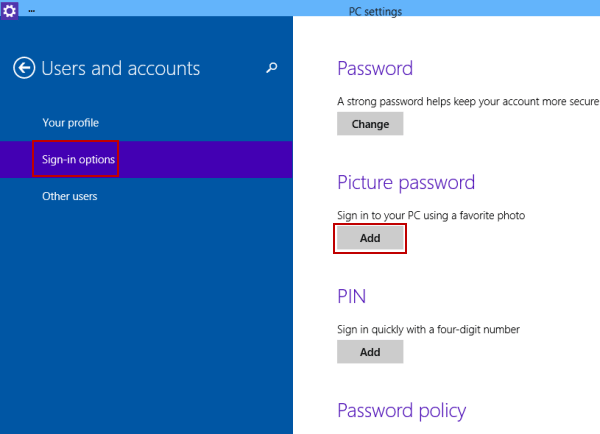
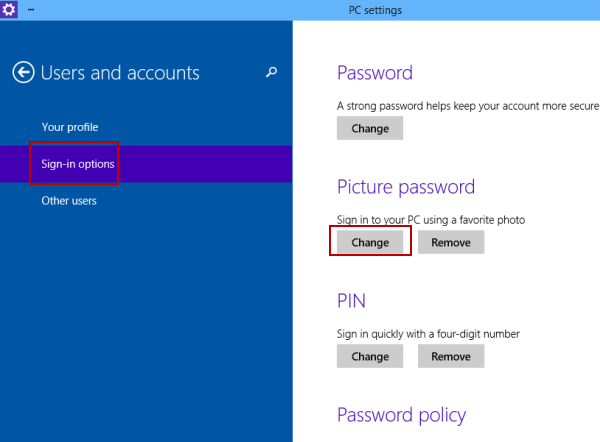
Step 2: Select Sign-in options and click the Change button under Picture password. If you want to remove this sign-in option, directly click Remove and it will be removed imediately from your PC.
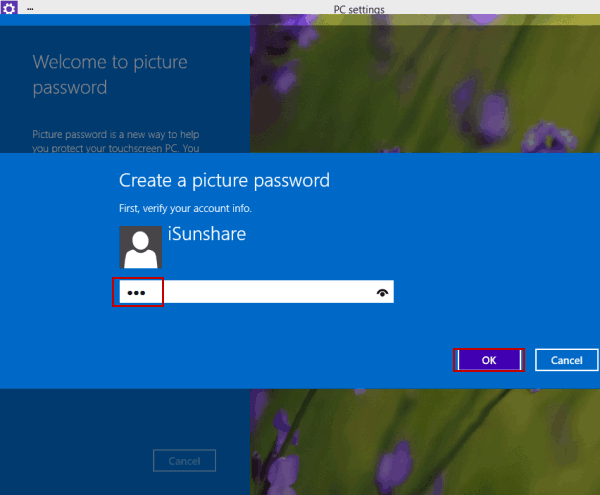
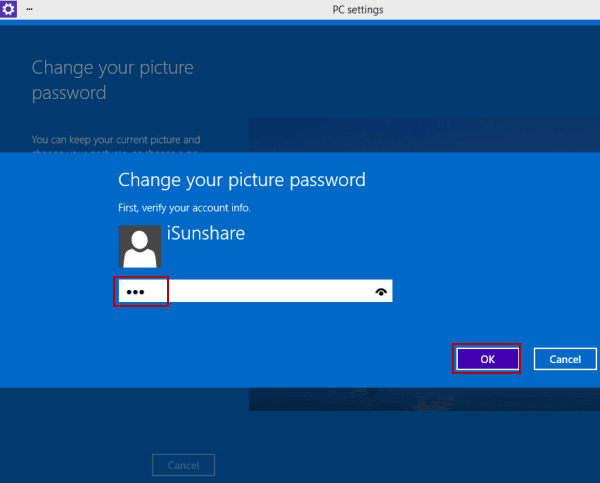
Step 3: Type user password and tap OK to confirm your account info.
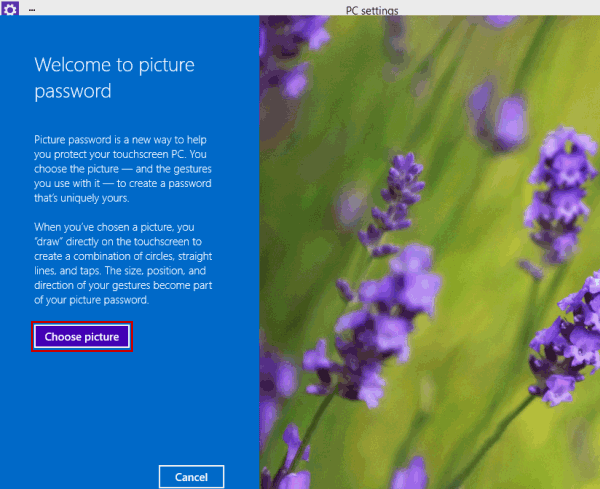
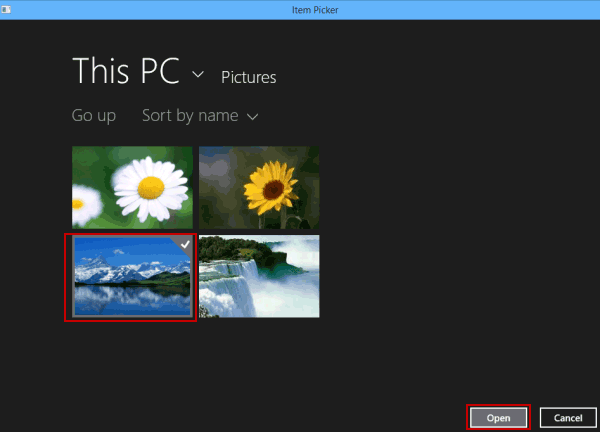
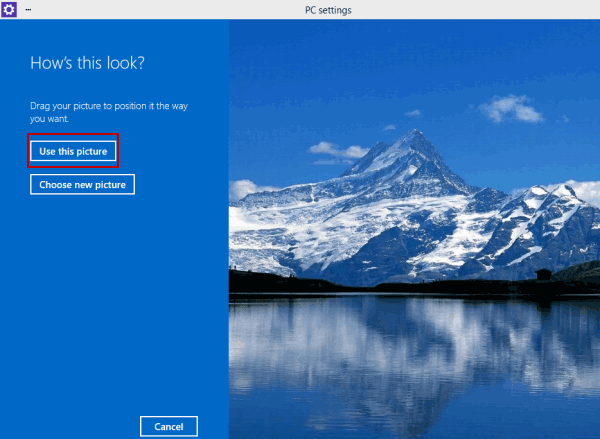
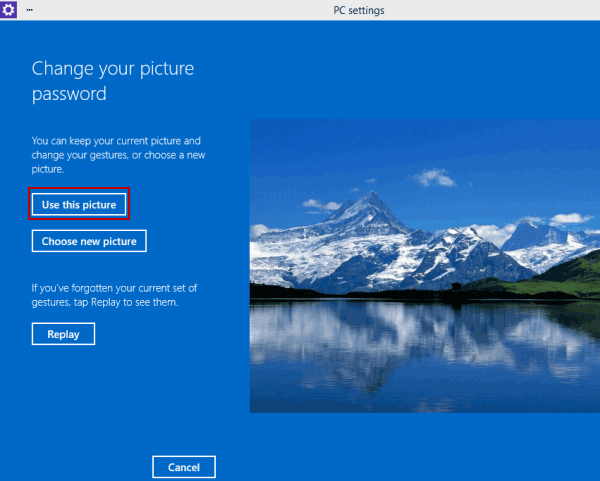
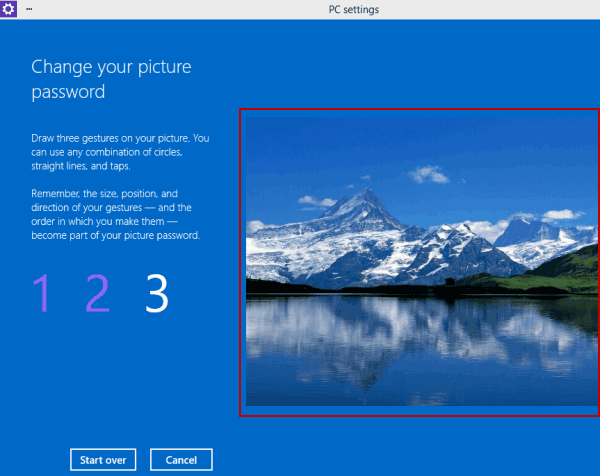
Step 4: Select Use this picture to continue.
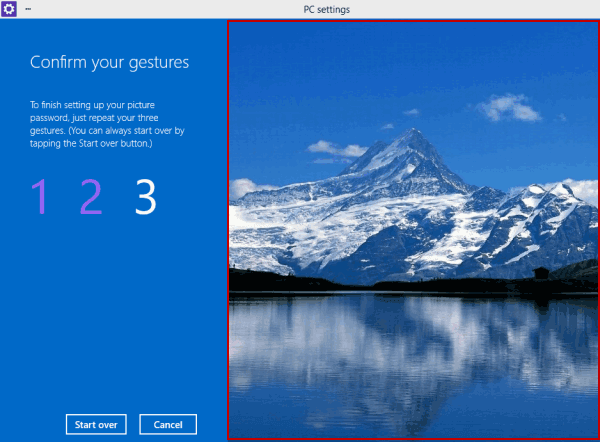
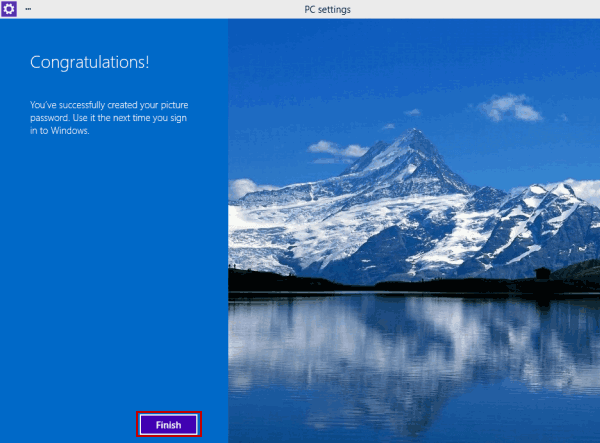
Step 5: Draw three new gestures (e.g. circles, straight lines and taps) on the picture. Then redraw it for confirmation. After that, click Finish to exit. Then the picture password is changed.
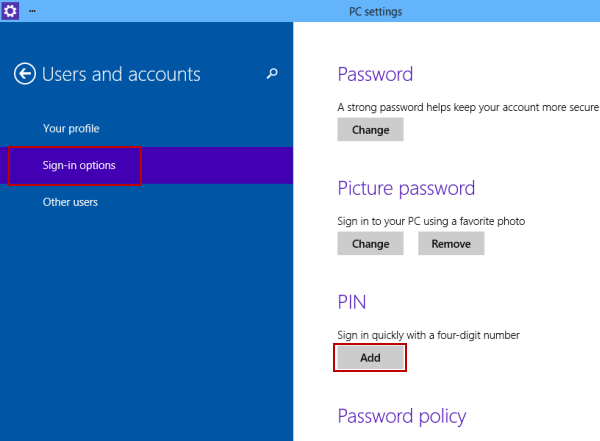
Option 3: Change or Remove PIN on Windows 10
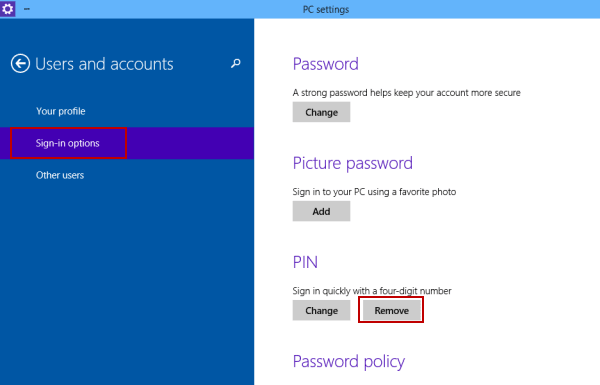
Step 1: Open PC settings and enter Users and accounts.
Step 2: You can click Remove to remove this sign-in option.
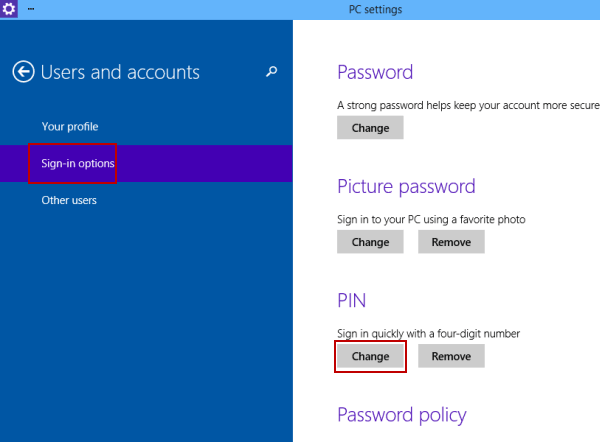
Or Choose Sign-in options and tap the Change button under PIN.
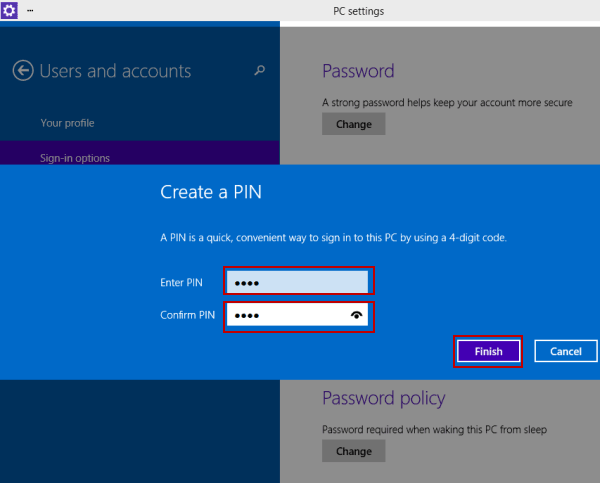
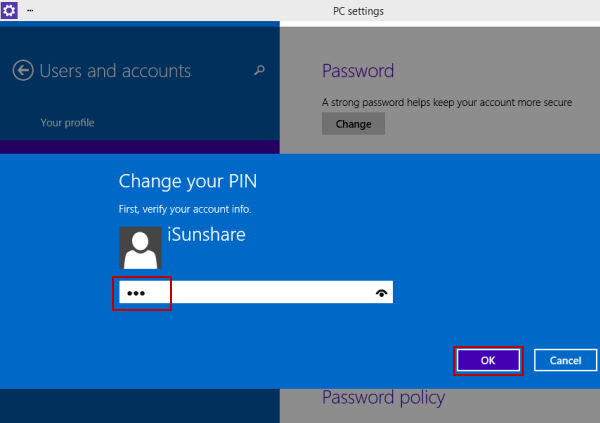
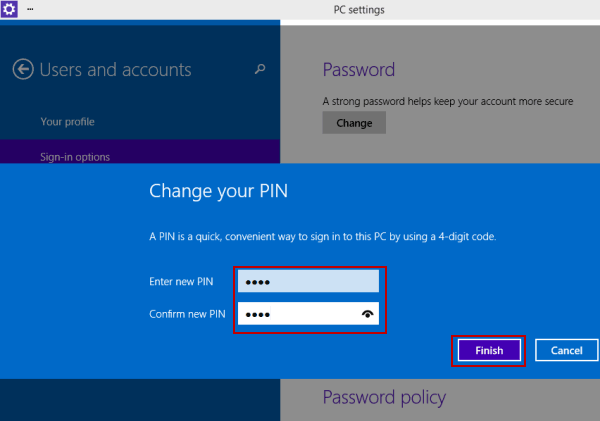
Then input user password and click OK to go on.
Finally, enter a new PIN containing 4 digits, reenter it and select Finish.
Part 3: How to Use Windows Hello and Security Key Sign-in Options in Windows 10
These two sign-in options are usually unavailable for the common Windows 10 computer. So, just a few people can add and remove such sign-in options.
To use Windows Hello sign-in option, your PC should have a compatible camera or fingerprint reader. As for the security key option, you need to purchase such a physical key from retailers who sell computer accessories.
To add, change or remove Windows Hello option
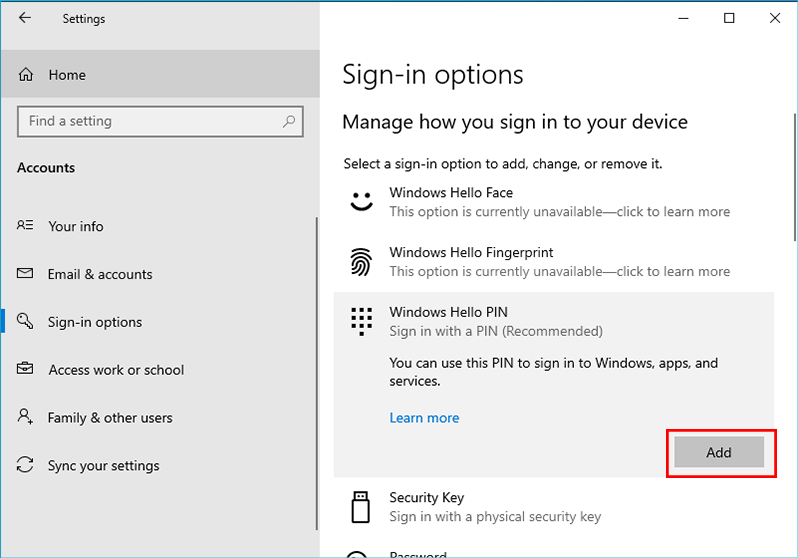
Windows Hello takes advantage of your face ID, iris, fingerprint or PIN to sign in the devices, apps or services. So in some Windows 10 computer, there will be three options related to Windows Hello: Windows Hello Face, Windows Hello Fingerprint, and Windows Hello PIN. You can choose one of them to use.
Step 2: Choose one Windows Hello option you want to use. Then click the Set up or Add option.
Step 3: Enter your current Windows password if you have enabled Password Sign-in. After that, set up the Face, fingerprint or PIN to sign in your computer. After that, hit on the OK button. And the Windows Hello option is added.
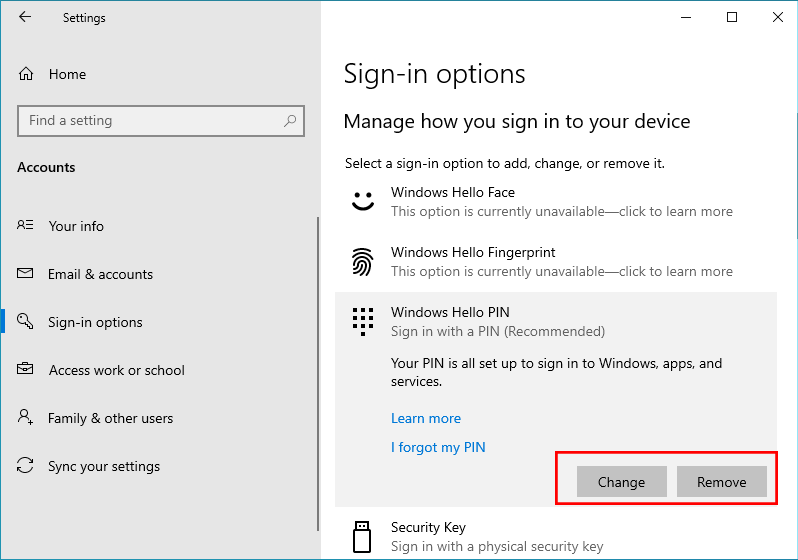
If you want to change or remove Windows Hello option, just head to Start > Settings > Accounts> Sign-in options and then choose the set-up Windows Hello option. Then click the Change option or Remove option to change it.
How to Use the Security Key Sign-in Option
The security key option should be used with a fingerprint or PIN. So even others get your security key, they cannot log in your computer without the PIN or fingerprint you set up.
You can add or remove the security key option by following the guides below:
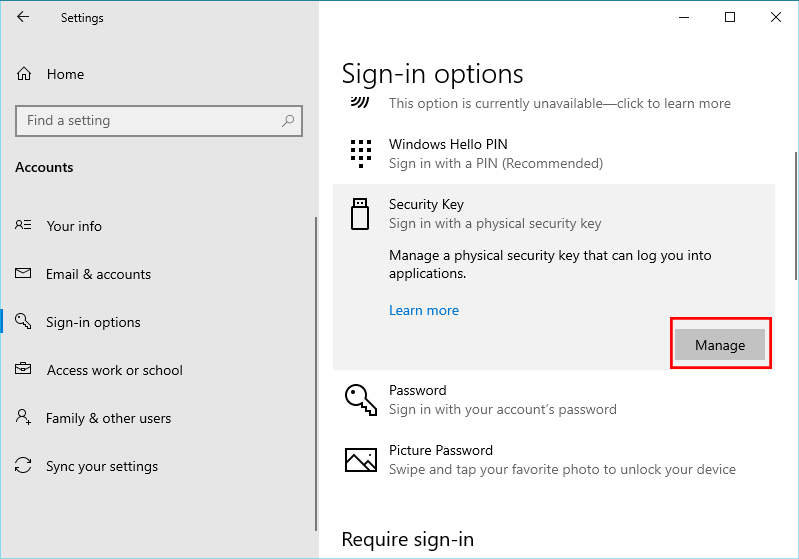
Step 1: Open Start > Settings> Accounts > Sign-in options.
Step 2: Choose the Security Key option on the right panel.
Step 3: Insert the security key into the computer and then click the Manage button. After that, follow the instructions to add or remove the security key sign-in option.
Part 4: FAQs on Windows 10 Sign in Options
Q1: Why is Windows Hello not available on my device?
Windows Hello requires specific hardware, such as an infrared camera for facial recognition or a fingerprint sensor. Ensure your device supports these features.
Q2: Sign-in Option Not Available on my Windows 10, what to do?
Some options might be disabled by your administrator if you're using a work or school account. Or you can check if Windows is up to date by going to Settings > Update & Security.
Q3: Can I remove my sign-in password?
Yes, but it's not recommended for security reasons. You can disable password sign-in under Sign-in options by selecting "Require sign-in: Never" under Additional Settings.
Conclusion
Whether you prefer using a traditional password, PIN, biometric authentication, or a security key, Windows 10 provides flexible options to suit your needs. By customizing your sign-in methods and keeping your credentials secure, you can enhance your overall Windows experience.