We use cookies for personalizing content and ads and providing social media features. Your usage information on our website will be used for social media, advertising, and traffic analytics, or shared with our partners. Clicking "Accept" means you agree to use our cookies .
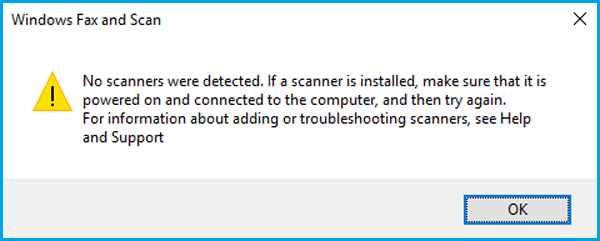
"No scanners were detected" is a common problem in Windows 10. Quite a few users have reported that when they were trying to scan files or documents with the Windows Fax and Scan, they received an error message saying "No scanners were detected. If a scanner is installed, make sure that it is powered on and connected to the computer, and then try again. For information about adding or troubleshooting scanners, see Help and Support". What can you do if you are prompted no scanners were detected in Windows 10? Below are 5 troubleshooting methods.
Method 1: Check the Setup Routine of the Scanner Carefully
If you are prompted that Windows 10 Fax and Scan not detecting scanner, there may be something wrong with the setup of your scanner. Therefore, you should carefully check your scanner's setup. How to do that? You should:
Attention 1: Check the cables and power supply.
If the scanner is turned off, the computer can't connect to it correctly, which will cause the "No scanner were detected" issue appearing. In order to make sure that the scanner is powered on, you need check whether you have plugged the scanner to the power source and then make sure you have turned on the switch button to connect the scanner to power supply. In addition, in order to avoid the cables faulty, plug in the cables correctly and firmly at the both ends to enable them to work properly.
Attention 2: Check the USB port.
Sometimes the cause of this error may lie in the USB port problem. Therefore, when you encounter the issue that no scanners were detected by Windows Fax and Scan, you can try to disconnect the scanner and then plug it into a different USB port to see if it works.
If you have checked all the above points that deserve your attention, you can see if the error message still persists. If it still persists, move on to the next method.
Method 2: Run Hardware and Devices Troubleshooter
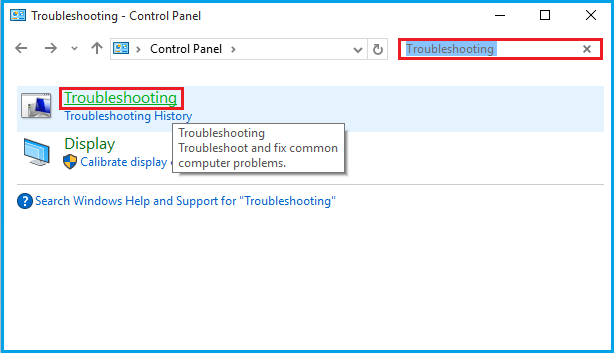
When you are facing the Windows Scan and Fax not detecting scanner issue, you can run the Windows 10 built-in Hardware and Devices troubleshooter to diagnose and fix the exact issue. Follow the below steps to run the troubleshooter:
Step 2: Enter "Troubleshooting" in the search blank and then the result will appear. Click Troubleshooting to go ahead.
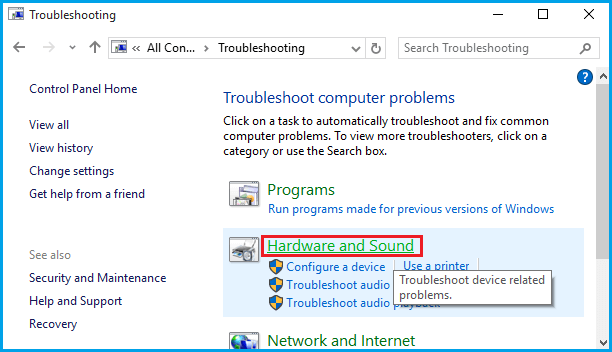
Step 3: Click Hardware and Sound in the Troubleshooting window.
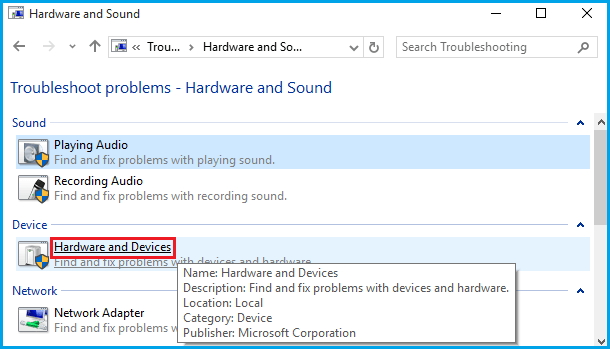
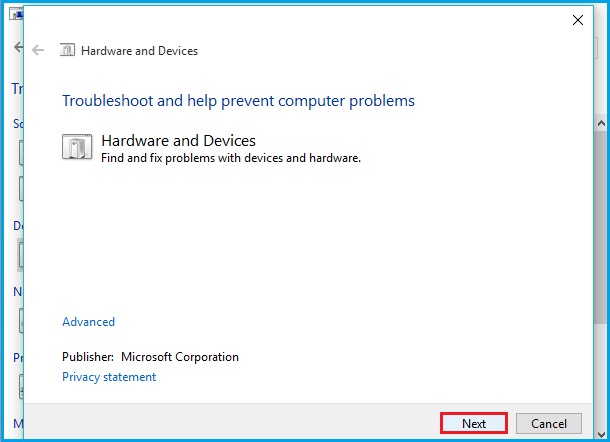
Step 4: Look for Hardware and Devices under the Device section and click it.
Step 5: Click the Next button to continue. And finish the process according to the tips. The troubleshooter will try to find and fix problems with devices and hardware.
Method 3: Disable and Re-enable Windows Fax and Scan
When the Windows Fax and Scan doesn't work normally, you can try to disable the Windows Fax and Scan via Windows Features, restart your computer and then re-enable it again. Sometimes such a simple operation can enable it back to work properly.
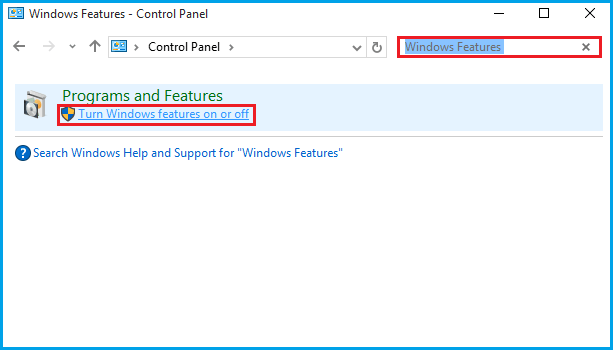
Step 1: Go to Control Panel, type "Windows Features" in the search blank and click Turn Windows features on or off from results.
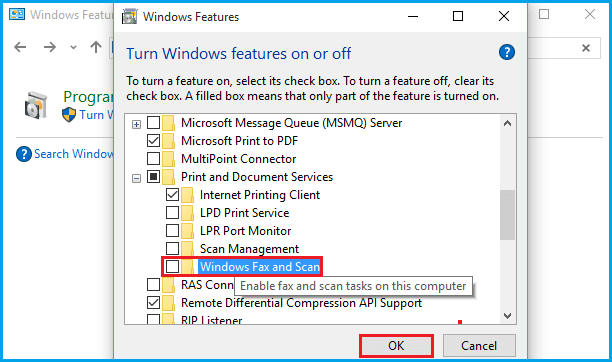
Step 2: Then you will come to the window of Windows Features. Scroll down to look for Print and Document Services and expand it.
Step 3: Uncheck the option of Windows Fax and Scan and click OK to save changes and exit.
Step 4: Restart your computer to make the changes take effects and then re-enable Windows Fax and Scan by re-checking the box again.
Method 4: Reconfigure the Scanner Again
Windows Fax and Scan no scanners were detected? Follow the below instructions to add the scanner as a new device in your Windows computer.
Step 1: Make sure that the scanner is power on during the process.
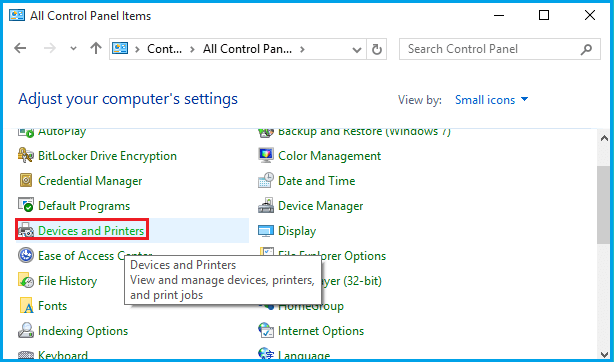
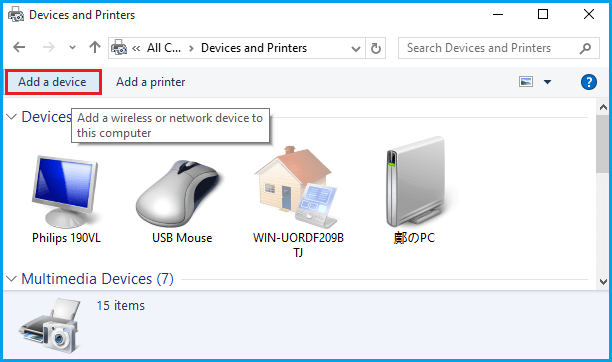
Step 2: Go to Control Panel, choose to view by large icons or small icons and then select Devices and Printers.
Step 3: Click Add a device in the Devices and Printers window.
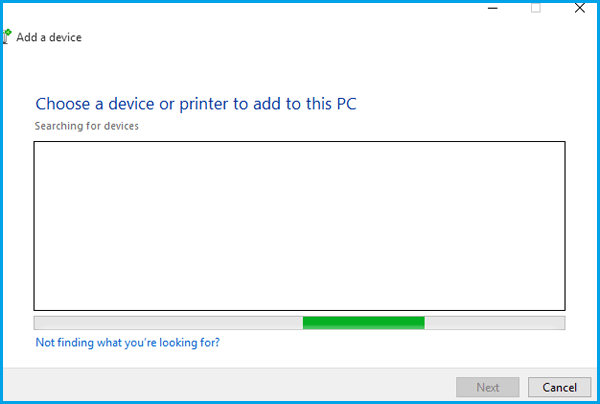
Step 4: And then it will start searching printers or scanners for you. You'll see the devices listed in the box.
Step 5: Select the printer or scanner you intend to connect and click Next to continue.
Your Windows will start to install the printer or scanner for you, and wait for the process to finish. Then try to connect to your scanner and scan again to see if it works.
Method 5: Update the Scanner Drivers
If all the above methods fail to solve this question, you should shift your focus to the scanner driver. Maybe the scanner driver is missing or outdated. Under this circumstance, you should try to update the scanner driver in order to fix this issue. How to update the scanner driver? Go to the manufacturer's website and download the latest scanner driver, and then install it to your computer manually.